サポートと今すぐチャット
サポートとのチャット

DR Series DR4300e - Owner's Manual

DR4300e system overview Technical specifications Initial system setup and configuration Pre-operating system management applications
Options to manage the pre-operating system applications System Setup Dell Lifecycle Controller Boot Manager PXE boot
Installing and removing system components
Safety instructions Before working inside your system After working inside your system Recommended tools Front bezel (optional) System cover Cooling shroud Cooling fans Cooling-fan assembly System memory Processors and heat sinks PCIe card holder Cable retention bracket Integrated storage controller card Expansion cards and expansion card riser Internal dual SD module (optional) Network daughter card Internal USB memory key (optional) System battery Power supply units (PSU) System board Trusted Platform Module Hard drives Hard drive backplane SD vFlash card (optional) Control panel assembly
Using system diagnostics Jumpers and connectors Troubleshooting your system

Installing memory modules

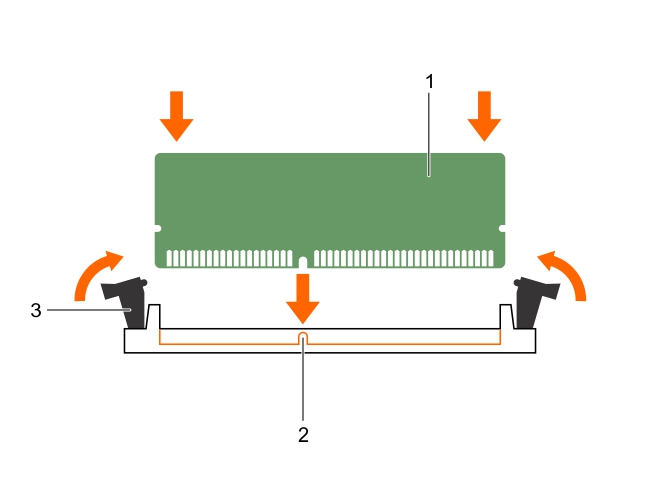
This figure shows installing the memory module.

The system should have already changed the value to reflect the installed memory.

Processors and heat sinks

Removing a heat sink

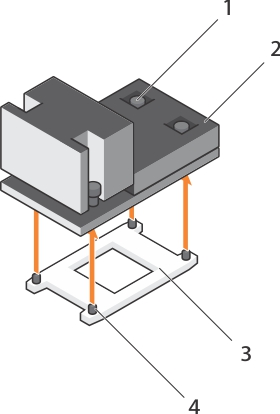
This figure shows removing the processor heat sink.

Removing a processor

NOTE: If you are upgrading your system, download the latest system BIOS version from Dell.com/support and follow the instructions included in the compressed download file to install the update on your system.
1.
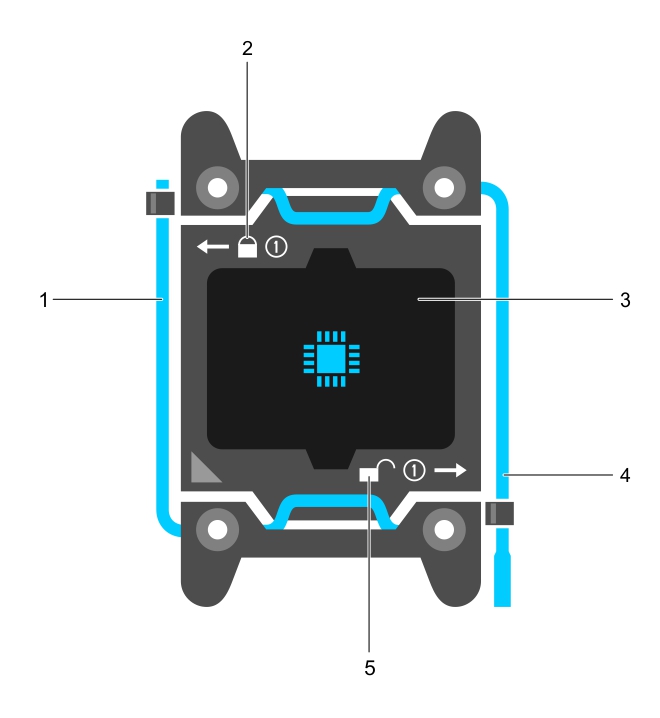
Release the open first socket lever near the unlock icon unlock icon by pushing the lever down and out from under the tab.
2.
Release the close first socket release lever near the lock icon lock icon by pushing the lever down and out from under the tab. Lift the lever 90 degrees upward.
3.
Lower the open first socket-release lever to lift the processor shield.
5.
Lift the processor out of the socket and leave the open first socket-release lever up.
Figure 20. Processor shield

This figure shows the sequence of opening and closing the processor levers.

a.
close first socket release lever
d.
open first socket release lever

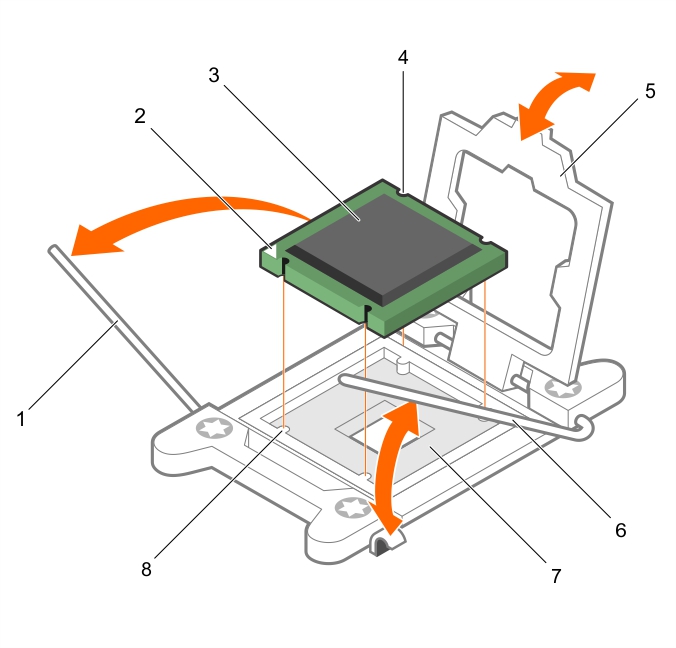
This figure shows removing a processor.

a.
close first socket-release lever
f.
open first socket-release lever
g.
関連ドキュメント

The document was helpful.

評価を選択

I easily found the information I needed.

評価を選択