|
• |
Default password: calvin |
|
• |
Default static IP address: 192.168.0.120 |
For information on how to configure the iDRAC, see the Dell RACADM Reference Guides at support.dell.com/manuals and Accessing iDRAC6/iDRAC7 Using RACADM.
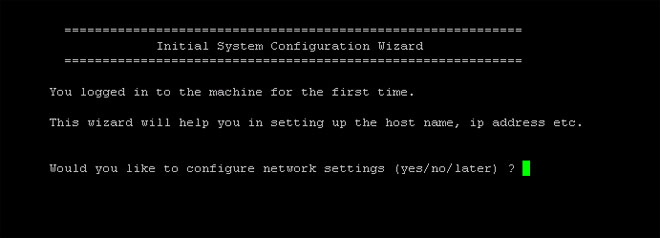
When the Dell DR Series System splash screen is displayed, you are ready to begin initialization using the DR Series system CLI login process. For more information, see Logging in and Initializing the DR Series System.
Use the DR Series system CLI and the Initial System Configuration Wizard to log in to and initialize the system. After completing a local console or iDRAC connection, log in to the DR Series system CLI:
|
2. |
|
3. |
At the administrator@<system_name> password: prompt, type the default administrator password (St0r@ge!), and press <Enter>. |
|
4. |
|
NOTE: When you select static IP addressing, you are prompted to type the static IP address (for example, you could use the default IP, 10.77.88.99) for the system, and press <Enter>. If your network supports the use of DHCP, type yes at the DHCP prompt, press <Enter>, and respond to any prompts. |
|
8. |
|
10. |
|
11. |
To change the default host name (for example, the serial number of the DR Series hardware appliance), type y (for yes) and press <Enter>. |
|
12. |
|
13. |
If you want to change any of these settings, type n (for no), and press <Enter>. Modify the settings as needed, and press <Enter>. |
|
14. |
You are now ready to log in to the system using the DR Series system GUI.
The login values you can use for making iDRAC connections are:
|
• |
Default password: calvin |
|
• |
Default static IP address: 192.168.0.120 |
For more information, see the RACADM Reference Guides for iDRAC, the Integrated Dell Remote Access Controller 6 (iDRAC6) User Guide, or the Integrated Dell Remote Access Controller 7 (iDRAC7) User Guide that are available at support.dell.com/manuals.
To log in to the DR Series system using a browser-based connection, complete the following:
|
1. |
In a supported web browser, type the IP address or hostname of the system in the browser Address bar, and press <Enter>. |
|
NOTE: The DR Series System Login page may display a warning message if the web browser you are using does not properly support the DR Series system. If you are running a Microsoft Internet Explorer (IE) web browser, make sure that you disable the Compatibility View. For more information about disabling the Compatibility View settings, see Disabling the Compatibility View Settings. For more information about the supported web browsers, see the Dell DR Series System Interoperability Guide. |
|
NOTE: For best results when using IE web browsers in combination with supported Windows-based servers, ensure that Active Scripting (JavaScript) is enabled on the Windows client. This setting is often disabled by default on Windows-based servers. For more information on enabling Active Scripting, see Enabling Active Scripting in Windows IE Browsers. |
|
NOTE: If you want to reset your login password, click Reset Password on the DR Series System Login page. The Reset Password dialog is displayed.
NOTE: The reset options displayed depend on the password reset option you configured earlier. For more information see, Modifying Password Reseting Options.
NOTE: By default, the service tag option is displayed. In Service Tag, enter the service tag number ID for the system, and click Reset Password to reset the system password back to its default setting (or click Cancel to return to the DR Series System Login page). |
|
2. |
|
3. |
|
a. |
|
b. |
|
c. |
|
d. |
|
e. |
|
f. |
Select Notify me of [DR Series] daily container statistics to be notified about container statistics on a daily basis. |
|
g. |
Select Don't show me this again to not display the Customer Registration and Notification page again. |
|
h. |
Click Confirm to have the DR Series system accept your settings (or click Skip without configuring any settings) to proceed with initialization. |
|
NOTE: If you click No, you will bypass the initial system configuration process, and the DR Series system Dashboard page is displayed. However, when you next log in to the DR Series system, you will be prompted to perform the initial system configuration process again with the Initial System Configuration Wizard page is displayed. |
|
5. |
In the Settings pane of the Initial Configuration — Change Administrator Password page, complete the following: |
|
a. |
|
b. |
|
c. |
|
d. |
Click Next to continue with the initial configuration process (or click Back to return to the previous page, or click Exit to close the Initial System Configuration Wizard). |
|
6. |
|
a. |
In Hostname, enter a hostname that meets the hostname naming convention: A-Z, a-z, 0–9, the dash special character (-), within a maximum 19 character limit. |
|
b. |
In IP Address, select the Static or DHCP mode of IP addressing, and if planning to use a Secondary DNS, enter an IP address for the secondary domain name system. |
|
c. |
|
d. |
In Bonding, enter the MTU value for the maximum transmission unit (the MTU accepts values between 512 and 9000). For more information, see Configuring Networking Settings. |
|
e. |
In Active Directory, enter a fully qualified domain name for the Active Directory Services (ADS) domain in Domain Name (FQDN), enter an organization name in Org Unit, enter a valid ADS username in Username, and enter a valid ADS password in Password. |
|
NOTE: If an ADS domain has already been configured, you will not be allowed to change the values for the Hostname or IP Address settings. |
|
f. |
Click Next to continue with the initial configuration process (or click Back to return to the previous page, or click Exit to close the Initial System Configuration Wizard). |
|
NOTE: If the Microsoft Active Directory Services (ADS) domain has already been configured, the Initial Configuration — Date and Time page will not display. |
|
7. |
|
a. |
If you select NTP, accept or revise the NTP servers as desired (you are limited to only three NTP servers), and in Time Zone, select the desired time zone from the drop-down list. |
|
b. |
If you select Manual, in Time Zone, select the desired time zone from the drop-down list, click the Calendar icon and select the desired day in the month, and adjust the Hour and Minute sliders to the desired time (or click Now to choose the current date and time), and click Done. |
|
c. |
Click Next to continue with the initial configuration process (or click Back to return to the previous page, or click Exit to close the Initial System Configuration Wizard) |
|
8. |
The Initial Configuration — Summary page displays a summary of all of the initial configuration changes you have made. Click Finish to complete the Initial System Configuration Wizard (or click Back to return to a previous page to change a setting). |
|
9. |
|
NOTE: You can display the Help system documentation by clicking Help, or log out of the system by clicking Log out at the top right of any page. |
|
NOTE: When logged in, a Logout Confirmation dialog is displayed after 45 minutes of non-use. This dialog displays for 30 seconds before the DR Series system performs a forced timeout. Click Continue to reset the 45-minute logout timer. If you do not click Continue before the 30-second interval elapses, the DR Series system logs you out. You must log in again to resume using the DR Series system features and GUI. |