Source Preview
Modules, Windows And Dialogs > Source Preview

Preview the source code of text objects (stored programs, triggers and views), or a package’s individual entry points.
-
Select the object
-
Click View | Source Preview.
|

|
TIP:
- While the Source Preview window is open, you can select objects in any of the windows named above, and the object’s source code will automatically appear in the Source Preview window.
- Use a bookmark to conveniently mark various locations in the source code and quickly move about in the text without searching through the code and without losing your current editing location. You can set up to ten bookmarks. See Edit Menu.
|
SQL Modeler
Modules, Windows And Dialogs > SQL Modeler

The SQL Modeler provides a fast means for creating the framework of a Select, Insert, Update, or Delete statement. You can select Tables, Views or Synonyms, join columns, select columns, and create the desired type of statement.
| Model Area |
Used to graphically lay out a query. |
| SQL Modeler Toolbar |
Most frequently used Modeler functions. |
| Criteria Tab |
Criteria used in generating the model. |
| Generated Query Tab |
Automatically generated SQL as a result of the model. |
|
SPLITTERS |
The SQL Modeler has two splitters to change how you divide the screen.
- There is a horizontal splitter between the Model Area and the Criteria/Generated Query/Query Results tabs. Drag it up or down and release to see more or less detail.
- There is a vertical splitter between the Model Area and the Table Selector List. Drag it left or right to see more or less detail.
|
Toolbar
Modules, Windows And Dialogs > SQL Modeler > SQL Modeler Toolbar
 |
New model |
Clear the modeler window ready to create a new query. |
 |
Open an existing model |
Open a saved query. |
 |
Save current model as... |
Save the query. Specify the filename and location. |
 |
Save model |
Save the query to the current filename and location. |
 |
Model information |
Edit current model information |
 |
Edit calculated fields |
Edit calculated fields |
 |
Generate a SELECT statement |
Select the type of statement you want to create.
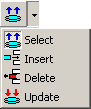
If the query in the SQL Modeler is an UPDATE, DELETE or INSERT statement, a rollback will occur automatically. |
 |
Execute query |
Use to test the query. The results show in Query Results Tab. |
 |
Explain plan |
Open the Explain Plan Tool. |
 |
Load in the Code Editor |
Copy the new query to the Code Editor. |
 |
Show Table List |
Show/Hide the Table Selector.
The Table Selector lists the tables, views and synonyms available to you for inclusion in your SQL Model. You can select from the current schema or any other schema. Only those tables, views or synonyms for which you have SELECT privilege will be listed.
To add a table, view or synonym, double click on it or drag and drop it onto the Model Area. |
| |
Save sub query and return to master query |
Save sub query and return to master query |
| |
Cancel sub query and return to master query |
Cancel sub query and return to master query |
 |
Edit global where clauses |
Edit global WHERE clauses.
Open the Global WHERE Conditions Window. |
 |
Edit global having clauses |
Set Global HAVING conditions (Must have a Group By condition set in the Criteria Tab.)
Open the Global HAVING Conditions Window. |
 |
View joins |
View Joins Dialog |
 |
Auto join objects |
Auto join objects |
 |
|
Percentage of zoom for modeler pane |
View Joins Dialog
From this dialog you can see individual joins, browse through the joins, and make changes to the joins.
| From / To |
The join fields, joined from one table to another. |
| Join Type |
You can change the Join Type from Inner to Outer. The line color denotes the type of join. |
| Outer Join On |
If you have selected an Outer join, you can change which table the outer join is performed on. |
|
Join Test |
You can change the test for the join.
You can make it Less than, Greater than, etc. instead of Equal to. |
|
Buttons |
| Previous Join |
Delete the current join. |
| Next join |
Move forward in the join list. |
| Delete Join |
Move backward. |
| OK |
Close the window and return to the SQL Modeler. | |
To open this dialog, click View Joins on the SQL Modeler toolbar. Alternatively, double click on a join line in the Model Area.
