Creating a SharePoint Site Collection
|
Navigation: Preparing for a Migration > Creating a SharePoint Object > Creating a SharePoint Site Collection |
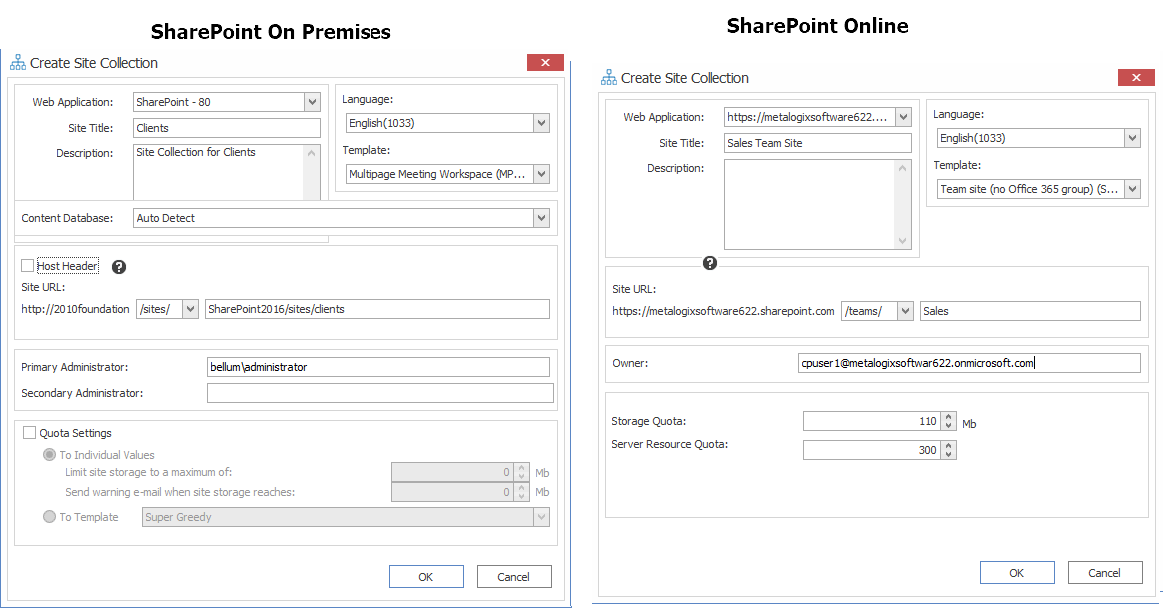
You can create a site collection for a read/write (source/target) connection type at the farm/tenant, or Web application level. If creating a site collection is invalid for the connection type, this option will be disabled.

To create a new SharePoint site collection:
1.In the Explorer View navigate to the SharePoint Farm/ Web Application (on premises) or Tenant (SharePoint Online) where the new site collection should be created.
2.Right-click and choose Create Site Collection.
3.Complete the fields on the Create Site Collection dialog for the selected Mode as you would if you were creating a site collection from within SharePoint.
NOTE: In addition, you have the option to create a host named site collection using the Host Header option. Refer to the Microsoft TechNet article details about host-named site collections.
Note that if you are migrating to SharePoint Online or SharePoint 2019, the default template is (modern) Team Site (no Office 365 group) (STS#3). For SharePoint Online, Content Matrix does not support connections to tenant-level groups.
4.After completing the dialog, click [OK].
The new site collection now displays in the Explorer View.
Creating a SharePoint Site
|
Navigation: Preparing for a Migration > Creating a SharePoint Object > Creating a SharePoint Site |
You can create a new SharePoint site via Metalogix Content Matrix under an existing site collection or site as long as the connection type is not read-only. If site creation is not valid for the connection type, the option will be disabled

To create a new SharePoint site:
1.In the Explorer View, select the site collection or site under which you want to create the new site.
2.Right-click and choose Create Site.
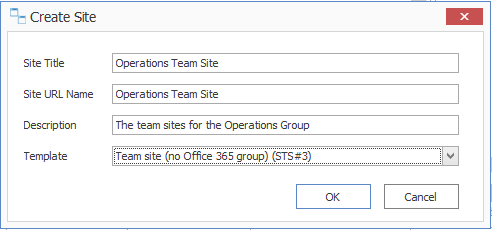
The Create Site dialog displays, prompting you to enter the Site Title, Site URL Name, Description, and Template for the new site.
NOTE: For Site URL Name, it is only necessary to enter the name of the site as you want it to appear in the URL, not the entire URL path.
Note that if you are migrating to SharePoint Online or SharePoint 2019, the default template is (modern) Team Site (no Office 365 group). For SharePoint Online, Content Matrix does not support connections to tenant-level groups.
3.When you have completed the fields on the Create Site dialog, click [OK].
The new site will now display in Explorer View.
Create a SharePoint List
|
Navigation: Preparing for a Migration > Creating a SharePoint Object > Create a SharePoint List |
You can create a new SharePoint list via Metalogix Content Matrix under an existing site as long as:
·the connection type is not read-only, and
·the new list can use any site template that is installed on the SharePoint environment.
If site creation is not valid for the connection type, the option will be disabled.

To create a new list:
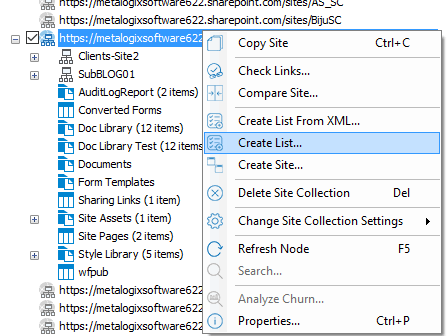
1.Navigate to the SharePoint Site where the list/library should be created.
2.Right-click and choose Create List.
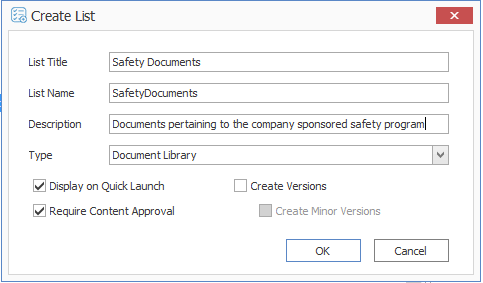
3.Complete the Create List dialog as you would if you were creating a list from within SharePoint.
4.After completing the dialog, click [OK].
The new site collection now displays in Explorer View.
Create SharePoint Folder
|
Navigation: Preparing for a Migration > Creating a SharePoint Object > Create a SharePoint Folder |
You can create a new SharePoint list via Metalogix Content Matrix under an existing list or library (or within an existing folder) as long as the connection type is not read-only.. If folder creation is not valid for the connection type, the option will be disabled.

To create a new SharePoint folder:
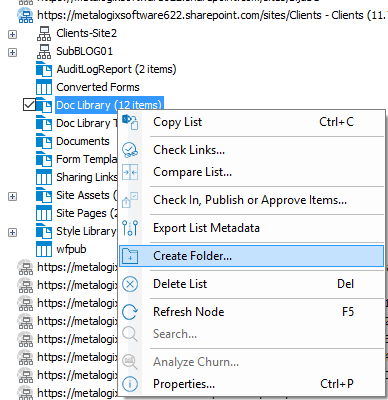
1.Navigate to the SharePoint Document Library, List, or Document Folder under which the new folder should be created.
2.Right-click and choose Create Folder.
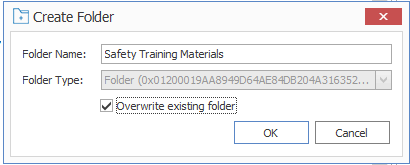
3.Complete the Create Folder dialog.
Note that the Folder Type drop down allows you to select the content type with which to create the folder. if only one content type exists on that list/library/folder, the option will be grayed out. There is also a check-box option to overwrite any existing folder that uses the same folder name at the level the folder is being added.
4.After completing the dialog, click [OK].
The new folder now displays in Explorer View.

