Introduction
Quest® vRanger®: at a glance
Key benefits
Major feature list
Target audience
Recommended additional reading
vRanger overviewvRanger overview
Installation overview
Configuration overview
Configuring vRanger
Configuration overview
Configuring vRanger through the Startup Wizard
Using vRanger
Opening the Startup Wizard
Adding and selecting a license
Adding vCenter and host information
Adding Hyper-V System Center VMM, cluster, and host information
Selecting hosts for licenses
Adding a physical machine
Selecting physical machines for licenses
Deploying and configuring the VA from the Startup Wizard
Adding a repository
Setting up the SMTP server
Adding an email address
Configuring vRanger manually
Adding a vCenter
Adding a vCloud Director
Adding an ESXi server
Adding a Hyper-V System Center VMM, cluster, or host
Adding a physical server
Adding a repository
Managing repository replication
Configuring an SMTP server
Configuring display language
Configuring a virtual appliance (VA)
Importing a license file
Managing VM host licensing
Managing physical machine licensing
Managing job configuration settings
Enabling cataloging options
Managing Transport Failover options
Configuring the number of times a backup process tries to run
Supplemental instructions: additional repository types
Adding an NFS repository
Adding a NetVault SmartDisk repository
Adding an EMC Data Domain Boost (DD Boost) repository
Adding a Quest Rapid Data Access (RDA) repository
Understanding the vRanger virtual appliance (VA)
The VA scratch disk
Deploying the VA by using the Virtual Appliance Deployment Wizard
About deploying multiple VAs
Changing the VA configuration
Configuring VA networking
Disabling Distributed Resource Scheduler (DRS) for the vRanger VA
vRanger user interface (UI) overview
My Inventory view
My Jobs view
My Repositories view
My Reports view
Backup
Backup overview
Reviewing backup transport options
Restore
VMware backup transport options
Transport selection order: VM backup
Hyper-V backup transport options
Physical backup transport options
Determining application consistency
Understanding retention policies and space-saving technologies
Performing optional configurations
Enabling VMware Changed Block Tracking (CBT)
Adding a custom backup group
Configuring VSS tools for VMware VMs
Configuring a backup job
Starting the Backup Wizard
Excluding VMs
Including hard disks of physical machines or VMs
Selecting a repository
Selecting a backup data transport method for VMware machines
Configuring backup options
Selecting a Retention Policy
Setting the recurrence schedule
Configuring email notifications
Starting the backup job
The vRanger restore process
Performing a full restore for VMware VMs
Performing a full restore for Hyper-V® VMs
Performing a full restore for VMware vApps
Performing a full restore of a physical machine
Performing an FLR on Windows
Performing an FLR on Linux
Restoring from manifest
Replicate VMs
Understanding replication of VMs
Replication modes
Reports
Integrating and monitoring vRanger
Replication with Changed Block Tracking (CBT)
Differential replication
Configuring transport failover options
Pre-seeding replication jobs
Creating a replication job
Selecting the source VM
Selecting a target host
Selecting the replication mode
Selecting replication network mapping
Selecting hard disks
Selecting replication options
Setting the recurrence schedule
Configuring email notifications
Starting the replication job
Using replication failover
Integrating vRanger: overview
Using the vRanger Console
vAPI Cmdlet details
Performing vRanger sweep-to-tape using Quest NetVault Backup
Using deduplication with Quest NetVault SmartDisk and vRanger
Using Data Domain and vRanger repositories
Monitoring vRanger
Add-BackupGroupEntity
Add-BackupJobTemplate
Add-CIFSRepository
Add-DdbReplicationRepository
Add-DdbRepository
Add-EsxHost
Add-HypervCluster
Add-HypervHost
Add-HypervRestoreJobTemplate
Add-NFSRepository
Add-NVSDRepository
Add-PhysicalMachine
Add-RdaRepository
Add-ReplicationJobTemplate
Add-RestoreFromManifestJobTemplate
Add-RestoreJobTemplate
Add-VirtualAppforLinuxFLR
Add-VirtualAppforLinuxFLRVA
Add-VirtualCenter
Disable-Job
Dismount-LinuxVolume
Enable-Job
Get-AddressBook
Get-BackupGroupEntity
Get-CatalogSearchData
Get-CatalogStatus
Get-ConfigOption
Get-Connection
Get-CurrentTemplateVersionID
Get-Datastore
Get-GlobalTransportFailover
Get-InventoryEntity
Get-IsInventoryRefreshing
Get-Job
Get-JobTemplate
Get-MonitorLog
Get-Network
Get-PhysicalMachineDiskMap
Get-Repository
Get-RepositoryJob
Get-RepositorySavePoint
Get-RestoreDiskMap
Get-SavepointDisk
Get-SavepointManifest
Get-Savepoints
Get-TransportFailover
Get-VirtualApplianceConfig
Get-VirtualApplianceDeploymentStatus
Get-VirtualApplianceReconfigStatus
Get-VirtualMachinesUnderInventory
Get-VmDisk
Get-VMDKVolume
Install-VirtualAppliance
Mount-LinuxVolume
New-BackupFlag
New-BackupGroupMember
New-Daily Schedule
New-EmailAddress
New-IntervalSchedule
New-MonthlySchedule
New-ReplicationFlag
New-RestoreFlag
New-SMTPServer
New-TransportConfiguration
New-VirtualAppliance
New-WeeklySchedule
New-YearlySchedule
Remove-AllMount
Remove-BackupGroupEntity
Remove-BackupGroupMember
Remove-Catalog
Remove-DdbStorageUnit
Remove-JobTemplate
Remove-LinuxVolume
Remove-Repository
Remove-SavePoint
Remove-VirtualAppliance
Remove-VirtualApplianceConfiguration
Run-JobsNow
Run-ReplicationFailover
Run-ResumeReplicationFailover
Run-TestReplicationFailover
Set-Cataloging
Set-CBTonVM
Set-LinuxVolume
Set-MountPath
Set-Resources
Stop-vRangerJob
Update-BackupJobTemplate
Update-GlobalTransportFailover
Update-HypervRestoreJobTemplate
Update-Inventory
Update-ReplicationJobTemplate
Update-RestoreJobTemplate
Update-VirtualAppliance
Update-VirtualApplianceConfiguration
About us
Main toolbar
 |
 |
Using vRanger > vRanger user interface (UI) overview > Main toolbar
Status Bar
| |
|
Using vRanger > vRanger user interface (UI) overview > Status Bar
My Inventory view
| |
|
Using vRanger > My Inventory view
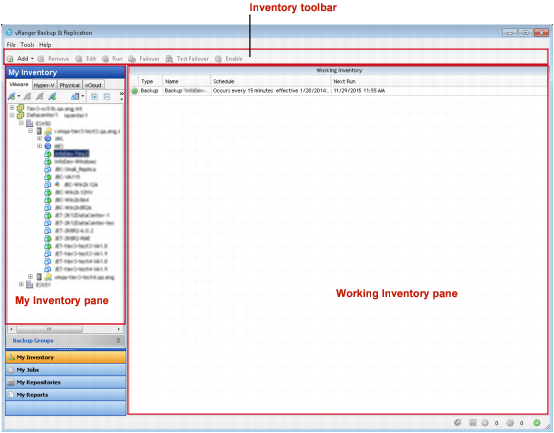
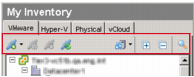
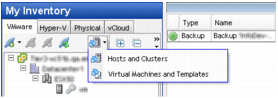
My Inventory pane
| |
|
Using vRanger > My Inventory view > My Inventory pane
The My Inventory pane offers four tabs — one to show the infrastructure of VMware® VMs, one to show the inventory of Hyper-V® VMs, one for physical servers, and one to show the inventory of VMware vCloud Director® servers.From this pane, you can navigate and refresh the tree; add or remove connections to VCs or VMware® ESXi™ servers; and add credentials to virtual servers. You can also add a backup or replication job.