Question:
How can I make sure my Table names (Physical side) show as CamelCase?
Solution:
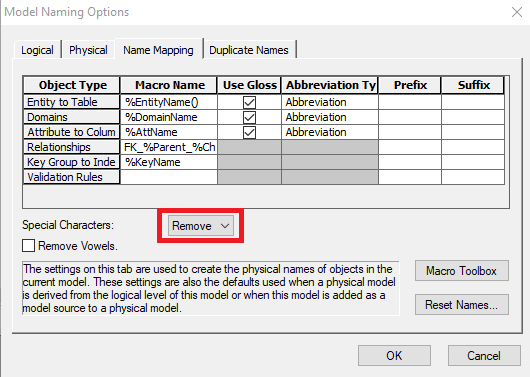
- Navigate to the following: Actions > Model Naming Options > Name Mapping Tab.
- Set a new Entity to begin with Lowercase letter and any trailing word to begin with an Uppercase letter, similar to the following name: "test Table"
- Set the Model Naming Options to the following:
- In the Logical tab: Entity Case - None
- In the Physical tab: Entity Case - None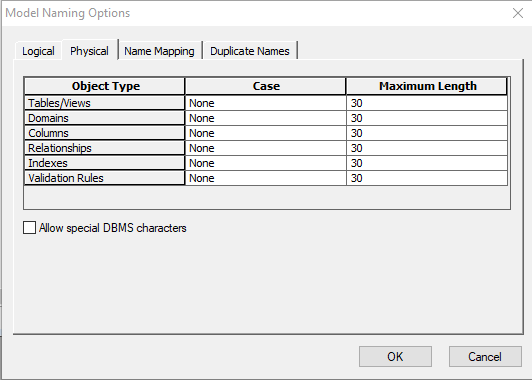
- In the Name Mapping tab, select Special Characters: Remove
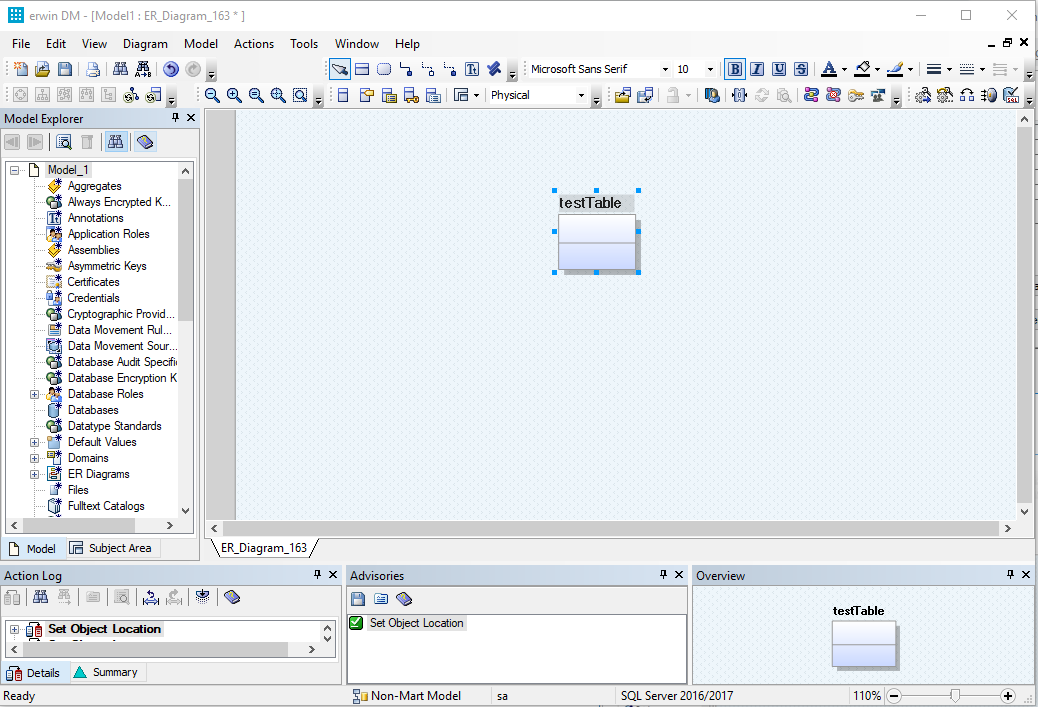
Example Result: Entity shows as Table name: testTable on the Physical side
Alternative Solution:
- Navigate to the following: View > Windows > Bulk Editor Pane > Bulk Editor Wizard
- Once in the Bulk Editor Wizard, select the Object Types from the side menu
- Click on the "Display either Logical names or Physical names" button
- Select: Physical Names
- Click on the Tables checkbox
- Select the Object Instances from the side menu
- Click on the Tables checkbox
- Click the Edit button
- Back in the Bulk Editor, click the Save button to Export the tables to a .CSV file
- Open the saved .CSV file within Excel, use the following function to create camelcase naming:
- For Table names like "new Table" use the following function: "=LOWER(LEFT(B2)) & MID(SUBSTITUTE(PROPER(B2)," ",""),2,LEN(B2))"
- For Table names like "new_Table" use the following function: =LOWER(LEFT(B2)) & MID(SUBSTITUTE(PROPER(B2),"_",""),2,LEN(B2)) - Replace old fields within Table name columns with the text in the
- Save changes made to .CSV file
- Import the edited .CSV File to the Bulk Editor
