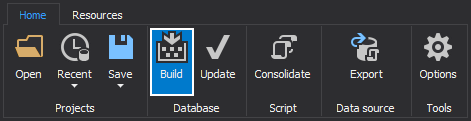
Click the Build button under the Database section from the Home tab:
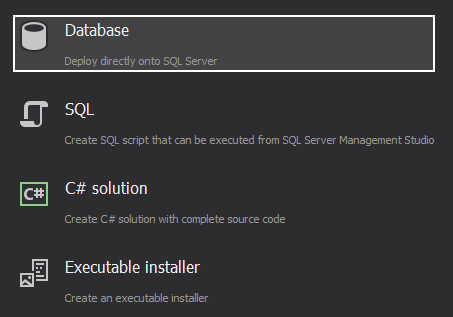
Choose Database in the Output type step:
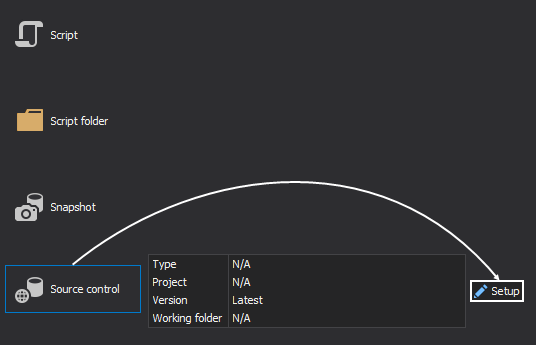
Select Source control as an Input source (database has been versioned in a source control repository), and click the Setup button to set the source control repository options:
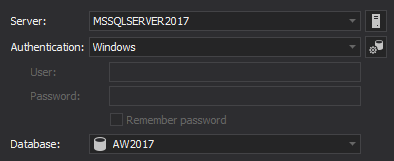
Enter SQL Server name and authentication way in the Connect to SQL Server step, where a database will be created:
A script for the database exists in the repository itself e.g. Database.sql. In this case, just specify the details for the target SQL Server, and select the From source control as an option for creating the database:
In case the database script isn’t in the repository, but it does exist locally on the machine, the script can be loaded into the application by selecting the From script option and then choosing the script file from folder:

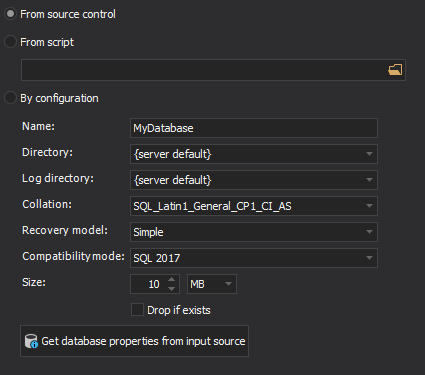
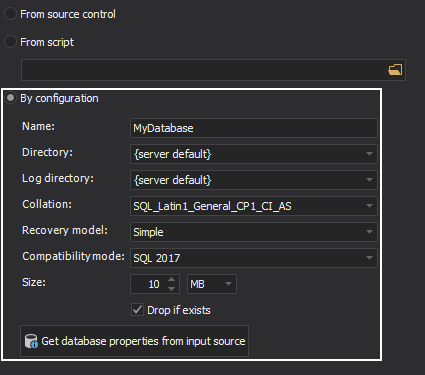
If no script exists in the repository, nor in some file locally, one can be created from within the application itself, when the By configuration option is selected:
Here, instead of specifying all database properties, those can be loaded with a click on the Get database properties from input source button.
The Drop if exists option, which when checked, will drop the existing database of the same name, before creating the new database creation script.
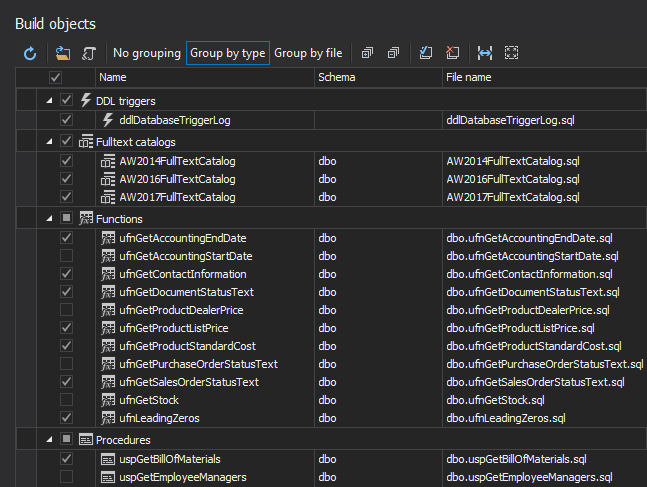
In the Build objects step, objects can be selected to be included in the build. All objects pulled out from the source control will be presented, and selected by default:
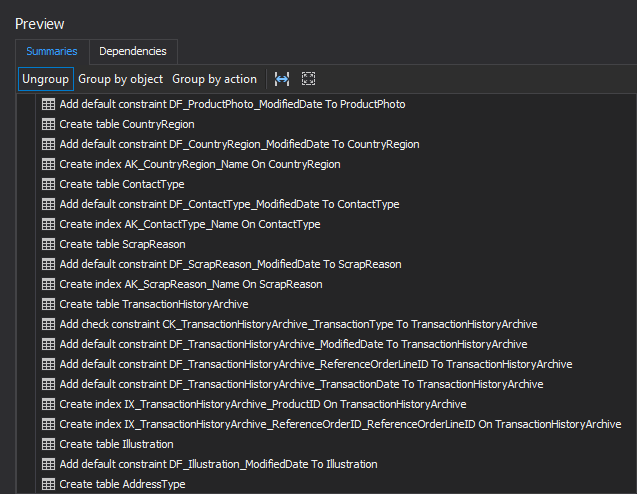
The Preview step shows the summary of all actions that will be taken while executing the build script:
The next step in the process of building a SQL Server database from source control is to include static data. In order to include static data, ApexSQL Build has an option, which is checked by default, under the Script tab in the Options window, from the Home tab:
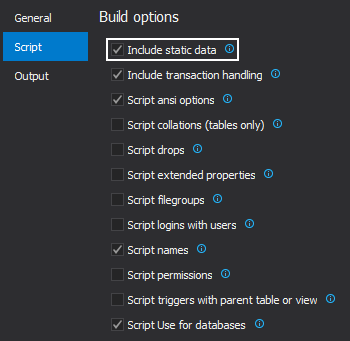
The Include static data option, when checked, collects all static data, that exists in the source control repository, associated with selected tables, and includes them in the build process.
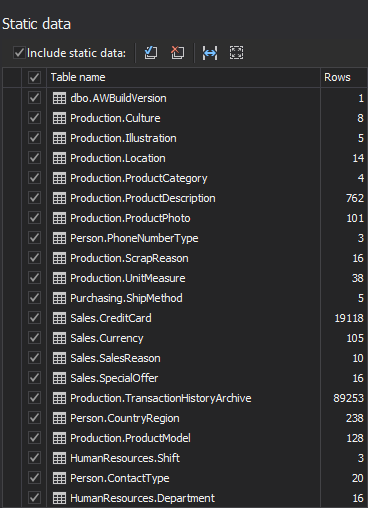
When this option is checked, the Static data window will be presented in the wizard where the user can see the static data files, which will be included in the database:
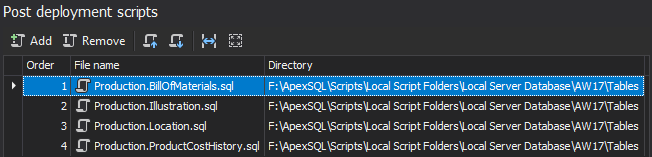
The Post deployment scripts step offers an option to add scripts which will be executed after the database has been created (this is optional and it can be skipped):
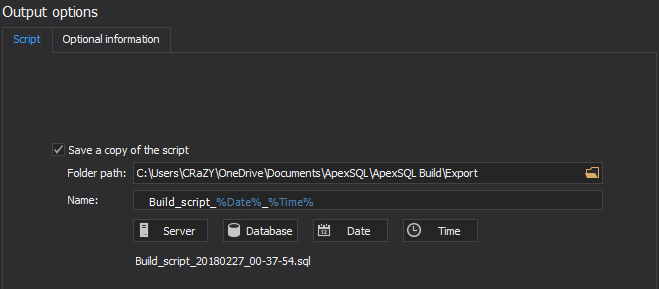
The Output options step is the last step in the database creation process. In this window under the Script tab an output action can be selected – such as Save a copy of the script:
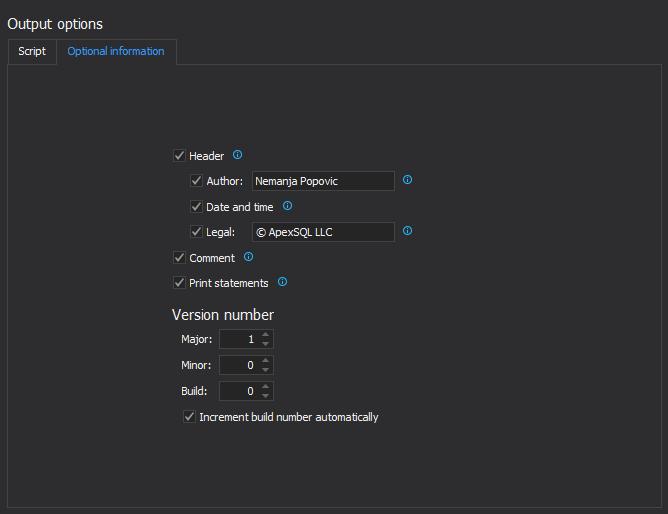
 In the Optional information tab version options can be set – which can be useful in the continuous integration workflow build step, along with an option to insert header, with its options, to the build script:
After everything is set, save your project by clicking the Save button from the Home tab:

After this whole process has been saved in a single project file, it can be run on demand whenever is needed to recreate SQL Server test environment.
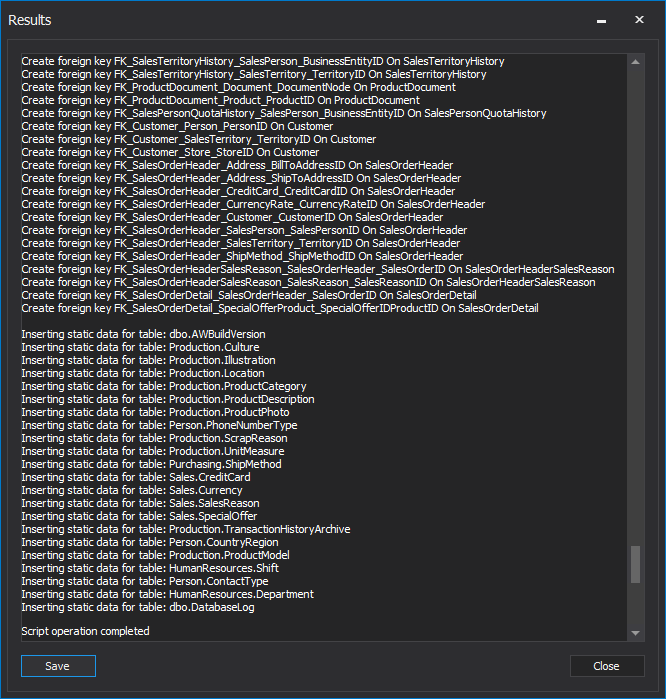
After clicking the Finish button, the entire database will be built from the source control, without writing a single line of code. After the database creation process has been done, in the Results window will be shown if the process was successfully finished, or with errors:
 Note that PowerShell project can call and execute the application’s CLI code only if it is under the single quotation marks, and if the code is written in single line.
For more information about using the ApexSQL Build via the CLI check out the article about ApexSQL Build Command Line Interface (CLI) switches.
The project file previously created in the ApexSQL Build contains all needed information including the passwords, which will be saved and encrypted in it. Learn more about using the project file in the CLI.
In this example Windows authentication was used, but you can learn more from the article about Four ways of handling database/login credentials during automated execution via the CLI
After an execution of the PowerShell, all execution messages will be visible in the output file which is similar to the Results window explained earlier:
Note that PowerShell project can call and execute the application’s CLI code only if it is under the single quotation marks, and if the code is written in single line.
For more information about using the ApexSQL Build via the CLI check out the article about ApexSQL Build Command Line Interface (CLI) switches.
The project file previously created in the ApexSQL Build contains all needed information including the passwords, which will be saved and encrypted in it. Learn more about using the project file in the CLI.
In this example Windows authentication was used, but you can learn more from the article about Four ways of handling database/login credentials during automated execution via the CLI
After an execution of the PowerShell, all execution messages will be visible in the output file which is similar to the Results window explained earlier:
 In case that some error occurs while the execution process is running, an appropriate return code will be shown in ApexSQL Build.
Each alteration in the source control repository will be applied in the process and accurate order for the execution will be provided, regardless of using the project file or individual switches.
In case that some error occurs while the execution process is running, an appropriate return code will be shown in ApexSQL Build.
Each alteration in the source control repository will be applied in the process and accurate order for the execution will be provided, regardless of using the project file or individual switches.
