This version of Metalogix Essentials for Office 365 introduces the following features:
Features
Migrating SPO to SPO in Hyper Mode
Implemented the ability to migrate SharePoint Online sites(Classic Team Sites and Modern Team Sites (not connected to Office 365 Groups) between tenants using Hyper Mode.
Automatic registration for OAuth Authentication along with Claims
Changes made to how OAuth authentication is added to the tenant, and added support for Claims connections using OAuth.
Support for GCC High tenant
Implemented the ability to migrate to and from GCC High Tenants.
Centralized proxy settings and support for PAC and White-Listing
Implemented the ability to set up proxy from a central location. New proxy dialog is now available which supports bypassing White Lists, and PAC scripts with and without authentication.
Job Status Reports
Job Status reports, which show information about your jobs, are now available in a user-friendly excel file, which can be sent automatically in email notifications.
Nintex support for SP 2019 On-Prem and Nintex app Registration
Implemented the ability to register Nintex Apps once across site collections.
User Mapping Report
Implemented a new Tenant to Tenant and File Share to Tenant report option, which allows users to create user mapping CSV reports.
Documentation Updates
Changes made to the structure of the user manual, including the current updates made to the tool.
Fixed Issues
|
Description |
Work Item |
|---|---|
|
Resolved modern page migration error from O365 groups to O365 groups. |
|
|
Resolved issue where users were unable to see accounts connected to SPO or add more Admin pool accounts to existing projects. |
422204
|
|
Resolved issue where users were unable to migrate Modern Team Sites from one tenant to another, due to Home.aspx corrupting. |
415532 |
|
Resolved issue where not all OneDrive users were being loaded from the tenant. |
|
|
Resolved issue where temporary files for Hyper Migrations were not getting flushed automatically, resulting in the need to delete them manually. |
426494 |
|
Resolved issue where multiple OneNote Files, and locations of logs, were out of storage. |
|
|
Resolved issue where reports were not generating for large jobs. |
412145 |
|
Resolved issue where users were being redirected to the home page after receiving an error message. |
444942 |
|
Resolved issue where Essentials was not using the configured proxy for all Internet Traffic that the tool was generating. |
438338 |
|
Resolved issue where could not copy survey file, when migration between SPO and SPO. |
445132 |
|
Resolved issue where Migration jobs were running for too long. |
|
|
Resolved issue where Essentials version in tool is different from the one displayed on the Control Panel. |
442406 |
|
Resolved issue where Essential was not Bypassing the Local Addresses when Proxy is configured and used with the tool. |
443931 |
|
Resolved issue where Workflow setting "Creating a new item will start this workflow" is not preserved after migration. |
445292 |
|
Resolved Issues that were occurring while migrating Surveys List. |
445132 |
|
Resolved issue where "The Modified At" Metadata was not migrating correctly for Folders that were not at the root level. |
448221 |
|
Resolved issue where O365 Groups Default Library titles were not being preserved. |
450971 |
|
Resolved issue where Migrating from File Share to SharePoint Online user mapping was not working. |
451852 |
|
Resolved issue where users evaluation Essentials wnated to import files from share drive to share. |
451990 |
|
Resolved issue where MySites to OneDrive Migration via proxy server was not working. |
|
|
Resolved issue where Deleting item(s) from source was not deleting them in folder structure. |
439993 |
|
Resolved issue where Migration was stopping in the middle with an "unable to delete file" error. |
455042 |
|
Resolved issue where Migration with mapping of Folders to custom Document Set content type was not working. |
452590 |
|
Resolved issue where Dropbox to Office 365 Groups copy to existing site collection reports was resulting in an error and not mapping users. |
453237 |
|
Resolved issue where Task scheduler for migration was not working. |
451034 |
|
Removed the OneDrive Management Button from the Drives Tab. |
|
|
Resolved issue where creating a new profile resulted in broken email notifications table |
451942 |
|
Resolved issue where user was not able to connect to google in order to open google account in navigator. |
455713 |
|
Resolved issue where permissions were not working for SharePoint Groups. |
456364 |
Our desktop tool is a multi-threaded/multi-tasking application. As such, available system memory is the most critical parameter for optimal performance.
Hardware
|
Component |
Minimum Requirement |
Recommended |
|---|---|---|
|
Processor |
Intel Core i7 |
Intel Core i9, X-Series or higher |
|
Memory |
16 GB |
32 GB |
|
Disk Drives |
Dual hybrid disk drives C: OS, Program Files, Data Files |
Dual SSD drives C: OS and Program Files D: Data Files |
|
Network Card |
100 Mbps |
1Gbps |
Operating System Software
·Windows 10 or higher
·Disable anti-virus software or disable scanning of Metalogix Essentials Program, Program Folder, and Data folders.
After purchasing Metalogix Essentials, you will receive an email with the link to the product download and the activation code to activate the product. If you did not receive such an email please contact us: www.quest.com/contact.
1.Once installation has been completed, upon starting the Essentials application for the first time, you will be presented with a Registration Screen. Enter your activation code in the allowed space, and select your choice of activation method. For Activate Now proceed to step 2. Go to the following section for instructions on how to Activate Manually (used if you do not have internet access).
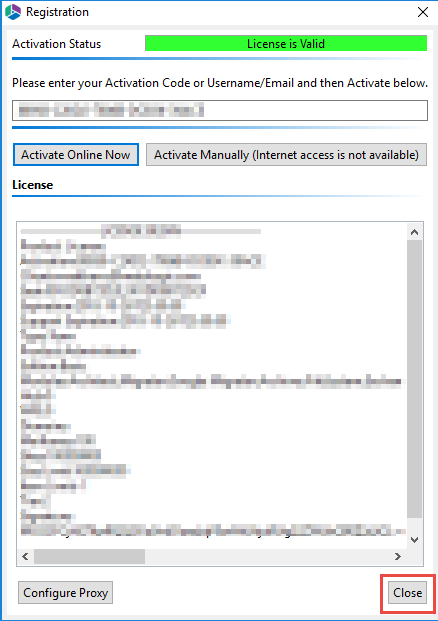
2.The license should appear in the License box and the Activation Status bar should turn green and display "License is Valid". You will also receive a message stating that your License key has been retrieved successfully. Click Ok.
3.After this click the Close button and proceed to the product.
After purchasing Metalogix Essentials, you will receive an email with the link to the product download and the activation code to activate the product.
1.Once installation has been completed, upon starting the Essentials application for the first time, you will be presented with a Registration Screen. Enter your activation code in the allotted space, and select to Activate Manually.
2.You will be presented with a window that details the instructions on how to obtain your license manually in the case that the machine on which Essentials has been installed does not have access to the internet.
3.As is displayed in the above screen shot, upon clicking Ok, your internet browser will be opened, if you do not have access to the internet, then simply copy the URL in the address bar and paste it into the browser of a machine with an active internet connection. This will give you access to your license data.
4.Select all the license data and copy it, then click Close.
5.Once you have copied the license data, and closed the license data window, you will be redirected to the Offline Activation page. Paste the license data into the area marked Activation Text. Click Activate.
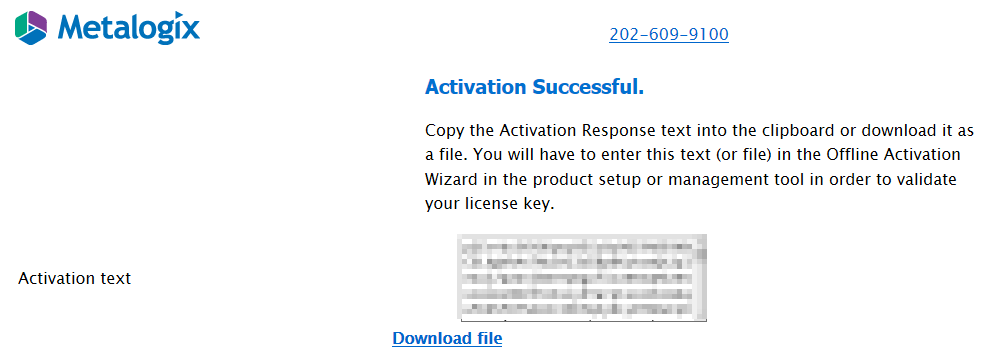
6.If activation was successful you will be redirected to the successful activation page. Here you must either copy the Activation Text.
7.Return to the Essentials Registration Screen. An Enter License Data window will have opened, paste the activation text here, and select Apply.
8.The license should appear in the License box and the Activation Status bar should turn green and display "License is Valid". Your license has been activated, you may now click Close and use the Essentials console.