The Complex Table feature provides an option to display a complex table and object's properties (Title, size of the table, size of the column), and disable all the filters at once.
Hover over 
You can configure complex tables at Table Level, View Level, and Column Level.
To configure a complex table at Table level, follow these steps:
Open the browser and login to erwin Evolve Web Platform.
Click a model. For example, EA Foundation – Sample Model.

Click Administration.

Click Complex Table.
Click the Table Level Settings drop-down list box.
The options for table-level settings appear.
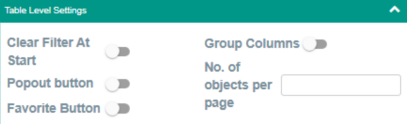
Use the following options:
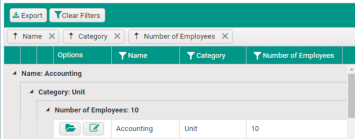
Switch this option on to view the object's properties in the pop-out. To view object properties, click 
This opens the object's properties in the right pane. For example, the following image displays the Accounting object's properties in the pop-out.
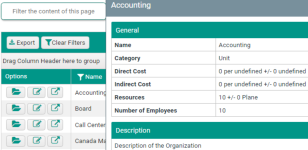

 .
.
You will be notified that the "The page has been set as a favourite and is now available on your home page."
Click 
You will be notified that the "Configuration draft has been saved".
Click 
You will be notified that the "Configuration published successfully".
To configure a complex table at View level, follow these steps:
Click the Evolve view drop-down list box and select the required view. For example, Organization & Roles (index_organisations).
Click the View Level Settings drop-down and use the following options:
 |
Before enabling Remove Title option, ensure that the Table title is available in the Evolve Designer. |
|---|
Click
You will be notified that the "Configuration draft has been saved".
Click 
You will be notified that the "Configuration published successfully".
To configure a complex table at Column level, follow these steps:
Click the Column Level Settings drop-down.
Select the required table to configure. For example, Organization (organisation_grid).
Click the Popout to use drop-down list box and select the required option. For example, organization_diagram_popout.
Click the required column to configure. For example, Name.
Use the following options:
Click
You will be notified that the "Configuration draft has been saved".
Click
You will be notified that the "Configuration published successfully".
The Settings feature enables you to configure settings at different levels such as Print Settings, Tabs Settings, and Filter Settings.
Hover over
To configure settings, follow these steps:
Open the browser and login to erwin Evolve Web Platform.
Click a model. For example, EA Foundation – Sample Model.

Click Administration.
Click Settings.
To configure settings at Print level, follow these steps:
Click the Print Settings drop-down and use the following option:
To configure settings at the Tabs level, follow these steps:
Click the Tabs Settings drop-down and use the following option:
To configure settings at Filter level, follow these steps:
Click the Filter Settings drop-down and use the following option:
 to save the configuration.
You will be notified that the "Configuration draft has been saved".
 to publish the configuration.
You will be notified that the "Configuration published successfully".
Evolve includes a built-in Workflow capability which provides three useful processes:
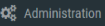
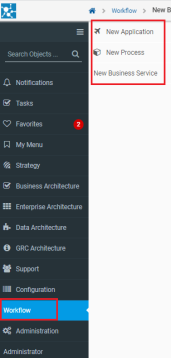
A new Separate module for Workflow execution – new module, workflow is added to the Erwin Evolve site, where you can create new applications, process, and business services.
A review and approval process for data changes - meaning that when users create objects, delete objects or edit any data in Evolve, those changes are not submitted to the repository until they have been approved.
An object validation request process - where users can request for an object to be validated by a nominated set of users, and when all users approve the data, properties are set on the object to record the validation.
A review process for Site pages - where you can share a page with a Role and every user in the Role must confirm they have reviewed the content.

Each of these processes are supported by Task and Notification mechanisms. Tasks are created for every workflow that's initiated and users are alerted to them with notifications in the Site menu when they log in, prompting them to take action.
In addition, users of your Site can Follow objects governed by workflows so they are notified of any workflow-related activity affecting those objects.
Workflow can be configured to use SMTP, which enables alerts to be sent to users via email when Tasks are created and completed. The emails, which are customizable, include details of the Task and the latest activity, as well as direct links back to your Site for users to follow.
What do you want to do?
Set up the Review and Approval Workflow
Set up the Object Validation Workflow
Set up the Review Page Workflow
Review and approve, or reject, data changes
Confirm you have reviewed an Object Pages
See who has reviewed a page you shared
Evolve includes a built-in Workflow capability which provides three useful processes:
A new Separate module for Workflow execution – new module, workflow is added to the Erwin Evolve site, where you can create new applications, process, and business services.
A review and approval process for data changes - meaning that when users create objects, delete objects or edit any data in Evolve, those changes are not submitted to the repository until they have been approved.
An object validation request process - where users can request for an object to be validated by a nominated set of users, and when all users approve the data, properties are set on the object to record the validation.
A review process for Site pages - where you can share a page with a Role and every user in the Role must confirm they have reviewed the content.
Each of these processes are supported by Task and Notification mechanisms. Tasks are created for every workflow that's initiated and users are alerted to them with notifications in the Site menu when they log in, prompting them to take action.
In addition, users of your Site can Follow objects governed by workflows so they are notified of any workflow-related activity affecting those objects.
Workflow can be configured to use SMTP, which enables alerts to be sent to users via email when Tasks are created and completed. The emails, which are customizable, include details of the Task and the latest activity, as well as direct links back to your Site for users to follow.
What do you want to do?
Set up the Review and Approval Workflow
Set up the Object Validation Workflow
Set up the Review Page Workflow
Review and approve, or reject, data changes
