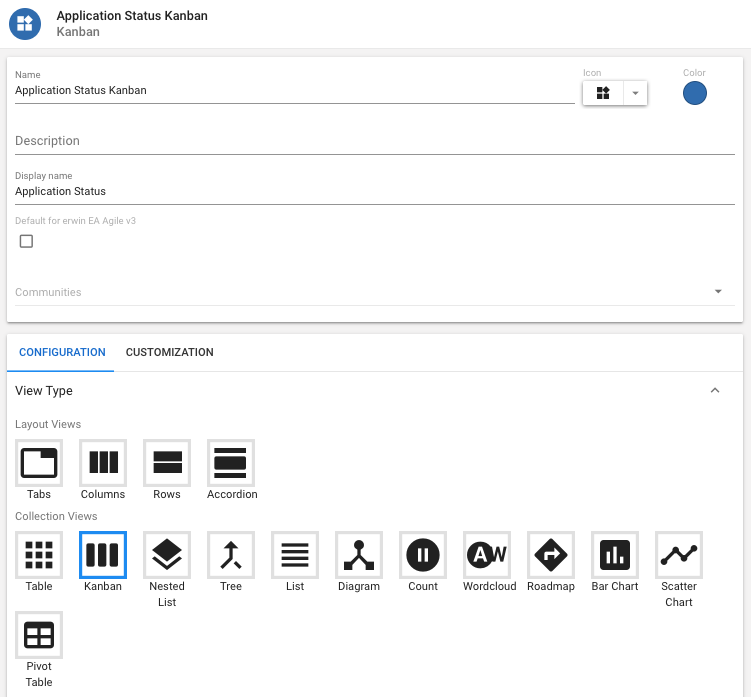
Collection Views
How Do I Create a Kanban?
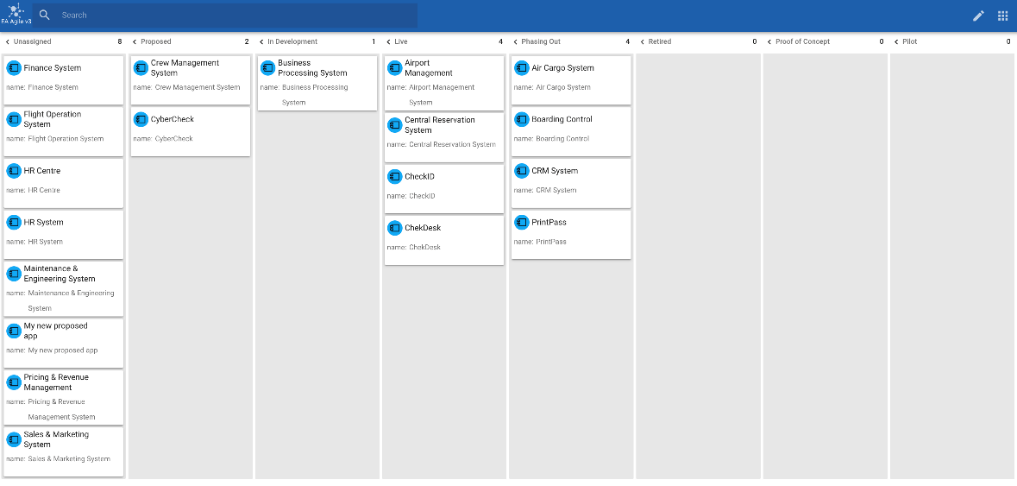
Kanban boards are the visual storyboard for a process or workflow. They represent the journey and the objects within that journey. Objects are represented as cards on the board. Objects may be moved from one stage to another by dragging.
|
|
Before starting you must read and follow the instructions in the New View help page. |
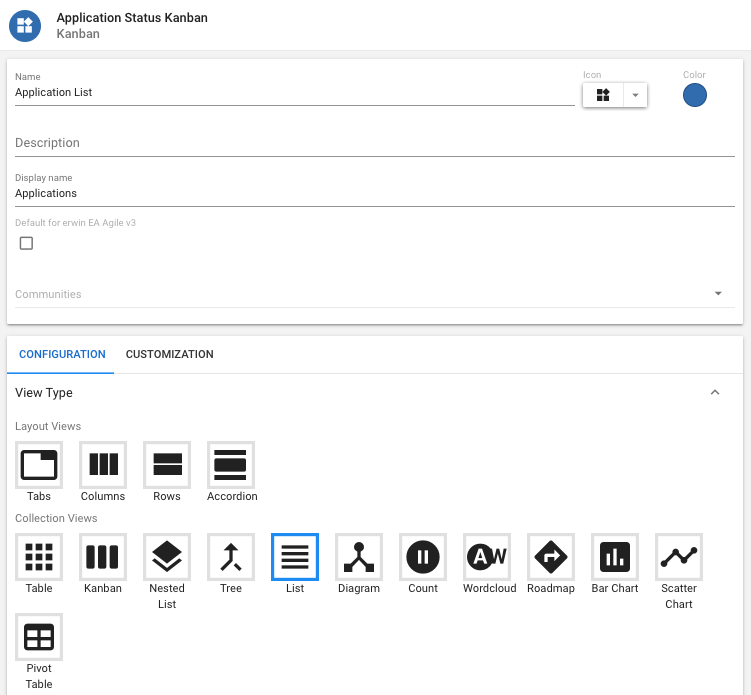
1. Select ‘Kanban’ from Collection Views.
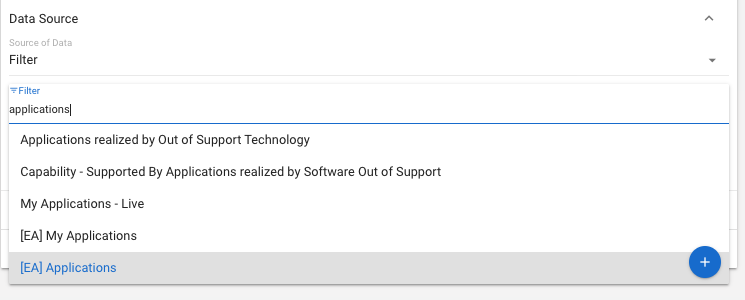
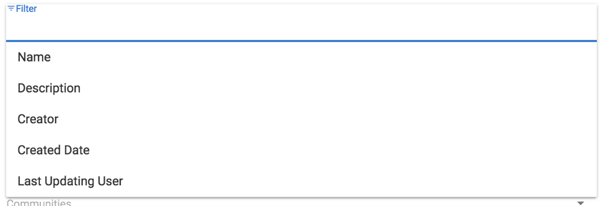
2. Add a Filter so your Kanban only displays the instances you require. You can either select a filter or create a new one (For more on how to create a filter please read the Filters help file.
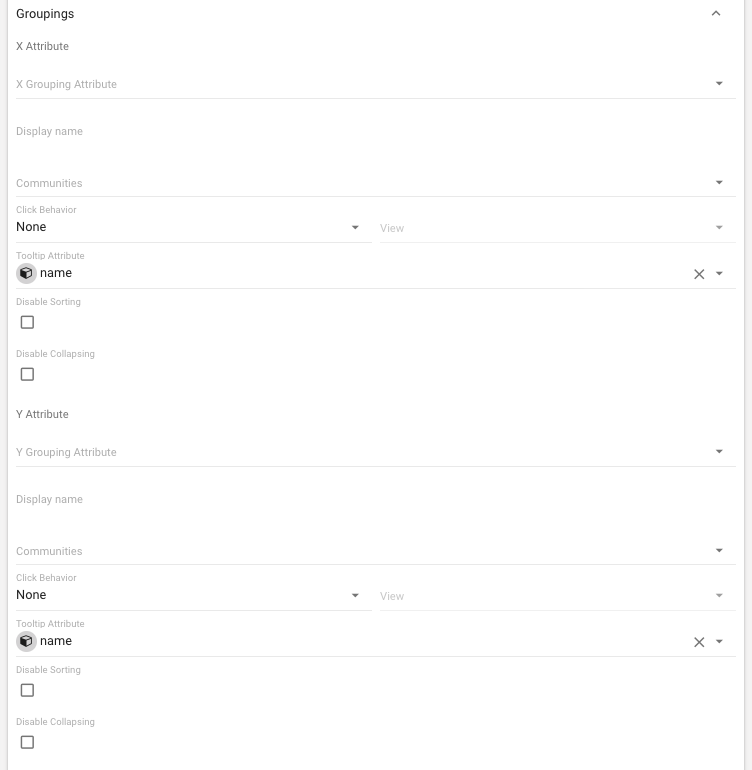
3. You will then need to set the X & Y attribute for your Kanban View
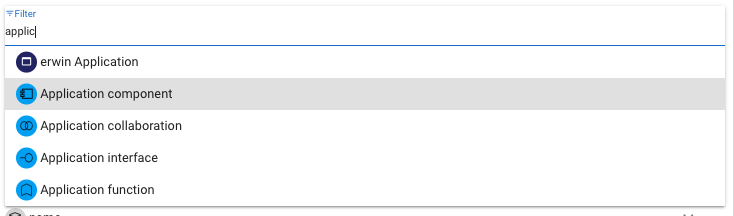
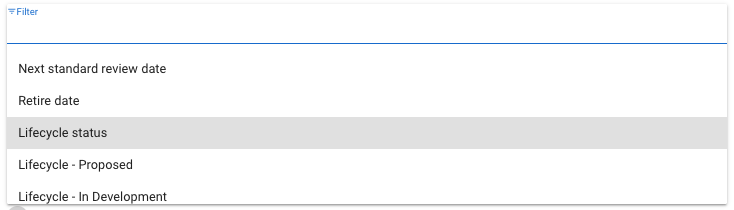
a. Select your X axis grouping attribute, for this example we will use the Status Attribute of Object Type ‘Business Term’
This will bring a list of Object Type specific Attributes. Below the example is for Business Terms. For general Attributes click ‘Generic Attributes’
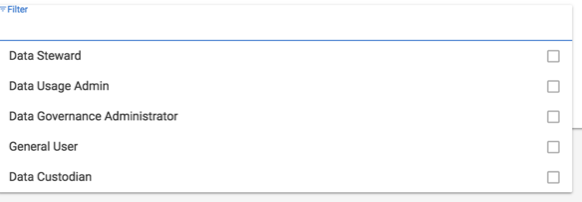
b. To restrict the Attribute to a Community, click the ‘Communities’ field. If you wish the Attribute to be viewed by all leave this field blank
c. You can now choose whether the Icon has a Click Behaviour. There are 5 options:
i. Context:
ii. None: Nothing will happen when the Property is clicked
iii. Open In Panel: A side panel will pop out
iv. Navigate To: Redirected to a new page displaying the set view
v. Open In Dialogue: The set view pops up in a box in the centre of the screen
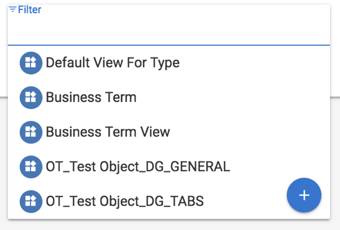
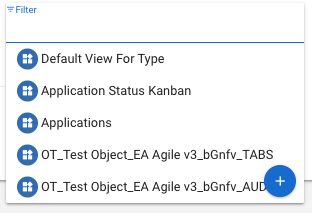
d. Open In Panel, Navigate To & Open In Dialogue require you to set a View to navigate to. Clicking in the ‘View’ field allows you to select a View by searching by name, select from a list or create a new view. The most common choice is ‘Default View For Type’
e. Repeat for Step 4a – 4d for your Y axis
4. Next you will need to select which Attributes are displayed within your Kanban cards.
a. Generic Attributes are Attributes that are in all Object Types
b. If you want to display Attributes that are only of the Object Type you’re creating your display view for. You can either select the Object Type manually or search for a specific term
c. This will bring a list of Object Type specific Attributes. Below the example is for Business Terms
5. To allow users to change the Attribute there is a checkbox labeled ‘Editable’. Unselecting this box will lock the Property
6. To restrict the Attribute to a Community, click the ‘Communities’ field. If you wish the Property to be viewed by all leave this field blank
7. You can now choose whether the Attribute has a Click Behaviour. As in Step 4c you have 5 options. If your selection requires a View select from a list or create your own (Step 4d)
|
|
To add additional Attributes, click ‘Add Display Property’ and repeat from Step 4 |
8. Once you have finished configuring your Kanban View click ‘Save’.
How Do I Create a List View?
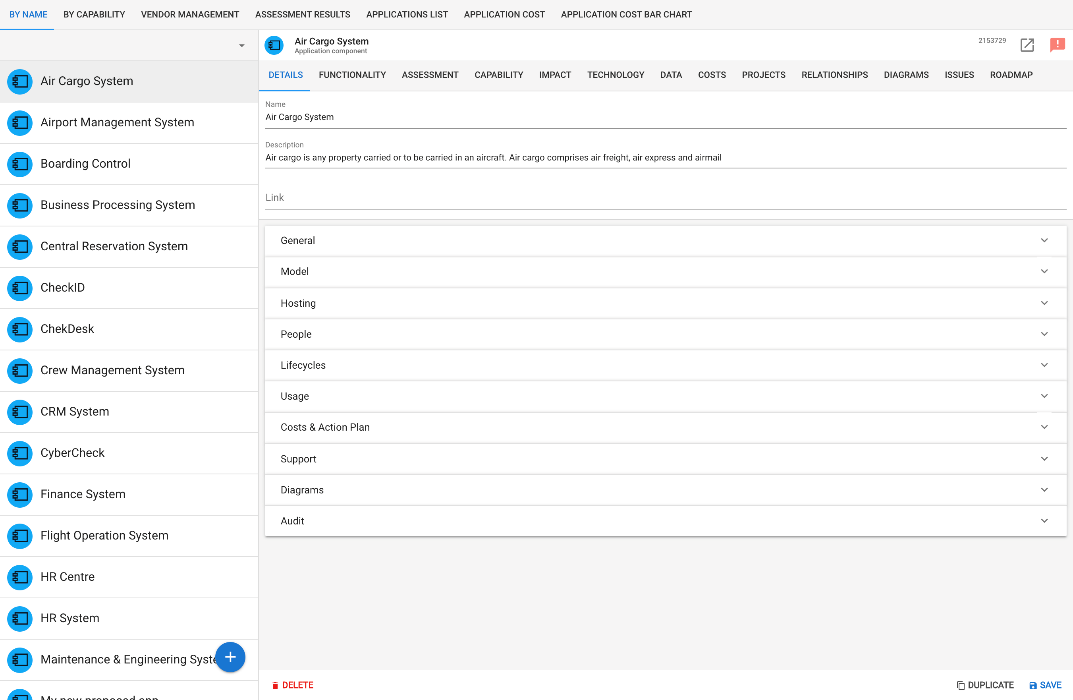
An example of a list view displaying Application Components alongside their default view. Lists can display any Objects within your metamodel and customized with various click behaviors.
|
|
Before starting you must read and follow the instructions in the New View help page. |
1. Select ‘List’ from Collection Views
2. Add a Filter so your list only displays the instances you require. You can either select a filter or create a new one (For more on how to create a filter please visit the Filters help file
3. Next you will need to select which Attributes are displayed within your list.
a. Generic Attributes are Attributes that are in all Object Types
b. If you want to display Attributes that are only of the Object Type you’re creating your display view for. You can either select the Object Type manually or search for a specific term
c. This will bring a list of Object Type specific Attributes. Below the example is for Business Terms
4. To allow users to change the Attribute there is a check box labelled ‘Editable’. Unselecting this box will lock the Attribute
5. To restrict the Attribute to a Community, click the ‘Communities’ field. If you wish the Attribute to be viewed by all leave this field blank
6. You can now choose whether the Icon has a Click Behaviour. There are 5 options:
i.Context:
ii.None: Nothing will happen when the Attribute is clicked
iii.Open In Panel: A side panel will pop out
i❖.Navigate To: Redirected to a new page displaying the set view
❖.Open In Dialogue: The set view pops up in a box in the centre of the screen
Open In Panel, Navigate To & Open In Dialogue require you to set a View to navigate to. Clicking in the ‘View’ field allows you to select a View by searching by name, select from a list or create a new view. The most common choice is ‘Default View For Type’
7. To add additional Attributes, click ‘Add Display Attribute’ and repeat from Step 5
8. To add alphabetical letters on the side of your list tick ‘Alpha Group’
9. Once you have finished click ‘Save’.
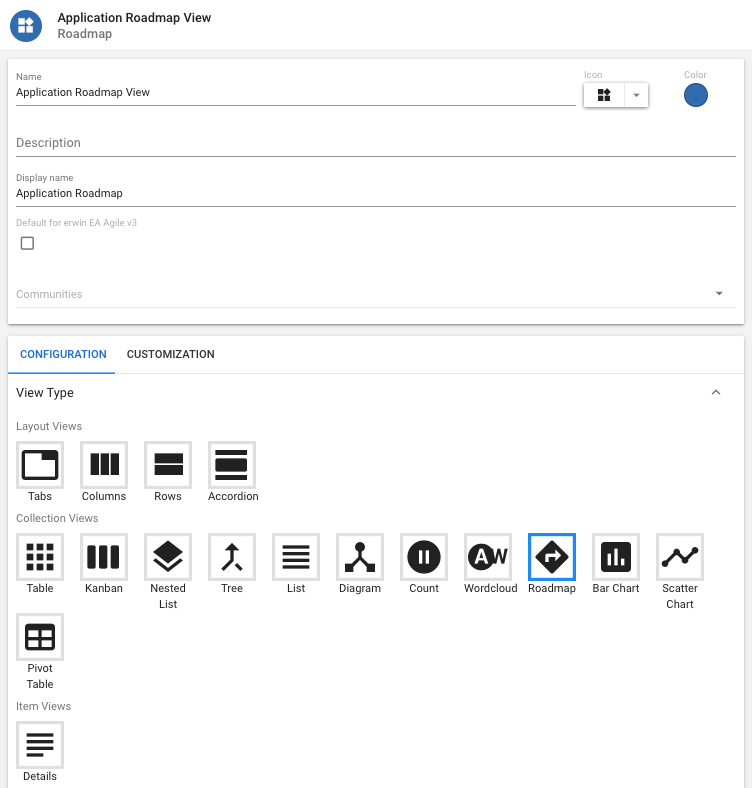
How Do I Create a Roadmap?
Roadmaps provide a mechanism to show any concept over a time period. Most Enterprise Architect (EA) concepts will have a time dimension.
|
|
Before starting you must read and follow the instructions in the New View help page. |
1. Select ‘Roadmap’ from Collection Views
2. Add a Filter so your Roadmap only displays the instances you require. You can either select a filter or create a new one (For more on how to create a filter, please visit the Filters help file)
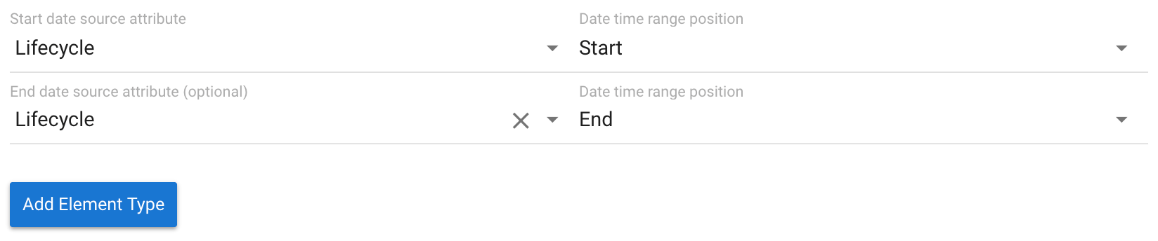
3. Next, you will need to select your Date Attributes for your Roadmap View.
a. First, select your element type.
b. Then, select the Source Attributes for your date or date range
4. If you wish to add another Element Type click 'Add Element Type' and repeat step 4
5. Once you have finished click ‘Save’ in the bottom right corner
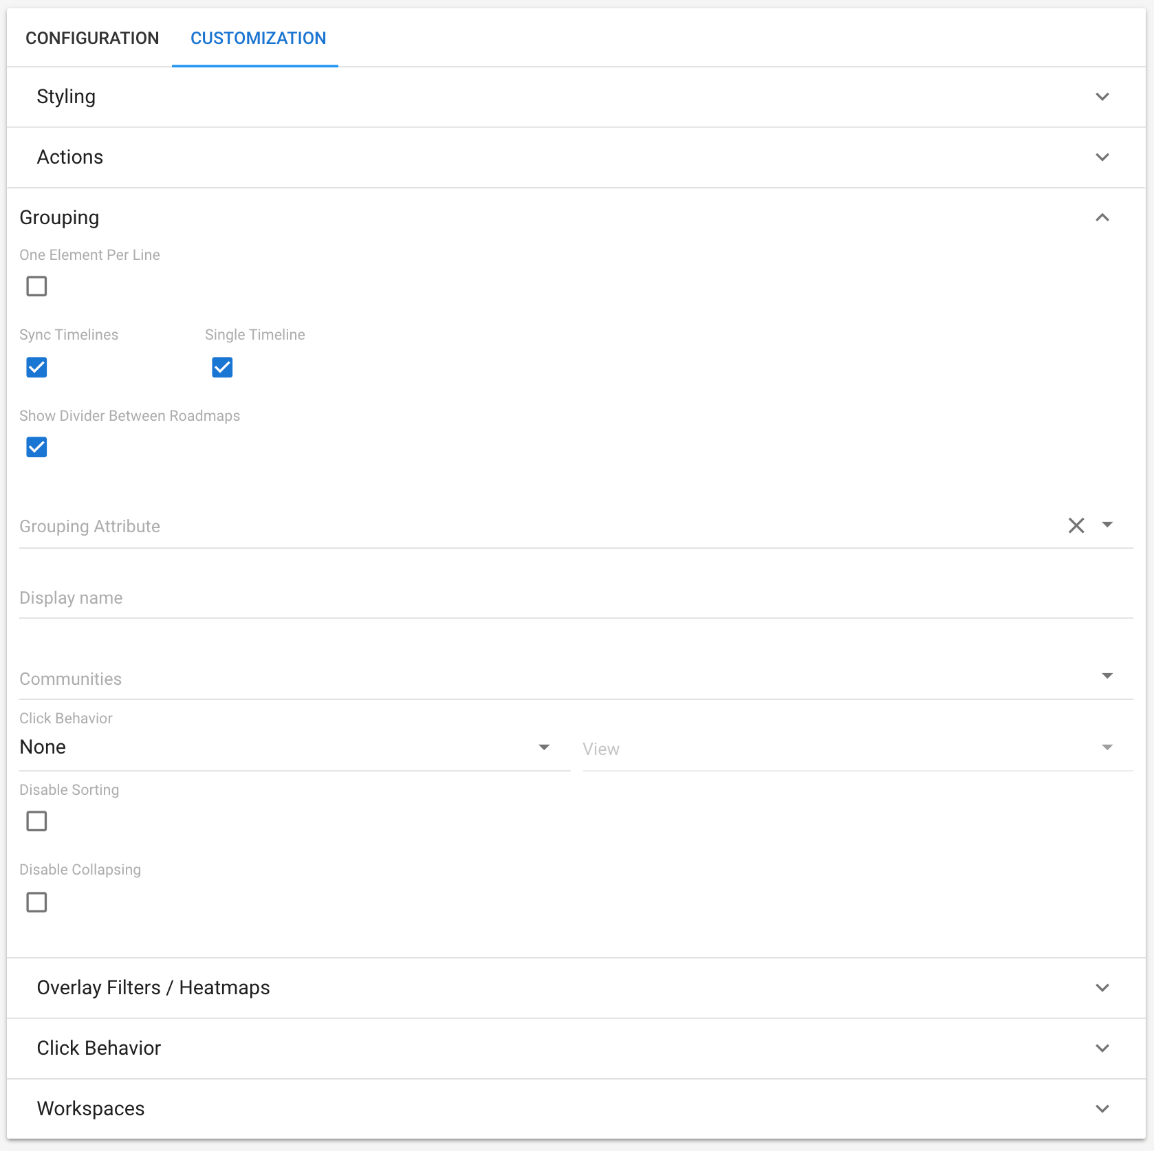
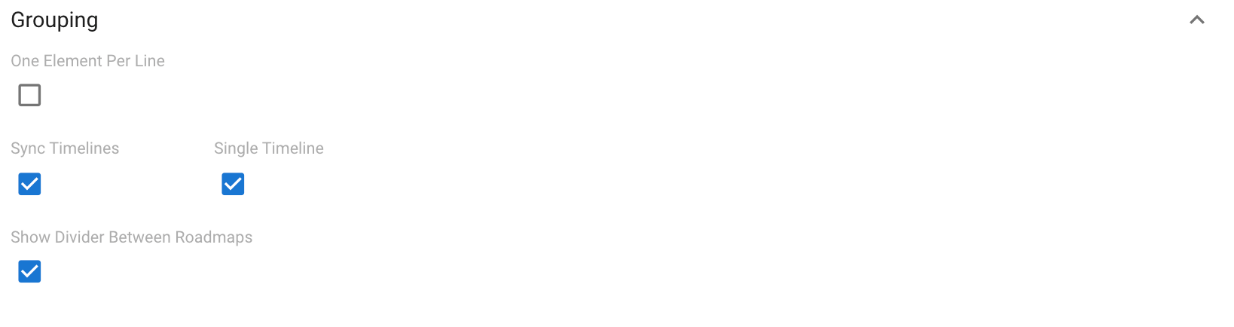
How Do I Add a Grouping Attribute
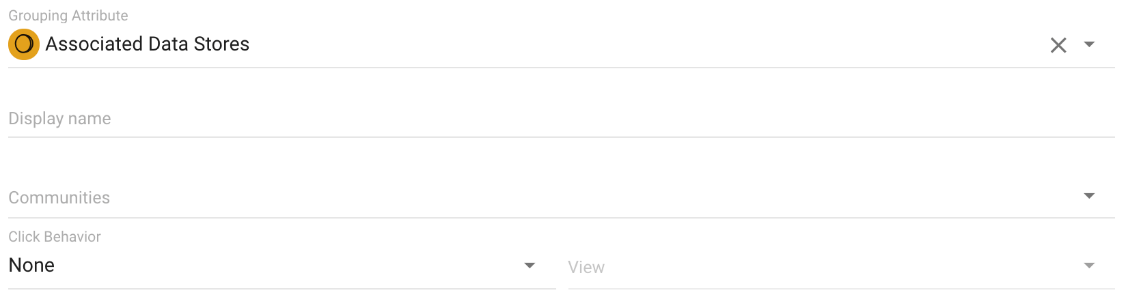
1. Once you've configured your Roadmap view go to the customization tab and open the 'Grouping' accordion.
2. Select the Attribute you wish to group by
Roadmap Styling
There are several styling options available for our Roadmap View.
You can choose to display elements one-per-line
Tick the box and Save to change the style
If you've chosen to group your roadmap by an Attribute you can Sync timelines for easier navigation. You can also choose to have one master timeline rather than a timeline per-group