|
|
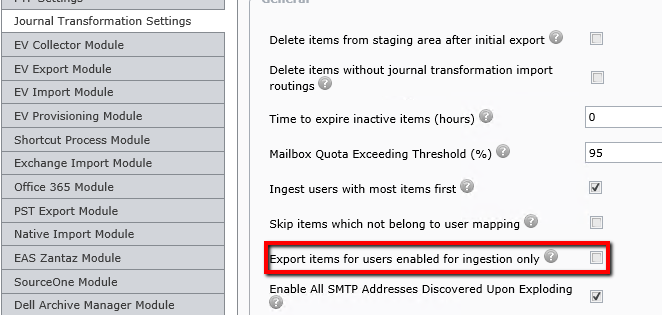
NOTE: Collection of Journal Transformation data through Enterprise Vault indexes is set as default from Archive Shuttle 11.3. For new mappings, the settings Export items for users enabled for ingestion only and Enable collection of sender recipients on export are enabled by default. |
Recipients can be collected separately. It has been seen to improve performance, and reduces the staging area space requirements.
A Journal Transformation setting enables this feature.
Once it is enabled, when the bulk mapping wizard is used part way through the wizard you will be asked if you want to export items for users enabled for migration only. This will now default to true, but you can disable it on that mapping if you wish, and the old way will be used.
On the summary screen, you will see confirmation that Archive Shuttle will use the EV Index.
Items are collected. Once some item data has been collected, the collection for sender and recipient information is handled via the EV Collector, and it will query the EV Index. All of the recipients will be collected and sent to the core. This collection can be retried if required.
The Existing Mapping page has an advanced view option. If this is selected the mappings will show export based on ev index if we have used this feature. It can be disabled on a mapping by mapping basis as well. This is dynamic and can be done on a mapping which is part way through being processed.
Selective migration is also visible on the Stage 2 screen, after adding additional columns:
·Export based on EV index
·Collecting count
·Collected count
·Retryable errors (Sender recipient collection)
·Permanent errors (Sender recipient collection)
The layout can be saved, if required.
If there are errors during collection, the mapping wont be marked in red as theyre only failures during the collection itself. Sender / Recipient collection can be retried from the Journal Transformation tab.
User mappings can be created based on this collected sender/recipient information, and the mappings enabled. When this is done, the EV Export module will then begin to export the data for those mappings. This reduces the storage area space needed for a Journal Transformation migration.
Leavers are supported in this scenario as well.
The EV Collector must run under a service account which has access to query the index for the archives mapping for migration.
Finally the failed item page has been enhanced to introduce a new tab Sender Recipient Collection. This will show any issues with collection of sender/recipient information from the EV Index. These errors can be retried, if required.
There is a fallback mechanism for collection. Collection will retry 10 times, before being marked as permanently failed. These items are exported in the old way, in order to get the sender/recipient information from the item itself, and the sender/recipient information gathered from that.
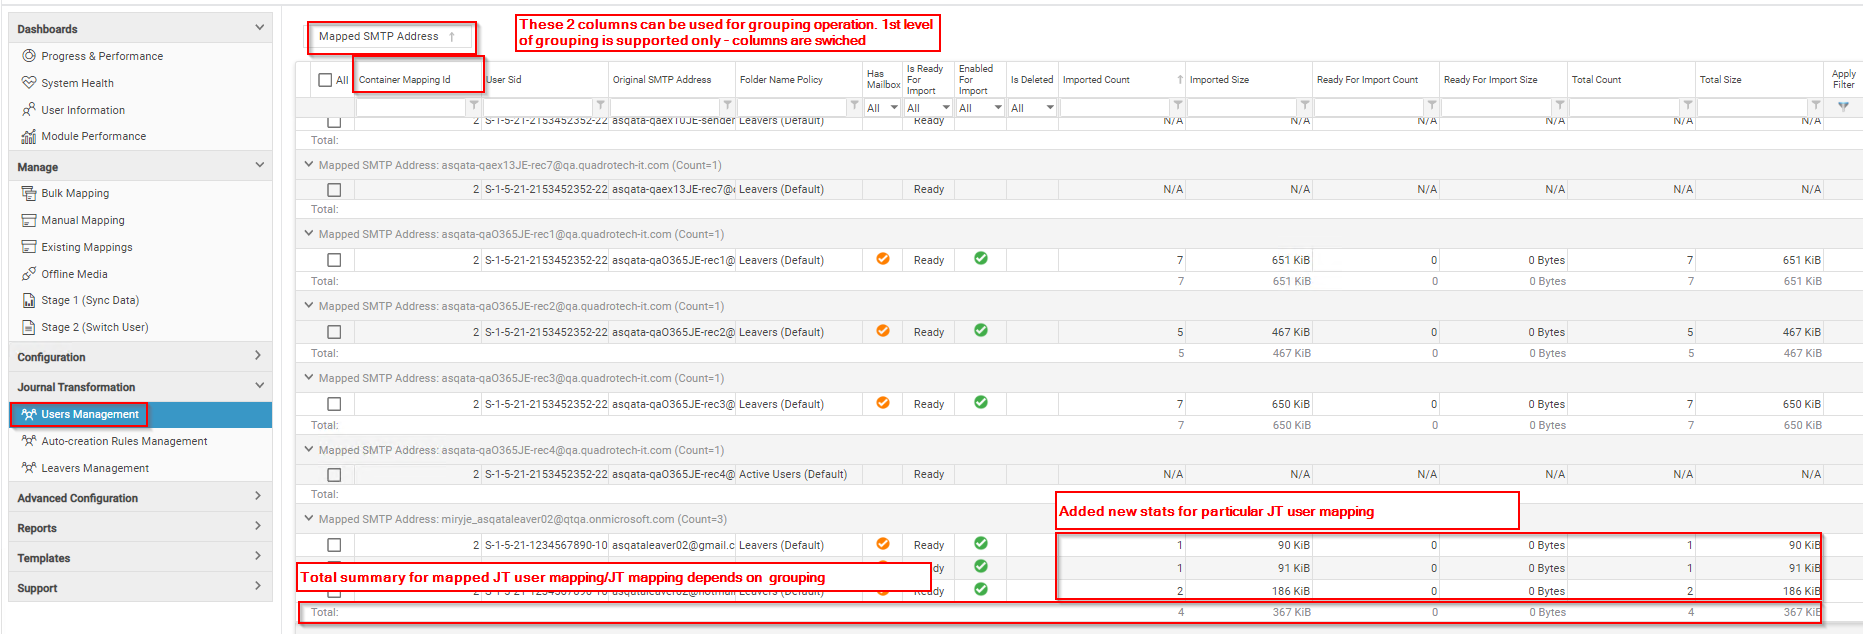
The Journal Transformation detail grid on the Stage 1 page of the user interface contains many details relating to the item level detail surrounding a mapping which is in migration.
Here is an example of how the screen might look:
As shown in the screenshot, it is possible to perform grouping to aid with management of the migration.
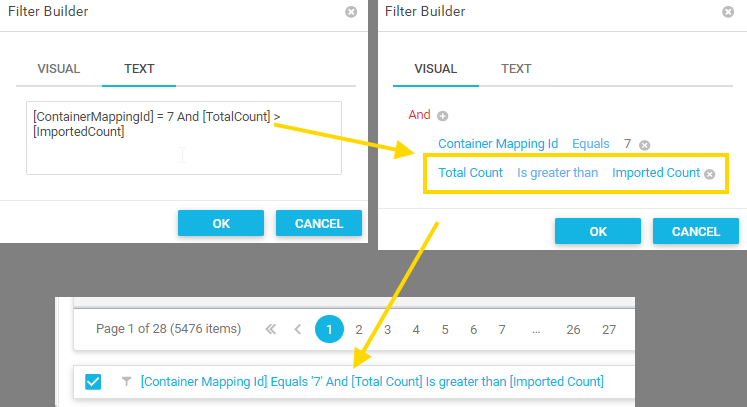
In addition the filtering possibilities have the ability to enter free text:
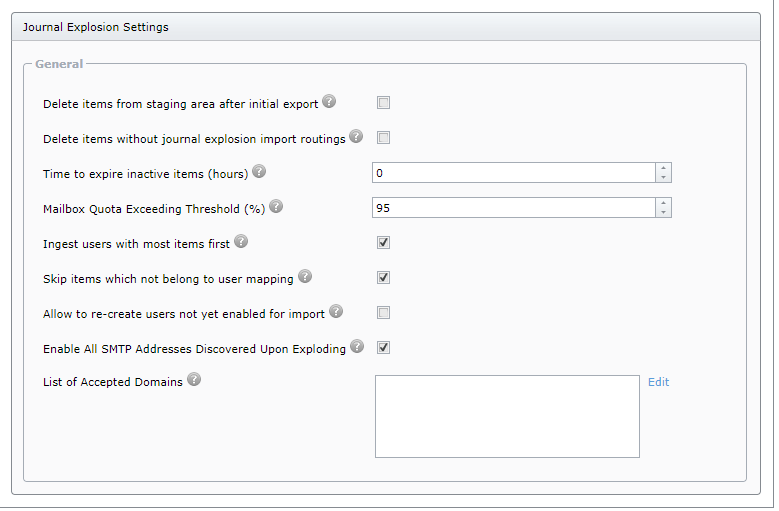
As part of the configuration you must configure the List of Accepted Domains prior to enabling any journal migration.
If this is not configured, all SMTP addresses discovered during the transformation/explosion process will not be eligible for further processing. All SMTP addresses would need to be manually enabled in the SQL database.
Archive Shuttle Journal Splitting setup
The Office 365 Virtual Journal feature brings with it the possibility to migrate large journal archives to Office 365, using multiple target mailbox/personal-archives and specifying criteria such as number of items and size of target. This article explains more detail about this splitting process.
There are two ways that data can be split:
Number of Items
This is the simplest form. The splitting to a new mailbox/personal-archive occurs when the specified number of items are routed to the target mailbox or personal archive.
Size of Items
The splitting here is determined by the size of the items from the source environment. In the case where migration is from Enterprise Vault, the size used is the larger of the original size versus compressed size. When the amount of data routed to a target container reaches the specified value, a new target container will be created.
Journal archives in source environments are typically large. Their multiple terabyte nature makes it currently quite hard to migrate the data to Office 365 as there are limits imposed by Microsoft on both the mailbox and personal archive sizes. To be able to migrate a large journal archive to Office 365, the product introduced a concept of a Journal Splitting.
There are two processes in migrating a journal archive to Office 365. This can be via Journal Splitting or a Journal Transformation. Below are the steps for Journal Splitting.
The general process for doing this is:
1.Define the naming scheme for the target. It is suggested to prefix or postfix names, eg AL- or -Departed. This makes the data easier to find in the target after the migration has completed.
2.Define the allowed number of rolling licenses.
3.Decide on the type of hold to place on the migrated data.
4.Configure the maximum number of items allowed per child container, and maximum size allowed.
5.Perform the mapping.
In the background what will happen is:
1. Provisioning
a.A user account will be created according to the naming scheme.
b.A Personal Archive will be created if it was required in the mapping.
c.The mailbox/personal archive will be placed on the selected type of hold.
d.A license will be assigned from the pool.
e.The data from Office 365 about the user will be synchronized.
2. Migration
a.Data will be exported after the provisioning process is done.
b.Data will be imported soon after it is exported, when a particular child container is full, as determined by the system settings, a new one will be created.
3. Stage 2
a.The license which was assigned in order to be able to ingest data in to the mailbox (or Personal Archive) will be removed (usually as the last step) and returned to the pool so that another mapping can take that license and complete the provisioning step.
Transformation
Journal Transformation information can be found here.
To PST
This can be found in the Archive Shuttle Migration Guide.