-
Titre
Production environment was upgraded by installer that was ran in test environment. -
Description
The production Desktop Authority Server was cloned to a virtual machine for pre-upgrade testing. However, the production Desktop Authority Database was upgraded by the installer (DesktopAuthority.exe) that was ran in the test environment. -
Cause
The cloned Desktop Authority Server retains all existing settings and still takes reference to the production Desktop Authority Database.
With reference to the Desktop Authority Installation Guide:
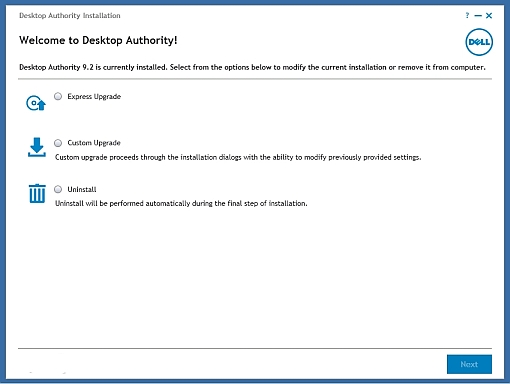
Express Upgrade
Choosing Express upgrade will skip the typical installation dialogs, confirm prerequisites and go directly to the Review dialog. You will, however, be given the opportunity to back up the databases.
Custom Upgrade
Choosing Custom upgrade option allows you to proceed through the installation dialogs with permission to modify existing settings. -
Résolution
Before starting the upgrade process use the Setup Tool to update the SQL Server Instance:
1) Open the setup tool via Start | All Programs | Quest | Desktop Authority Manager | Desktop Authority Setup Tool.
2) Go to the “DB Configuration” tab, verify that the correct server and instance is shown, then click “Connect”:
3) Click “Edit properties”
4) On the “Configure Properties” window that is displayed click on the “Browse” button and select the local instance of the database.
5) Click “Add Selected” then click the “Next” button back on the “Configure Properties” screen
6) Then configure the service credentials for the Desktop Authority Manager Service and the Application pool identity and click “Update”.
7) Finally click “Yes” to restart the Desktop Authority Manager Service, when the window closes the changes will be done.
8) Close the Desktop Authority Setup Tool.When it is done, and the upgrade installer is started, instead of going with the Express Upgrade, select Custom Upgrade which steps through the installation while retaining the existing settings.
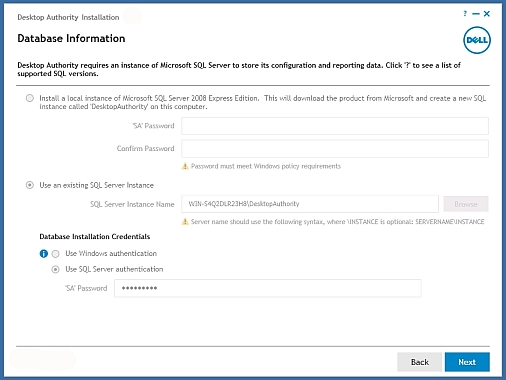
At the Database Information screen, the information will point to the test SQL Server(i.e. assumed cloned or already set up with Desktop Authority Database copied across) or install a local SQL Server Express, whichever is preferred.