When recovering from a SQL Server database failure, a database administrator needs to restore a set of SQL Server database backups in a logically correct and meaningful restore sequence. With this in mind, to the goal is to devise a disaster recovery strategy by creating a solid backup plan, as well as a proper database restore plan in SQL Server. This article will describe 2 different solutions for creating and scheduling a database restore in SQL Server.
When creating a database restore plan, the first thing to keep in mind it that there are 3 different restore scenarios in a SQL Server:
Page restore – restores one or more damaged pages (An unbroken chain of log backups must be available)
Note: Page restore is not available when database is in a simple recovery model
The main difference between complete SQL Server database restore and the file/page restores is the following:
Regardless of how data is restored, before a database can be recovered, the SQL Server Database Engine checks and ensures that the whole database is logically consistent. This means that it will not be possible to recover a file and bring it online if it has not been rolled-forward far enough to be consistent with the rest of the database.
Database roll-back is controlled by the RESTORE statement through the RECOVERY and NORECOVERY options:
To automate and schedule a database restore with SQL Server Agent:
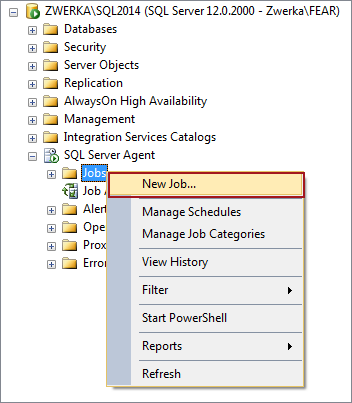
In the Object Explorer pane, navigate to the SQL Server Agent, expand the node, right click Jobs and select New job from the context menu
In the backup step, provide the step name and add Transact-SQL script (T-SQL)
To restore a full SQL Server database (from the AdventureWorks2012Backups logical backup device) use the following script:
RESTORE DATABASE AdventureWorks2012
   FROM AdventureWorks2012Backups;
To restore a full and differential database backups use the following script:
RESTORE DATABASE AdventureWorks2012
   FROM DISK = 'C:\Backups\AdventureWorks2012.bak'
   WITH FILE = 3
      NORECOVERY;
RESTORE DATABASE AdventureWorks2012
   FROM DISK = 'C:\Backups\AdventureWorks2012.bak'
   WITH FILE = 5
      RECOVERY;
Note: provided example restores a full database backup, followed by a restore of a differential backup from the same backup device/file. Restored full database backup is the 3rd backup set on the device (FILE=3) and the differential database backup is the 5th backup set on the device (FILE=5)
To restore pages use the following script:
RESTORE DATABASE AdventureWorks2012 PAGE='1:23, 1:107, 1:109, 1:349'
   FROM 'C:\Backups\AdventureWorks2012.bak'
To restore specific files or filegroups use the following script:
RESTORE DATABASE AdventureWorks2012
   FILE = N'AdventureWorks2012_Data',
   FILEGROUP = 'new_customers',
   FROM DISK = N'C:\Backups\AdventureWorks2012.bak'

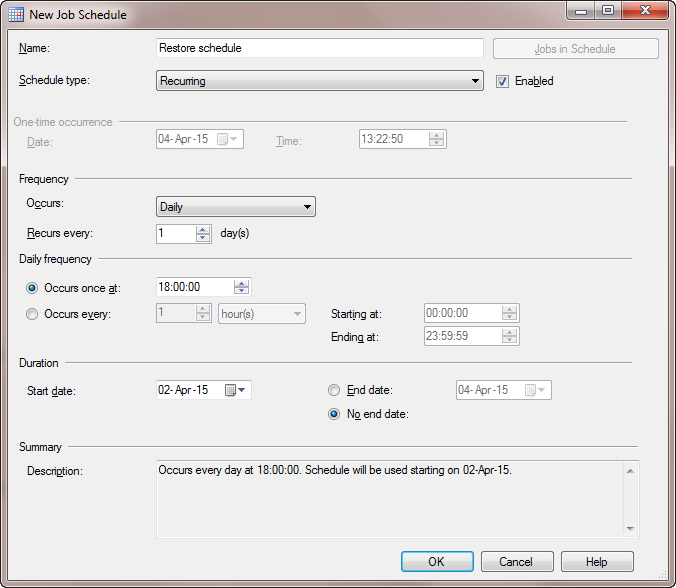
Provide a name for the schedule and specify the schedule type, an occurring frequency and the validity date. Click OK to create a schedule and close the dialog
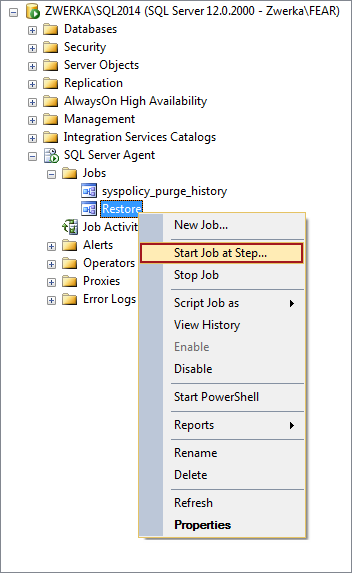
At his moment, the job is created and can be located in the Object Explorer pane under the SQL Server Agent ➜ Jobs node.
To start the job, right click on it in the Object Explorer pane and select the Start job at step option
With this, the restore job is set to motion, and will occur in relation to the predefined schedule
There are several cons to this method:
Another way to create and schedule database restore job in SQL Server is to use ApexSQL Backup – a SQL Server backup and restore management tool. ApexSQL Backup is a tool that helps user schedule a database restore job via an intuitive wizard, and also allows one to see all jobs history, schedules and outcomes, or raise an instant email alert on a job fail/success.
ApexSQL Backup is a tool that enables management and automation of the backup and restore jobs while preserving the backup chain for an easy point-in-time restoration – database rollback.

In the first step of the wizard, specify the following:
Choose whether to forcefully close any existing connections to the database that might block a restore job
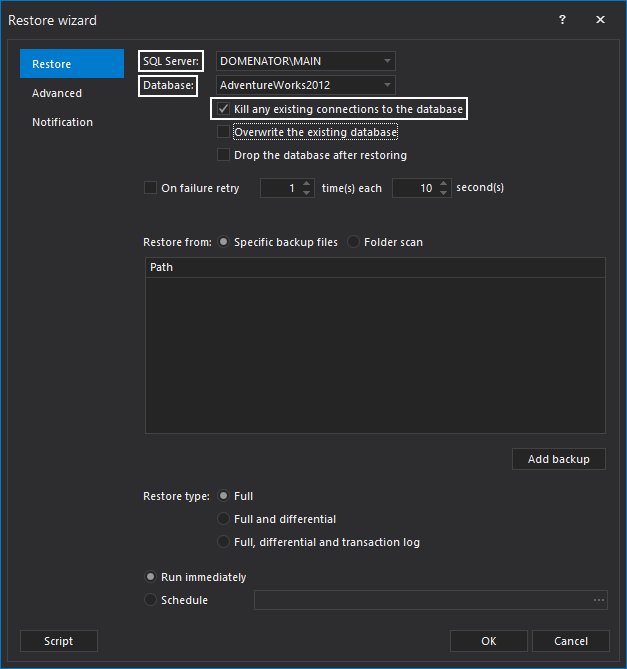
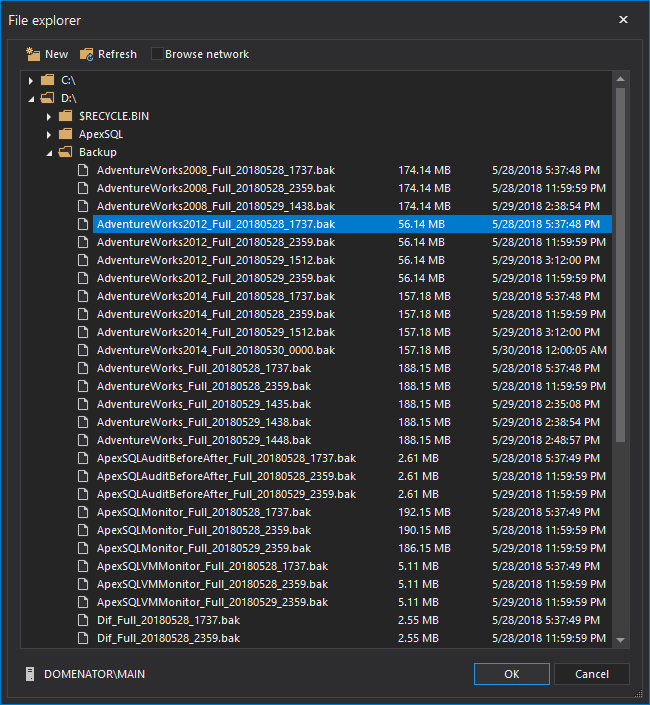
If a specific database backup is selected, it is required to provide a file path of the backup file. To do so, click on Add backup button. Paste the filepath to the text box, or click on folder button to browse for the backup file with file explorer.

In case that the Scan folder option is selected, it is required to specify a folder path, and optional to add a filename pattern, and include subfolders:
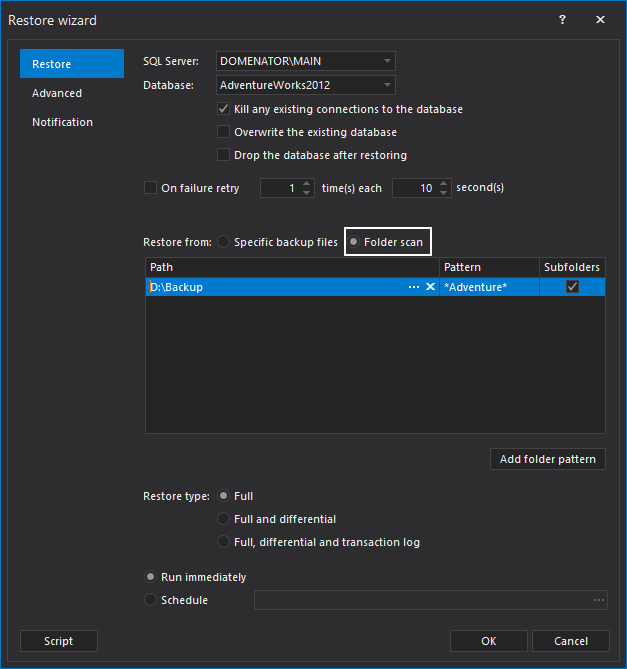
Restore type is selected in the same tab. Depending on the available backup files, select one of the three restore types:
In last option set on the form, user needs to choose whether he would like to restore a SQL Server database immediately or to schedule a restore job. If the later one is selected, the Schedule wizard dialog will appear, and allow the user to choose a job frequency, a period, and a time range

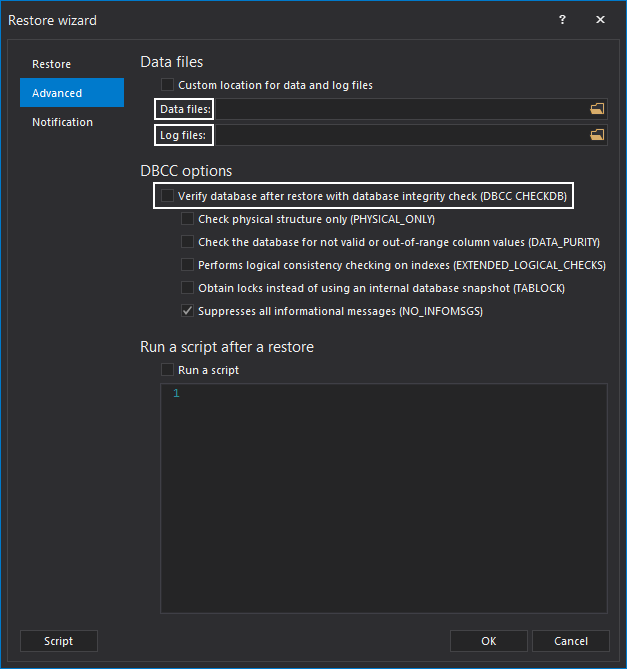
In Advanced tab of the wizard, it is possible to specify locations for the data and log file folders, as well as the post-restore database verification. If needed, custom script can be run after the restore operation. The script command can be inserted in a text box at the bottom of the form
It is possible to set Email notifications for the restore job In Notification tab. Just check the job conditions that should trigger Email notification. Finally, add one or more Email recipients to the list. To save the job settings, click OK button at the bottom of the form

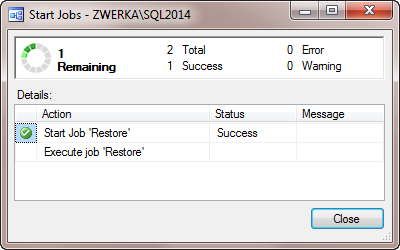
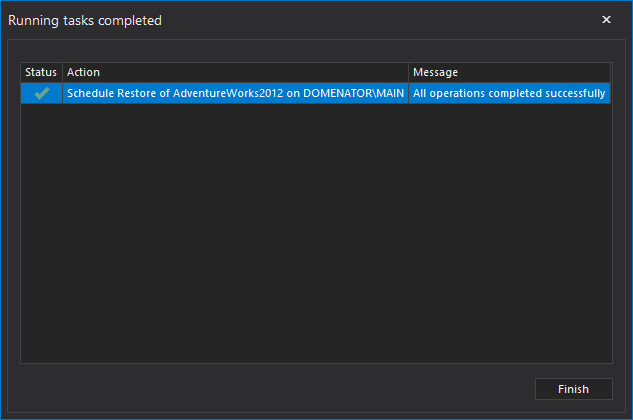
If the settings were configured properly, the completion message will appear. Click the Finish button to complete the configuration
With this, the backup job schedule is created, and a backup will occur in accordance to the schedule’s parameters. A created schedule is now displayed in the Schedules tab of the main application window, with other existing schedules, from where it can be tracked, or alternatively removed:
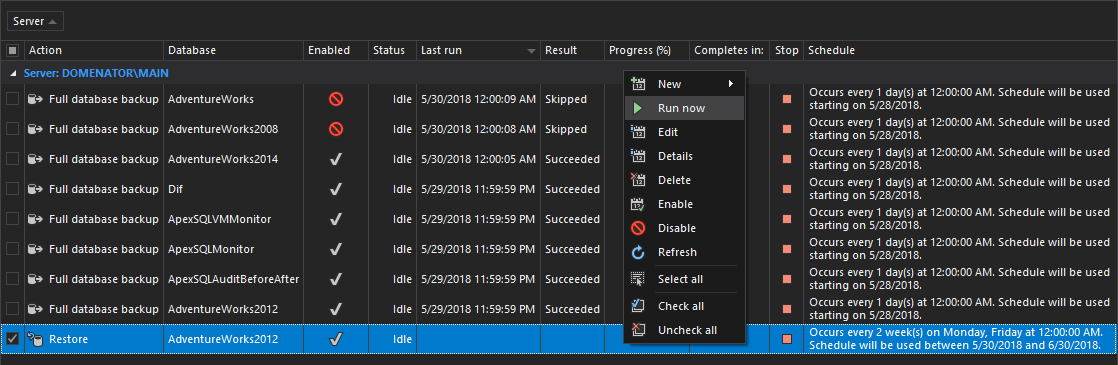
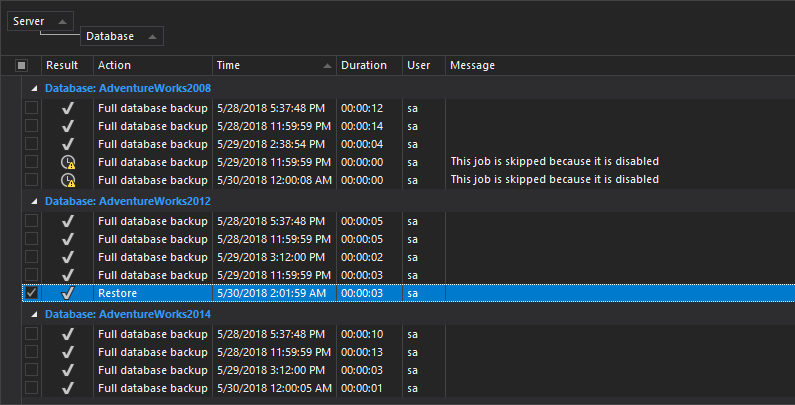
Furthermore, when a scheduled restore job occurs, it can be tracked in the Activities tab