Configuring ControlPoint Services
Toward the end of ControlPoint configuration process you have the option to configure the following Windows service(s):
·The ControlPoint Discovery Service, which collects data and stores it in the ControlPoint Services (xcAdmin) database cache for use in ControlPoint data analysis and reporting.
AND/OR
·If Sensitive Content Manager is installed in your environment, ControlPoint Sensitive Content Manager (SCM) Services will allow you to use it within ControlPoint:
§as a means of checking for:
oContent Analysis (CA) jobs ready to be uploaded from ControlPoint to Sensitive Content Manager for scanning.
AND
oScan results ready to be downloaded from Sensitive Content Manager to ControlPoint for further action.
AND
§Because they support multi-threading, SCM Services are especially suited to very large content analysis jobs.
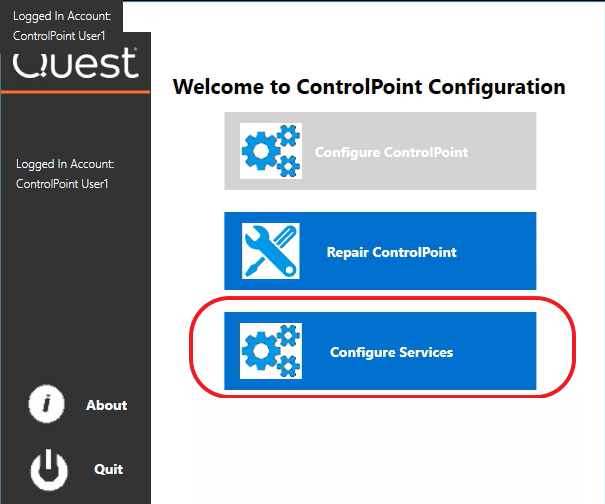
NOTE: If you want to configure services at a later time, you can do so by launching the Configuration Wizard from the server on which ControlPoint is installed (using the same on premises and O365 login accounts used to install the ControlPoint application). After you have verified the Wizard has finished checking installed components, select Configure Services.
To configure ControlPoint Services:
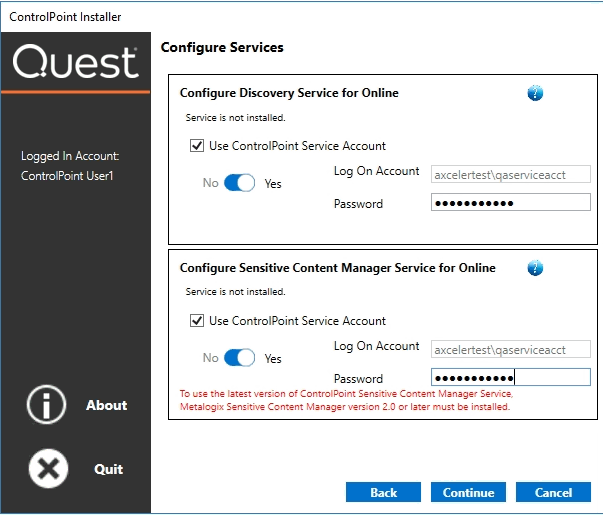
1On the Configure Services dialog, select the service(s) you want to configure.
IMPORTANT:
§The Service Account must meet all of the requirements of the ControlPoint Service Account, as well as permission to Run as a Service.
§Keep in mind that the latest version of ControlPoint Sensitive Content Manager Service will only work with version 2.0 or later of Sensitive Content Manager.
2Click [Continue].
3Click [Start Deployment].
The installer deploys the selected Windows service(s).
4When the services have been successfully deployed, click [Finish].
Additional Setup Requirement for the ControlPoint Discovery Service
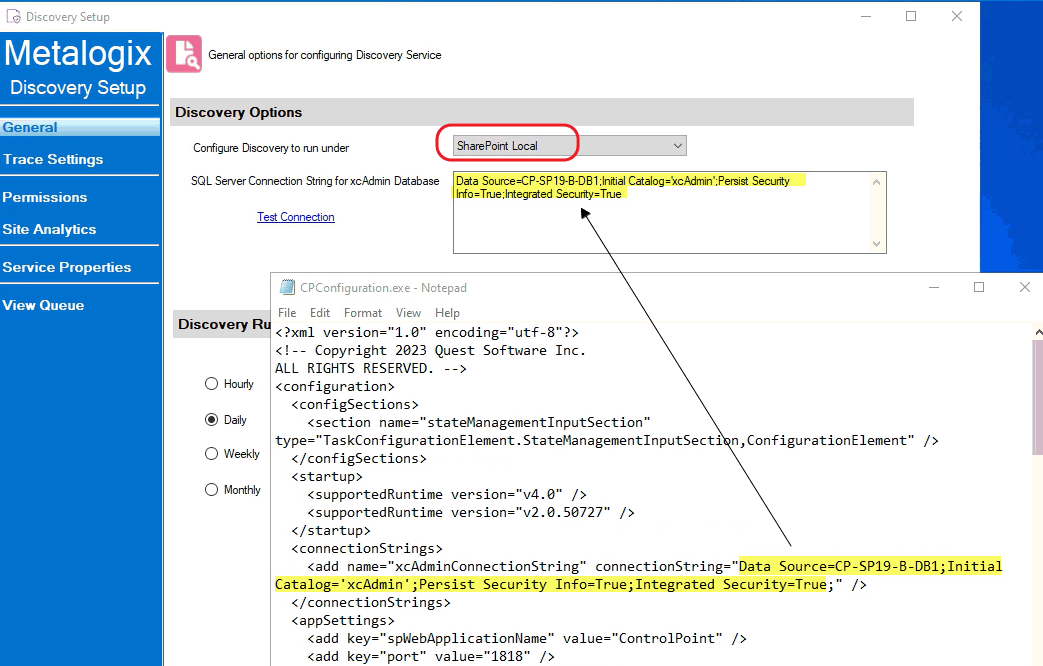
Before you can use the ControlPoint Discovery Service for the first time, you must also perform the following configuration tasks on the General tab of the Discovery Setup application (located, by default, in the folder C:\Program Files\Metalogix\ControlPointOnline\ControlPointFeatures\Services\Discovery):
·For Configure Discovery to run under, select SharePoint Local, and
·Add the SQL Server Connection String for xcAdmin Database.
NOTE: You can copy the Connection String from the file CPConfiguration.exe.config, located, by default, in the folder C:\Program Files\Metalogix\ControlPointOnline\ControlPointFeatures. Use the portion of the string that starts with the words Data Source and ends with Integrated Security = <value>.
You can also change a service's default settings from its Setup application. Refer to the ControlPoint for Microsoft 365 Administration Guide for complete details.
IMPORTANT: Before Services Can be Run:
Before you can run Discovery and Sensitive Content Manager services, make sure that:
·TLS version 1.2 is enabled on the server where the services are installed
AND
·the .NET Framework is configured to support strong cryptography (via the Windows Registry setting SchUseStrongCrypto).
Refer to the following Microsoft articles for complete details.
·Transport Layer Security (TLS) best practices with the .NET Framework
Launching ControlPoint Online
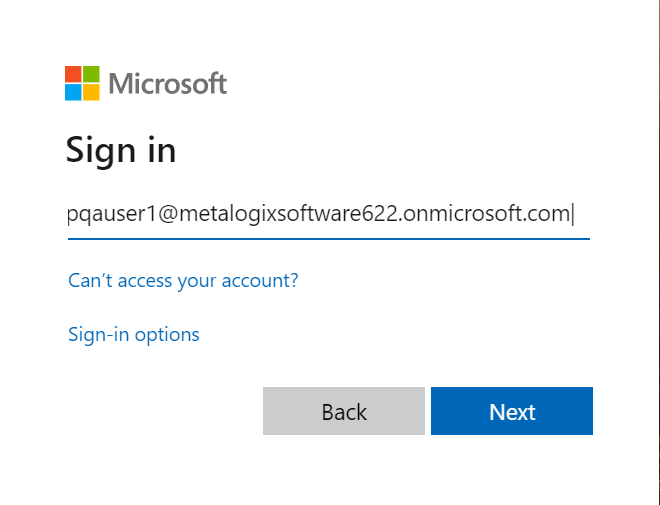
To use ControlPoint Online, you must be a Site Collection Administrator for the site collection that hosts the ControlPoint Online Configuration Site. Upon launching ControlPoint, you will first be prompted to authenticate with Microsoft Online using your O365 account credentials.
IMPORTANT: If you are using Internet Explorer or Edge and the Sign in dialog continually prompts for your account without proceeding to the Password prompt, refer to the topic I am Continually Prompted to Log Into ControlPoint but the Login Never Completes.
If that authentication is successful, a token will be returned to ControlPoint Online, which will then determine if the account is a valid ControlPoint Online user.
Use one of the following options to launch the ControlPoint Online application.
From your workstation browser:
Enter https://<machine_name>:<port_number> or <host_header_name>/_layouts/axceler/xcmain.aspx.
(The server machine name is the name of the machine on which the ControlPoint client application is installed. 2828 is the default port number for the ControlPoint Online application pool.)
From the machine on which ControlPoint Online has been installed:
1Log into the server using the account that was designated as the ControlPoint Service Account at the time the ControlPoint Online application was installed.
2From the Windows Start menu, choose Programs > Metalogix > ControlPoint_Online> Launch ControlPoint Online Application.
Upgrading from a Previous Version of ControlPoint Online
Upgrading from an earlier version of ControlPoint Online is same as that First Time Installation and Configuration, with the following exceptions:
·After installing the new files, you will be given the option to Upgrade ControlPoint.
·The license key, ControlPoint Service (xcAdmin) database, and ControlPoint Configuration site will be retained and updated.
·You will be unable to overwrite the ControlPoint Service Account or connection string.
NOTE: If you need to update the connection string after an upgrade, you can do so via the ControlPoint Configuration Setting SQL Server Connection String for xcAdmin Database (xcAdmin ConnectionString). Refer to the ControlPoint Administration Guide for details.]
Additional caveats depend on the version you are upgrading from, as described in the following table.
|
If you are upgrading from version ... |
Then ... |
|---|---|
|
8.6 or earlier |
if you previously ran Discovery using the Windows Scheduled Task to run (which has been removed as of version 8.7), you will need to configure the Discovery Service. |
|
8.4 or earlier |
if you are upgrading ControlPoint Sensitive Content Manager Service, version 2.0 or later of Sensitive Content Manager must be also be installed if you want to continue to use it. |
|
8.1 or earlier |
Discovery and Sensitive Content Manager Services will be recreated in the folder C:\Program Files\Metalogix\ControlPoint Online\ControlPointFeatures\Services, and all settings will be preserved. |
|
8.3.0 or earlier |
to use Microsoft Modern Authentication you will also be required to to: ·specify an SSL certificate to use in IIS AND ·register the ControlPoint Online app. |
|
8.0 or earlier |
installed files, which formerly resided in a folder called AxcelerFeature, will be placed in a folder called ControlPoint Features. |
Removing (Uninstalling) ControlPoint Online
Use the following procedure if you want to remove ControlPoint Online installed components.
Note that you will have the option to either retain or remove the following components:
§ControlPoint Services (xcAdmin) database. You may want to keep this database if, for example, you plan to reinstall ControlPoint at a later time or want to archive the data. Remember to retain the xcAdmin Database if you are using ControlPoint in a multi-farm environment and want to continue to use it to manage other farms.
§ControlPoint OnlineConfiguration Site and ControlPoint Online Azure Application.
When removing installed components:
Make sure that you:
·run the installer on the server on which the original installation was performed, and
·log in using the account from which the original installation was run.
To launch the installer:
From the Control Panel Programs and Features select Quest ControlPoint (or, if you are uninstalling version 8.8 or earlier, Metalogix ControlPoint) and choose Uninstall.
To remove (uninstall) ControlPoint Online:
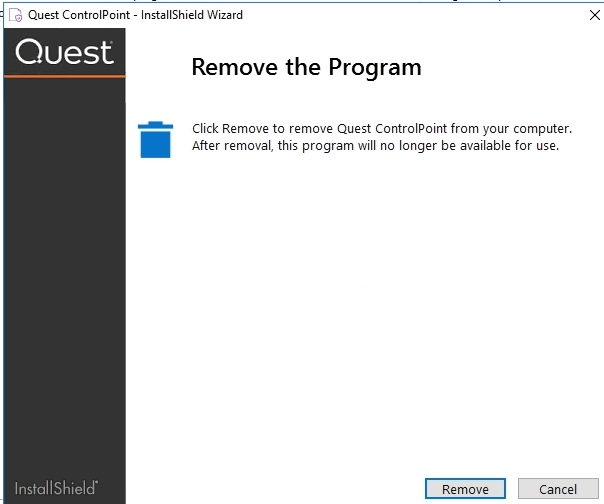
1From the Remove Program dialog click [Remove].
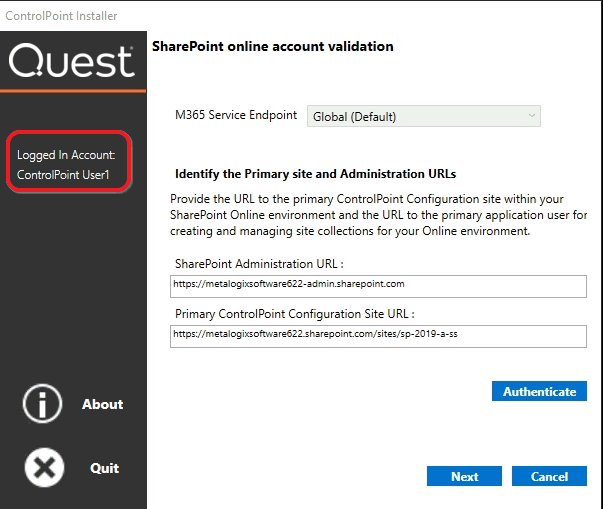
2.Complete the SharePoint online account validation dialog and authenticate using the Microsoft 365 account used at the time ControlPoint was installed (which must be a Global Administrator for the tenant).
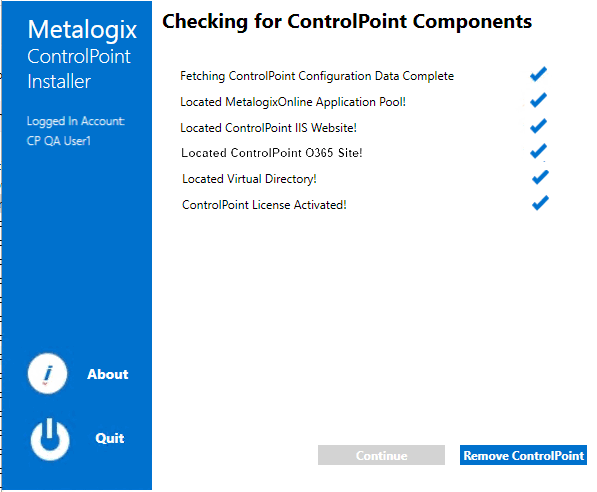
The installer checks for ControlPoint Components.
3When the Component check has been completed successfully, click [Remove ControlPoint].
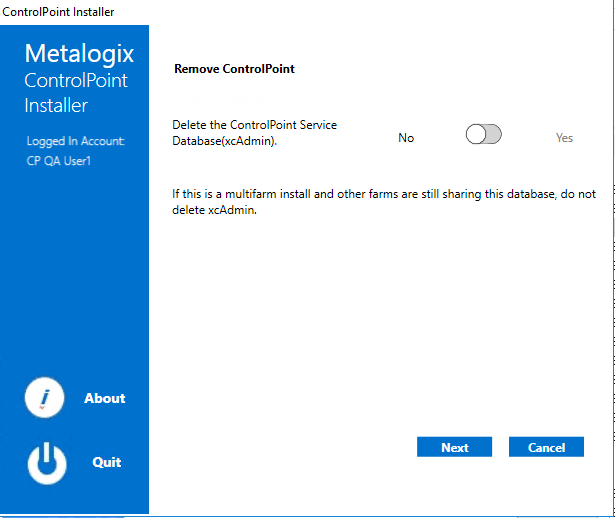
4Use the information in the following table to determine the appropriate option to select for Delete the ControlPoint Service Database (xcAdmin).
|
If ... |
Then ... |
|---|---|
|
·you are using ControlPoint in a multi-farm environment and want to continue to use it to manage other farms OR ·you plan to reinstall ControlPoint in your environment |
for Delete the ControlPoint Service Database (xcAdmin), select No. |
|
§you are permanently removing ControlPoint from a single-farm environment OR §you have a multi-farm installation of ControlPoint and you want to permanently remove the application from all farms |
for Delete the ControlPoint Service Database (xcAdmin), select Yes. |
5Click [Next].
NOTE: If you have configured the ControlPoint SCM Service and/or Discovery Service, you will then be prompted to Remove ControlPoint's services. Note that the only selectable option is Yes (that is, these services cannot be retained if the ControlPoint application is not also installed).
6Click [Remove].
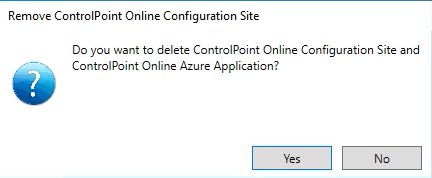
7Use the information in the following table to determine the appropriate option to select for Remove ControlPoint Online Configuration Site and ControlPoint Online Azure application prompt.
|
If ... |
Then ... |
|---|---|
|
you plan to reinstall ControlPoint in your environment and you want to retain any customizationsas keep the ControlPoint Online Azure application and associated consents |
click [No]. |
|
you are permanently removing ControlPoint and/or you do not want to retain customizations or the ControlPoint Online Azure application |
click [Yes]. |
8Click [Complete] to begin the ControlPoint Uninstallation.
9When the The program unistall is complete. message displays, click [Finish].
10Once the ControlPoint Unistallation process has finished, click [Complete].
11When the The program unistall is complete. message displays, click [Finish].

