
Appendix G – upgrading YOUR DATABASE FOR evolve 2023.0+ & Evolve Suite 2023.0
These instructions explain how to update your database for 2023.0.0 database.
|
|
Before beginning the upgrade process you must make sure that your database user has DBA permissions. |
|---|

Step 1 - Uninstall Evolve & Evolve Suite
-
It is recommended that you back up your database and any customisations that you have made to Evolve before commencing with the database upgrade.
-
Uninstall any versions of Evolve and Evolve Suite currently installed on your system.
Step 2 - Install Evolve Suite 2023.x
-
Log in to your Quest account and download Evolve Suite 2023.x
-
Install Evolve Suite 2023.x following the information detailed in the installation guide.
Step 3 - Upgrade the Database
-
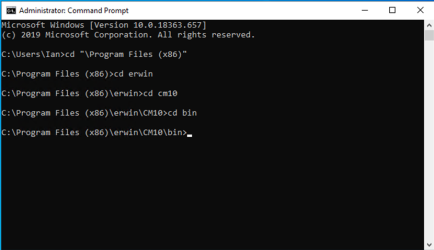
Run Command Prompt as an administrator and navigate to the 'bin' directory where Evolve Suite is installed.
-
Type the following: ValidateRepository.exe -connection:YourConnectionName -username:YourUserName password:YourPassword -upgradedb
The Validate Repository tool will do various checks and will display the results of these checks as well as a prompt to commence the upgrade.
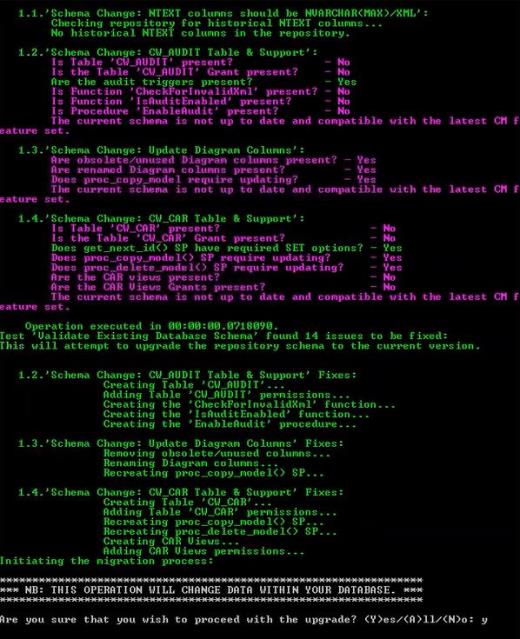
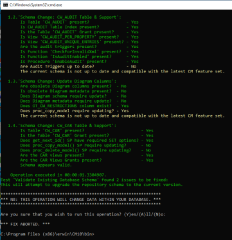
If your user does not have DBA permissions you will see the following message:

If you see this message you should not proceed with the database upgrade.
|
|
Additional Step if upgrading from an earlier version of 2023: The Audit trail recording system, and Global Search system in the later versions of 2023 require additional, minor changes to the database. These changes do not affect the desktop product, so there is no requirement to upgrade Evolve Suite on machines, other than the Evolve Server (unless you wish to do so).
Using ValidateRepository run the following command: ValidateRepository.exe -connection:YourConnectionName -username:YourUserName password:YourPassword -applyfixes
When prompted to apply fixes, review the changes (there may be other faults that need fixing, check you are happy |
|---|

To install Evolve 2023.0.0+:
Step 4 - Install Evolve 2023.0.0
-
Install Evolve 2023.0.0+, following the information detailed in the installation guide.
-
Restore any customisations that you had backed up prior to uninstalling Evolve.
Appendix H - Upgrading CoffeeMaker
Upgrading from 2022.0.0 or later
After uninstalling the older version, follow these steps:
-
Restart the machine.
-
Go to C:\erwin\Evolve\Site\bin\webDesigner\custom\Marketplace\libs.
-
Delete the Custom Layout Configuration and Utils folders.
-
Go to C:\erwin\Evolve\Site\bin\webDesigner\custom\Marketplace\libs\Utils\src and check whether the “cwPdf.js” and “utils.js” files are present.
-
If yes, then delete the Utils folder from the following location:
C:\erwin\Evolve\Site\bin\webDesigner\custom\Marketplace\libs\. -
Else, delete these files from the following location:
'C:\erwin\Evolve\Site\bin\webDesigner\custom\Marketplace\libs\Utils\src'.
-
-
Go to C:\erwin\Evolve\Site\bin\webDesigner\js\external and delete the 'async' and 'ASyncLayoutLoader' folders.
-
Go to 'C:\erwin\Evolve\Site\bin\webDesigner\libs\modules' and delete 'bootstrap', 'bootstrap-select', 'docxTemplater', and 'jspdf'.
-
Go to 'C:\erwin\Evolve\Data\Common\html' and delete 'coffee', 'customDisplayStringSimulator', 'cwGrid', 'cwHtml5DiagramFilter', 'cwLayoutBackup', 'cwLayoutcwCount', 'cwWorkflow', and 'homePage' (If the html folder is empty after deleting these, then delete the html folder as well.).
-
Go to 'C:\erwin\Evolve\Site\bin\webDesigner\themes' and delete the 'theme_erwin.css', 'theme_erwin. less', 'theme_nextGen.css,’ and ‘theme_nextGen.less' files.
-
Install the new version.
-
Click Update Meta Model & Themes.
-
Click Save.
-
Click Dynamic Site.
Upgrading to 2023.0.0
After uninstalling the older version, follow these steps:
-
Restart the machine.
-
Go to C:\erwin\Evolve and delete the 'CWFileHandling' and 'CWObjectExportImport' folders.
-
Go to C:\erwin\Evolve\Site\bin\webDesigner\custom\Marketplace\libs.
-
Delete 'Custom Layout Configuration’.
-
Go to C:\erwin\Evolve\Site\bin\webDesigner\custom\Marketplace\libs\Utils\src and check whether the “cwPdf.js” and “utils.js” files are present.
-
If yes, then delete the Utils folder from the following location:
C:\erwin\Evolve\Site\bin\webDesigner\custom\Marketplace\libs\. -
Else, delete these files from fromt he following location:
'C:\erwin\Evolve\Site\bin\webDesigner\custom\Marketplace\libs\Utils\src'.
-
-
Go to 'C:\erwin\Evolve\Site\bin\webDesigner\js\external' and delete the 'async' and 'ASyncLayoutLoader', and ‘tinyColors’ folders.
-
Go to 'C:\erwin\Evolve\Site\bin\webDesigner\libs\modules' and delete 'bootstrap', 'bootstrap-select', 'docxTemplater', 'jspdf', and ‘vis’.
-
Go to 'C:\erwin\Evolve\Data\Common\html' and delete 'coffee', 'customDisplayStringSimulator', 'cwGrid', 'cwHtml5DiagramFilter', 'cwLayoutBackup', 'cwLayoutcwCount', 'cwWorkflow', abd 'homePage' (If the html folder is empty after deleting these, then delete the html folder as well.).
-
Go to 'C:\erwin\Evolve\Site\bin\webDesigner\themes' and delete the 'theme_erwin.css', 'theme_erwin. less', 'theme_nextGen.css,’ and ‘theme_nextGen.less' files.
Next, to install and configure the new version, follow these steps:
-
Install new version.
-
Start Evolve Designer.
-
Click a model. For example, EA Foundation - Sample Model.
-
Click Site.
-
Click Update Meta Model & Themes.
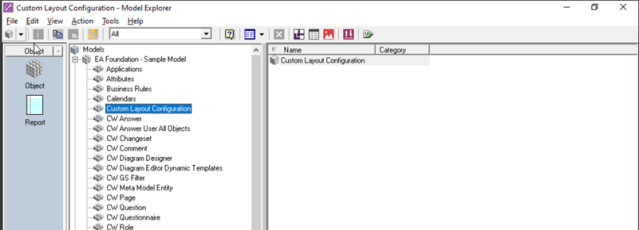
A new object type, “Custom Layout Configuration”, is created in the Model Explorer.
If Custom Layout Configuration is not visible in the Model Explorer, click Show or Hide object types in Evolve Designer. (If CW object types are already visible then hide and then unhide them.)
-
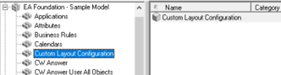
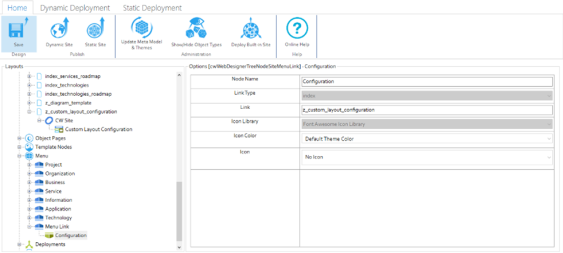
Expand Site > Index Pages > z_custom_layout_configuration > CW Sites.
-
Click Layout Custom Layout Configuration.
-
Copy the JSON text mentioned in the Json Configuration field.
-
Start erwin Evolve Suite and click Model Explorer.
-
Expand the model. For example, EA Foundation – Sample Model.
-
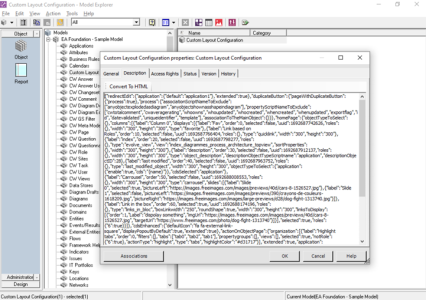
Click Custom Layout Configuration.
Clicking Custom Layout Configuration opens an object “Custom Layout Configuration” in the right pane.
-
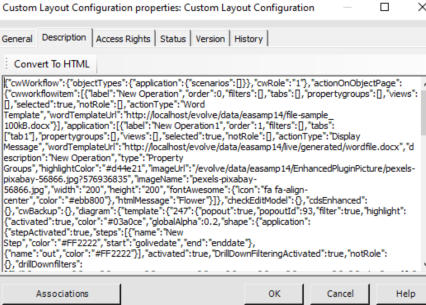
Double-click the Custom Layout Configuration object.
A Custom Layout Configuration properties: Custom Layout Configuration dialog box opens.
-
Click Description.
-
Paste the copied JSON text in the Description field.
-
Click OK.
-
Restart Evolve Designer.
You can now delete the index page ‘z_custom_layout_configuration’.
Before deleting this index page, ensure that you copy or take backup of the Json file.
-
Unlink the deleted index page from the Menu.
-
Click Save.
-
Click Dynamic Site.


About Us
Quest creates software solutions that make the benefits of new technology real in an increasingly complex IT landscape. From database and systems management to Active Directory and Office 365 management, and cyber security resilience, Quest helps customers solve their next IT challenge now. Around the globe, more than 130,000 companies and 95% of the Fortune 500 count on Quest to deliver proactive management and monitoring for the next enterprise initiative, find the next solution for complex Microsoft challenges and stay ahead of the next threat. Quest Software. Where next meets now. For more information, visit www.quest.com.
Technical support resources
Technical support is available to Quest customers with a valid maintenance contract and customers who have trial versions. You can access the Quest Support Portal at https://support.quest.com.
The Support Portal provides self-help tools you can use to solve problems quickly and independently, 24 hours a day, 365 days a year. The Support Portal enables you to:
-
Submit and manage a Service Request
-
View Knowledge Base articles
-
Sign up for product notifications
-
Download software and technical documentation
-
View how-to-videos
-
Engage in community discussions
-
Chat with support engineers online
-
View services to assist you with your product.