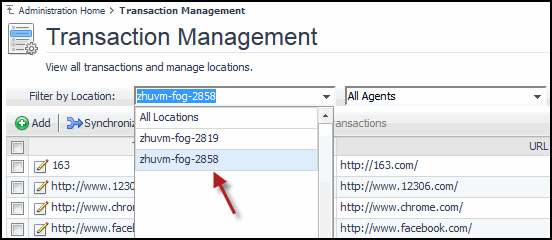
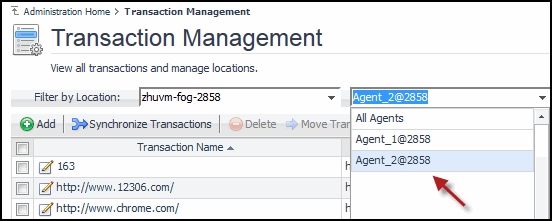
|
4 |
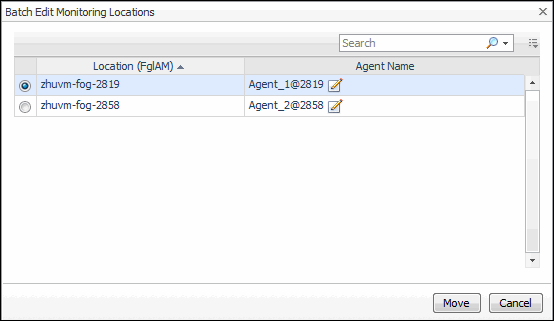
Click Move Transactions. |
|
6 |
Click Move. |
|
1 |
|
2 |
On the navigation panel, under Dashboards, click Management Server > Servers > Data Management. |
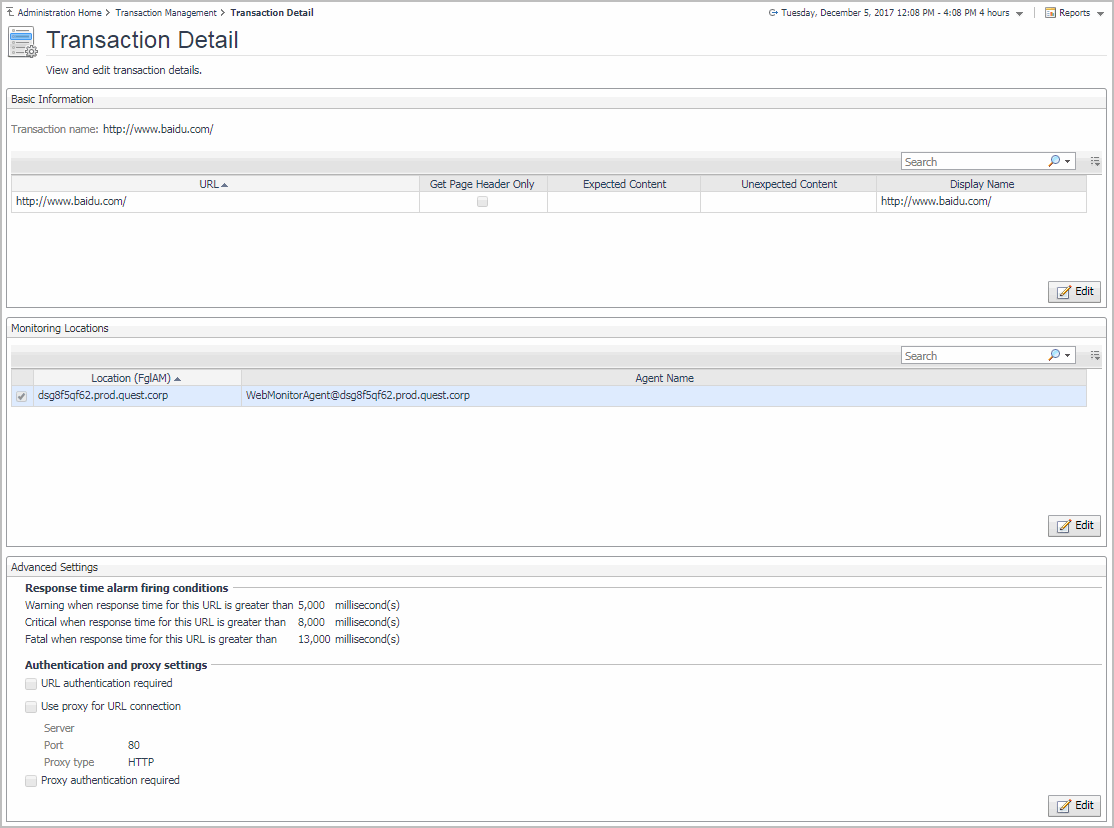
For more information about the Transaction Management dashboard, see Exploring your collection of monitored Web sites. For complete details about the data appearing on this dashboard, see Transaction Detail view.
You can make changes to any transaction details that appear on this dashboard by clicking the appropriate Edit button and making the required changes.
Any changes you make to transaction alarm thresholds results in creating topology-scoped values of the registry variables that control these thresholds, and the other way around. The topology type used to contain Web transaction definitions is Internal Synthetic Transaction (Webmonitor), and the Internal Synthetic Transaction (Webmonitor) topology object names are the configured transactions names.
For more information about the Foglight registry, see the Administration and Configuration Help.
|
• |

|
• |
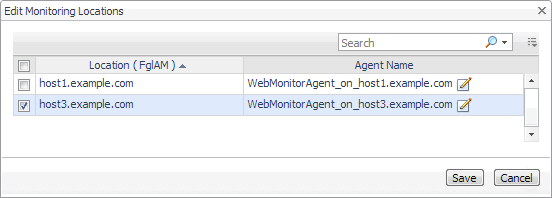
To start monitoring this Web site with a new set of monitoring agents, in the Monitoring Location view, click Edit. |
|
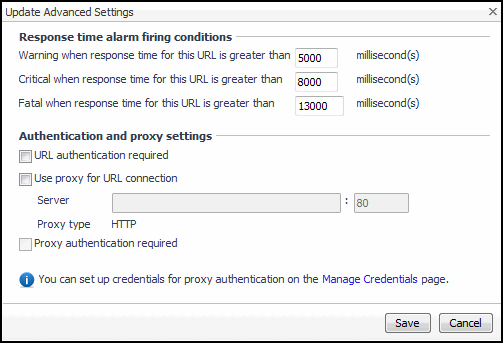
• |
To specify different thresholds for alarm generation, or authentication and proxy settings, in the Advanced Settings view, click Edit. |
|
2 |
Click Save. |
You can access this dashboard from the navigation panel. Under Dashboards, click Web Monitor > Performance Browser.
When you navigate to the Performance Browser for the first time, the Monitor tab, described in this topic, appears open. This tab provides an overall summary of your monitored environment. The FAQts tab is also available. For more information about this tab, see Exploring the FAQts tab.
Start by indicating the type of objects you want to investigate. To do that, select the appropriate tile at the top of the Monitor tab, Transactions or Locations. This causes the Quick View to display information about the selected objects. Next, select an object or group of objects in the Quick View, such as All Transactions or All Locations, to display additional information about that selection. For example, selecting all transactions identifies the locations with the lowest availability, the lowest MET (met expected time) data, and the highest consumed response time. For complete information about the data appearing on the Performance Browser, see Web Monitor Performance Browser views.