Adding filters, including comparisons, and changing the date range
You can modify an insight by using the insight customization bar at the top of the insight. The customization bar allows you to
You can alter an insight to obtain a one-time result. However, if you want to keep your revisions, you can save the changes, either by updating the existing insight or saving it as a new insight.
After you have made changes using the customization bar, you can reset an insight back to its default values.
|
• |
Click More at the top right of the insight and select Reset to defaults. |
Any custom filters you applied to the insights are removed and the insight is reset to the library version of the insight.
|
|
The Reset to defaults option only affects changes that you have applied from the customization bar. It does not reset any layout changes that you made to an insight. For information about changing an insight layout, see Modifying the layout of an insight . |
Adding comparison data to an insight
By default, most insights show data for the previous 28 days. You can add comparison data for the previous date range.
If the insight includes a trend view (graph), the previous period appears as a secondary trend line in the graph. For tables and pie charts, the comparison data is shown by red arrows (decrease from previous period) and green arrows (increase from previous period) and values that show the percentage difference from the previous period.
|
4 |
Click Previous Date Range. |
Viewing date ranges for different data
When viewing an insight, if you select a date range, you will notice that date ranges work differently for different types of data.
For example, suppose you select a date range (14 days) for data that continuously changes, such as Exchange Email - Activity or ActiveSync - User Activity. The insight will show the data for the selected date range.
However, if you select a date range for data that is fairly static (such as users, servers, policies, departments, and so on) and is gathered in a “once-day-snapshot” data collection, the insight shows only the most recent data as collected at the last date of the specified date range.
In some insights, there will be snapshot data over time, as in the Platforms - User Adoption insight. In this case, if you enter a date range, you will see snapshot data for each day in the range.
For more information about “snapshot” data collections, see the section titled “How often do collections update the data?” in the Unified Communications Analytics Deployment Guide.
When you use Quick Dates: Last 7 Days filter, the results that are displayed by the insight include the day on which the Insight is run. So if you run an insight at 12 noon on Monday, the insight contains 6 1/2 days of data.
Alternately, you can use the Custom filter to set date ranges such as:
How the filters work
If you click FILTERS in the customization bar at the top of the insight, you can apply various filters to the displayed insight.
On some insights, there may be pre-defined filters set. For example, on the Exchange - Meetings Summary insight, by default one filter is set for Is Meeting equals Yes. This restricts the insight to show only meetings that have attendees in addition to the meeting organizer. If you remove the filter, the insight will show both meetings and appointments (a calendar item that users create for themselves that have no attendees).
You can enter multiple values for a single filter. If you specify multiple values for a single filter, the results include values that have at least one of the specified values. For example, if you filter for Department and enter HR, R&D, and Accounts Receivable as the values, the results will include the employees who are in either the HR, R&D, or Accounts Receivable departments. You can enter multiple values in a single field with each entry separated by a semi-colon (;) as the delimiter.
You can use the Search function  to find a specific filter for an insight. For example, suppose you are looking for Lync enterprise voice calls that are going out through an external PSTN (public switched telephone network). The following example shows how you could use the search option to filter for these calls.
If you define more than one search parameter in your insight, the data included must match all the filters. For example, in the Users - Inventory insight, if you filter for users that have a Department of HR and an Office of Manila, only users that have HR as the department and Manila as the office are included.
|
2 |
Click FILTERS on the customization bar. |
|
3 |
Click  to display the Add Filter page and enter PSTN In the search field. |
You could use the same process to set these filters for the Skype for Business / Lync Enterprise Voice - Details insight as well.
If you select the Show advanced fields option in the Add Filters page, for many insights you can filter on counted values such as the number of recipients for a message. For example, in the Email - Activity insight, suppose you want to see all emails that had at least 3 recipients.
|
2 |
Click to display the Add Filter page and select the Show advanced fields check box. |
The insight now displays only the emails that had 3 or more recipients.
To get data when you use an “after hours” filter on insights, you must have run a mailbox contents (EWS) data collection for the specific mailboxes for which you want the information. For more information, see the UC Analytics Deployment Guide.
If you use an “after hours” filter in an insight, the following factors apply:
To get data when you use a “response time” filter on insights, you must have run a mailbox contents (EWS) data collection for the specific mailboxes for which you want the information. Recipient response time is available only if mailbox content data is collected for the message recipient. For more information, see the UC Analytics Deployment Guide.
The “response time” filter allows you to filter messages based on the time that it takes a message recipient to respond to the sender, either by replying to the message or by including the sender in a forwarded message.
Response time is calculated as follows:
For a sub-attribute of a collection field you can set a filter where any or all the members in the collection must meet the filter criteria. Collection fields are fields that can contain multiple values such as File Attachments, Participants, Recipients (as opposed to scalar fields). Collection fields also have sub- attributes.
For example, in the Email - Activity insight, suppose you want to exclude system accounts (account name includes System) from the results.
If you set a filter for Recipients | Name Not Equals System, you can specify if the filters should include results where at least one recipient or all the recipients must meet the filter criteria. If you select All, only the results where all the recipients meet the filter criteria are included in the insight.
When you configure UC Analytics, you have the option to create call classifications for Skype for Business/Lync enterprise voice and peer-to-peer sessions and for Cisco peer-to-peer sessions and conferences. You can create call classifications to distinguish different call types such as internal, local, long-distance, toll-free, and international.
If call classifications have been created, you can filter the insights that display the Cisco and Skype for Business/Lync call data by call classification.
For example, when you display the Skype for Business/Lync Enterprise Voice - Details insight on your home page, click the FILTERS option on the customization bar. You can select Call Classification on the Add Filter page and filter the insight results by a one or more call classifications.
You can filter the insights that show details for Exchange email messages, Skype for Business/Lync peer-to-peer sessions and voice calls, or Cisco peer-to-peer sessions by direction (internal, inbound, or outbound).
For example, you could display the Email - Details insight. In the Direction column, you could left-click a value that showed Outbound and select Show only Outbound. The insight would now show only outbound email messages.
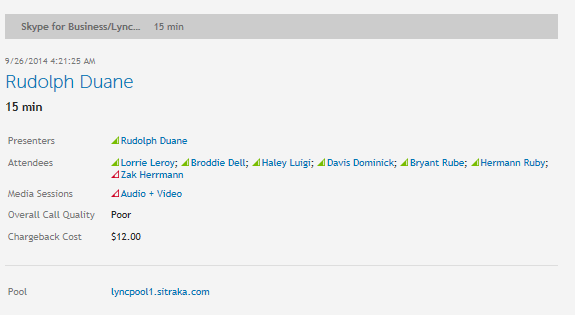
If you have configured both the Skype for Business/Lync QoE Database and the Skype for Business/Lync CDR Database data sources to collect data, you can filter the Skype for Business/Lync details insights using the Overall Call Quality field to show the conferences, peer-to-peer sessions, or voice calls that had overall poor call quality.
For example, you could display the Skype for Business/Lync Conferences - Details insight. In the Overall Call Quality column, you could left-click a value that showed Poor and select Show only Poor. The insight would now show only the conferences that had poor quality.
When UC Analytics was configured, thresholds might be set to identify minimum and maximum values that your organization wants to track. For example, for the Skype for Business/Lync Quality of Experience (QoE) data, thresholds can be set to flag the QoE metrics that result in poor calls.
You can select a column that contains a value for which a threshold was configured and then filter on the threshold to show all the values that meet the threshold.
In the following example, thresholds have already been set for Average Jitter in the Admin Settings | Classifications | Threshold Classifications.
|
2 |
Click FILTERS on the customization bar. |
|
3 |
Click to display the Add Filter page. |
|
4 |
Select Average Jitter and click Next. |
For Exchange email insights such as Email - Details, you can filter the message subject data by filtering by the subject of the message or by subject keywords that appear in the subject.
If you select Subject as a filter, you must enter an exact match. For this reason, you normally use the Subject filter with wildcards. For example, to filter for messages that contain “bank” in the subject you would enter *bank* in the Subject filter dialog. The filtered messages could include subjects such as “annual banking forecast”, “Bank of Geneva transactions”, and “banker’s acceptance”.
If you select Subject Keyword as a filter, you can enter one or more words that appear in a message subject. You can use one of the following operators: Equals, Not equals, Contains, Does not contain, Starts with, Does not start with, Ends with, Does not end with, or Is set.