Deleting Permissions Backups
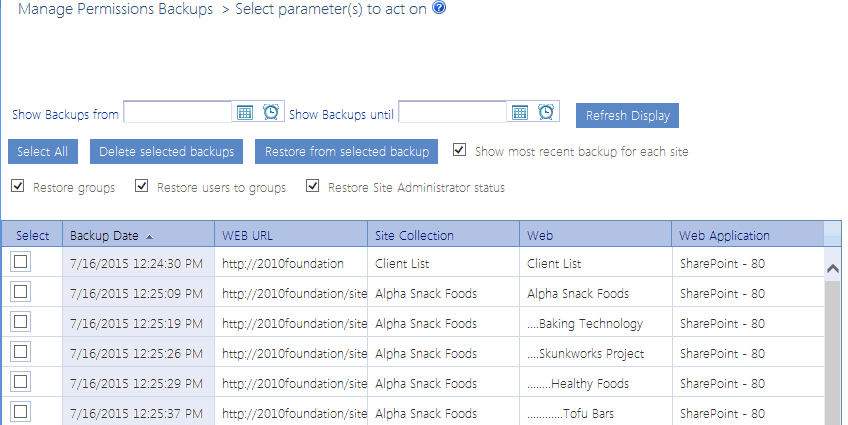
From the Manage Permissions Backups interface you can delete one or more permissions backups. You can also purge all backups created before a specified date.
NOTE: If you want to narrow the list to backups to a specific date range, select a Show Backups from and Show Backups until date (

To delete selected backup(s):
1In the Select column, check the box beside each backup you want to delete.*
2Click [Delete selected backups].
You will be prompted to confirm the deletion before the operation is carried out.
To delete all backups:
1Click [Select All].*
2Click [Delete selected backups].
You will be prompted to confirm the deletion before the operation is carried out.
*NOTE: If you want to de-select currently selected backups, click [Reset].
To purge all backups created before a specific date:
1Scroll to the bottom of the Manage Permissions Backups page.
2For Purge all Backups in the Farm before this date, select the earliest date for which you want to retain permissions backups.
3Click [Purge].
Duplicating Security from One Site to Others
The Duplicate Site Security action lets you to copy the security settings (users, groups, and permissions) of a SharePoint site to one or more other sites within the same farm. This may be useful, for example, if you have created one or more new SharePoint sites and want them to have the same users, groups, and permissions as an existing site.
You also have the option of backing up destination site permissions before the Duplicate Site Security action is carried out.
In a multi-farm environment, site security can be duplicated within a single farm; either the home farm or a remote farm.
Factors to Consider before Duplicating Site Security
·Duplicate Site Security is a one-time action. Any ongoing changes to permissions on the source site will not be replicated to the destination site(s). You can, however, schedule the action to run on a recurring basis.
·The action will replace the list of users with direct permissions on a destination site with that of the source site.
·Any permissions level referenced in the source site that does not exist in the destination site collection will be created there as a custom permissions level (even if it exists as a SharePoint default permission level in the source site collection). If custom permissions levels with the same name but different definitions exist in both locations, you can choose whether or not to overwrite the definitions in the destination site collection.
·If you duplicate security to a site that inherits permissions from its parent, that inheritance will be broken and it will become a site with unique permissions that have been copied from the source. Conversely, if you duplicate security to a parent site, child objects with inherited permissions will inherit the new permissions that have been copied from the source.
·You have the option of duplicating permissions (and breaking any existing inheritance) to target lists with identical names (for example, Calendar to Calendar; Shared Documents to Shared Documents). You cannot, however, duplicate permissions of list items.
·Any list with unique permissions on the destination site that does not exist in the source site will remain intact.
How "Matching" Groups Are Handled
SharePoint groups that include the name of the source site (such as Owners, Members, and Visitors) will be matched to equivalent groups on the destination site, using the destination site name. (For example, Source Owners will be matched to Target Owners and so on.) Whenever a "matching" group already exists on the destination site, the action can:
·add members of the source group to the target group, if they are not already there
OR
·replace members of the target group with members of the source group
OR
·leave the target group membership unchanged.
If a group on the destination site has a matching name but the permissions level is different, ControlPoint will replace the permissions level of the destination group with that of the source group.
Other group settings, including Group Owner, will not be changed.
If a matching group is not found at the destination:
It will be createdusing the name of the destination siteand the membership will be copied from the source. Additional settings will be handled as described in the following table.
|
Setting |
Action That Will be Taken |
|---|---|
|
Group Owner |
ControlPoint will attempt to use the group ownerwhich may be either an individual or another SharePoint groupfrom the source site (provided that owner already exists on the destination site). If the owner does not exist at the definition, the ControlPoint user who is performing the action will become the group owner. |
|
Other group settings |
the SharePoint default values will be used (regardless of whether they match the settings for the source group). |
To duplicate site security:
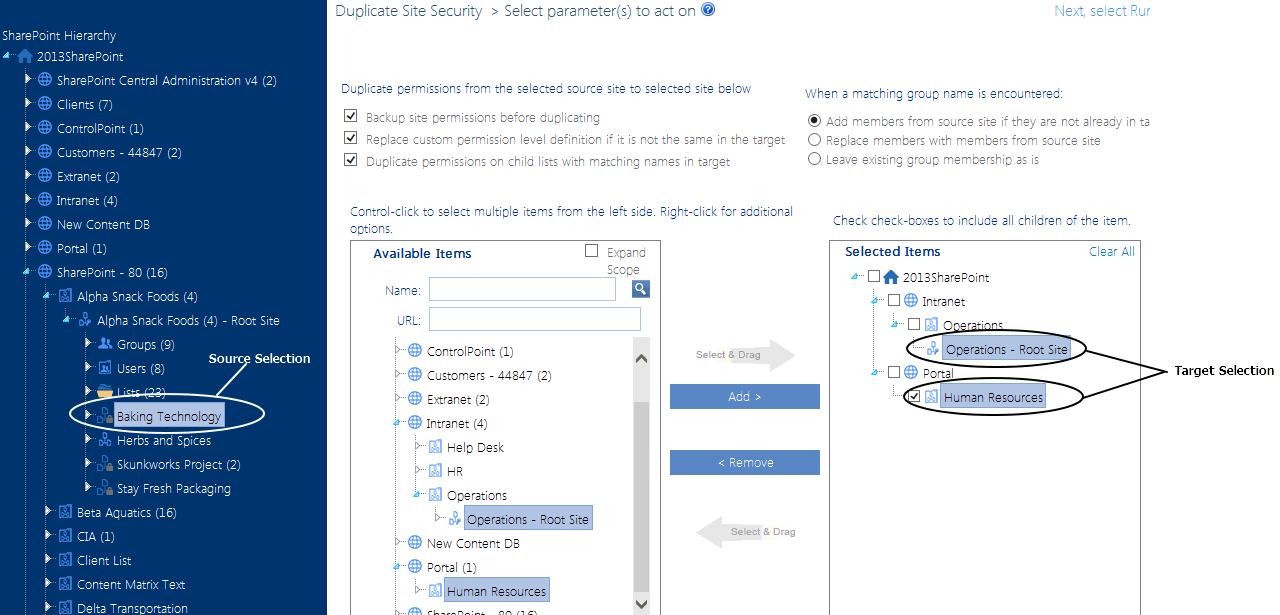
1In the SharePoint Hierarchy, select the site whose security you want to duplicate.
NOTE: This action is only available at the site level.
2Right-click and choose Users and Security > Duplicate Site Security.
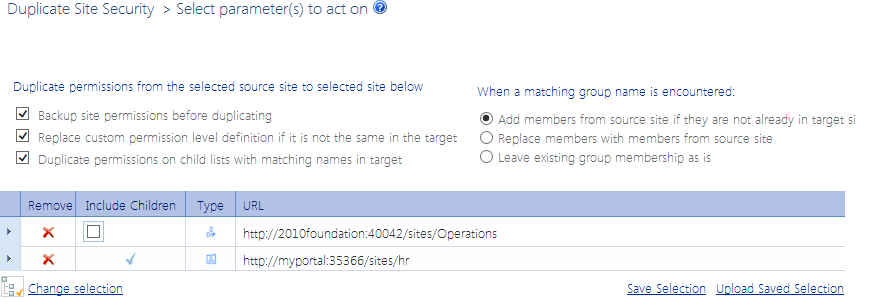
3If you want to back up permissions on the destination site(s) before performing the duplicate action, check the Backup site permissions before duplicating box.
NOTE: If you check this box and encounter issues with the operation, you can restore permissions from the backup using the procedure for Restoring Site Permissions from a Backup.
4If you want custom permissions level definitions from the source to replace any in the destination site collection that have the same name, leave the Replace custom permission level definition if it is not the same in the target box checked.
NOTE: If you uncheck this box, existing custom permissions level definitions will not be changed.
5If you want permissions of source site lists to be carried over to destination site lists of the same name, leave the Duplicate permissions on lists with matching names checked.
NOTE: If you uncheck this box, permissions for lists with matching names will not be changed.
6Specify how you want the action to proceed When a matching group name is encountered:
§Add members from source site if they are not already in target site
OR
§Replace members with members from source site
OR
§Leave existing group membership as is
7From the Available Items list, select the site(s) to which you want permissions duplicated and move them to the Selected Items list.
8When you have finished selecting sites, click [Apply]
Now you can:
·run the operation immediately (by clicking the [Run Now] button)
OR
·schedule the operation to run at a later time or on a recurring basis.
OR
·save the operation as XML Instructions that can be run at a later time.
If you chose the Run Now, option, after the operation has been processed:
·a confirmation message displays at the top of the page, and
·a ControlPoint Task Audit is generated for the operation and displays in the Results section.
If you schedule the operation, a link to the Task Audit is included in the scheduled action notification email.
See also The ControlPoint Task Audit.
Migrating Active Directory Accounts for SharePoint User (SharePoint 2010)
The Migrate Users action lets you update user accounts in SharePoint 2010 farms when:
·Active Directory accounts have been moved from one domain to another
OR
·a user's Active Directory login name has changed.
You can also
·duplicate Active Directory group permissions, and
·if the account was moved in a way that preserved the SID history, verify the SID history to ensure that the old and new accounts correspond.
NOTES:
§In order to use the "Preserve SID History" flag, the ControlPoint Service Account must have dbowner rights to the User Profile Service Application Profile Database.
§For a simple account rename, the same SID is used and a SID history is not generated, so the verification of SID history cannot be performed.
In a multi-farm environment, users can be migrated for a single farm; either the home farm or a remote farm.
NOTE: This action is not available for SharePoint 2013 or later farms.
Factors to Consider Before Using the ControlPoint Migrate Users Action
Migrating Multiple Users
You can migrate only one individual user at a time using the ControlPoint application interface. If you want to migrate multiple users, you can:
·use a wildcard (for example domain_name\*)
NOTE: If you use a wildcard, you also have the option of excluding specified users from the migration.
· save the operation as xml, add users to the xml file, then run the xml instructions.
For the sake of performance, when a wildcard is used users are collected from the ControlPoint cache, which is updated whenever the ControlPoint Discovery process. This information is current as of the date and time of the last Discovery.
IMPORTANT: Permissions of Old and New Accounts
ControlPoint gives you the option not to remove any existing permissions of target users. If you select this option, ControlPoint will check for the existence of permissions granted to the target account of an individual user using permissions information collected during the last Discovery, and if found, will skip the migration for that account and will continue on to the next account. For Active Directory groups, permissions from the source account will be appended to the target account without deleting existing permissions. Individual user accounts that have been skipped will be reported in the ControlPoint Task Audit.
If you choose to remove existing permissions for the target user:
·The default stsadm -o migrateuser behavior will apply for individual Active Directory users. That is, if a user has given permissions in SharePoint using the new account name prior to the Migrate Users action, those permissions will, by default, be deleted as part of the migration. The permissions originally granted to the old account are transferred to the new account after deleting the permissions for the new account. Note that this means:
§You should not run the function two times, as the second run will remove the permissions transferred to the new account by the first run.
§After running this function, the old account will still exist in Active Directory, but will no longer have permissions in SharePoint.
·In the case of Active Directory groups, permissions of the new group will replace existing permissions of the old group.
NOTE: If your ultimate goal is to copy permissions to users in a target domain while retaining all existing permissions in both domains, you can do so using the ControlPoint Duplicate User Permissions action.
Before Migrating Users in ControlPoint
Before using the ControlPoint Migrate Users action, make sure that the changes have been made in Active Directory (that is, new accounts have been created or renamed accounts have been renamed).
How Names Appear After Migration
SharePoint's handling of display names after rename in Active Directory and/or a run of Migrate Users depends on many factors, including which versions of SharePoint you are running, whether and how several Profile Synchronization jobs are configured. In SharePoint Foundation, no shared profile exists. Display names are stored only in each individual site collection and must be modified directly there. By default, there is no automated process to update the display names.
In SharePoint Server, a shared profile is available. This should normally be updated using whatever methods are in place in your environment.
In general, if your environment is configured to have SharePoint Profile Synchronization jobs run on a regular basis, until it runs, SharePoint and ControlPoint will show:
·the new account name, and
·the old display name.
After the Profile Synchronization jobs have run, the new display name normally will show in both SharePoint and ControlPoint, with the following exceptions:
·Activity by User, Activity by Document, and Change Log Analyses will continue to show the old display name.
·Any ControlPoint analysis using cached data will show the old display name until the next time Discovery runs.


