Exchange Environment > Monitoring tab
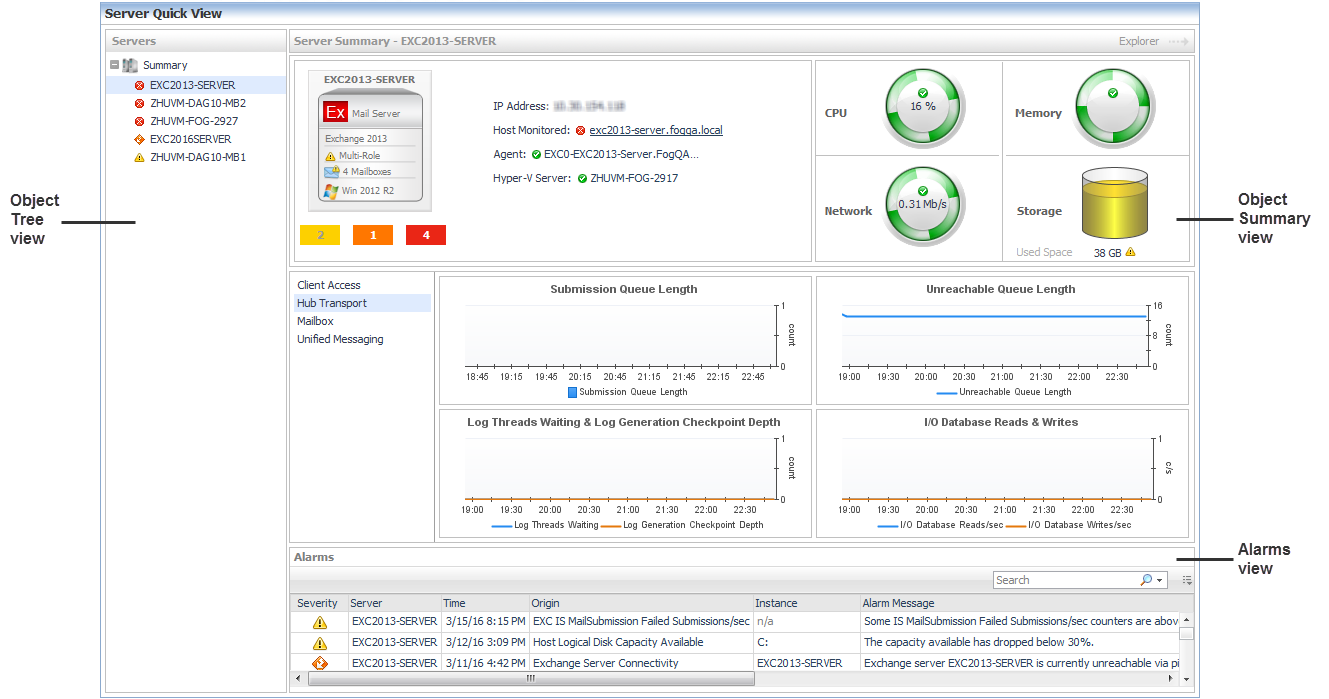
The Quick View consists of the following embedded views:
In addition, at the top right of the Object Summary view there is an Explorer link. This enables you to quickly navigate to the Exchange Explorer dashboard for more detailed metrics about the selected object or group of objects.
The following table lists the information displayed when the different object tiles are selected.
Exchange Environment > Administration tab
|
• |
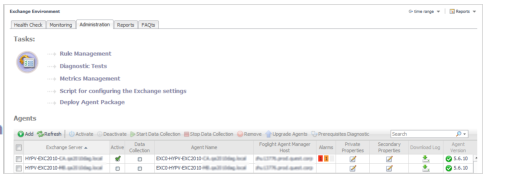
Deploy Agent Package: Deploy the Exchange agent package, create Exchange agent instances on one or more servers at a time, activate or deactivate Exchange agents, and start and stop collecting data. |
|
• |
Rule Management: View and manage rules that exist in your environment. For more information, see Foglight for Exchange rules. |
|
• |
Diagnostic Tests: View a list of diagnostic tests that are available, as well as run a test immediately or define a schedule for when a test is to be run. For more information, see Running diagnostic tests. |
|
• |
Metrics Management: View, edit, and enable/ disable the optional metric collections that are configurable for Exchange agents. For more information, see Managing Exchange metrics. |
|
• |
Script for configuring the Exchange settings: Download and run a script that automatically configures the Exchange servers. |
Exchange Environment > Reports tab
|
• |
|
• |
|
• |
|
1 |
Start the Create a Report wizard. |
|
2 |
|
• |
Scheduled Report Name: Type a valid name for the report. |
|
• |
Report Templates: Select the template on which you want to base your report. The Report Inputs section is populated with the template’s report parameters. Use the default parameters to quickly create a report, or optionally change the report parameters to customize the report to better meet your requirements. For more details about Exchange template reports, see Foglight for Exchange reports. |
|
3 |
|
• |
Schedule: Select the report schedule from the list of available options. |
|
• |
Retained Results: Type the number of results retained for the report. |
|
• |
Enabled: Select the check box if you want to enable the report. Clear the check box if you want to disable the report. |
|
• |
Report Format: Select the report format from the list of available options. |
|
• |
Email Recipients: Type the email addresses of the recipients to be notified when the report is generated. |
|
1 |
Start the Copy Existing Report wizard. |
|
2 |
|
3 |
|
• |
Scheduled Report Name: Type a valid name for the new report. |
|
• |
Report Templates: The report template can not be modified, only the report parameters in the Report Inputs section at the bottom of the page. |
|
• |
Schedule: Select the report schedule from the list of available options. |
|
• |
Retained Results: Type the number of results retained for the report. |
|
• |
Enabled: Select the check box if you want to enable the report. Clear the check box if you want to disable the report. |
|
• |
Report Format: Select the report format from the list of available options. |
|
• |
Email Recipients: Type the email addresses of the recipients to be notified when the report is generated. |
|
1 |
Start the Edit Existing Report wizard. |
|
2 |
|
3 |
|
• |
Scheduled Report Name: Change the report name, as necessary. |
|
• |
Report Templates: The report template and its parameters can not be modified. |
|
• |
Schedule: Select the report schedule from the list of available options. |
|
• |
Retained Results: Type the number of results retained for the report. |
|
• |
Enabled: Select the check box if you want to enable the report. Clear the check box if you want to disable the report. |
|
• |
Report Format: Select the report format from the list of available options. |
|
• |
Email Recipients: Type the email addresses of the recipients to be notified when the report is generated. |
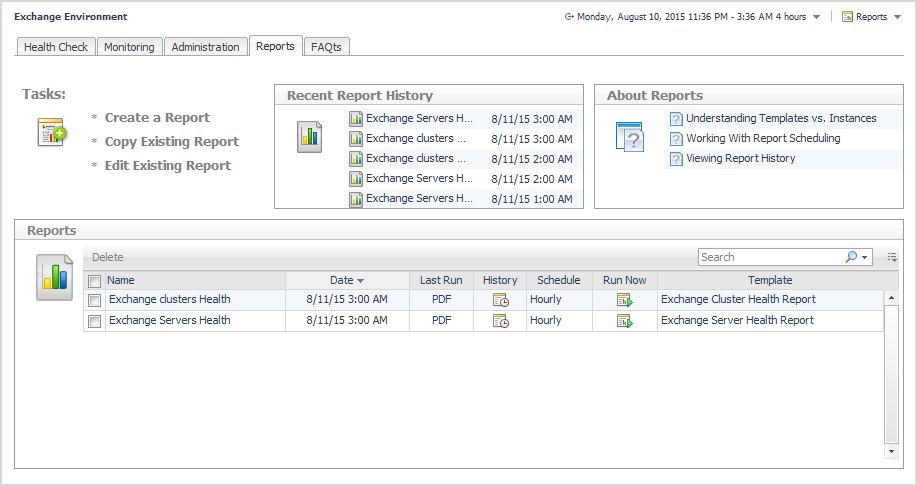
The About Reports view enables you to get answers to common questions about Exchange reports.
The Reports view displays all of the report instances configured in your Exchange environment.
The view contains the following information for each configured report instance.
|
Use the selection check boxes to select report instances for running or removal. | |
To delete one or several reports from the list, select the report(s) and click the Delete button at the top left corner of the view.
To search for a particular report, type the report name on the Search box at the top right corner of the view, then click Enter.
Exchange Environment > FAQts tab
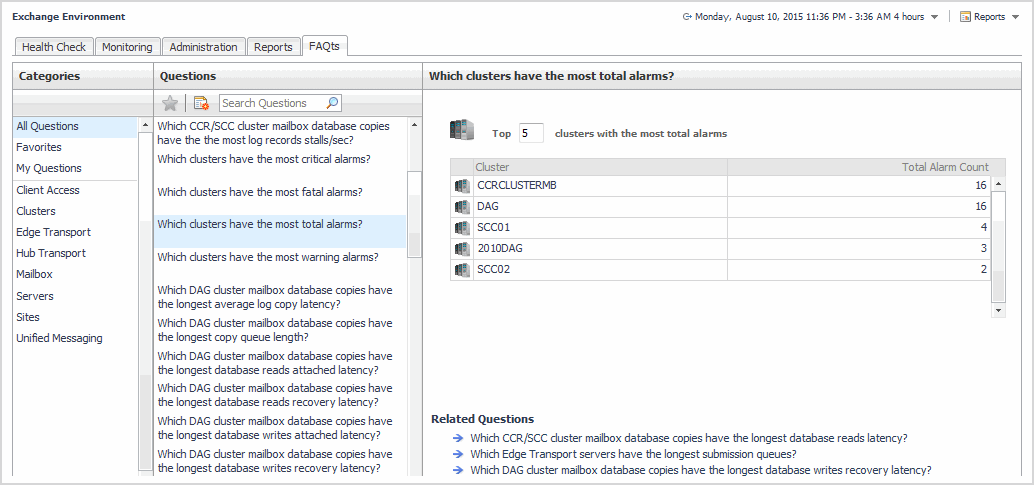
The FAQts view enables you to get answers to common questions about your Exchange environment.
The FAQts navigation tab is made up of the following embedded views:
The Categories view lists the categories (that is, servers, sites, Mailbox role, Client Access role, Unified Messaging role, Hub Transport role and Edge Transport role) for which questions can be answered by Foglight. It also contains a Favorites and My Questions category which allows you to customize the list of questions displayed.
By default, All Questions is selected. Click a category to view a list of questions relating to a type of Exchange object or click Favorites or My Questions to view your customized list of questions.
The Questions view lists the questions available for the category selected in the Categories view.
Click a question from the list to have Foglight gather and report an answer.
Use the buttons at the top of the Questions view as follows.
|
Mark the selected question as a ‘favorite’. Questions marked as a ‘favorite’ will be displayed when the Favorites category is selected. | |
|
If the list of questions is long, you can narrow it down by entering a text string in the Search field. Enter a word or text string and select the search button To clear the filter and return to the original list of questions, click |
Top x <objects of category> ...
where x is the number of objects of the category selected in the Categories view.


