Installation instructions for Foglight for Snowflake are detailed in the following sections and should be performed in order:
Before Foglight can monitor Snowflake, you must set up a Snowflake user with the right permissions. This user allows the agent to read system tables and collect data from Snowflake and user-created databases. Skip any steps in configuration that were previously completed. For additional information, refer to the complete Snowflake User Management documentation.
Snowflake User Requirements
Follow the steps below to ensure the Snowflake user account has the required access:
1. Assign the ACCOUNTADMIN Role (if possible)
To access all Snowflake collections, the user must have the ACCOUNTADMIN role.
If this role is not granted, the following collections will be unavailable:
-
Current Locks
-
Resource Monitors
2. Configure Cost Optimization Dashboards
The Cost Optimization dashboards use data from the ORGANIZATION_USAGE schema.
This schema is located in the organization account but can also be accessed from regular accounts with the ORGADMIN role enabled.
For official setup instructions, see the Accessing the ORGANIZATION_USAGE Schema documentation.
3. Grant Required Organizational Privileges
Make sure the user has these privileges to view organization-level data:
-
ORGANIZATION_BILLING_VIEWER
-
ORGANIZATION_USAGE_VIEWER
-
ORGANIZATION_GOVERNANCE_VIEWER
GRANT ORGANIZATION_BILLING_VIEWER TO ROLE <monitoring_role>;
GRANT ORGANIZATION_USAGE_VIEWER TO ROLE <monitoring_role>;
GRANT ORGANIZATION_GOVERNANCE_VIEWER TO ROLE <monitoring_role>;
4. Assign Additional Privileges (if needed)
Other Foglight collections require certain global or object-level privileges to access monitoring data.
The user must also have access to a warehouse to run performance and monitoring queries.
Refer to the section below for details on how to grant these permissions.
Snowflake Role Setup
1. Create a Monitoring Role in Snowflake
- Log in with a user that has the
ACCOUNTADMIN role. - Go to Admin > Users & Roles > Roles.
- Click + Role and name it
MONITORADMIN. - Open the role, click the ... menu, and choose Manage Global Privileges.
- Grant these privileges:
MONITOR EXECUTIONMONITOR USAGE
2. Assign Role to a User
- If the user already exists:
Go to the role page and click Grant to User. - If creating a new user:
Assign MONITORADMIN during setup.
3. Grant Warehouse Access
- Go to Admin > Warehouses.
- Select or create a warehouse.
- Grant
USAGE privilege to MONITORADMIN.
Read Selecting a Compute Warehouse below for important information to consider when designating a warehouse.
4. Grant Database Access
- Go to Data > Databases.
- For the Snowflake database:
- Grant
IMPORTED PRIVILEGES to MONITORADMIN.
- For each user-created database:
- Grant
USAGE on the database. - Grant
MONITOR on existing pipes. - Optionally, grant
MONITOR - FUTURE PIPE for automatic access to new pipes.
5. Create or Update Monitoring User
- Go to Admin > Users & Roles > Users.
- With a user that has the
ACCOUNTADMIN role selected. Click + User and fill in the details. - Under Advanced Options:
- Set default role to
MONITORADMIN. - Assign a default warehouse.
Read the Selecting a Compute Warehouse section below for important information to consider when designating a warehouse.
- Click Create User.
FMS Configuration
Because data gathered from some Snowflake sources are only available after a window of latency, some additional configuration steps are required for the FMS to handle this delay correctly.
1. Update FMS Host Settings
- Go to:
C:\Quest\Foglight\config
(or your FMS install directory) - Open
server.config. - Add this line to increase data delay tolerance to 3 hours:
server.vm.option0 = "-Dfoglight.data_service.max_past_timestamp_delta=10800000"
- Restart the FMS.
Update FMS Web Console Schedule
- Go to Administration > Schedules > Manage Schedules.
- Click Daily Database Maintenance.
- Change the start time to 3:00 AM.
The Snowflake agent runs lightweight queries to collect monitoring data. These queries need a compute warehouse to run. Choosing the right warehouse affects:
- Whether the agent can run smoothly
- How much Snowflake charges for compute usage
Warehouse Access Requirements
- The Snowflake user must have the USAGE privilege on the warehouse.
- The warehouse must be:
- Always running, or
- Set to auto-resume when needed
If the warehouse is suspended and not set to auto-resume, an admin with OPERATE privilege must manually start it.
Understanding Snowflake Billing
- Snowflake charges per second, with a minimum of 60 seconds per query.
- Even if a query runs for just 5 seconds, Snowflake bills for 60 seconds.
- If the warehouse resumes every minute for short queries, it costs the same as keeping it running.
Recommended Configurations
Option 1: Shared Warehouse (Low Cost, Low Impact)
- Use a warehouse already running other workloads.
- Make sure it has spare compute capacity.
- Agent queries will have no extra cost and minimal impact.
Option 2: Dedicated Warehouse (Isolated, Slightly Higher Cost)
- Use a separate warehouse just for the agent.
- To reduce cost:
- Set warehouse size to X-Small
- Enable auto-resume and auto-suspend
- Set suspend delay to 15 seconds
- In Agent Properties, set collection intervals to 5–10 minutes
This setup keeps the warehouse suspended most of the time, saving credits while still collecting data reliably.
1. Open the Foglight Web Console
- Launch your browser and log into the Foglight Web Console.
2. Install the Snowflake License
- From the left navigation pane, go to:
Administration > Setup > Manage Licenses - On the Licenses screen:
- Click the Install button.
- Browse and upload your valid Snowflake
.license file from your computer.
3. Install the Snowflake Cartridge
- From the navigation pane, go to:
Administration > Cartridges > Cartridge Inventory - On the Cartridge Inventory screen:
- Click Install Cartridge
- Browse to the location of the
SnowflakeAgent-x_xx.car file. - Upload the file.
- Make sure the "Enable on Install" checkbox is checked.
4. Confirm Installation
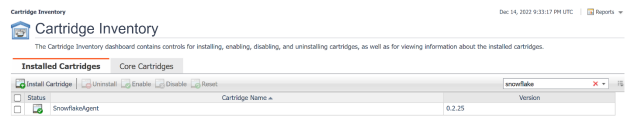
-
- After installation, the SnowflakeAgent Cartridge will appear in the list of installed cartridges on the Foglight Management Server.
For more information on these dashboards, read the Foglight User Guide.
Using the Agent Status Dashboard
The Agent Status page can be used to create new agents and configure and manage existing agents. To access the page from the navigation pane, select: Dashboards > Administration > Agents > Agent Status.
Use the following steps to create a new agent instance:
1. Deploy the Agent Package (if needed)
- If the Snowflake agent package hasn’t been deployed to the FglAM (Foglight Agent Manager) yet:
- Go to Agent Status or Agent Managers page.
- Click Deploy Agent Package.
- This step is automatic if skipped and the first agent is created.
2. Create the Snowflake Agent
- Click Create Agent.
- Follow the wizard steps:
Host Selector
- Choose the Agent Manager where the agent will run.
- Consider:
- Proximity to the Snowflake instance
- Available system resources
- Grouping with similar agents
Agent Type and Instance Name
- Select SnowflakeAgent as the type.
- Choose Specify Name and enter a name that reflects the Snowflake account being monitored.
Summary
- Review settings and click Finish.
3. Configure Agent Properties
- After the agent is created:
- Check the box next to the Snowflake agent.
- Click Edit Properties.
- Choose Modify the default properties for this agent.
- Update the agent settings as described in Knowledge base article 4369842
4. Activate the Agent
- Click the Activate button to start monitoring.
To modify the properties for an existing agent, skip to step 3 and Deactivate, then Reactivate the agents after changing the configuration.
