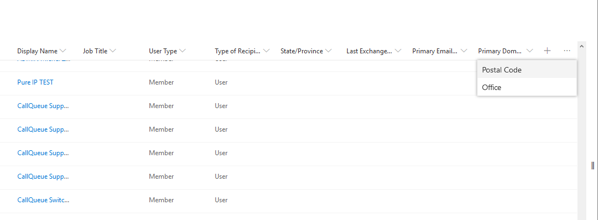
When a table report section is added to Nova Report Center, sometimes there can be too many columns to see them all in the current browser window.
Over on the right hand side of the column headings, you can click to see those extra columns. Click the three dots (...) to bring up the list of additional columns. Values for that column will then be displayed in a pop-up window, and you can decide if you want to drag them into the list of columns which are visible.
For more information on tabular data in Nova, click here.
The Nova Tenant Management System (TMS) allows service providers to support multiple customers from a common interface. Using the Nova TMS, the service provider adds new customer tenants, and then delegates access to those tenants and the Nova platform.
Click here for a video overview of the TMS user interface.
This section explains how to manage customer tenants and add tenant administrators.
My Associations
Here, you can select your default tenant or remove your access to a tenant. This is where you can view all of the tenants that your QTID is associated with. To access this, click your tenant name at the top right hand side of the toolbar, then select My Associations.
My Invitations
Here, you can invite someone to associate with the organization and delegate management rights to them. Use this page to view the status of invitations you send. To access this, click your tenant name at the top right hand side of the toolbar, then select My Invitations.
Adding a Customer Tenant
Use the Nova Tenant Management System to add customer tenants. If you are managing a lot of tenants, or if some of your customers have multiple tenants, you might need to organize the tenants into organization groups. Here is how to add a new tenant to the TMS:
1.On the My Organization page, click Add Child.
2.Enter the organization name. We like to format this with the logical name, followed by the Microsoft 365 tenant name in parenthesis. It looks like this: Organization Name (tenant)
3.Select an organization type.
4.Select the 2 check boxes, if desired, which allows the parent organization to view the child organization's data and manage the child organization's settings.
5.Click Create.
Click here to watch a video showing how to add and manage customer tenants.
Adding a Tenant Administrator
You will want to invite someone from the organization to act as the tenant administrator. Follow the steps below to invite a tenant administrator.
1.On the My Organization page, expand the organization hierarchy until you can select the tenant to which you will add a tenant administrator.
2.Click Manage.
3.Enter their email address and select the role(s) you want to assign to them.
They'll receive an email invitation to access the application. When they follow the link in the email and accept the invitation, they'll authorize Nova to access their tenant's data and they'll allow the setup process to be completed.
|
|
NOTE: If the invited user does not receive an email, check the contents of any junk mail folder. |
Click here to watch a video showing this process.
Additional Notes About Tenants
Here are some additional notes about the Tenant Management System:
·The individual who adds a tenant to TMS is automatically the tenant's default association and system administrator until a different default association and administrator is assigned.
·If you want to change your default tenant, go to My Associations and click the circle icon for the tenant you want to set as your default organization.
·If you want to remove your association/access to a tenant, go to My Associations, and click the Remove association button next to that tenant.
·If you are managing several tenants, you might want to organize them into groups using the Organization Groups page.
Due to the deprecation of basic authentication, it may be necessary to use certificate-based authentication to access some Quest Nova services. Click here to learn more.
If your organization uses one or more of the following services:
·Exchange ActiveSync
·POP
·IMAP
·Remote PowerShell
·Exchange Web Services
·Offline Address Book
·Or Outlook for Windows and Mac,
You will need to assign the Microsoft Entra ID role to the Nova Read application. To use certificate-based authentication in Exchange Online, you will need to assign the Global Reader role to the Nova Read-Only Access application. For general instructions about assigning roles in Microsoft Entra ID, click here.
There are two methods of assigning the Global Reader role:
Automatic
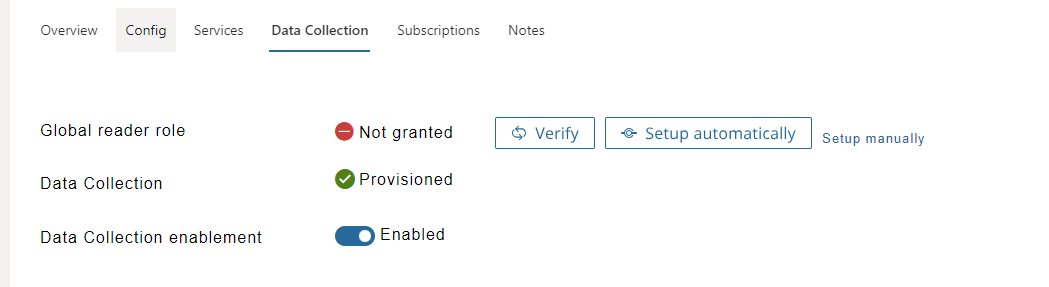
The tenant administrator can assign the Global Reader role within Nova by doing the following:
1.Go to TMS and select the desired organization.
2.Select the Data Collection tab.
3.Next to Global Reader, click Setup automatically.
4.Login and grant consent.
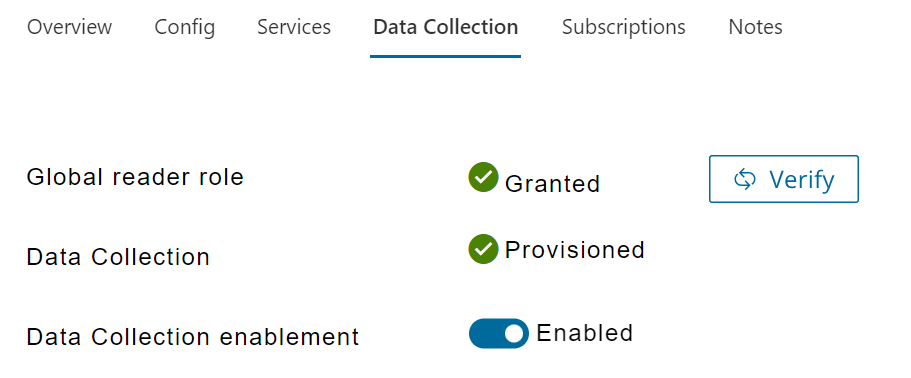
5.The Global Reader role status should now have changed to Granted. If the status has not changed, click Verify to refresh the status.
Manual
If you prefer to assign the Global Reader role manually, follow the steps below:
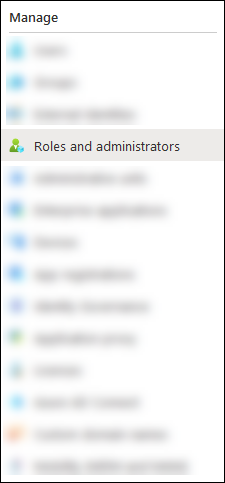
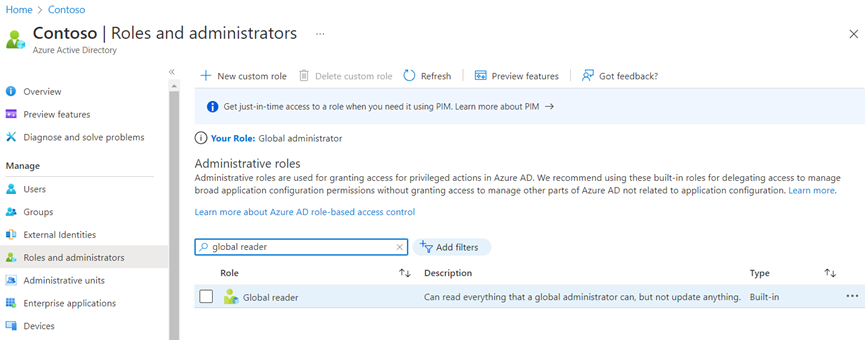
1.Open the Microsoft Entra portal, and click Microsoft Entra ID.
2.On the Overview page, under Manage, select Roles and administrators.
3.On the Roles and administrators page, find and select Global reader by clicking on the name of the role (not the check box) in the results.
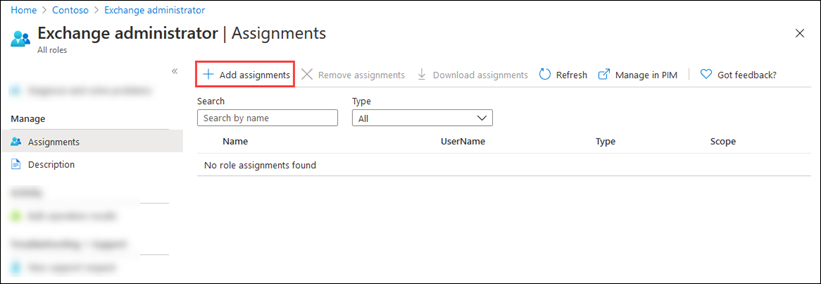
4.On the Assignments page, click Add assignments.
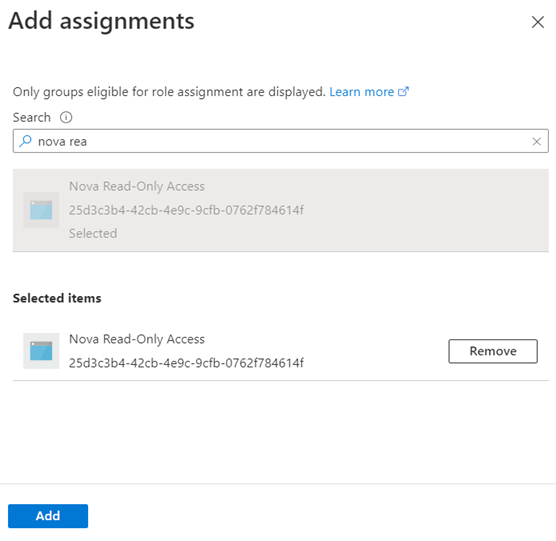
5.In the Add assignments flyout, find and select the Nova Read-Only Access app. Note that if you are a SoftwareONE user, this app will be named SoftwareONE Cloud Insider Read Only.
When you are finished, click Add.
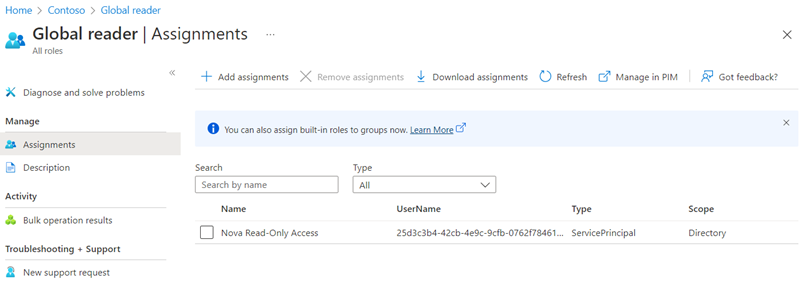
6.Go back to the Assignments page and verify that the Nova Read-Only Access (or SoftwareONE Cloud Insider Read Only for SoftwareONE users) app has been assigned to the role.
You need to grant consent to new API permissions to avoid losing access to some SharePoint data. Consent of the API permissions will depend on the Azure application you are using. Click here to learn more on certificate based authentication.
All users using the Azure application 'Nova Read-Only Access' must grant consent to the following API permissions:
·Sites.FullControl.All
·User.ReadWrite.All
Users using the Azure application 'SoftwareONE Cloud Insider - Read Only' must grant consent to the above two API permissions, as well as the following permission:
·User.Read.All