
7.1 Supported Upgrade Path
Upgrades are supported to the latest GA (Generally Available Release) from two GA versions prior. GA releases are listed on our website. If you are upgrading to a CSR (Customer Specific Release), please contact Support for clarification on whether the upgrade is supported.
If upgrading from a release older than two releases prior to the current GA, it is highly recommended that Support is contacted to discuss upgrade options for your specific environment. Some implementations which are more complex or have custom configurations may require a dedicated resource to assist in the upgrade process. If the upgrade goes beyond the scope of product support, this issue will be escalated to our Professional Services to assist at a billable rate.
Please contact Support if you have questions or need clarification on the Directory Synchronization upgrade process.
7.2 Upgrade Process
Directory Sync Pro for Active Directory and Migrator Pro for Active Directory can be upgraded to a new version without uninstalling the existing version. The installation wizard will detect the necessary changes and manage the upgrade.
Redeploying the Migrator Pro for Active Directory agents after upgrading is recommended in order to take advantage of new features in the new version of Migrator Pro for Active Directory.
|
|
Any customizations to the System actions in the ADM_Command and/or ADM_ActionCommand tables will be overwritten upon upgrade. If new custom actions are added through the user interface, those will not be lost during future upgrade. The PowerShell commands that are installed and stored in the SQL database should not be modified as they may be lost during an upgrade. |

Careful consideration should be taken when:
-
Upgrading in a production environment
-
Upgrading an older release of Directory Sync Pro for Active Directory to the latest release
Recommendations:
-
Truncating the log or reducing the log size as much as possible before upgrading is recommended. This will reduce the amount of time needed to rebuild the log table index during the upgrade process.
-
The examination of the Log SQL database during an upgrade may take longer than expected. Please allow the process to complete and the upgrade installation to proceed.
-
Download the installation package from the Support site and save it to the Binary Tree Windows Server.
-
Run the executable file. The install wizard will appear and proceed through the standard installation steps.
|
|
You must delete the C:\Windows\BTPass folder from all domain controllers being used in the Directory Sync Pro for Active Directory profiles. A new version of BTPass will be pushed to the domain controllers on the next sync. |
|
|
Mirroring should be stopped in the SQL environment prior to upgrading or installing.
|
Section 8. Modifying, Repairing and Uninstalling Directory Sync Pro for Active Directory and Migrator Pro for Active Directory
Directory Sync Pro for Active Directory and Migrator Pro for Active Directory can be modified, repaired, or uninstalled from the Programs and Features upgraded to a new version without uninstalling the existing version. The install wizard will detect the necessary changes and manage the upgrade.
-
Open Programs and Features by clicking the Windows Start button, clicking Control Panel, and clicking Programs and Features.
-
Select Directory Sync Pro for Active Directory or Migrator Pro for Active Directory from the list of programs and click Change.
-
The wizard screen appears displaying the following options. Select one of the following options and click Next:
-
Modify – use the Modify option to add and subtract components of Directory Sync Pro for Active Directory and/or Migrator Pro for Active Directory. This is useful if you wish to add or remove the Directory Sync Pro for Active Directory Console.
-
Repair – use the Repair option if Directory Sync Pro for Active Directory and/or Migrator Pro for Active Directory needs to be repaired due to corruption.
-
Remove – use the Remove option to uninstall Directory Sync Pro for Active Directory and/or Migrator Pro for Active Directory. You can also uninstall by clicking Uninstall on the Programs and Features page.

-
Proceed through the wizard until finished.
-
Section 9. Migrator Pro for Active Directory Agent Installation
9.1 Installing the Migrator Pro for Active Directory Agent on Devices
The Migrator Pro for Active Directory Agent is a key component of Active Directory migration. The agent contacts the Migrator Pro for Active Directory server at regular intervals, called polling, looking for jobs and tasks to perform.
Refer to the Requirements to verify all workstations and servers meet the requirements for agent installation.
Agent Installation
The agent can be installed using a GPO (Group Policy Object) or manually.
To install the agent with a GPO:
-
Right-click on the Migrator Pro for Active Directory Agent Installer MSI, point to Share with, and click on specific people.
-
Add a security group. The "authenticated users" group already includes all computers and is a good group to use. The group you add must have the shared Read permission and NTFS permission.
-
Click Share.
-
Click Done.
-
From the Start menu, point to Administrative Tools and click on Group Policy Management.
-
Right-click on the domain or OU you will be migrating and click on Create a GPO in this domain, and link it here.
-
In the New GPO dialog box, enter a Name for the GPO and click OK.
-
Click on the new GPO and click OK.
-
Right-click on the GPO and select Edit.
-
Open Computer Configuration > Policies > Software Settings and right-click on Software Installation and then point to New and click on Package.
-
In the File Name field, enter the UNC path to the MSI file and click Open.
-
Select the Active Directory Pro Agent and click Open.
-
In the Deploy Software window, select the Assigned deployment method and click OK.
|
|
The device must be rebooted for the applied group policy to complete the agent installation. |
To verify the GPO:
-
Log on to a workstation within the scope of the GPO using administrator credentials.
-
From a command prompt on the workstation, run gpresult -r
-
The Computer Settings section will display the applied group policy.
|
|
A newly applied group policy will not immediately be displayed. The Computer Settings section displays the applied group policy, but the agent installation is not completed until the device is rebooted. |
To manually install the agent:
-
Copy the Active Directory Pro Agent Installer MSI file to each computer.
-
Double-click the file to open the installer.
-
On the Welcome screen, click Next.
-
On the Destination Folder screen, click Next.
-
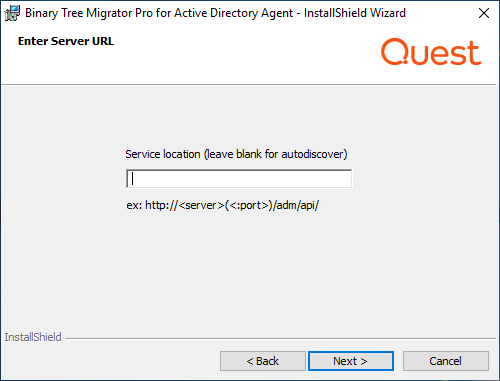
On the Enter Server URL screen, enter the FQDN of the server running the Migrator Pro for Active Directory service and click Next.
|
|
Leave this screen blank if an SRV record has been created. See Creating SRV Records below for more information. If there is an SRV record found in the Domain, any entry manually entered during the agent install for the Server URI will be ignored. |
-
On the Ready to Install the Program screen, click Install.

-
When the install completes, click Finish.
Refer to the Troubleshooting section to resolve common agent install issues.
Creating SRV Records
The Migrator Pro for Active Directory Agent uses DNS to "autodiscover" the Migrator Pro for Active Directory server. An SRV (service location) record must be created in DNS to point the clients to the correct server or servers.
To create an SRV record using DNS Manager:
-
In the DNS Manager, right-click on the DNS server and click on Other New Records.
-
In the Resource Record Type dialog, select the Service Location (SRV) type and click Create Record.
-
In the New Resource Record dialog, enter "_btadm" in the Service field.
-
Enter the following information for HTTP or HTTPS:
-
For HTTP:
Protocol: _http
Priority: 0
Weight: 0
Port Number: 80
Host offering the service: the FQDN of server running the Migrator Pro for Active Directory service.
-
For HTTPS:
Protocol: _https
Priority: 0
Weight: 0
Port Number: 443
Host offering the service: the FQDN of server running the Migrator Pro for Active Directory service.
|
|
You can make SRV records using HTTP, HTTPS, or both protocols. Using HTTPS is suggested for increased security. If both protocols are used, the agent will always attempt to use HTTPS first. |
-
Click OK.
Every client running the agent software must be able to resolve the DNS records.
To verify the clients can resolve the SRV DNS records:
-
Open a command prompt on the client machine.
-
Run nslookup -q=srv _btadm._http.source.int where "http" is the protocol: http or https, and "source.int" is the name of the source domain.