
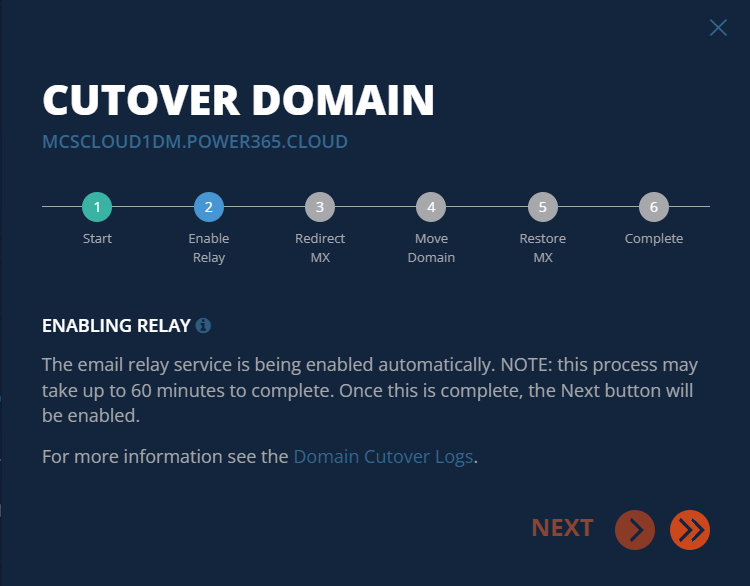
Enable Email Relay (Step 2)
-
Power365 will now start the Email Relay provisioning process. The screen will automatically refresh and move to the next step once the Email Relay is provisioned.
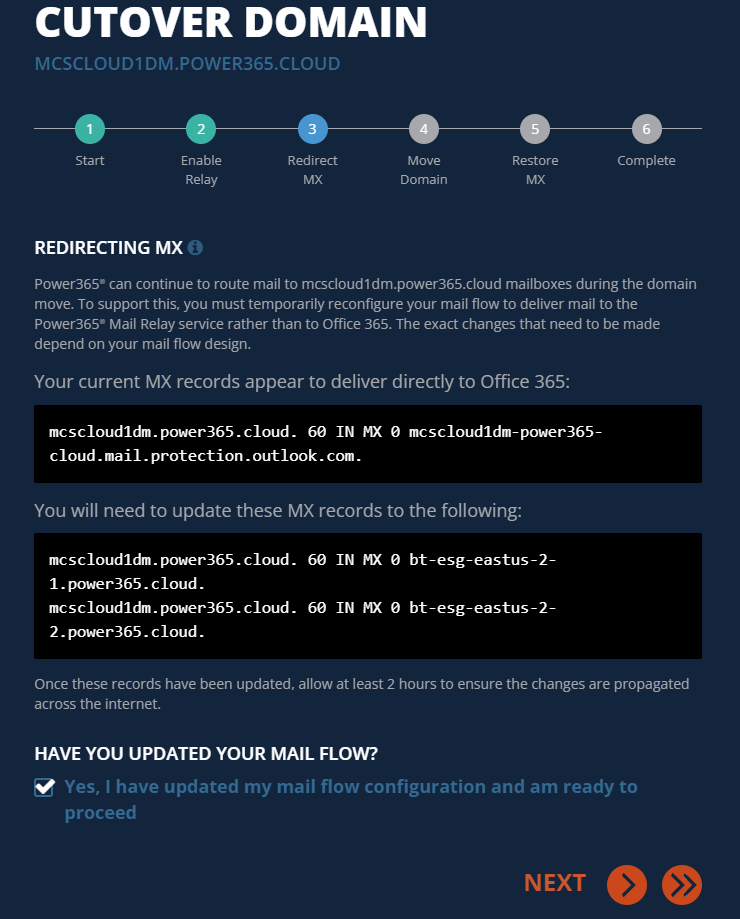
Redirect MX (Step 3)
-
Update the DNS MX record for the domain being moved and point it to the Email Relay Service. Check the checkbox and click the Next button once the MX record is updated.
Important Tip: Once the MX record has been updated, external incoming email messages will be delivered to the Email Relay Service (ERS) first. Once the message is processed by ERS it will be sent to the target tenant for final delivery.
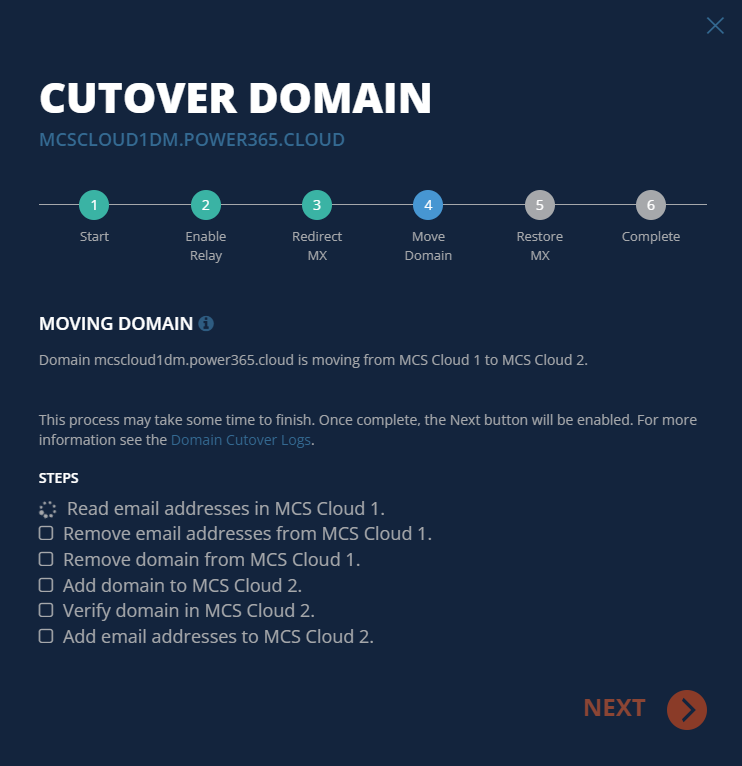
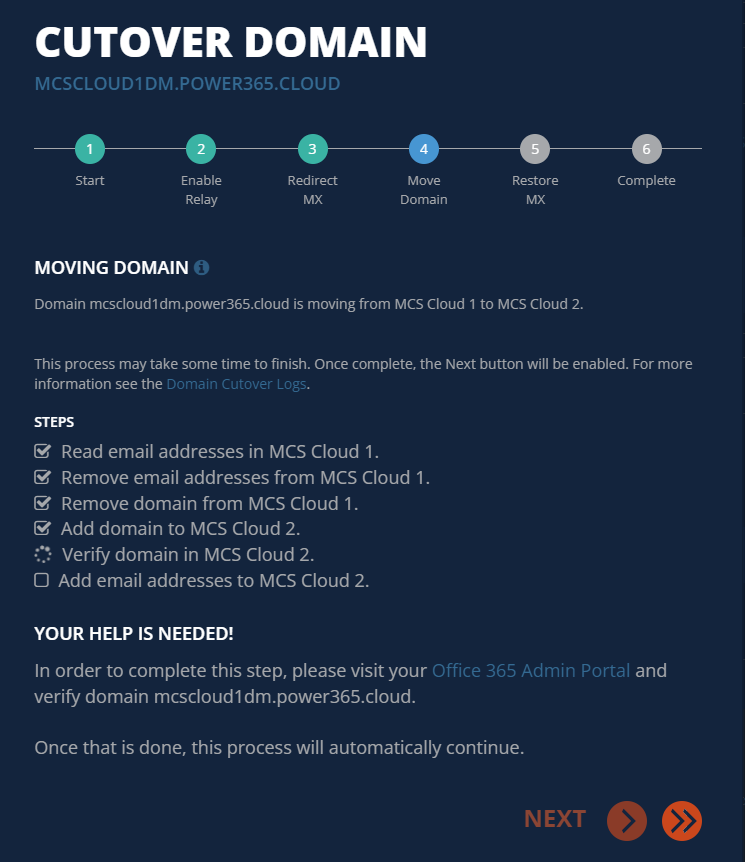
Move Domain (Step 4)
-
The following steps are then done automatically Power365.
-
Read the email addresses from the source tenant.
-
Remove the email addresses from the source tenant for all objects.
-
Remove the domain from the source tenant.
-
Add the domain to the target tenant.
-
-
Log into the Microsoft 365 admin portal for the target tenant and verify the newly added domain.
-
Power365 now automatically adds the email addresses to matched objects in the target tenant using the target address setting previously selected.
Restore MX (Step 5)
-
Restore the domain MX record now that email addresses have been added to the matching target objects. Check “Yes, I have updated my mail flow to Office 365 and am ready to proceed” and click Next.
