
Using Foglight Hybrid Cloud Manager for Azure
Installation requirements
Azure Performance Agent Configuration
Azure monitoring setup
Monitoring Tab
Getting authentication information through Azure portal
Configuring firewall settings
Creating Azure Performance Agent
Dashboard location and UI elements
Regions monitoring
Virtual Machines monitoring
Resource Groups Monitoring
Storage Accounts monitoring
Virtual Networks monitoring
Tags Tab
Report Tab
Rule Configuration Tab
Usage & Quotas Tab
Global Services Tab
Administration Tab
Optimizer Tab
Cost Tab
Editing agent properties
|
3 |
The Cloud Manager dashboard opens.
|
4 |
Click Administration. |
The Administration dashboard opens.
|
5 |
|
6 |
|
• |
Azure Environment*: The value of Azure Environment: Azure.com (default value) or Azure.cn(China). |
|
• |
Tenant Directory ID *: The value of Tenant ID retrieved in Getting authentication information through Azure portal or Getting authentication information through Azure portal. |
|
• |
Tenant Alias Name: The display name that identifies your Tenant |
|
• |
Application ID *: The value of Application ID retrieved in Getting authentication information through Azure portal or Getting authentication information through Azure portal. |
|
• |
Access Key *: The value of Access Key retrieved in Getting authentication information through Azure portal or Getting authentication information through Azure portal. |
|
• |
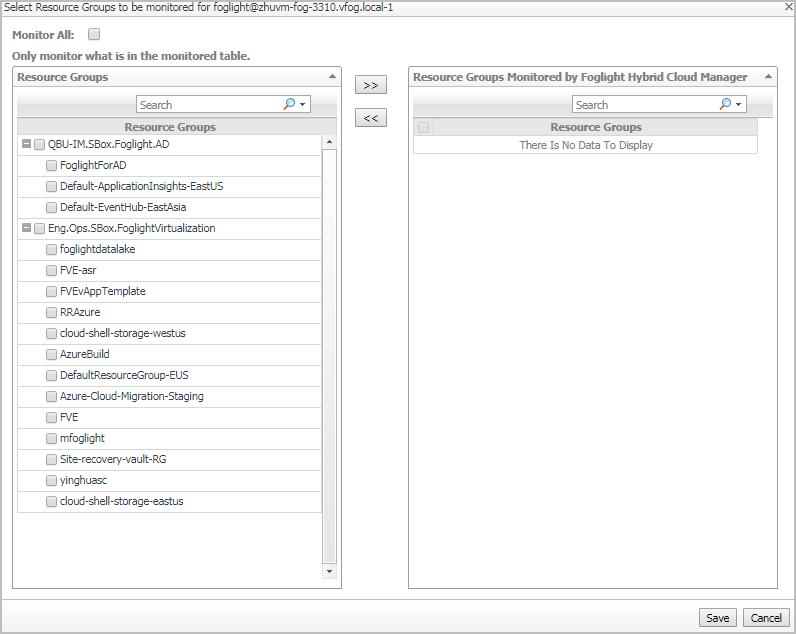
Select Resource Groups to be monitored: Specify to monitor all resource groups or only monitor specified resource group. |
|
• |
If Monitor All is selected: By monitoring all Resource Groups or any Resource Group that is running on the monitored cloud which will be monitored 24x7 may consume licenses depending the number of virtual machines in the Resource Group. |
|
• |
If Monitor All is not selected: The following view appears on the bottom of the Select Resource Groups to be monitored dialog box. Select virtual machines that you want to monitor, and then click >> to move selected Resource Groups to the Resource Groups Monitored by Foglight Hybrid Cloud Manager table. |
|
• |
If the Removed from Monitoring and Virtual Machines Monitored by Foglight Hybrid Cloud Manager tables are empty, and Monitor All is not selected, the Azure agent will not collect any Virtual Machine data. |
|
• |
Select IaaS Virtual Machines to Monitor: Specify to monitor all virtual machines or only monitor specified virtual machine. |
|
• |
If Monitor All is selected: By monitoring all virtual machines any virtual machine that is running in the monitored cloud will be monitored 24x7 consuming a monitored virtual machine license. Every virtual machine that is monitored will count against the purchased license pool. Any Monitored Virtual Machine that is above the purchased license limit will require an additional Foglight Hybrid Cloud Manager per Monitored Virtual Machine license. |
|
• |
If Monitor All is not selected: The following view appears on the bottom of the Selected IaaS Virtual Machines to Monitor dialog box. |

|
• |
If Automatically Monitor New Virtual Machines is selected, select virtual machines that you do not want to monitor, and then click >> to move selected virtual machines to the Removed from Monitoring table. |
|
• |
If Automatically Monitor New Virtual Machines is not selected, select virtual machines that you want to monitor, and then click >> to move selected virtual machines to the Virtual Machines Monitored by Foglight Hybrid Cloud Manager table. |
|
• |
If the Removed from Monitoring and Virtual Machines Monitored by Foglight Hybrid Cloud Manager tables are empty, and Automatically Monitor New Virtual Machines is not selected, the Azure agent will not collect any virtual machine data. |
|
• |
Collect Cost Metrics: Select the checkbox to enable and configure the cost metrics collection. Configurations will take effects only after a complete metrics collection cycle is finished. |
|
• |
Collect Cost Metrics by Enterprise Agreement API: Enterprise Agreement Billing API only applies to Enterprise Agreement subscriptions and collects cost metrics directly from the Azure Enterprise Portal. If not, Foglight Hybrid Cloud Manager will use Usage and Rate Card APIs to collect and populate the cost data for subscriptions. |
|
• |
Enrollment Number: See To get the Enrollment Number and Usage API Access Key: to get this value. |
|
• |
Usage API Access Key: See To get the Enrollment Number and Usage API Access Key: to get this value. |
|
• |
|
• |
Billing Cycle Day: Calculate the total usage from the specified Billing Cycle Day of the month, and then populate the rate card data. See To get the subscription information: to get this value. |
|
7 |
Click Save. The Edit Properties dialog box closes and the list of agent instances automatically refreshes in the display area. |
Optimizer Tab
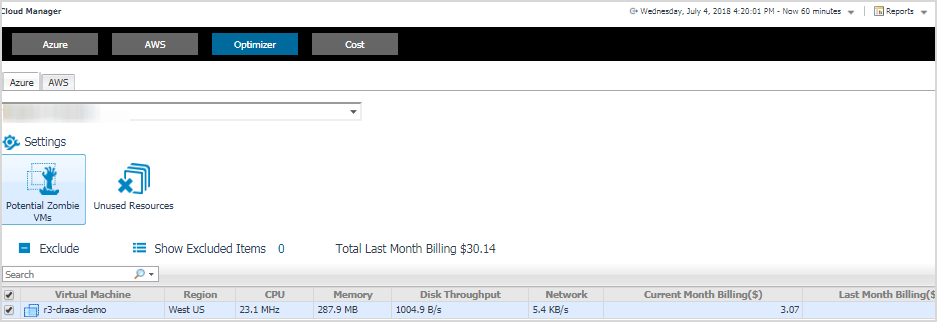
Click Optimizer on the top of the Cloud Manager dashboard to navigate to the Optimizer tab.
Figure 27. Optimizer tab
|
3 |
The Cloud Manager dashboard opens.
|
4 |
|
5 |
The Optimizer - Azure view includes the following elements:
|
• |
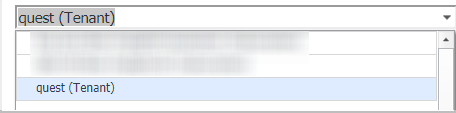
Group selector: The group selector is located at the top of the Optimizer - Azure view and allows you to select the Azure environment that you want to optimize. |
|
• |
Settings. The Settings dialog box is used to change the time period and properties that are used for calculation. For more information, see Settings. |
|
• |
Potential Zombie VMs table. Shows virtual machine name, regions, CPU, memory, disk throughput, network, current month Billing, and last month billings of the zombie virtual machines based on calculation settings. |
|
• |
Unused Resources table. Detects and shows those unused resources. For example, a virtual machine has been deleted, but its Disk/Network Interface/Public IP/Network Security Group/Storage Account are still remained in Azure. |
|
• |
The Exclude button.Select an object from the Virtual Machine table and click Exclude. Then this object is added to the list of excluded objects under a specific category. |
|
• |
The Show Excluded Items button. If you want to see the excluded objects, click Show Excluded Items. The Settings dialog box appears. For more information, see Settings. |
Settings
The Settings dialog box includes two tabs:
|
• |
Cost Tab
Click Cost on the top of the Cloud Manager dashboard to navigate to the Cost tab.
|
NOTE: Ensure that you have configured the cost metrics for subscriptions through the Agent Properties dialog box; otherwise there will have no data displayed on this tab. For more information about how to configure cost metrics, refer to the “Configure Subscription Cost to Monitor” step on page 49. |
Figure 28. Cost tab

|
3 |
The Cloud Manager dashboard opens.
|
4 |
|
5 |
Click Azure. |