Cutover Job Result Codes
| Result Code | Error | Rollback Possible |
|---|---|---|
| 1 | Unidentified Error - PowerShell Command Error | No |
| 2 | Source Domain could not be contacted | No |
| 4 | Bad Source Credentials | No |
| 8 | Target Domain could not be contacted | No |
| 16 | Bad Target Credentials | No |
| 32 | Target DNS Server could not be contacted or could not resolve the target DNS domain | No |
| 64 | Change Obtain DNS by DHCP | |
| 128 | Set DNS Server IPs | |
| 256 | Set WINS Servers | |
| 512 | Register NIC with DNS | |
|
1024 |
Clear DNS Suffix Search List / Set to use NIC | |
| 2048 | Set Alternate DNS Suffix List | |
| 4096 | Enable Dynamic DNS Registration | |
| 8192 | Set NIC Specific DNS Suffix | |
| 16384 | Domain Disjoin Failed | |
| 32768 | Domain Join Failed | |
| 65536 | Source domain name does not match the system's domain | No |
| 131072 | Computer Reboot failed | |
| 262144 | Target Domain Name could not be resolved via existing DNS, and new DNS Servers were not provided | No |
 |
An odd numbered result code represents an error running the Cutover PowerShell script. The most common cause of an odd numbered result code during Cutover is that the computer either has no network card with a default gateway or more than one network card with a default gateway. Result codes are additive. There are likely multiple errors if the result code is not represented in the table. |
Upload Logs Result Codes
This table includes result codes for BT-UploadLogs PowerShell jobs.
| Result Code | Error | Rollback Possible |
|---|---|---|
| 32 | (zip folder) could not be created. | No |
| 64 | Failed to Zip log files on computer. | No |
| 128 | Upload failed to contact the server. Please verify the URL (url) is correct and BITS is enabled. | No |
SQL Repermission Tool
Use the SQL Repermission Tool to update a SQL Server’s Source AD Windows Authentication Group Login permissions and their associated database users for the Target domain to which the user and group objects have been migrated.
Prior to re-permissioning SQL servers, accounts must be migrated and Mapping Files created using Migrator Pro for Active Directory.
- Open the SQL Repermission.msi file included in the installation.
- Run the installer on the Migrator Pro for Active Directory Server or any machine that will have access to the SQL Server instance and databases to be re-permissioned.
-
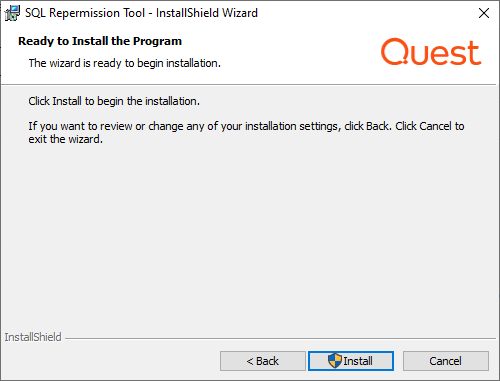
The Welcome screen appears. Click Next to continue.
-
The "Ready to Install the Program" screen appears. Click Install to begin the installation.
-
When the installation completes, the "InstallShield Wizard Completed" message appears. Click Finish to close the wizard.
- Copy the map.usr and map.gg files created using Migrator Pro for Active Directory to a folder on the same machine.
-
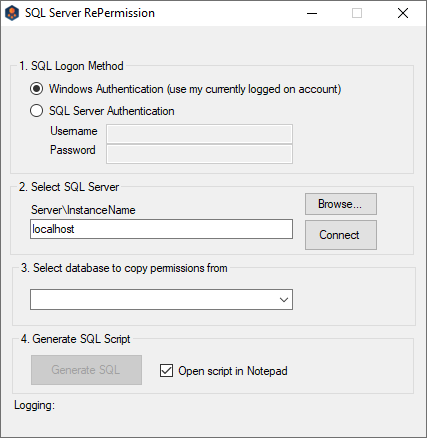
Launch the SQL Repermission Tool from the Apps screen or the Start menu.
- Select the SQL Logon Method. If SQL Server Authentication is selected, enter the Username and Password. If Windows Authentication will be used, you must be logged onto the machine with an account that has access to the SQL Server instance and databases to be re-permissioned.
-
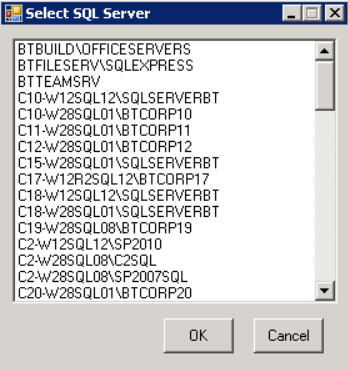
Click on Browse to select the SQL Server instance to be re-permissioned.
-
Select the SQL server instance from the list and click on OK.
-
Click on the Connect button. If connection is successful, the Logging message should read “SQL Server Connected” and there should be databases available to pick from in the drop-down list.
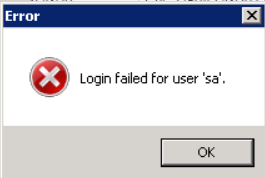
Note: If the login information is incorrect, the following error will be received. The credentials to connect to the SQL server instance should be corrected, and then the Connect should be retried.
-
Once successfully connected to the SQL Server instance, in the drop down select either <ALL> or a specific database that needs to be re-permissioned.
-
Click on the Generate SQL button. If the Open script in Notepad option is left checked, the results will be displayed when completed.
-
The Logging information will display the name of the SQL file created in the directory that the application is located.
-
If the option to open the file in Notepad was not checked, navigate to where the file was saved and right-click and choose Open with Notepad.
-
The results of the process can be reviewed prior to actually executing it on the SQL Server instance.
-
When the SQL file has been reviewed, either open the file in SQL Server Management Studio or create a new Query in SQL Server Management Studio and copy/paste the contents of the file into the Query.
-
Execute the Query and the new target credentials will be created.


Installing and Configuring SQL Server Reporting Services
Installing SQL Server Reporting Services
| |
These instructions are for existing SQL Server installs where reporting services are being added. |
- Load the ISO into the DVD drive.
- Open My Computer.
- Double-click on the DVD drive to run the SQL Server Installation Center dialog.
- Select Installation from the left.
- Select New installation or add features to an existing installation.
- Click the OK button on the Setup Support Rules page if everything passed.
- Click the Install button on the SQL Setup Files page.
- Click the Next button on the Setup Support Rules page if everything passed.
- Select Add features to an existing instance of SQL Server (verify your instance is shown).
- Click the Next button.
- Check the Reporting Services box and click the Next button.
- Click the Next button on Installation Rules.
- Click the Next button on Disk Space Requirements.
- Click in the Account Name field and select NT AUTHORITY\NETWORK SERVICE.
- Click the Next button.
- Click the Next button on the Reporting Services Configuration to Install, but do not configure the report server option.
- Click the Next button.
- Click the Next button on Installation Configuration Rules page if everything passed.
- Click the Install button on the Ready to Install page.
- If you have a green checkmark on the 'Complete' page, click the Close button.
- Close the SQL Server Installation Center dialog.
Configuring SQL Server Reporting Services
- Click Start > All Programs > Microsoft SQL Server > Configuration Tools.
- Click on Reporting Services Configuration Manager.
- Click the Connect button.
- Select Service Account from the left.
- Verify Network Service is set for the built-in account.
- Select Database from the left.
- Click the Change Database button.
- Verify 'Create a new report server database' is selected and click the Next button.
- Set your security type and click the Next button.
- Leave the defaults. Verify 'Report Server Mode' is set to 'Native' (Reporting will fail to work if not in Native Mode)
- Click the Next button.
- Click the Next button.
- Click the Next button and it will begin to configure the database.
- Click the Finish button.
- Select Web Service URL from the left pane.
- Click the Apply button.
- Select Report Manager URL from the left pane.
- Click the Apply button.
- Click the Exit button.
Your Report URLs
Browseable URL
http://<servername>/Reports
or
http://<servername>/Reports_InstanceName (if SQL Server is installed as an instance)
Web Service URL
http://<servername>/ReportServer
or
http://<servername>/ReportServer_InstanceName (if SQL Server is installed as an instance)
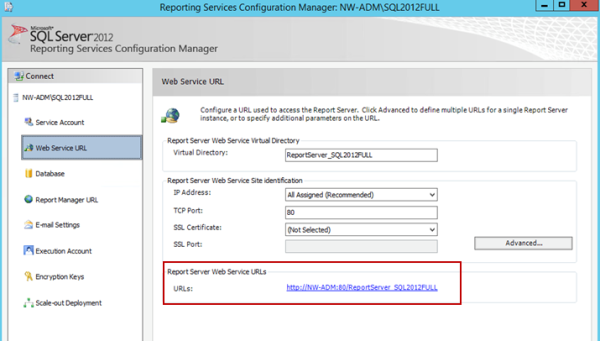
Verifying the Report Server URL
The Report Server URL is needed when installing the Reporting feature. Use the following steps to verify the correct URL to use.
- Open up Reporting Services Configuration Manager.
-
Provide the SQL Server Name and Report Server Instance name and click Connect.
- In the left folder navigation, select Web Service URL.
-
The Report Server URL appears in the Report Server Web Service URLs section.