
7.1 Preparing for Mail-in Database Migration
7.1 Preparing for Mail-in Database Migration
If you have already added all names to the Translation Table in a previous step, Mail-in databases are already there. If not, add them now by going back to the Email Repliability view. You can match these entries in either view as needed.
A Mail-in database can be migrated either to a .pst file or to the Exchange server.
The first step in the migration of a mail in database is to import it into Migrator for Notes and prepare it for migration.
-
Expand Mail In Database Migration | Preparation | Import in the Navigation Pane:
Import Mail-in DBs button
-
Click the Import Mail-in DBs button
-
From the Mail-In Databases view in <Domino directory> dialog box, select the mail-in database that you want to migrate and click OK:
-
Click OK in the message box:
-
Click OK in the results box:
-
Expand the Migration | Advanced view in the Navigation Pane
-
Select the database in the Data Pane and set its migration status, group and workstation
-
Database appears under its assigned group and displays its current migration status.
-
Expand the Audit Mail In view; verify the database by selecting it and then clicking the Verify Mail-In Database button:
-
Click Yes in the confirmation box:
-
Click OK in the box that appears showing that the database has been audited; the database is audited and its status and group are set.


7.2 Mail-In Database Replicas
7.2 Mail-In Database Replicas
Mail-In Database Replicas can be created and managed if Replication is required and enabled. Note that Replication must be enabled and configured in the Replica Settings tab of Settings. Replication views do not appear if Replication is disabled.
To manage replication:
-
Expand the 4. Mail In Database Migration | Preparation | Create Replicas view:
-
To create replicas, select one or more entries and click the Create Replicas button; the Change Replication Formula option is also available in this view
-
A dialog box will appear prompting you to enter the data when the migration will commence; select a date from the calendar picker and click OK:
-
When the Select the Staging Server dialog box appears, select a server from the dropdown menu and click OK
Only check the Override the replication formula if you want to override your replication formula in the Replica Settings document:
-
Click Yes in the proceed with Replica Creation? dialog box
-
A Results dialog box appears to show the results of the replication; click OK
-
Click Compare Replicas; the replica comparison will allow you to compare the original mail-in database and the staging replica
-
Select an option form the Verify Actions drop-down menu; a Quick Push Replication option is also available; click the Help button for more information about the replica comparison view:
The following table describes the function of each menu option:


|
Option |
Description |
|
Run Replica Comparison For Selected Users |
Allows you to select entries and compare replicas |
|
Set Verification Flag for Selected Users |
Allows you to select entries and set a verification flag for them |
|
Remove Verification Flag for Selected Users |
Allows you to select entries and remove the verification flag for them |
-
You may delete selected mail-in databases from the Delete Replicas view:
-
Click By Group | Set Migration Status
This view gives you the ability set the migration status, group and workstation:


7.3 Provisioning Mail-in Databases
7.3 Provisioning Mail-in Databases
Perform the following steps to set up the Exchange mailbox databases.
-
Select the appropriate Mail-in databases
-
Click the Set Exchange Mailbox DB button to manually choose a database from a list.
-
Select a database and then click OK to continue
-
Select Set Exchange Mailbox DB (Round Robin) to distribute the Mail-in databases across all available Exchange mailbox databases:

Set Exchange Mailbox DB
|
|
|

Once complete, the Exchange mailbox database is visible in the Mail-in Database Migration view.
-
Select the Enable/Create Mail In view to begin enabling Mail-in databases, set X500 Addresses and set full access; the Set X500 Address button only displays if you selected “Yes to separate the set X500 action” on the User Provisioning Settings tab
To match the selected Mail-In databases:
-
Expand Preparation and click Provisioning
-
Click Match selected
-
The drop-down menu displays four menu options:

The following table describes each menu option:
|
Option |
Description |
|
Match selected entries using LDAP |
Matches selected Mail-in databases with their corresponding entries in AD using LDAP. |
|
Match Selected users on CAS server |
Matches selected Mail-in databases with their corresponding entries in AD on the Exchange CAS server. |
|
Match Selected entries using PowerShell |
Matches selected Mail-in databases using PowerShell. |
|
Match all entries using PowerShell |
Matches all Mail-in databases using PowerShell. |
Match Selected Entries using LDAP
-
Select the Match selected entries using LDAP menu option
-
The selected Mail-in databases are matched in AD
-
Click OK to close the message box
Match Selected users on CAS Server
Use this option if the destination mailbox server and the CAS servers are not the same server.
-
Select the Match Selected users on CAS server menu option
-
The selected Mail-in databases are matched on the Exchange CAS server; click OK to close the message box
Match Selected entries using Powershell
-
Select the Match Selected entries using PowerShell menu option
-
The selected Mail-in databases are matched using PowerShell; click OK to close the message box
Match all entries using Powershell
-
Select the Match all entries using PowerShell menu option
-
All Mail-in databases are matched using PowerShell; click OK to close the message box
Once the migration is completed, you can update mail routing.
-
Click the Mail Routing button to set mail routing to Exchange. The Set Mail Routing Back to Notes option is for rolling back if needed.

7.4 Migrating Mail-in Databases
-
Go to Migration Profiles under the Configuration view in the Navigation Pane; create a profile to migrate the mail in databases to Exchange migrations or a .pst file and save it
-
Navigate back to the Mail In Database Migration | Migration | Set Migration Profile view in the Navigation Pane
-
Select the database and then click the Set CMT Migration Profile button
-
Select the migration profile you created to migrate the mail in databases to a .pst file in the Select Migration Settings dialog box, and click OK.
-
Click the Migrate view in the Navigation Pane
Select the database and then click Migrate Mail-In Database.
-
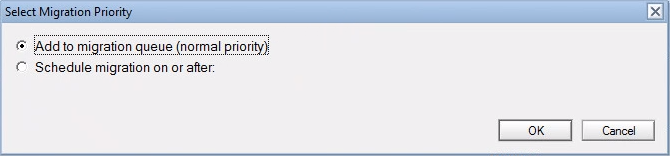
From the Select Migration Priority dialog box, select a priority and click OK:
-
Depending on the size of the data being migrated, the transfer may take few minutes to several minutes
-
The Refresh Migration Status button allows you to refresh the status of the selected mail-in databases
If the Audit Exchange Migrated Data option is enabled in the Settings, an Audit Migrated Data button will appear.
This agent audits the Exchange mailbox post-migration and creates a CSV file in the C:\Program Files\Binary Tree\CMT for Exchange\Logs directory of the workstation used to initiate the audit.
The CSV file has the following format:
Column A - UNID
Column B - NoteID
Column C - Migration Status (0=Unknown Result Status, 1=Successful, 2= Partially Migrated - Encrypted Body, unable to migrate attachment, but part of the message was converted and is available in Outlook)
Column D - Message Subject
The last line of the CSV file states “Audit Completed” when the agent completes. Contact and Group migrations are not included in the audit. Child documents that are integrated with the parent documents are not be listed in the CSV file.

Match Selected Entries using LDAP
7.3 Provisioning Mail-in Databases
Perform the following steps to set up the Exchange mailbox databases.
-
Select the appropriate Mail-in databases
-
Click the Set Exchange Mailbox DB button to manually choose a database from a list.
-
Select a database and then click OK to continue
-
Select Set Exchange Mailbox DB (Round Robin) to distribute the Mail-in databases across all available Exchange mailbox databases:
Set Exchange Mailbox DB
|
|
|
Once complete, the Exchange mailbox database is visible in the Mail-in Database Migration view.
-
Select the Enable/Create Mail In view to begin enabling Mail-in databases, set X500 Addresses and set full access; the Set X500 Address button only displays if you selected “Yes to separate the set X500 action” on the User Provisioning Settings tab
To match the selected Mail-In databases:
-
Expand Preparation and click Provisioning
-
Click Match selected
-
The drop-down menu displays four menu options:
The following table describes each menu option:
|
Option |
Description |
|
Match selected entries using LDAP |
Matches selected Mail-in databases with their corresponding entries in AD using LDAP. |
|
Match Selected users on CAS server |
Matches selected Mail-in databases with their corresponding entries in AD on the Exchange CAS server. |
|
Match Selected entries using PowerShell |
Matches selected Mail-in databases using PowerShell. |
|
Match all entries using PowerShell |
Matches all Mail-in databases using PowerShell. |
Match Selected Entries using LDAP
-
Select the Match selected entries using LDAP menu option
-
The selected Mail-in databases are matched in AD
-
Click OK to close the message box
Match Selected users on CAS Server
Use this option if the destination mailbox server and the CAS servers are not the same server.
-
Select the Match Selected users on CAS server menu option
-
The selected Mail-in databases are matched on the Exchange CAS server; click OK to close the message box
Match Selected entries using Powershell
-
Select the Match Selected entries using PowerShell menu option
-
The selected Mail-in databases are matched using PowerShell; click OK to close the message box
Match all entries using Powershell
-
Select the Match all entries using PowerShell menu option
-
All Mail-in databases are matched using PowerShell; click OK to close the message box
Once the migration is completed, you can update mail routing.
-
Click the Mail Routing button to set mail routing to Exchange. The Set Mail Routing Back to Notes option is for rolling back if needed.
7.4 Migrating Mail-in Databases
-
Go to Migration Profiles under the Configuration view in the Navigation Pane; create a profile to migrate the mail in databases to Exchange migrations or a .pst file and save it
-
Navigate back to the Mail In Database Migration | Migration | Set Migration Profile view in the Navigation Pane
-
Select the database and then click the Set CMT Migration Profile button
-
Select the migration profile you created to migrate the mail in databases to a .pst file in the Select Migration Settings dialog box, and click OK.
-
Click the Migrate view in the Navigation Pane
Select the database and then click Migrate Mail-In Database.
-
From the Select Migration Priority dialog box, select a priority and click OK:
-
Depending on the size of the data being migrated, the transfer may take few minutes to several minutes
-
The Refresh Migration Status button allows you to refresh the status of the selected mail-in databases
If the Audit Exchange Migrated Data option is enabled in the Settings, an Audit Migrated Data button will appear.
This agent audits the Exchange mailbox post-migration and creates a CSV file in the C:\Program Files\Binary Tree\CMT for Exchange\Logs directory of the workstation used to initiate the audit.
The CSV file has the following format:
Column A - UNID
Column B - NoteID
Column C - Migration Status (0=Unknown Result Status, 1=Successful, 2= Partially Migrated - Encrypted Body, unable to migrate attachment, but part of the message was converted and is available in Outlook)
Column D - Message Subject
The last line of the CSV file states “Audit Completed” when the agent completes. Contact and Group migrations are not included in the audit. Child documents that are integrated with the parent documents are not be listed in the CSV file.