
Set Migration Workstation
The following results are returned to the migration controller server for the overall migration status of all items:
-
Migrated Successfully – Completed processing all items, no problems during initialization, no critical errors encountered. There may be non-critical Warnings, Errors or failures during individual document processing, but these do not stop the migration. The migration will still be considered successful even if there are document warnings or errors.
-
Migration Failed – Critical errors/failures encountered that prevent the migration from continuing/completing. This status is typically caused by network/server connectivity problems.
-
Terminated Abnormally – This status is set by the migration worker when CMTProxy.exe (migration engine) crashes; this is typically caused by corrupt source data, a Notes client crash or Exchange terminating the migration connection
-
Failed to Initialize – Incorrect/Incompatible configuration settings, missing configuration or reference files, failure to connect to source or destination servers, and so on. No data is migrated
-
Migration cancelled – Manual cancellation of the migration the user
-
Not Queued: Migration history is pending update – The migration was not started due to the history of a previous migration not being updated
-
Migration failed: Exchange is not available – The migration failed because Exchange was not available
-
Nothing in Source File – The source mailfile is able to open but does not contain any data
-
Source Database Not Initialized – The source mailfile fails to open with “Database Not Initialized”
-
AutoDiscover Failure – The Target mailbox fails to connect with Autodiscover
-
No License – The migration was not processed as there were no available licenses to apply to the entry.
|
|
|
|
|
|

Set Migration Status
To manually update the status of migrated items, follow the steps below.
-
Expand the Migration | Advanced view; select rooms and resources in the Data Pane
-
At the top menu, click Actions | Other; the Run Agent dialog box will open
-
Select Set Migration Status and click Run:
-
From the Set Migration Status dialog box, then, for example, select Ready to Process and click OK:
-
A status message box displays showing that the migration status will be changed for the selected rooms; click Yes to confirm
Notice that the selected rooms and resources are now listed under the applied status:


Set Migration Group
-
At the top menu, click Actions | Other; the Run Agent dialog box will open
-
Select Set Migration Group in the dialog box and click Run:
-
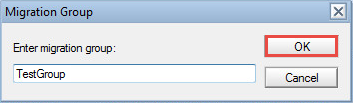
Specify the migration group name in the Migration Group dialog box and click OK:

-
A status message box displays showing that the migration group will be changed for the selected rooms; click Yes to confirm
Notice that the selected rooms and resources are now listed under the applied status:

-
At the top menu, click Actions | Other; the Run Agent dialog box will open
-
Select Set Migration Workstation in the dialog box and click Run:

-
From the Set Migration Workstation dialog box, select a workstation on which to run the selected users’ migrations, and then click OK:
-
A confirmation box appears; click Yes to confirm that you want the selected migration workstation to be set for selected rooms and resources
-
A status message box displays showing that the migration workstation will be set for the selected rooms; click Yes to confirm
Notice that the selected rooms and resources are now listed under the applied status

Clear Migration Status
-
In the same way, you can clear set migration status, migration group, and migration workstation by selecting appropriate options; if you do not set the migration workstation manually, Migrator for Notes will automatically farm the migration job out to the next available worker in the migration farm
-
Select the rooms and the resources, then click the Additional Actions button to display its drop-down menu options:
The drop-down menu options are as follows:

|
Option |
Description |
|
Clear Selected DB(s) and re-populate |
Selected room or resource will be cleared and then repopulated to import the updated information |
|
Delete Selected DB(s) |
Selected room or resource will be deleted from the Migrator for Notes database as well as the database into which the rooms or resources schedule was exported |
-
After you have performed all the pre-migration actions on the rooms and resources, go back to the Migrate view
-
Select all the rooms and resources you wish to migrate then click the Migrate Rooms & Resources button in the Data Pane toolbar
-
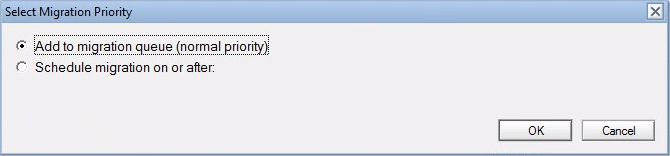
The Select Migration Priority dialog box appears; click OK to trigger the migration:
Depending on the size of the data being migrated, the transfer may take from few minutes to several minutes
-
The Refresh Migration Status button allows you to refresh the status of the selected rooms and resources
Set Migration MCC
In some cases, you have the option to set the Migration MCC. Refer to the chart below for a description of these MCC options:
|
|
|
Option |
Description |
|
Set Migration MCC |
Appears only if multiple Migration Control Centers (MCCs) are enabled on the Migrator for Notes Settings | Other Settings | Enable Advanced Features
Allows you to manually assign a Migration Control Centers (MCC) to process an item’s data |
|
Clear Migration MCC |
Appears only if multiple Migration Control Centers (MCCs) are enabled; Allows you to clear the Migration MCC assigned to item(s) |
Clear Migration Status
The following results are returned to the migration controller server for the overall migration status of all items:
-
Migrated Successfully – Completed processing all items, no problems during initialization, no critical errors encountered. There may be non-critical Warnings, Errors or failures during individual document processing, but these do not stop the migration. The migration will still be considered successful even if there are document warnings or errors.
-
Migration Failed – Critical errors/failures encountered that prevent the migration from continuing/completing. This status is typically caused by network/server connectivity problems.
-
Terminated Abnormally – This status is set by the migration worker when CMTProxy.exe (migration engine) crashes; this is typically caused by corrupt source data, a Notes client crash or Exchange terminating the migration connection
-
Failed to Initialize – Incorrect/Incompatible configuration settings, missing configuration or reference files, failure to connect to source or destination servers, and so on. No data is migrated
-
Migration cancelled – Manual cancellation of the migration the user
-
Not Queued: Migration history is pending update – The migration was not started due to the history of a previous migration not being updated
-
Migration failed: Exchange is not available – The migration failed because Exchange was not available
-
Nothing in Source File – The source mailfile is able to open but does not contain any data
-
Source Database Not Initialized – The source mailfile fails to open with “Database Not Initialized”
-
AutoDiscover Failure – The Target mailbox fails to connect with Autodiscover
-
No License – The migration was not processed as there were no available licenses to apply to the entry.
|
|
|
|
|
|
Set Migration Status
To manually update the status of migrated items, follow the steps below.
-
Expand the Migration | Advanced view; select rooms and resources in the Data Pane
-
At the top menu, click Actions | Other; the Run Agent dialog box will open
-
Select Set Migration Status and click Run:
-
From the Set Migration Status dialog box, then, for example, select Ready to Process and click OK:
-
A status message box displays showing that the migration status will be changed for the selected rooms; click Yes to confirm
Notice that the selected rooms and resources are now listed under the applied status:
Set Migration Group
-
At the top menu, click Actions | Other; the Run Agent dialog box will open
-
Select Set Migration Group in the dialog box and click Run:
-
Specify the migration group name in the Migration Group dialog box and click OK:
-
A status message box displays showing that the migration group will be changed for the selected rooms; click Yes to confirm
Notice that the selected rooms and resources are now listed under the applied status:
Set Migration Workstation
-
At the top menu, click Actions | Other; the Run Agent dialog box will open
-
Select Set Migration Workstation in the dialog box and click Run:
-
From the Set Migration Workstation dialog box, select a workstation on which to run the selected users’ migrations, and then click OK:
-
A confirmation box appears; click Yes to confirm that you want the selected migration workstation to be set for selected rooms and resources
-
A status message box displays showing that the migration workstation will be set for the selected rooms; click Yes to confirm
Notice that the selected rooms and resources are now listed under the applied status
-
In the same way, you can clear set migration status, migration group, and migration workstation by selecting appropriate options; if you do not set the migration workstation manually, Migrator for Notes will automatically farm the migration job out to the next available worker in the migration farm
-
Select the rooms and the resources, then click the Additional Actions button to display its drop-down menu options:
The drop-down menu options are as follows:
|
Option |
Description |
|
Clear Selected DB(s) and re-populate |
Selected room or resource will be cleared and then repopulated to import the updated information |
|
Delete Selected DB(s) |
Selected room or resource will be deleted from the Migrator for Notes database as well as the database into which the rooms or resources schedule was exported |
-
After you have performed all the pre-migration actions on the rooms and resources, go back to the Migrate view
-
Select all the rooms and resources you wish to migrate then click the Migrate Rooms & Resources button in the Data Pane toolbar
-
The Select Migration Priority dialog box appears; click OK to trigger the migration:
Depending on the size of the data being migrated, the transfer may take from few minutes to several minutes
-
The Refresh Migration Status button allows you to refresh the status of the selected rooms and resources
Set Migration MCC
In some cases, you have the option to set the Migration MCC. Refer to the chart below for a description of these MCC options:
|
|
|
Option |
Description |
|
Set Migration MCC |
Appears only if multiple Migration Control Centers (MCCs) are enabled on the Migrator for Notes Settings | Other Settings | Enable Advanced Features
Allows you to manually assign a Migration Control Centers (MCC) to process an item’s data |
|
Clear Migration MCC |
Appears only if multiple Migration Control Centers (MCCs) are enabled; Allows you to clear the Migration MCC assigned to item(s) |
Set Migration MCC
The following results are returned to the migration controller server for the overall migration status of all items:
-
Migrated Successfully – Completed processing all items, no problems during initialization, no critical errors encountered. There may be non-critical Warnings, Errors or failures during individual document processing, but these do not stop the migration. The migration will still be considered successful even if there are document warnings or errors.
-
Migration Failed – Critical errors/failures encountered that prevent the migration from continuing/completing. This status is typically caused by network/server connectivity problems.
-
Terminated Abnormally – This status is set by the migration worker when CMTProxy.exe (migration engine) crashes; this is typically caused by corrupt source data, a Notes client crash or Exchange terminating the migration connection
-
Failed to Initialize – Incorrect/Incompatible configuration settings, missing configuration or reference files, failure to connect to source or destination servers, and so on. No data is migrated
-
Migration cancelled – Manual cancellation of the migration the user
-
Not Queued: Migration history is pending update – The migration was not started due to the history of a previous migration not being updated
-
Migration failed: Exchange is not available – The migration failed because Exchange was not available
-
Nothing in Source File – The source mailfile is able to open but does not contain any data
-
Source Database Not Initialized – The source mailfile fails to open with “Database Not Initialized”
-
AutoDiscover Failure – The Target mailbox fails to connect with Autodiscover
-
No License – The migration was not processed as there were no available licenses to apply to the entry.
|
|
|
|
|
|
Set Migration Status
To manually update the status of migrated items, follow the steps below.
-
Expand the Migration | Advanced view; select rooms and resources in the Data Pane
-
At the top menu, click Actions | Other; the Run Agent dialog box will open
-
Select Set Migration Status and click Run:
-
From the Set Migration Status dialog box, then, for example, select Ready to Process and click OK:
-
A status message box displays showing that the migration status will be changed for the selected rooms; click Yes to confirm
Notice that the selected rooms and resources are now listed under the applied status:
Set Migration Group
-
At the top menu, click Actions | Other; the Run Agent dialog box will open
-
Select Set Migration Group in the dialog box and click Run:
-
Specify the migration group name in the Migration Group dialog box and click OK:
-
A status message box displays showing that the migration group will be changed for the selected rooms; click Yes to confirm
Notice that the selected rooms and resources are now listed under the applied status:
Set Migration Workstation
-
At the top menu, click Actions | Other; the Run Agent dialog box will open
-
Select Set Migration Workstation in the dialog box and click Run:
-
From the Set Migration Workstation dialog box, select a workstation on which to run the selected users’ migrations, and then click OK:
-
A confirmation box appears; click Yes to confirm that you want the selected migration workstation to be set for selected rooms and resources
-
A status message box displays showing that the migration workstation will be set for the selected rooms; click Yes to confirm
Notice that the selected rooms and resources are now listed under the applied status
Clear Migration Status
-
In the same way, you can clear set migration status, migration group, and migration workstation by selecting appropriate options; if you do not set the migration workstation manually, Migrator for Notes will automatically farm the migration job out to the next available worker in the migration farm
-
Select the rooms and the resources, then click the Additional Actions button to display its drop-down menu options:
The drop-down menu options are as follows:
|
Option |
Description |
|
Clear Selected DB(s) and re-populate |
Selected room or resource will be cleared and then repopulated to import the updated information |
|
Delete Selected DB(s) |
Selected room or resource will be deleted from the Migrator for Notes database as well as the database into which the rooms or resources schedule was exported |
-
After you have performed all the pre-migration actions on the rooms and resources, go back to the Migrate view
-
Select all the rooms and resources you wish to migrate then click the Migrate Rooms & Resources button in the Data Pane toolbar
-
The Select Migration Priority dialog box appears; click OK to trigger the migration:
Depending on the size of the data being migrated, the transfer may take from few minutes to several minutes
-
The Refresh Migration Status button allows you to refresh the status of the selected rooms and resources
In some cases, you have the option to set the Migration MCC. Refer to the chart below for a description of these MCC options:
|
|
|
Option |
Description |
|
Set Migration MCC |
Appears only if multiple Migration Control Centers (MCCs) are enabled on the Migrator for Notes Settings | Other Settings | Enable Advanced Features
Allows you to manually assign a Migration Control Centers (MCC) to process an item’s data |
|
Clear Migration MCC |
Appears only if multiple Migration Control Centers (MCCs) are enabled; Allows you to clear the Migration MCC assigned to item(s) |
Appendix F: Recovery Process
The Migrator for Notes migration engine has been enhanced to track the status of processed messages during migration to help recover failed migrations.
If a critical failure occurs in the migration engine, the migration process can terminate unexpectedly. The user status must be reported in Notes Migrator.nsf as “Migration terminated abnormally.” After correcting the cause of the failure, the new recovery feature allows Migrator for Notes users to restart migrating to an Exchange mail store or to a PST file from the point of crash. It prevents the application from reprocessing messages that were migrated during the initial run of the migration and moves to the next message in the message store without attempting to reprocess the message that caused the failure.
In addition, this feature also allows Migrator for Notes users to restart the migration on a secondary workstation if the first workstation is now busy after the original failed status.
In cases where a failure is caused by API errors processing the data, from Notes using the HCL Notes API or into Outlook using the MAPI API, the source document reference (UNID) will be marked in the migration history as a bad document. These types of faults are typically caused by memory exception errors as a result of source data that the vendor's API cannot process.
Subsequent migrations will skip processing (not migrate) a source document that caused a memory exception error where the migration worker was able to obtain the document UNID.
This section outlines the common reasons for a failed migration and recovery processes for each possible scenario and provides a background to the implementation and usage of this new feature.