
Migrating Encrypted Items
4.11. Configuring Other Settings
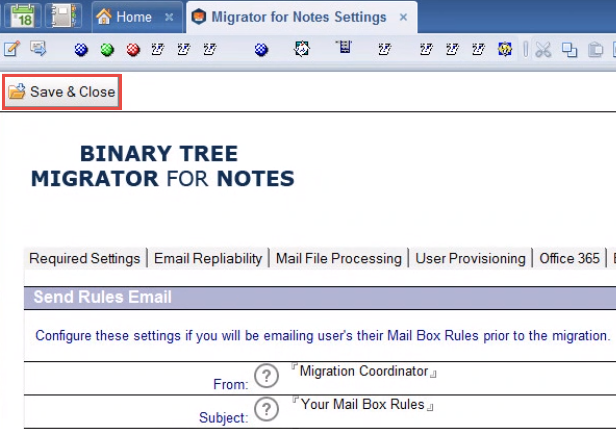
Click the Other Settings tab to configure settings to control how encrypted items are handled or mail rules found in the user mail file. In this tab, the Migration Checklist and Advanced settings can also be configured:


The following table describes the values for each setting:
|
Settings |
Description |
|---|---|
|
Send Rules Email |
Configure these settings if you will be sending users their mailbox rules before migration. |
|
From |
Contains the profile name that will send the mail regarding mailbox rules to users. Migration Coordinator is specified as default. |
|
Subject |
Contains a subject that briefly describes the purpose of the mail. Your Mail Box Rules is specified as the subject by default. |
|
Body |
Can contain any information that you may want to share with the end user about this procedure. |
|
Rules to Include |
Includes all rules or only the rules that are enabled. Select All Rules. |
|
Encrypted Items Migration |
Choose how to migrate encrypted messages. Valid options are:
Note: Enabling the Migrate into a Notes database as an attachment option will increase the size of each migrated item containing encrypted content. The Lotus Notes client, original Notes ID, and decryption keys are required on the workstation used to view the encrypted content of the migrated items. |
|
Send Encrypted Items Summary Email |
Configure these settings if you will be emailing users a summary of their encrypted items. The fields in this section display only when Require decryption action and migrate into the body option is selected. |
|
From |
Contains the profile name that will send users the mail with a summary of encrypted items. Migration Coordinator is specified as default. |
|
Subject |
Contains a subject that briefly describes the purpose of the mail. Your Encrypted Items is specified as the subject by default. |
|
Body |
Can contain any information that you may want to share with the end user about this procedure. |
|
Template Name (.ntf) |
This appears if you have selected Migrate into a Notes database as an attachment. Specify the template name in this format: filename.ntf
EncryptedContent.ntf is the default template that ships with Migrator for Notes. This template will be installed on every migration workstation during the product installation. This template will need to be signed with the appropriate Lotus Notes Administrative ID on all workstations.
You can use any database template; however, you will need to manually distribute the template to all migration workstations.
Binary Tree recommends that use of an alternative template or any changes to EncryptedContent.ntf be thoroughly validated prior to production use. |
|
Attachment name in Exchange |
This field displays only when the Migrate into a Notes database as an attachment option is selected. Specify the database name in this format: filename.nsf |
|
Text included with attachment |
This field displays only when the Migrate into a Notes database as an attachment option is selected. Customized text can be added to the migrated item to provide end-user instructions or information. The default text is as follows:
Portions of this document were encrypted with Lotus Notes encryption. This content has been stored in the attached Lotus Notes database during migration to preserve security. You may view this content by opening the attached file on a workstation that has a Lotus Notes Client and the recipient’s Notes ID. |
|
Migration Checklist |
The Migration Checklist is a personalized list of tasks which can be used to help manage the migration project. Determine, then classify or group the major steps you consider necessary to manage your migration project. Determine the sequence, timeline, and description for each migration task and enter them into the Migration Checklist. |
|
Enable Recovery |
This setting defines the default value for the Enable Recovery setting in the migration profiles’ Advanced tab.
If the Enable Recovery setting is set to Yes in the Advanced tab of a migration profile, it enables tracking of processed messages during migration. So, if the migration process terminates unexpectedly, this feature prevents the application from reprocessing messages that were migrated during the initial run of the migration. Click here to learn more about configuring the Enable Recovery setting. |
|
Disable MIME Cache |
Specify Yes to disable the local cache database when processing messages using MIME. Disabling this feature significantly impacts throughput when migrating MIME content from a Domino server. |
|
MAPI Custom Settings |
Select Specify advanced MAPI parameters to override the default values for MAPI retry count and MAPI retry delay. When configured, retries are attempted when the MAPI_E_NETWORK_ERROR (0x80040115) result code is encountered during any of the following MAPI calls:
If the configured retry limit is exceeded, the migration is cancelled and Migrator for Notes will begin the migration of the next user. If the migration is canceled in the middle of writing a document, the document will be partially written to Exchange. The default retry limit is set to 30 seconds.
Specify the Number of retries that will be attempted when the MAPI_E_NETWORK_ERROR (0x80040115) result code is encountered. Values ranging from 1 to 999 can be entered. The default number of retries is “9”. Note that entering “0” results in the default “9” retries being used.
Specify the Delay between retries in seconds between MAPI calls. The time is progressive. The number of seconds delay for a call is (retry # * delay). For example, if the retry delay is set to 1 second, and the retry count is 5, the delays between calls will be 1, 2, 3, 4, and 5 (progressively longer). If the retry delay is 1.5 seconds, the times will be 1.5, 3.0, 4.5, 6, and 7.5. Values ranging from 1 to 999 can be entered. The default delay is “1” second. Note that entering “0” results in the default delay “1” second being used. |
|
MAPI Retry Failure Limit |
When enabled, Migrator for Notes tracks documents where one or more MAPI calls could not be completed successfully. If the number of documents where one or more MAPI calls cannot be committed to Exchange, the migration will exit with ‘migration failed’ status.
The document retry failure limit feature can be disabled by setting the value to ‘0’ or leaving it blank.
MAPI Retry Migrator for Notes makes multiple MAPI calls when migrating a document, such as creating the message header, writing the body, adding attachments, etc. When processing messages, the remote Exchange server may become unresponsive in such a way that MAPI calls to write data do not complete. The call is retried a number of times (using the preexisting feature known as MAPI Retry: the maximum number and delay between retries can be set in EMM) to fully migrate data to Exchange.
If any of the MAPI calls cannot be completed, the document will be considered as failed due to MAPI retries, and added to the total of failed documents. Document information is logged, the NoteID is removed from both the in-memory migration history, and the CMTProcessedNoteID-[shortname].txt crash recovery file.
Note that other types of failures, such as a corrupt message body which results in a failure, are not counted toward the MAPI retry failure total. These other types of failures are specific to the source data, whereas the MAPI retry failures are related to the ability to write to exchange.
If the number of documents with MAPI retry errors exceeds the failure limit, the migration will exit, and return ‘Migration failed’ status. This migration will not automatically requeue and must be requeued by the migration administrator to fully migrate the mailbox. When a migration is requeued, it may be migrated by any workstation. Any documents containing MAPI retry errors on the failed migration will be remigrated during subsequent migrations.
If the migration terminates abnormally (crashes), the document being migrated when the crash occurs will not be retried, which is standard procedure for crash recovery in Migrator for Notes. Any other documents containing MAPI Retry Exceeded will be remigrated. In this case, Migrator for Notes will automatically restart the migration on the same workstation. |
|
Process attachments greater than |
The limit for the size attachments, in MB, that will be detached and processed as file attachment objects. A value of -1 disables this feature, and processes all attachments as MIME streams, similar to Migrator for Notes versions 4.6 and earlier. A value of 0 will process all attachments as file attachments. The default value is 0 MB to process all attachments outside the MIME Stream. |
|
Encapsulate special content |
When enabled, documents containing special notes functionality or items such as button or stored forms will be migrated as an attachment in addition to being rendered in the message body. End users can then open the NotesMessage.nsf attachment to use the native functionality of the form. |
|
Migrate documents as private |
When set to ‘Yes’, the migration will migrate documents designated as private in Notes as Private in Exchange. This will also include messages decrypted in Notes prior to migration. |
|
Process Sametime history as |
Controls how Sametime message transcripts will be processed. Rich Text (Recommended) – Content will be processed as Rich Text Format and does not require preprocessing. MIME (requires preprocessing) – Content will be processed as MIME. This results in a better representation after migration, but requires processing each file before migration. |
|
Convert UNC paths to links |
Specify No if you do not wish the body of the documents searched for UNC (Exchange Naming Convention) links during migration. If you specify Yes, CMT attempts to convert UNC links into actionable links. |
|
Add category to calendar events |
Field in Exchange. For example, if you specify Migrated with Migrator for Notes in the field, then all the calendar events, such as meetings and appointments, will display this phrase in the categories field after they are migrated. It enables you to visually differentiate calendar events that were migrated into Outlook from those created natively in Outlook before or after the migration. This setting is optional.
Note: Any categories that are in the original Notes calendar event will also display in the categories field. |
|
Process meeting with no end date using ICAL information |
Specify Yes to use the ICAL recurrence information to determine the repeat pattern when processing repeat calendar meetings with no end date.
Specify No to process repeat meetings with no end date without using ICAL recurrence information.
Note: When migrating a meeting with No End Date and this option is set to No, the meeting is migrated but limited to 250 occurrences. |
|
Enable Advanced features |
Select Yes to enable features used when migrating large environments or to cloud based services. |
|
Enable Hosted features |
Appears if Advanced features are enabled. Select Yes to enable features used when migrating hosted environments. This setting should only be enabled under the direction of Advanced Support. |
|
Enable multiple Control Centers |
Appears if Advanced features are enabled. Select Yes to enable features used when migrating with multiple Migration Control Center (MCCs). This setting should only be enabled under the direction of Advanced Support. |
Sending Mail Box Rules
Migrator for Notes allows you to send users their Mail Box Rules before migration occurs. You can define the From, Subject, text in the body, and which rules to include in the email sent to users.
Migrator for Notes offers two solutions for migrated items that have been encrypted via Lotus Notes. The data may be decrypted as part of the pre-migration process, or the encrypted content may be attached to the migrated message in a Lotus Notes database during migration.
When the Require decryption action and migrate into the body option is selected, additional fields will be visible in the Send Encrypted Items Summary Email section to configure the From, Subject and text in the body of the summary email sent to end users. If you select Migrate into a Notes database as an attachment option is selected, you will see new fields for the Template name, the Attachment name in Exchange and Text included with attachment.
Creating a Migration Checklist
-
Click the Migration Checklist button to enter the steps, timelines, and tasks in the Migration Checklist Profile to use for your customized Migration Checklists:

-
Starting with Step 1, click the down arrow button in the Timeline column.

-
The Select Keywords dialog box is displayed. Select one of the provided keywords or enter a new one in the New Keyword field at the bottom of the dialog box and click OK to continue:
|
|
If the predefined keywords do not appropriately describe your timeline, you can specify a new keyword in the New Keyword field. |


-
Enter a description in the Task column and click Save & Close to complete:

-
If you exit the document without saving, the following dialog box is displayed. Select Yes to save the Migration Checklist. If No is selected all new entries are discarded:

-
After all the settings have been configured, click Save & Close to save all the configuration settings.
Enabling Recovery
As stated earlier, the Enable Recovery setting in the Other Settings tab defines the default value for the Enable Recovery setting (found under the Advanced tab) in the existing migration profiles as well as the new profiles you may create.
By default, it is set to Yes, so in all the existing migration profiles and the new ones you create, the Enable Recovery setting will also be set to Yes. However, if you were to change this setting to No in the Other Settings tab, and save the changed configuration settings, the following prompt will display.

If you click Yes in this dialog box, the Enable Recovery setting in all the existing migration profiles will change to No, and any new migration profile created will also have No as the default value in this field.
But if you click No in this dialog box, the Enable Recovery setting in all the existing migration profiles will remain Yes (the prior setting), however, when you create a new migration profile now, the Enable Recovery setting will be set to a default No.
|
|
It is recommended that you review the description provided for the Enable Recovery setting in the Advanced tab of migration profiles (Section 6.6) for a complete understanding of how this setting works. |
Creating a Migration Checklist
4.11. Configuring Other Settings
Click the Other Settings tab to configure settings to control how encrypted items are handled or mail rules found in the user mail file. In this tab, the Migration Checklist and Advanced settings can also be configured:
The following table describes the values for each setting:
|
Settings |
Description |
|---|---|
|
Send Rules Email |
Configure these settings if you will be sending users their mailbox rules before migration. |
|
From |
Contains the profile name that will send the mail regarding mailbox rules to users. Migration Coordinator is specified as default. |
|
Subject |
Contains a subject that briefly describes the purpose of the mail. Your Mail Box Rules is specified as the subject by default. |
|
Body |
Can contain any information that you may want to share with the end user about this procedure. |
|
Rules to Include |
Includes all rules or only the rules that are enabled. Select All Rules. |
|
Encrypted Items Migration |
Choose how to migrate encrypted messages. Valid options are:
Note: Enabling the Migrate into a Notes database as an attachment option will increase the size of each migrated item containing encrypted content. The Lotus Notes client, original Notes ID, and decryption keys are required on the workstation used to view the encrypted content of the migrated items. |
|
Send Encrypted Items Summary Email |
Configure these settings if you will be emailing users a summary of their encrypted items. The fields in this section display only when Require decryption action and migrate into the body option is selected. |
|
From |
Contains the profile name that will send users the mail with a summary of encrypted items. Migration Coordinator is specified as default. |
|
Subject |
Contains a subject that briefly describes the purpose of the mail. Your Encrypted Items is specified as the subject by default. |
|
Body |
Can contain any information that you may want to share with the end user about this procedure. |
|
Template Name (.ntf) |
This appears if you have selected Migrate into a Notes database as an attachment. Specify the template name in this format: filename.ntf
EncryptedContent.ntf is the default template that ships with Migrator for Notes. This template will be installed on every migration workstation during the product installation. This template will need to be signed with the appropriate Lotus Notes Administrative ID on all workstations.
You can use any database template; however, you will need to manually distribute the template to all migration workstations.
Binary Tree recommends that use of an alternative template or any changes to EncryptedContent.ntf be thoroughly validated prior to production use. |
|
Attachment name in Exchange |
This field displays only when the Migrate into a Notes database as an attachment option is selected. Specify the database name in this format: filename.nsf |
|
Text included with attachment |
This field displays only when the Migrate into a Notes database as an attachment option is selected. Customized text can be added to the migrated item to provide end-user instructions or information. The default text is as follows:
Portions of this document were encrypted with Lotus Notes encryption. This content has been stored in the attached Lotus Notes database during migration to preserve security. You may view this content by opening the attached file on a workstation that has a Lotus Notes Client and the recipient’s Notes ID. |
|
Migration Checklist |
The Migration Checklist is a personalized list of tasks which can be used to help manage the migration project. Determine, then classify or group the major steps you consider necessary to manage your migration project. Determine the sequence, timeline, and description for each migration task and enter them into the Migration Checklist. |
|
Enable Recovery |
This setting defines the default value for the Enable Recovery setting in the migration profiles’ Advanced tab.
If the Enable Recovery setting is set to Yes in the Advanced tab of a migration profile, it enables tracking of processed messages during migration. So, if the migration process terminates unexpectedly, this feature prevents the application from reprocessing messages that were migrated during the initial run of the migration. Click here to learn more about configuring the Enable Recovery setting. |
|
Disable MIME Cache |
Specify Yes to disable the local cache database when processing messages using MIME. Disabling this feature significantly impacts throughput when migrating MIME content from a Domino server. |
|
MAPI Custom Settings |
Select Specify advanced MAPI parameters to override the default values for MAPI retry count and MAPI retry delay. When configured, retries are attempted when the MAPI_E_NETWORK_ERROR (0x80040115) result code is encountered during any of the following MAPI calls:
If the configured retry limit is exceeded, the migration is cancelled and Migrator for Notes will begin the migration of the next user. If the migration is canceled in the middle of writing a document, the document will be partially written to Exchange. The default retry limit is set to 30 seconds.
Specify the Number of retries that will be attempted when the MAPI_E_NETWORK_ERROR (0x80040115) result code is encountered. Values ranging from 1 to 999 can be entered. The default number of retries is “9”. Note that entering “0” results in the default “9” retries being used.
Specify the Delay between retries in seconds between MAPI calls. The time is progressive. The number of seconds delay for a call is (retry # * delay). For example, if the retry delay is set to 1 second, and the retry count is 5, the delays between calls will be 1, 2, 3, 4, and 5 (progressively longer). If the retry delay is 1.5 seconds, the times will be 1.5, 3.0, 4.5, 6, and 7.5. Values ranging from 1 to 999 can be entered. The default delay is “1” second. Note that entering “0” results in the default delay “1” second being used. |
|
MAPI Retry Failure Limit |
When enabled, Migrator for Notes tracks documents where one or more MAPI calls could not be completed successfully. If the number of documents where one or more MAPI calls cannot be committed to Exchange, the migration will exit with ‘migration failed’ status.
The document retry failure limit feature can be disabled by setting the value to ‘0’ or leaving it blank.
MAPI Retry Migrator for Notes makes multiple MAPI calls when migrating a document, such as creating the message header, writing the body, adding attachments, etc. When processing messages, the remote Exchange server may become unresponsive in such a way that MAPI calls to write data do not complete. The call is retried a number of times (using the preexisting feature known as MAPI Retry: the maximum number and delay between retries can be set in EMM) to fully migrate data to Exchange.
If any of the MAPI calls cannot be completed, the document will be considered as failed due to MAPI retries, and added to the total of failed documents. Document information is logged, the NoteID is removed from both the in-memory migration history, and the CMTProcessedNoteID-[shortname].txt crash recovery file.
Note that other types of failures, such as a corrupt message body which results in a failure, are not counted toward the MAPI retry failure total. These other types of failures are specific to the source data, whereas the MAPI retry failures are related to the ability to write to exchange.
If the number of documents with MAPI retry errors exceeds the failure limit, the migration will exit, and return ‘Migration failed’ status. This migration will not automatically requeue and must be requeued by the migration administrator to fully migrate the mailbox. When a migration is requeued, it may be migrated by any workstation. Any documents containing MAPI retry errors on the failed migration will be remigrated during subsequent migrations.
If the migration terminates abnormally (crashes), the document being migrated when the crash occurs will not be retried, which is standard procedure for crash recovery in Migrator for Notes. Any other documents containing MAPI Retry Exceeded will be remigrated. In this case, Migrator for Notes will automatically restart the migration on the same workstation. |
|
Process attachments greater than |
The limit for the size attachments, in MB, that will be detached and processed as file attachment objects. A value of -1 disables this feature, and processes all attachments as MIME streams, similar to Migrator for Notes versions 4.6 and earlier. A value of 0 will process all attachments as file attachments. The default value is 0 MB to process all attachments outside the MIME Stream. |
|
Encapsulate special content |
When enabled, documents containing special notes functionality or items such as button or stored forms will be migrated as an attachment in addition to being rendered in the message body. End users can then open the NotesMessage.nsf attachment to use the native functionality of the form. |
|
Migrate documents as private |
When set to ‘Yes’, the migration will migrate documents designated as private in Notes as Private in Exchange. This will also include messages decrypted in Notes prior to migration. |
|
Process Sametime history as |
Controls how Sametime message transcripts will be processed. Rich Text (Recommended) – Content will be processed as Rich Text Format and does not require preprocessing. MIME (requires preprocessing) – Content will be processed as MIME. This results in a better representation after migration, but requires processing each file before migration. |
|
Convert UNC paths to links |
Specify No if you do not wish the body of the documents searched for UNC (Exchange Naming Convention) links during migration. If you specify Yes, CMT attempts to convert UNC links into actionable links. |
|
Add category to calendar events |
Field in Exchange. For example, if you specify Migrated with Migrator for Notes in the field, then all the calendar events, such as meetings and appointments, will display this phrase in the categories field after they are migrated. It enables you to visually differentiate calendar events that were migrated into Outlook from those created natively in Outlook before or after the migration. This setting is optional.
Note: Any categories that are in the original Notes calendar event will also display in the categories field. |
|
Process meeting with no end date using ICAL information |
Specify Yes to use the ICAL recurrence information to determine the repeat pattern when processing repeat calendar meetings with no end date.
Specify No to process repeat meetings with no end date without using ICAL recurrence information.
Note: When migrating a meeting with No End Date and this option is set to No, the meeting is migrated but limited to 250 occurrences. |
|
Enable Advanced features |
Select Yes to enable features used when migrating large environments or to cloud based services. |
|
Enable Hosted features |
Appears if Advanced features are enabled. Select Yes to enable features used when migrating hosted environments. This setting should only be enabled under the direction of Advanced Support. |
|
Enable multiple Control Centers |
Appears if Advanced features are enabled. Select Yes to enable features used when migrating with multiple Migration Control Center (MCCs). This setting should only be enabled under the direction of Advanced Support. |
Sending Mail Box Rules
Migrator for Notes allows you to send users their Mail Box Rules before migration occurs. You can define the From, Subject, text in the body, and which rules to include in the email sent to users.
Migrating Encrypted Items
Migrator for Notes offers two solutions for migrated items that have been encrypted via Lotus Notes. The data may be decrypted as part of the pre-migration process, or the encrypted content may be attached to the migrated message in a Lotus Notes database during migration.
When the Require decryption action and migrate into the body option is selected, additional fields will be visible in the Send Encrypted Items Summary Email section to configure the From, Subject and text in the body of the summary email sent to end users. If you select Migrate into a Notes database as an attachment option is selected, you will see new fields for the Template name, the Attachment name in Exchange and Text included with attachment.
-
Click the Migration Checklist button to enter the steps, timelines, and tasks in the Migration Checklist Profile to use for your customized Migration Checklists:
-
Starting with Step 1, click the down arrow button in the Timeline column.
-
The Select Keywords dialog box is displayed. Select one of the provided keywords or enter a new one in the New Keyword field at the bottom of the dialog box and click OK to continue:
|
|
If the predefined keywords do not appropriately describe your timeline, you can specify a new keyword in the New Keyword field. |
-
Enter a description in the Task column and click Save & Close to complete:
-
If you exit the document without saving, the following dialog box is displayed. Select Yes to save the Migration Checklist. If No is selected all new entries are discarded:
-
After all the settings have been configured, click Save & Close to save all the configuration settings.
Enabling Recovery
As stated earlier, the Enable Recovery setting in the Other Settings tab defines the default value for the Enable Recovery setting (found under the Advanced tab) in the existing migration profiles as well as the new profiles you may create.
By default, it is set to Yes, so in all the existing migration profiles and the new ones you create, the Enable Recovery setting will also be set to Yes. However, if you were to change this setting to No in the Other Settings tab, and save the changed configuration settings, the following prompt will display.
If you click Yes in this dialog box, the Enable Recovery setting in all the existing migration profiles will change to No, and any new migration profile created will also have No as the default value in this field.
But if you click No in this dialog box, the Enable Recovery setting in all the existing migration profiles will remain Yes (the prior setting), however, when you create a new migration profile now, the Enable Recovery setting will be set to a default No.
|
|
It is recommended that you review the description provided for the Enable Recovery setting in the Advanced tab of migration profiles (Section 6.6) for a complete understanding of how this setting works. |
Enabling Recovery
4.11. Configuring Other Settings
Click the Other Settings tab to configure settings to control how encrypted items are handled or mail rules found in the user mail file. In this tab, the Migration Checklist and Advanced settings can also be configured:
The following table describes the values for each setting:
|
Settings |
Description |
|---|---|
|
Send Rules Email |
Configure these settings if you will be sending users their mailbox rules before migration. |
|
From |
Contains the profile name that will send the mail regarding mailbox rules to users. Migration Coordinator is specified as default. |
|
Subject |
Contains a subject that briefly describes the purpose of the mail. Your Mail Box Rules is specified as the subject by default. |
|
Body |
Can contain any information that you may want to share with the end user about this procedure. |
|
Rules to Include |
Includes all rules or only the rules that are enabled. Select All Rules. |
|
Encrypted Items Migration |
Choose how to migrate encrypted messages. Valid options are:
Note: Enabling the Migrate into a Notes database as an attachment option will increase the size of each migrated item containing encrypted content. The Lotus Notes client, original Notes ID, and decryption keys are required on the workstation used to view the encrypted content of the migrated items. |
|
Send Encrypted Items Summary Email |
Configure these settings if you will be emailing users a summary of their encrypted items. The fields in this section display only when Require decryption action and migrate into the body option is selected. |
|
From |
Contains the profile name that will send users the mail with a summary of encrypted items. Migration Coordinator is specified as default. |
|
Subject |
Contains a subject that briefly describes the purpose of the mail. Your Encrypted Items is specified as the subject by default. |
|
Body |
Can contain any information that you may want to share with the end user about this procedure. |
|
Template Name (.ntf) |
This appears if you have selected Migrate into a Notes database as an attachment. Specify the template name in this format: filename.ntf
EncryptedContent.ntf is the default template that ships with Migrator for Notes. This template will be installed on every migration workstation during the product installation. This template will need to be signed with the appropriate Lotus Notes Administrative ID on all workstations.
You can use any database template; however, you will need to manually distribute the template to all migration workstations.
Binary Tree recommends that use of an alternative template or any changes to EncryptedContent.ntf be thoroughly validated prior to production use. |
|
Attachment name in Exchange |
This field displays only when the Migrate into a Notes database as an attachment option is selected. Specify the database name in this format: filename.nsf |
|
Text included with attachment |
This field displays only when the Migrate into a Notes database as an attachment option is selected. Customized text can be added to the migrated item to provide end-user instructions or information. The default text is as follows:
Portions of this document were encrypted with Lotus Notes encryption. This content has been stored in the attached Lotus Notes database during migration to preserve security. You may view this content by opening the attached file on a workstation that has a Lotus Notes Client and the recipient’s Notes ID. |
|
Migration Checklist |
The Migration Checklist is a personalized list of tasks which can be used to help manage the migration project. Determine, then classify or group the major steps you consider necessary to manage your migration project. Determine the sequence, timeline, and description for each migration task and enter them into the Migration Checklist. |
|
Enable Recovery |
This setting defines the default value for the Enable Recovery setting in the migration profiles’ Advanced tab.
If the Enable Recovery setting is set to Yes in the Advanced tab of a migration profile, it enables tracking of processed messages during migration. So, if the migration process terminates unexpectedly, this feature prevents the application from reprocessing messages that were migrated during the initial run of the migration. Click here to learn more about configuring the Enable Recovery setting. |
|
Disable MIME Cache |
Specify Yes to disable the local cache database when processing messages using MIME. Disabling this feature significantly impacts throughput when migrating MIME content from a Domino server. |
|
MAPI Custom Settings |
Select Specify advanced MAPI parameters to override the default values for MAPI retry count and MAPI retry delay. When configured, retries are attempted when the MAPI_E_NETWORK_ERROR (0x80040115) result code is encountered during any of the following MAPI calls:
If the configured retry limit is exceeded, the migration is cancelled and Migrator for Notes will begin the migration of the next user. If the migration is canceled in the middle of writing a document, the document will be partially written to Exchange. The default retry limit is set to 30 seconds.
Specify the Number of retries that will be attempted when the MAPI_E_NETWORK_ERROR (0x80040115) result code is encountered. Values ranging from 1 to 999 can be entered. The default number of retries is “9”. Note that entering “0” results in the default “9” retries being used.
Specify the Delay between retries in seconds between MAPI calls. The time is progressive. The number of seconds delay for a call is (retry # * delay). For example, if the retry delay is set to 1 second, and the retry count is 5, the delays between calls will be 1, 2, 3, 4, and 5 (progressively longer). If the retry delay is 1.5 seconds, the times will be 1.5, 3.0, 4.5, 6, and 7.5. Values ranging from 1 to 999 can be entered. The default delay is “1” second. Note that entering “0” results in the default delay “1” second being used. |
|
MAPI Retry Failure Limit |
When enabled, Migrator for Notes tracks documents where one or more MAPI calls could not be completed successfully. If the number of documents where one or more MAPI calls cannot be committed to Exchange, the migration will exit with ‘migration failed’ status.
The document retry failure limit feature can be disabled by setting the value to ‘0’ or leaving it blank.
MAPI Retry Migrator for Notes makes multiple MAPI calls when migrating a document, such as creating the message header, writing the body, adding attachments, etc. When processing messages, the remote Exchange server may become unresponsive in such a way that MAPI calls to write data do not complete. The call is retried a number of times (using the preexisting feature known as MAPI Retry: the maximum number and delay between retries can be set in EMM) to fully migrate data to Exchange.
If any of the MAPI calls cannot be completed, the document will be considered as failed due to MAPI retries, and added to the total of failed documents. Document information is logged, the NoteID is removed from both the in-memory migration history, and the CMTProcessedNoteID-[shortname].txt crash recovery file.
Note that other types of failures, such as a corrupt message body which results in a failure, are not counted toward the MAPI retry failure total. These other types of failures are specific to the source data, whereas the MAPI retry failures are related to the ability to write to exchange.
If the number of documents with MAPI retry errors exceeds the failure limit, the migration will exit, and return ‘Migration failed’ status. This migration will not automatically requeue and must be requeued by the migration administrator to fully migrate the mailbox. When a migration is requeued, it may be migrated by any workstation. Any documents containing MAPI retry errors on the failed migration will be remigrated during subsequent migrations.
If the migration terminates abnormally (crashes), the document being migrated when the crash occurs will not be retried, which is standard procedure for crash recovery in Migrator for Notes. Any other documents containing MAPI Retry Exceeded will be remigrated. In this case, Migrator for Notes will automatically restart the migration on the same workstation. |
|
Process attachments greater than |
The limit for the size attachments, in MB, that will be detached and processed as file attachment objects. A value of -1 disables this feature, and processes all attachments as MIME streams, similar to Migrator for Notes versions 4.6 and earlier. A value of 0 will process all attachments as file attachments. The default value is 0 MB to process all attachments outside the MIME Stream. |
|
Encapsulate special content |
When enabled, documents containing special notes functionality or items such as button or stored forms will be migrated as an attachment in addition to being rendered in the message body. End users can then open the NotesMessage.nsf attachment to use the native functionality of the form. |
|
Migrate documents as private |
When set to ‘Yes’, the migration will migrate documents designated as private in Notes as Private in Exchange. This will also include messages decrypted in Notes prior to migration. |
|
Process Sametime history as |
Controls how Sametime message transcripts will be processed. Rich Text (Recommended) – Content will be processed as Rich Text Format and does not require preprocessing. MIME (requires preprocessing) – Content will be processed as MIME. This results in a better representation after migration, but requires processing each file before migration. |
|
Convert UNC paths to links |
Specify No if you do not wish the body of the documents searched for UNC (Exchange Naming Convention) links during migration. If you specify Yes, CMT attempts to convert UNC links into actionable links. |
|
Add category to calendar events |
Field in Exchange. For example, if you specify Migrated with Migrator for Notes in the field, then all the calendar events, such as meetings and appointments, will display this phrase in the categories field after they are migrated. It enables you to visually differentiate calendar events that were migrated into Outlook from those created natively in Outlook before or after the migration. This setting is optional.
Note: Any categories that are in the original Notes calendar event will also display in the categories field. |
|
Process meeting with no end date using ICAL information |
Specify Yes to use the ICAL recurrence information to determine the repeat pattern when processing repeat calendar meetings with no end date.
Specify No to process repeat meetings with no end date without using ICAL recurrence information.
Note: When migrating a meeting with No End Date and this option is set to No, the meeting is migrated but limited to 250 occurrences. |
|
Enable Advanced features |
Select Yes to enable features used when migrating large environments or to cloud based services. |
|
Enable Hosted features |
Appears if Advanced features are enabled. Select Yes to enable features used when migrating hosted environments. This setting should only be enabled under the direction of Advanced Support. |
|
Enable multiple Control Centers |
Appears if Advanced features are enabled. Select Yes to enable features used when migrating with multiple Migration Control Center (MCCs). This setting should only be enabled under the direction of Advanced Support. |
Sending Mail Box Rules
Migrator for Notes allows you to send users their Mail Box Rules before migration occurs. You can define the From, Subject, text in the body, and which rules to include in the email sent to users.
Migrating Encrypted Items
Migrator for Notes offers two solutions for migrated items that have been encrypted via Lotus Notes. The data may be decrypted as part of the pre-migration process, or the encrypted content may be attached to the migrated message in a Lotus Notes database during migration.
When the Require decryption action and migrate into the body option is selected, additional fields will be visible in the Send Encrypted Items Summary Email section to configure the From, Subject and text in the body of the summary email sent to end users. If you select Migrate into a Notes database as an attachment option is selected, you will see new fields for the Template name, the Attachment name in Exchange and Text included with attachment.
Creating a Migration Checklist
-
Click the Migration Checklist button to enter the steps, timelines, and tasks in the Migration Checklist Profile to use for your customized Migration Checklists:
-
Starting with Step 1, click the down arrow button in the Timeline column.
-
The Select Keywords dialog box is displayed. Select one of the provided keywords or enter a new one in the New Keyword field at the bottom of the dialog box and click OK to continue:
|
|
If the predefined keywords do not appropriately describe your timeline, you can specify a new keyword in the New Keyword field. |
-
Enter a description in the Task column and click Save & Close to complete:
-
If you exit the document without saving, the following dialog box is displayed. Select Yes to save the Migration Checklist. If No is selected all new entries are discarded:
-
After all the settings have been configured, click Save & Close to save all the configuration settings.
As stated earlier, the Enable Recovery setting in the Other Settings tab defines the default value for the Enable Recovery setting (found under the Advanced tab) in the existing migration profiles as well as the new profiles you may create.
By default, it is set to Yes, so in all the existing migration profiles and the new ones you create, the Enable Recovery setting will also be set to Yes. However, if you were to change this setting to No in the Other Settings tab, and save the changed configuration settings, the following prompt will display.
If you click Yes in this dialog box, the Enable Recovery setting in all the existing migration profiles will change to No, and any new migration profile created will also have No as the default value in this field.
But if you click No in this dialog box, the Enable Recovery setting in all the existing migration profiles will remain Yes (the prior setting), however, when you create a new migration profile now, the Enable Recovery setting will be set to a default No.
|
|
It is recommended that you review the description provided for the Enable Recovery setting in the Advanced tab of migration profiles (Section 6.6) for a complete understanding of how this setting works. |
4.11. Creating Migration Profiles
Migration Profiles define settings for certain groups of users. For instance, it may be desirable to have a profile where all executives have a filter that only migrates the last four years of mail and calendar to Exchange. Every user must have a Migration Profile set before migration can proceed.
Before you create a migration profile that contains filters to migrate specific user data, you must create a default migration profile. After the default profile has been saved, create migration profiles that will be used to migrate users. These profiles should have descriptive names, such as 90DayMailOnly or 4Years-Calendar-Mail.
Important! – The default migration profile does not have all values and should not be used for migrations. A new profile should be created to prevent problems with corrupting the backend database. This will help avoid problems during production migration.
-
Click Migrate Profiles in the Navigation Pane:

-
Click the Create New Profile button:
Each migration profile contains a source and destination setting that determines which mail items are migrated and if the migration is to a Microsoft Exchange server (including Office 365) or to a .pst file.
When a migration is carried out, a migration profile must be assigned to specify how the migration should be performed. You can create as many migration profiles as desired.

-
The Profile dialog box displays; the Source Options tab opens by default:

The following table describes the values for each setting:
|
Settings |
Description |
|---|---|
|
Message Types |
Specify the Migration Options. You can either select all message types or specify the types that you wish to be included in the migration (Mail, Calendar, Task, and Contact). |
|
Date Filter |
Specify a range of dates that will ensure that only the data that falls within the specified range is migrated.
The Date Filter will apply to all the selected message types. For example, if you select All message types, the specified date filter will apply to Mail, Calendar, Tasks, and Contacts. |
|
Migration Log Level |
By default, Migrator for Notes creates a log file for every user that is migrated. In this field, you specify the level of detail you want in the logs. There are three levels provided.
Selecting Verbose significantly increases the size of the log files that are created. This is only recommended for troubleshooting purposes. Log files are located in the Logs subdirectory where CMT Exchange is installed, usually C:\Program Files\Binary Tree\CMT for Exchange\Logs. |
|
Skip folders named |
Specify a list of folder names from your Domino mail files that you would like Migrator for Notes to bypass during the migration. This feature is useful if you have a customized mail template that may contain folders with non-messaging data. Specify folder names in the Skip folders named field. Separate entries by commas. |
|
Migrate empty folders |
Select to migrate empty folders in users’ mailboxes to Outlook. |
|
Migrating Sent Items |
In Lotus Notes, a mail message can exist in the Sent Items folder or in the Sent Items folder and a user-defined folder(s). In Outlook, a mail message can only exist in one or the other. This field provides two options.
|
|
Migrate Unfiled Documents |
This option determines if “unfiled” documents will be migrated. “Unfiled” documents are those documents in Notes which do not appear in any folder and can only be accessed from the ‘All Documents’ view within the mail file. Documents may be unfiled if a user deletes a folder without deleting the documents or removes a document from the only folder it resided within. |
|
Audit Notes UNIDs During Migration |
The migration worker will record an audit of the Notes source document UNID [unique identifier] for all items processed in a .csv file. This will be uploaded to the migration controller in the logs folder. |
|
Ignore Privacy Flag |
If set to ‘Yes’, this will not migrate any documents as private in Outlook. This will override the Settings | Other Settings option if that is set to ‘Yes’. This is typically useful for shared mailbox migrations. |
-
Click Destination Options:

The following table describes the values for each setting:
|
Settings |
Description |
|---|---|
|
Migrate to Exchange Server |
Select if you want the migrated data to go directly to the Exchange server or Office 365. |
|
Migrate to .PST file |
Select if you want the migrated data to go to a .pst file.
The PST Folder Path field is added to the form when this option is selected. |
|
PST Folder Path |
Specify the path where you want the .pst file(s) to be stored. This must be a Windows drive and folder or mapped drive on the migration workers. A Windows UNC path should not be used.
When migrating to a PST file, the file name format will be “<User’s SMTP Address>-Notes Database ID.pst”. |
|
Individual attachment size limit |
Specify a size limit in bytes to filter individual attachments. For example, if you specify 1000, each individual attachment that is greater than 1000 bytes in size will be filtered out during migration.
Maximum message size cannot exceed 125 MB. This field should be set to 131072000 to avoid memory errors during the migration. |
|
Attachment total size limit |
Specify the total size limit of all attachments in a document in bytes. For example, a value of 10000 would allow only a total of 10000 bytes for attachments migrated per message.
Maximum message size cannot exceed 150 MB. This field should be set to 157286400 to avoid memory errors during the migration. |
|
|
|
-
Next, click the Advanced tab
-
Check the Enable Advanced Options box:

Advanced options are now displayed in the dialog box; configure these settings:

The following table describes the values for each setting:
|
Settings |
Description |
|---|---|
|
Advanced Message Filtering Options |
Configure these settings if you wish to filter the messages based on their various age limits. |
|
Mail Age limit |
Specify the number of days from the migration date to filter the mail messages. For example, if you specify 30, the application will only migrate messages that were created 30 days prior to the migration date. |
|
Task Age limit |
Specify the number of days from the migration date to filter the tasks (To Do Lists). For example, if you specify 30, the application will only migrate tasks that were created 30 days prior to the migration date. |
|
Calendar Age limit |
Specify the number of days from the migration date to filter the calendar events. For example, if you specify 30, the application will only migrate calendar events that will occur in the 30 days prior to the migration date. |
|
Filter Repeating meetings |
By default, all repeating meetings are migrated. Repeating meetings are filtered based on the specified age limit criteria only when you check the Filter Repeating meetings checkbox.
It should be noted that in case of repeating meetings, the filter applies to the date of the parent-meeting document and does not filter the series. This means that if the parent meeting falls within the specified date range, the entire series is migrated and if the parent meeting falls outside the date range, the entire series is skipped. The dates of the meeting recurrences do not matter. |
|
Additional Options |
Configure these settings to improve the migration throughput. |
|
Enable Recovery
|
Specify Yes to enable the setting to track processed messages during migration. So, if the migration process terminates unexpectedly, this feature will prevent the application from reprocessing messages that were migrated during the initial run of the migration.
To disable this setting, specify No.
Refer to the Enable Recovery setting in the Configuring Other Settings section to understand how the default value for the Enable Recovery setting in the Advanced tab is determined. |
|
Process as RTF |
Specify Yes to override the default MIME processing and to process native Notes documents as Rich Text.
Note: Enabling this feature is not recommended. |
|
Disable MIME Cache |
Specify Yes to disable the local cache database when processing messages using MIME.
Disabling this feature significantly impacts throughput when migrating MIME content from a Domino server. |
|
Convert UNC paths to links |
Specify No if you do not wish the body of the documents searched for UNC (Exchange Naming Convention) links during migration.
If you specify Yes, CMT attempts to convert UNC links into actionable links. |
|
Add category to calendar events |
Specify a word or phrase in the field to add to the category field in Exchange. For example, if you specify Migrated with Migrator for Notes in the field, then all the calendar events, such as meetings and appointments, will display this phrase in the categories field after they are migrated. It enables you to visually differentiate calendar events that were migrated into Outlook from those created natively in Outlook before or after the migration. This setting is optional. |
|
Flush log to disk after |
Specify the number of log events (entries) after which you want CMT to close the log file and flush it to the disk.
Leave the field blank or specify 0 or 1 to log continuously until the migration completes.
Please note that all the logs are flushed to the disk after they close irrespective of the value specified in this field.
Note: The specified value in the field only forces CMT to update the log file after a specified number of entries (events). It may improve processing in certain environments but if CMTProxy terminates during a migration, you also run the risk of missing complete information in the log file. |
|
|
All the settings in the Advanced tab are pushed to the migration workstation performing the migration through the AdditionalSettings.xml file. If you haven’t changed the default Advanced settings, the .xml file is not used during a migration. |
-
A default name is specified in the Profile field. You must specify a descriptive name for the migration profile and do not use Default as the name.
-
Click OK to save the migration profile settings.
-
A confirmation box appears; click Yes to save these settings to the Migrator for Notes database:

-
A new profile by the name you specified in the Profile field is created. If you do not see it listed in the Data Pane immediately, you can refresh the Data Pane. Click the Refresh Profiles button.

To delete unused profiles, click the Delete Settings from migration server button. A profile cannot be removed if the profile has been used for end user migration.