
-
标题
How to create SQL Server database split backup files -
解决办法
Introduction
One of the main tasks for every database administrator is creating a reliable disaster recovery plan. The plan always includes multiple backup and restore operations. Usually, opting for conventional, single file backups should suffice, but in some cases, resources like disk space, backup time, or both could be the issue. This is usually the case when working with large databases.
In these situations, backups can be easily split into multiple files, and stored on multiple smaller hard drives, or even thumb drives. Backing up large databases by using conventional backups may take way too much time, and requires the vast amount of free hard disk space on a single drive. By using split backup method, one large backup file gets split into multiple smaller files of similar file size. The smaller split files are much easier to handle: they can be easily copied on media with smaller capacity or distributed across the network. These files could be stored on a single, or multiple drives. By writing database backups to multiple drives, the time needed for the backup process gets much shorter, since more than one thread gets involved in the process, and higher I/O is achieved. SQL Server 2008 and later even have built-in Database Backup Compression, that enables further size reduction for the backup files. However, there is one huge drawback for using the split backup files on multiple drives: if any of the drives fail, the entire set of backup files becomes useless.
There are a few ways to configure a backup process to create split backup files: by using T-SQL scripts, SQL Server Management Studio or ApexSQL Backup.
Creating split backup files with T-SQL script
The script for creating split backup files is very similar to script for conventional backups. The only difference is the destination path. Script for conventional backups contains only one backup path. The split backup script must have multiple paths defined: one path for each split backup file. In this case, 3 split backup files are created for a single database backup, and all of them are stored on different drives. Be sure to have all necessary read and write permissions on the drives used for backup and restore, and make all the necessary folders defined in the path.
BACKUP DATABASE AdventureWorks2014
TO DISK = 'C:\Backup\AdventureWorks2014/1.bak',
   DISK = 'D:\Backup\AdventureWorks2014/2.bak',
   DISK = 'E:\Backup\AdventureWorks2014/3.bak'
GO
The conventional backup for AdventureWorks2014 database takes approximately 195 MB of free space. It takes about 13 seconds to create conventional backup on my machine. When using the split backup query, three files of 65.5 MB are created, and the whole process lasts 7 seconds. The time needed to create the backup files is almost halved!
To restore the database from the split backup files, use the similar query:
RESTORE DATABASE [AdventureWorks2014]
FROM DISK = N'C:\Backup\AdventureWorks2014/1.bak',
     DISK = N'D:\Backup\AdventureWorks2014/2.bak',
     DISK = N'E:\Backup\AdventureWorks2014/3.bak'
GO
The restore process lasted 9 seconds for the split backup query, while using the conventional backup took 11 seconds.
Creating split backup files with SQL Server Management Studio
To create split backup files with SQL Server Management Studio, perform the following steps:
Open the Object Explorer, expand the Databases node, and right click on the database that needs to be backed up. From the dropdown menu select Tasks, and click on the Back up… option.
In the General tab, specify the database that is used for the backup and the backup type (full or differential). To specify multiple backup paths, click Add… button.
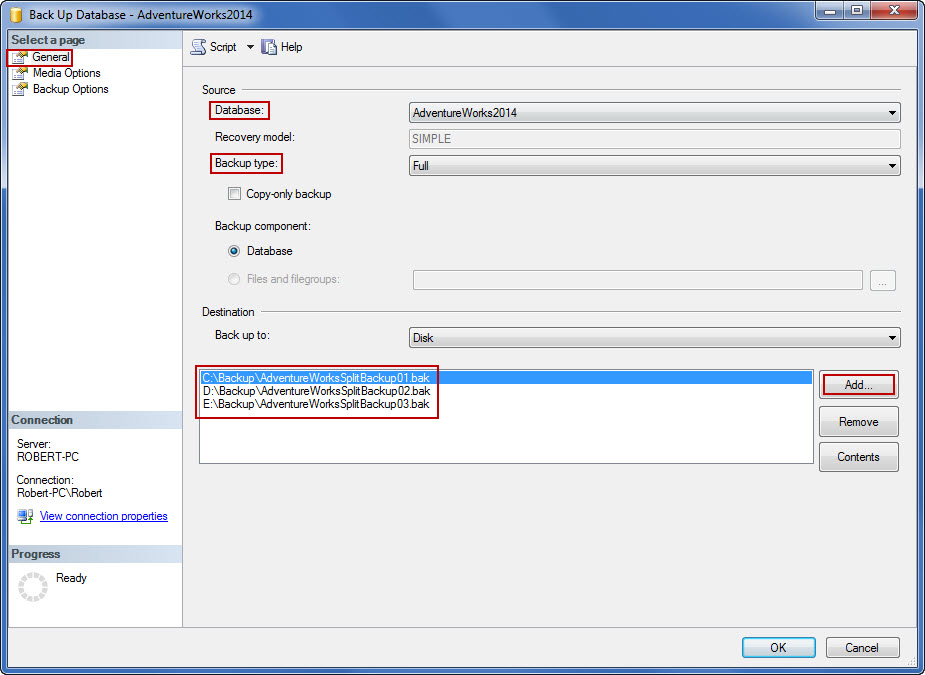
Set the backup destination by typing the path and the backup filename, or browse for the backup folder by using the browse button on the right. Click OK when done. Repeat the step until all destinations are set. The list of backup paths is displayed on the bottom of the page.

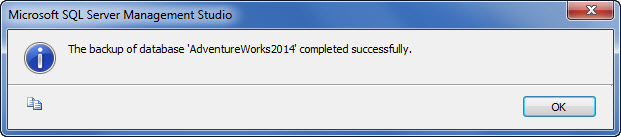
By clicking OK button on the lower right, the backup process starts. The success message is displayed when backup process completes.
To restore the database from split backup files with SQL Server Management Studio:
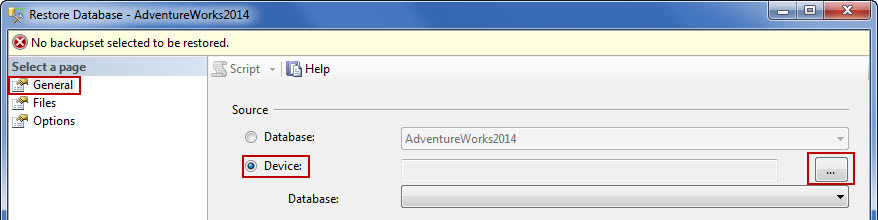
Open the object explorer, right click on Databases node, and select Restore Database…
In General tab, mark Device radio button, and browse for the backup files with browse button on the right.
In Select backup devices window, click Add.
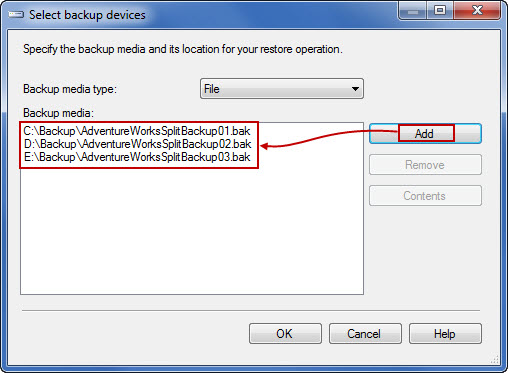
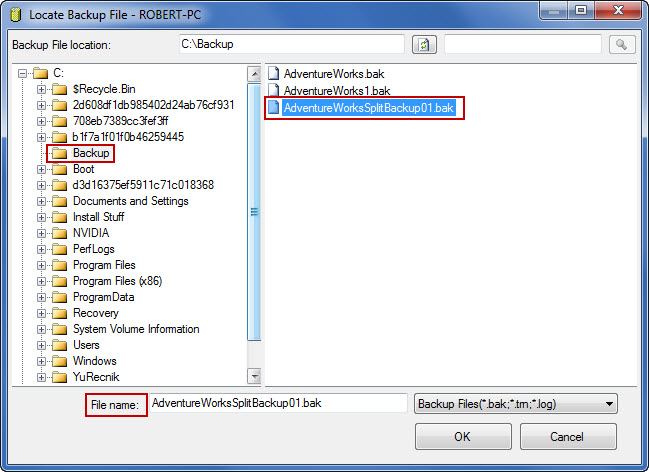
Browse for the backup files in the folder tree, or enter the backup path and file name manually. Click OK when done. Repeat the step until all of the backup files are listed, and click OK when finished.
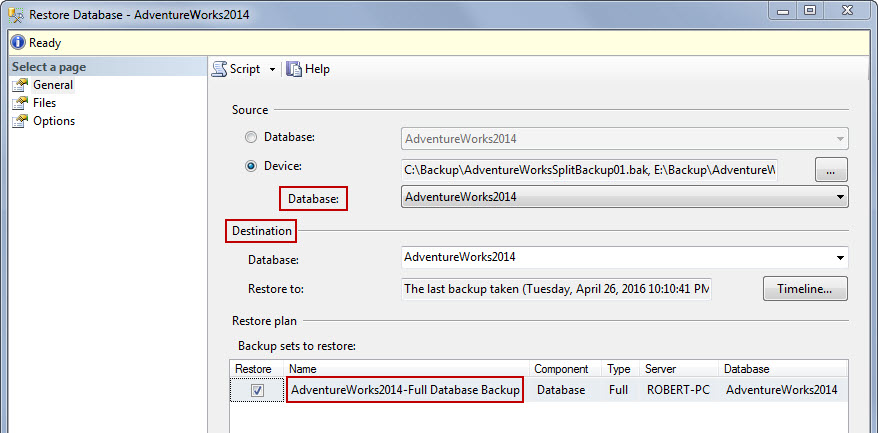
Program loads all file paths, and displays the name, type and the destination of the database that is about to be restored. To complete the restore process, click OK.
Creating split backup files with ApexSQL Backup
ApexSQL Backup is the simple, user friendly backup and restore manager. Among many other features, the application supports split backup files. The entire backup process is defined through a wizard-style setup, it can be saved as a policy or a schedule, and can be reused later. To create split backup files with Apex SQL Backup follow these steps:
Run the application and connect to the SQL Server instance(s) that need to be backed up.
In the Home Tab, click Backup button from the Tasks group. This will start the Backup wizard.

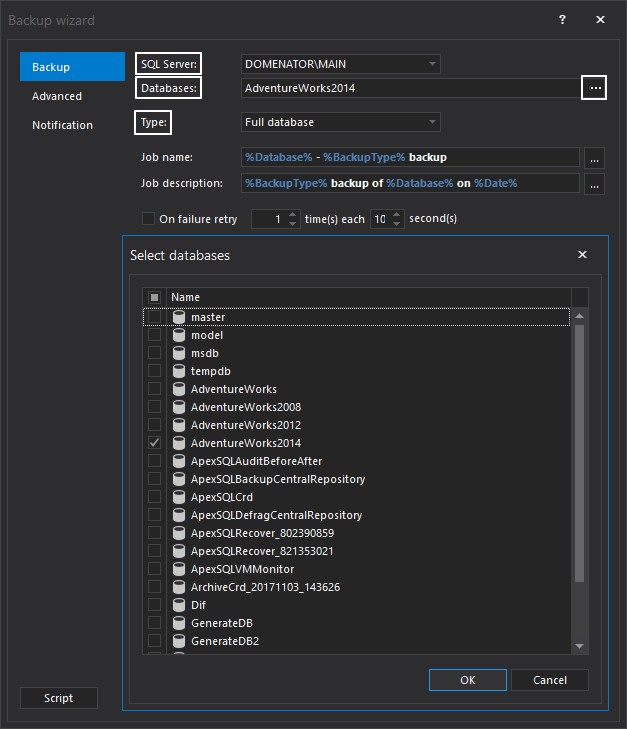
In Backup tab of the Backup wizard, choose the SQL Server instance from the drop down menu. To specify the database to back up, click on the browse (…) button in Databases box, and check the the database that needs to be backed up. To specify type of created backup file, expand the Type combo box, and select Full, differential or transaction log backup type. Be aware that at least one full backup file needs to exist in order to perform differential or transaction log backups. Proceed to the next step.
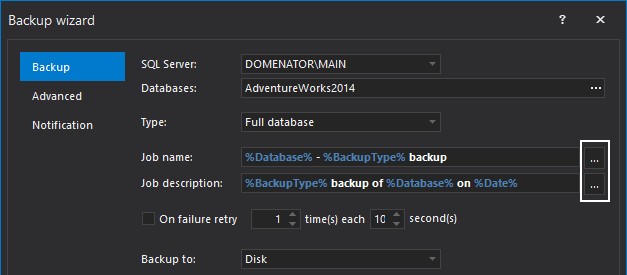
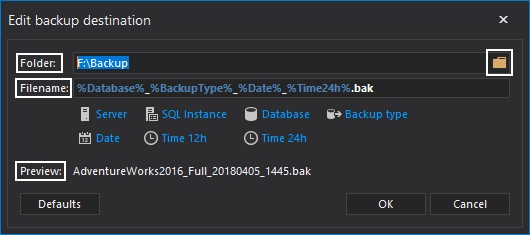
Automatic naming rules for the backups and descriptions may be defined. Different parameters like database name, backup type, server name, date, or time may be automatically included in the name or description of the backup jobs. To add more parameters for automatic job naming, click on the browse button (…) in Job name or Job description boxes, and select one or more parameters from the grid. To use custom database name/description, simply delete the contents from name/description fields, and enter the preferred name.
Destination paths also need to be defined in this step. Remove the default SQL Server backup path by clicking on close button next to the path. Click Add destination button to specify the backup paths.
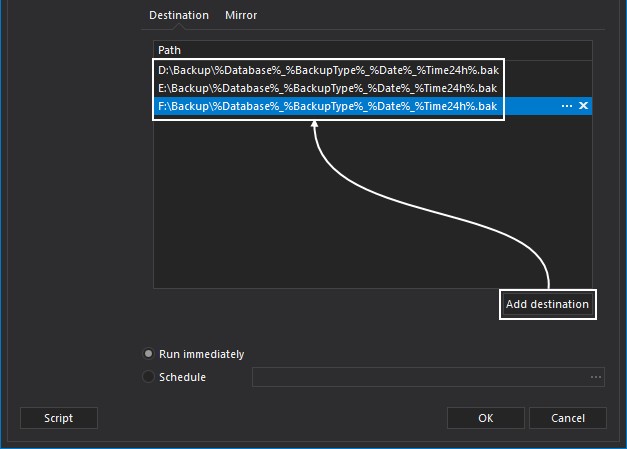
Enter the backup path manually or browse for the preferred destination with browse folder button. The naming rules for the backup files could be applied in this step in the same way as in the step 4. Repeat the step, until all backup paths are listed. Proceed to the next step when done.
-
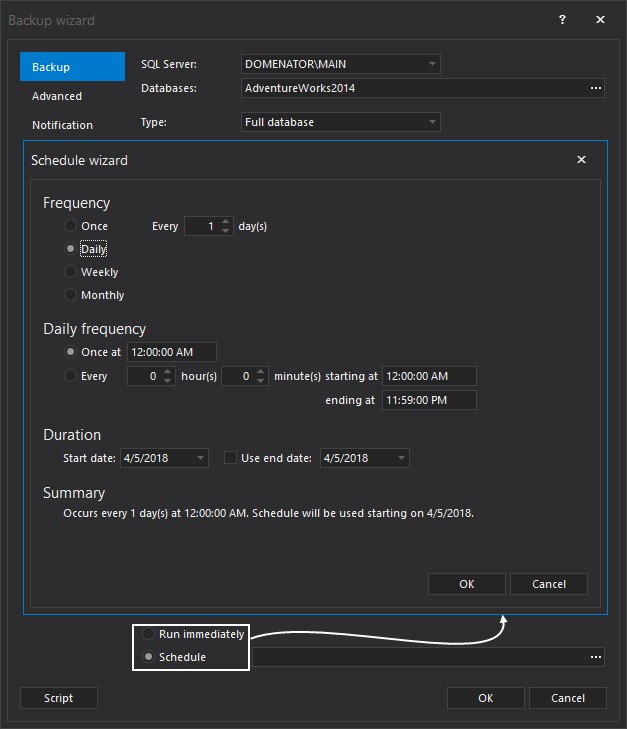
There is an option to automate the backup process by defining a schedule. To do this, simply tick the Schedule radio button, and set the preferred schedule. If there is no need for the automated backup, leave the Run immediately radio button checked.
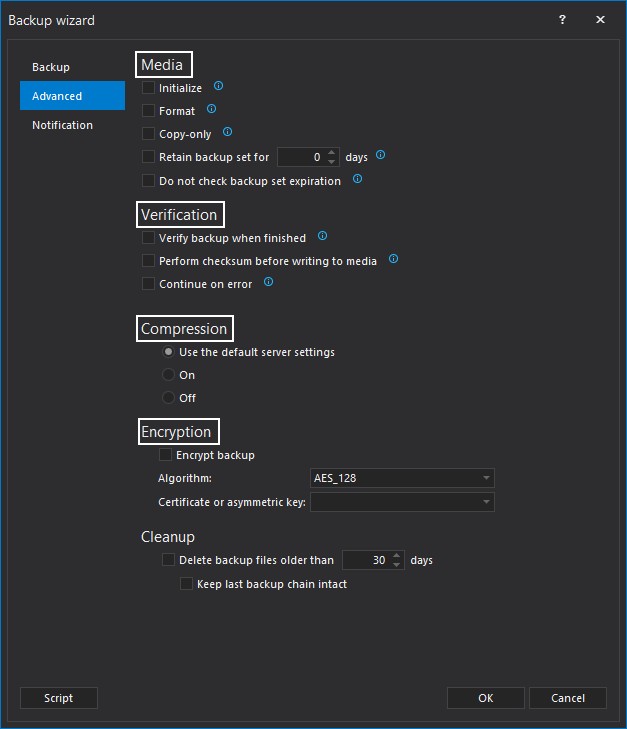
In Advanced tab of the wizard, some additional actions like verification, compression and encryption may be applied to the backup process.
To complete the wizard, click on the OK button. If Run immediately option is selected in step 7, the task will execute right away. If schedule is specified in step 7, created job can be located and run in the Schedules tab.
To restore the database with ApexSQL Backup:
Click on the Restore button from the Tasks group in the Home tab.

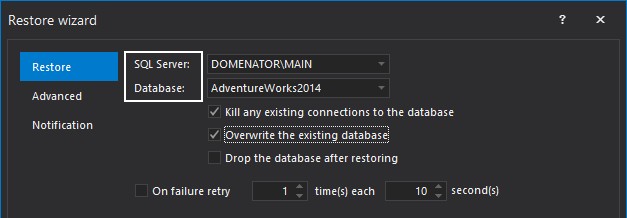
The Restore wizard starts. In Restore tab, choose the server, and the database to restore to. Alternatively, enter the name for a new database to restore to, if existing databases need to be kept for some reason.
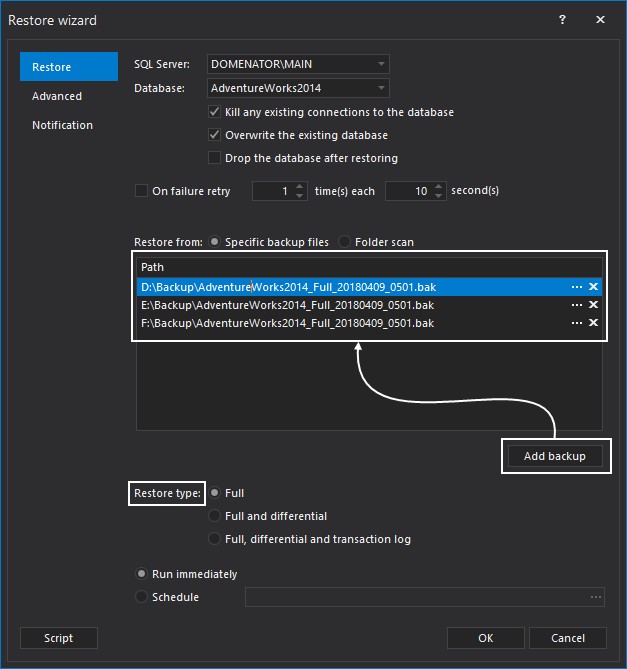
Bellow the server settings, choose to restore from Specific backup files. Click Add backup button and browse for the split backup files that were created in previous steps. Be sure to select the restore type that matches the type that was used for the backups.
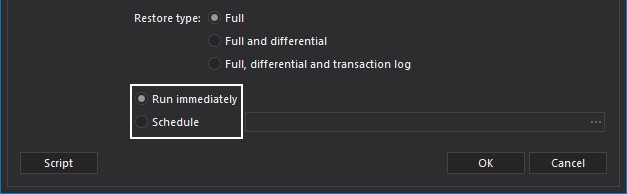
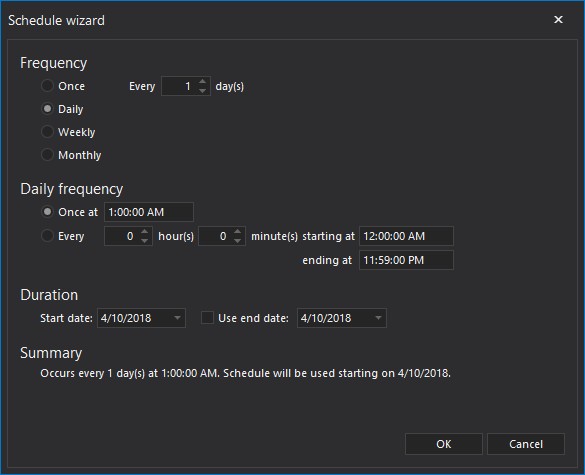
The restore process may be automated by defining a schedule. To set a schedule for the restore task, click on the Schedule radio button on the bottom of the form. When the scheduler form opens, set the preferred schedule if database needs to be restored frequently. If there is no need for the automated restore, leave the Execute immediately radio button checked.
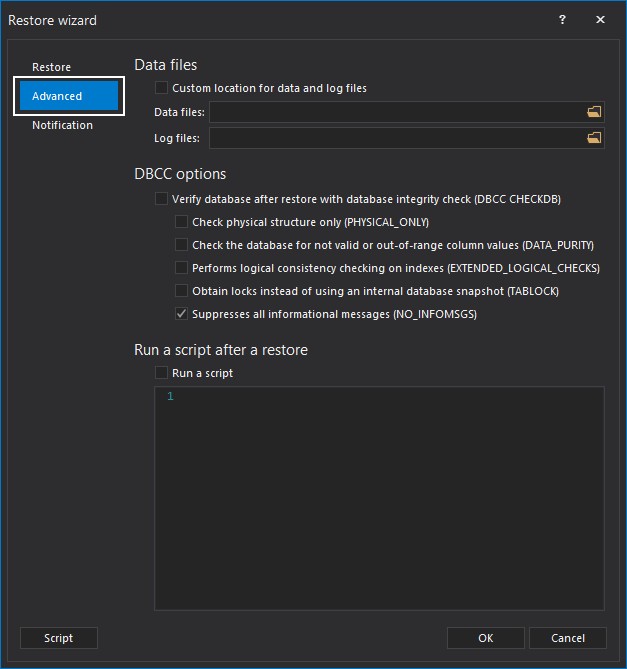
In Advanced tab of the wizard, set the additional tasks and checks that may be included in restore process.
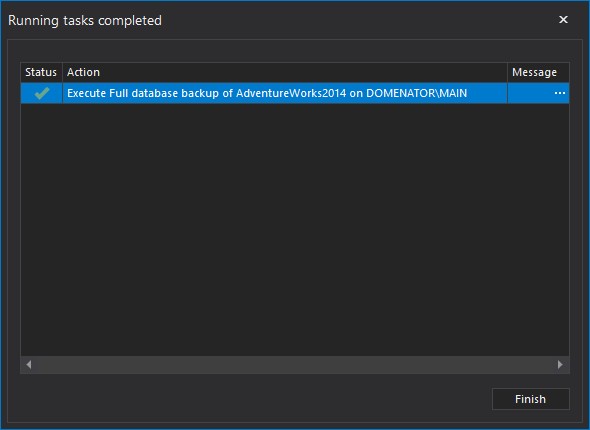
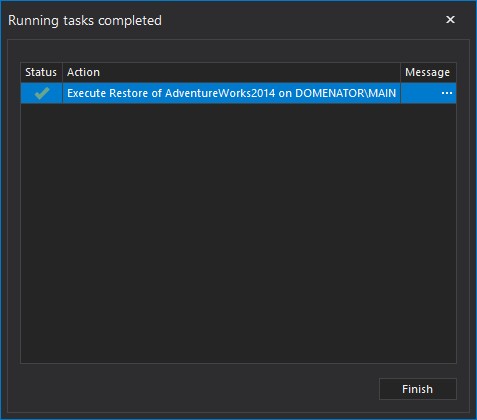
To execute set commands, click OK button. If Run immediately radio button was selected, all defined operations will be executed right away, and success message will be displayed. If the schedule was set, the operations will run on the defined schedule.
See also
- Recovery Advisor: Using SSMS to create/restore split backups
- Backup SQL Server database to and restoring from multiple files
- A beginner’s guide to SQL Server transaction logs
- Mirrored Backup and Restore and Split File Backup – Introduction