
Importing and Exporting Job Templates
|
Navigation: Saving or Running a Migration Job > Saving a Job Configuration as a Template > Importing and Exporting Job Templates |
In some cases, users may want to save and export a job template to another environment in order for other users (or a separate installation of Metalogix Content Matrix) to utilize the same configuration settings. To do this, users will need to export the specific job template, move the exported file to the new location, and then import the job template. The section below describes how to Export and Import job templates.
Exporting a Job Template
|
Navigation: Saving or Running a Migration Job > Saving a Job Configuration as a Template > Importing and Exporting Job Templates > Exporting a Job Template |
To export a job template:
1.In Metalogix Content Matrix's ribbon toolbar, switch to the Settings tab and click [Manage Job Configurations] button to display the Manage Job Configurations dialog.
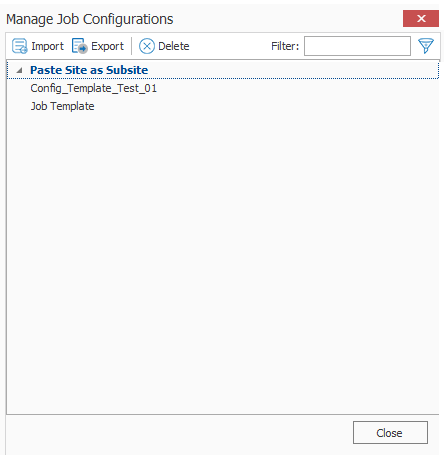
2.Select the template you want to export then click the Export button at the top of the Manage Job Configurations dialog, .
3.Navigate to the desired folder location where you want to save the job template, enter a File name, and click [Save].
4.The job template XML file will be saved to the selected folder location, and Metalogix Content Matrix will return to the Manage Job Configurations dialog. Any additional importing, exporting, or deleting of job templates can be done. Click Close to return to the main Metalogix Content Matrix window.
Now that the job templates have been exported and saved to a folder location they can be manually moved to another location as required.
Importing a Job Template
|
Navigation: Saving or Running a Migration Job > Saving a Job Configuration as a Template > Importing and Exporting Job Templates > Importing a Job Template |
Only templates that have been created from the same Edition of Metalogix Content Matrix Console can be imported. For example, a job template from SharePoint Edition cannot be used in eRoom Edition or Public Folder Edition, it can only be imported into SharePoint Edition.
To import a job template:
1.In Metalogix Content Matrix's ribbon toolbar, switch to the Settings tab and click [Manage Job Configurations] button to display the Manage Job Configurations dialog.
2.Click the Import button at the top of the Manage Job Configurations dialog, navigate to the folder location for the template XML file, then click [Open].
The job template will be added to the list of templates in the Manage Job Configurations dialog. The template will be listed using the same Display name that was used when the task was created on the original system, and will not have its file name displayed.
The job template is now imported and can be applied to any migration.
Importing and Exporting Migration Jobs
|
Navigation: Saving or Running a Migration Job > Importing and Exporting Migration Jobs to xml Files |
From the Job List, you can export a job to an xml file. This functionality allows you to:
·Copy a job from one instance of Metalogix Content Matrix to another (as long they are for the same Edition).
·Manually modify a job, then re-import it.
To export a job to an xml file:
1.In the Job List, select the job you want to export.
2.Right-click, and choose Export selected job to xml.
The xml file will automatically open in whatever program is set as the default application for xml files, and it can be saved to any desired location.
To import an xml file to the Job List:
1.Make sure the file you want to import uses a different ID value than any existing Jobs (this should only be an issue if the XML file was previously exported from the same Metalogix Content Matrix Console).
NOTE: If the xml file that is being imported contains the same ID value as an already existing Job, then the import will fail.
2.From the Job List menu, choose File > Import Jobs From Xml.
3.Select the xml file to import.
If the import is successful, the job will be listed in the Job List section. If unsuccessful, an error message will be given.