
Using PowerShell to Create Custom Transformations
|
Navigation: Configuring Copying Options > Transformation Options > Using PowerShell to Create Custom Transformations |
When you select the Add Transformer > Invoke PowerShell script option for an Available Definition, you can use custom PowerShell scripts to create your own transformations beyond the built-in capabilities of the Metalogix Content Matrix.
Specify when you want the script to run by selecting one of the following options:
Begin Transformation The transformation script will run before the migration of the affected objects, allowing you to read and make changes to objects on the source before objects themselves migrate.
Transform The transformation script will run while the migration of the affected object(s) is in progress. For example, the user mapping between source and target would be run using the Transform option.
End Transformation The transformation script will run after the migration of affected object(s), allowing you to read and make changes to objects on the target.
EXAMPLE: The following Transformer consists of two scripts for disabling and re-enabling the Required setting for a column list.
·The first script entered into the Begin Transformation tab sets the setting of any columns that are Required to false before copying begins.
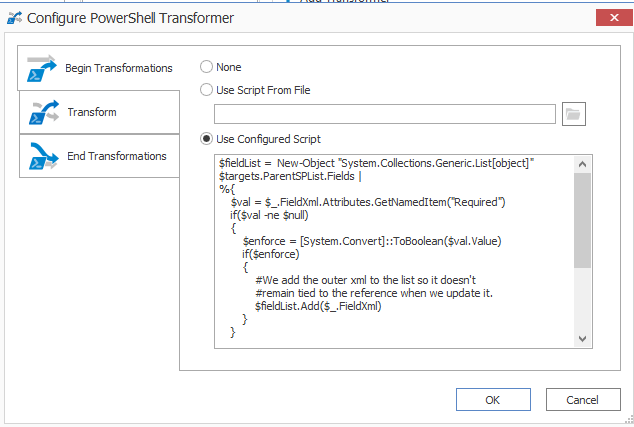
·The second script, entered into the End Transformations tab, sets the setting back to true after item migration has completed.

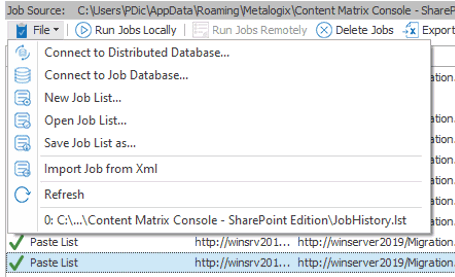
Saving or Running a Migration Job
When you finish configuring a migration action, you can run it immediately or save a copy of the settings to a job file, which displays in the Job List section. You can then:
·run a migration directly from the Job List section
OR
·If your environment is configured for Distributed Migration, submit a Distributed Migration job.
OR
·create a PowerShell script and schedule it to run as a Windows Scheduled Task
OR
·trigger jobs in the Content Matrix Console to run using PowerShell.
You can also save the job configuration as a template so that you can preserve and reuse settings for future migration jobs.
When the migration starts, a status dialog box will appear. The job logs can be viewed (in progress or after the migration is finished) by clicking [Details>>]. The Status section of the status box will list a live count for the number of successes, warnings, failures, etc. for the migration. The Progress section of this dialog will list any completions and the type of completion (Sites, lists, items, users, groups, etc.). A Migration Completed message will appear when finished. Click Close to exit the status dialog.
Connecting to a Full SQL Job Database
|
Navigation: Saving or Running a Migration Job > Connecting to a Full SQL Job Database |
If you are using SQL CE to host your Content Matrix Jobs Database, you will receive a warning in the job log (and as a pop-up if you are running the job from the Console interface).
The use of SQL CE in a production environment is discouraged because of the following limitations:
·It uses a single .list file that is less robust and reliable and may be corrupted after the database reaches 4 GB.
·Data compression is not supported.
·Support for large objects is limited.
To switch to a full-feature SQL Server for the Content Matrix Job Database:
1.From the Job List choose File > Connect to Job Database.
2.Complete the Connect to SQL Server dialog. Create (using the New Database option) or select the database you want to use.
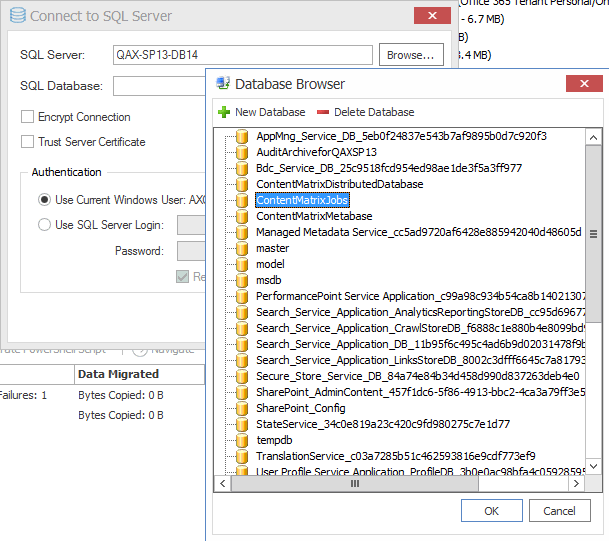
If you want to use an encrypted connection to the database, check the Encrypt Connection box.
NOTE: If the certificate used for encryption is not trusted, you will also need to check the Trust Server Certificate box.
Saving a Job Configuration as a Template
|
Navigation: Saving or Running a Migration Job > Saving a Job Configuration as a Template |
You can create job configuration templates for a set of selected settings which can be saved and reused, including any options that are not normally preserved using the Preserve Configuration Options option (in the ribbon Settings menu).
These templates can also be moved to another machine and used with a separate install of Metalogix Content Matrix Console (provided that it is the same Edition of Metalogix Content Matrix, and the same version number or greater).
To save a job configuration template:
1.After initiating a migration, complete the Configure (Object) Copying Options with the settings that you want to include in the template.
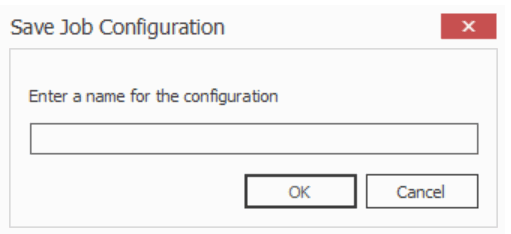
2.Click [Save Job Configuration].
Here you can set the display name for the job template. This is not the actual file name, but it is the name that Metalogix Content Matrix will use to list the template.
NOTE: In most cases, when a job template is saved by Metalogix Content Matrix it will be saved to the following location:
C::\Users\<User>\AppData\Roaming\Metalogix\Metalogix Content Matrix Console - <Product> Edition
However, it is highly recommended that you do not interact with this system location. If you are trying to save a job template so it can be exported to another system the template can be exported from the Manage Job Configurations dialog.
3.Enter the desired display name value and click [OK] to continue.
Once the save is complete, you will be returned to the Configure <Object> Copying Options dialog where the migration can either be Run or Saved.
The saved job templates will now be visible in the Manage Job Configurations dialog.
NOTE: If you are looking to save a job template and move it to another system for use, this should be done using the Export option in the Manage Job Configurations window. Additionally, if you are trying to Import a job template from another system, this must also be done from either the Manage Job Configurations dialog or it can be imported when applying a template.