
Mapping Columns
|
Navigation: Configuring Copying Options > Mapping Options > Mapping Columns |
You can map columns from the source connection into separate columns on the target when migrating content into a SharePoint target when you select Map list item data to different columns and click the [...] button from the Mapping Options tab.
NOTES:
·This option is only available when migrating folders or items from the source into an existing list or document library on the target. If migrating a site or list, this option will not be available.
·Currently, Metalogix Content Matrix supports mapping of single column at the source to a single Managed Metadata column at the target. Mapping the same source column to multiple Managed Metadata columns at the target may cause problems.
To map columns:
1.Use the information in the following table to determine the appropriate action to take.
NOTE: You can Filter items in each window to narrow displayed lists.
|
If you want to ... |
Then... |
|---|---|
|
manually map each individual source column to a target SharePoint column |
·From the left (source) window, select the Item that you want to map. ·From the right (target) window, select an available Item. ·Click the Map icon. |
|
create a new column on the target for any columns that are selected on the source side |
·From the left (source) window, select the Item that you want to map. ·Click the Target icon to display the New Mapping Target dialog. ·Enter a Column Name. ·If you want the column to be created as a site column, check the Create as Site Column, , and choose a column type from the Group drop-down. ·If you want to add the column to a content type that exists on the target: §check the Add to content type scoped at target site box AND §select the content type to which you want to add the column from the Type drop down. |
The mappings you create will display in the bottom window. (Note that you can also Unmap individually-selected mappings in the bottom window or Clear all mappings from the bottom window.)
2.Click [OK] once all desired mappings have been made and return to the Configuration Options dialog.
Global Mappings
|
Navigation: Configuring Copying Options > Mapping Options > Global Mappings |
When you click [Open Global Mappings] from Mapping Options tab, the Specify Global Mappings dialog displays, allowing you to set:
NOTE: Global Mapping can also be performed as a separate action.
User Mappings
|
Navigation: Configuring Copying Options > Mapping Options > Global Mappings > User Mappings |
During a migration, user mappings are carried out in the following order of precedence:
D.Mapping missing users to a user specified on the Mapping Options dialog
E.Mapping to logged-in user
Explicit User Mappings
|
Navigation: Configuring Copying Options > Mapping Options > Global Mappings > User Mappings > Explicit User Mappings |
Explicit user mappings are generally used when trying to migrate a user account that is "orphaned": that is, it exists on the source but is no longer active (or may not be in Active Directory). While the user may not exist, the users data may still need to be migrated to the target.
One alternative to adding such an orphaned user to the target is to map the account to another user account. All of the users basic metadata would be migrated, but the user name would be populated with the mapped account name instead.
User mappings can also be imported using the Import mappings from XML option.
If you want to map all users (which includes "orphaned" users) from the source domain to a different domain on the target, you can do so using Domain Mappings.
To configure explicit user mappings:
1.In the Specify Global Mappings dialog, make sure the User Mappings tab is selected.
2.From the Source: drop-down on the left side of the dialog, select the source object containing the users you want to map to the target.
The Source list becomes populated with the users that have permissions for that object.
3.Use the information in the following table to determine the appropriate action to take.
|
If the user ... |
Then |
|---|---|
|
already exists on the target |
A.Select the source user that you want to map. B.From the drop-down on the right (target) side of the dialog, select the target object containing the user to which you want to map. C.The target list becomes populated with users that have permissions for the selected object. D.Select the target user to which you want to map the source user. |
|
does not already exist on the target |
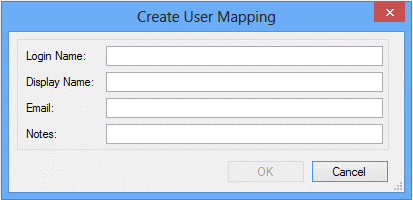
A.Click Create New User to display the Create New User dialog. B.(Required) Specify a Login Name. NOTE: This is the most important field as it is used to create/add a new user and should automatically retrieve any necessary values from the target side authenticator. Be sure to use the appropriate format for the authentication method (for example domain\user name, the O365 login name, or, if using Claims authentication, the appropriate Claims prefix and format). C.(Optional) Complete the Display Name and/or Email fields. If the Login Name does not authenticate for any reason, these fields will be used to fill out the user data. D.Click [OK]. |
4.Click Map.
The mapping displays in the lower half of the dialog.
5.Repeat steps 2-4 until you have completed mapping users.
NOTE: You can map multiple source users to a single target user.