
Migrating Nintex Workflows to SPO
|
Navigation: How Content Matrix Handles Various SharePoint Components > Nintex Workflows and Forms Migration > Additional Considerations for Nintex Workflows > Migrating Nintex Workflows to SPO |
Metalogix Content Matrix can facilitate the migration of Nintex sites and lists workflows to SharePoint Online. Individual sites and site content can be pasted with ease.
NOTE: Currently, Metalogix Content Matrix does not support Nintex workflow migration if the migration was initiated at the list level.
Prerequisites
·Two configuration keys in ApplicationSettings.xml relate to Nintex workflow migration to SharePoint Online, namely:
§NintexWorkflowsTempStorage: The temporary local path where Nintex workflow-related files will be stored prior to being migrated to SharePoint Online. If the value of this key is not modified, the files will be stored in the default temp folder on the system.
§NintexCleanupWorkflowsTempStorage: The value of this key determines whether or not the temporary storage folder described above will be cleaned after the migration completes. The default setting for this key is True.
·The Nintex Workflows for O365 app must be deployed to target site collections prior to migration.
IMPORTANT: Because this app is deployed at the site collection level and must be present before workflows are migrated, it will be necessary to create first create the site collection on the target, deploy the Nintex app(s), then migrate the content (using the Paste Site Content option).
Supported Actions
For a list of supported Nintex actions available when migrating from SharePoint On-Premises to SharePoint Online, refer to Supported Nintex Actions for SPO Migration.
NOTE: If the workflow contains an action that is not supported, this unsupported action will be created as a comment in the migrated workflow. The comment will contain the name of this unsupported action.
Deploying Nintex Apps to SharePoint Online
|
Navigation: How Content Matrix Handles Various SharePoint Components > Nintex Workflows and Forms Migration > Additional Considerations for Nintex Workflows > Migrating Nintex Workflows to SPO > Deploying Nintex Apps to SharePoint Online |
Before you can migrate workflows (and forms) to SharePoint online you must deploy them to your SharePoint Online tenant to make it available to specified site collections, as described below.
To deploy Nintex apps to SharePoint Online:
1.Sign into your tenant's SharePoint Admin Center using an account that is a Global Administrator.
2.From the left navigation bar, select More Features.
3.Under Apps, click [Open].
4.Select App Catalog.
NOTE: If the App Catalog site does not open, select Create a new app catalog site, and then click [OK]. On the Create App Catalog Site Collection page, enter the required info, and then click [OK].
5.If you do not have Nintex Workflows for O365 or Nintex Forms for O365 as part of your Site Contents, then select Add an App and install the application(s).
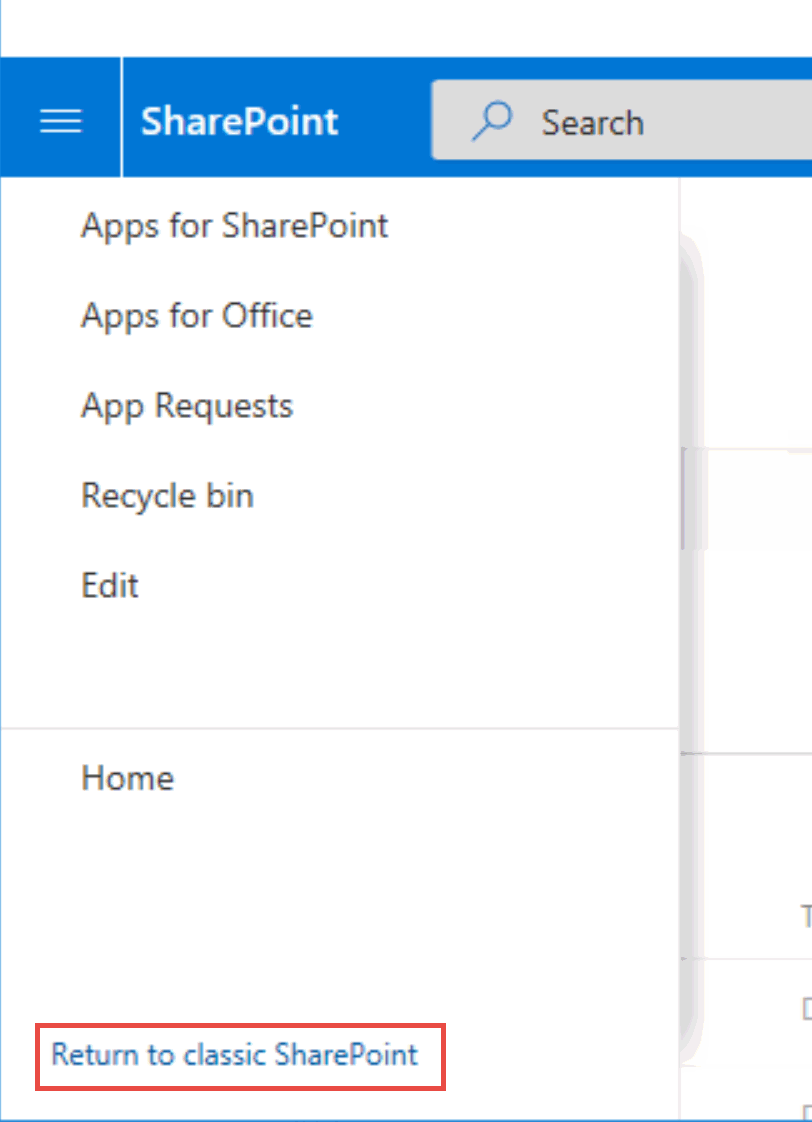
NOTE: Make sure you are in classic view in order to perform the deployment, as deployment cannot be done in modern view.
6.On the Site Contents page, Select the ellipses (...) next to the installed Nintex application, and click on Deployment.
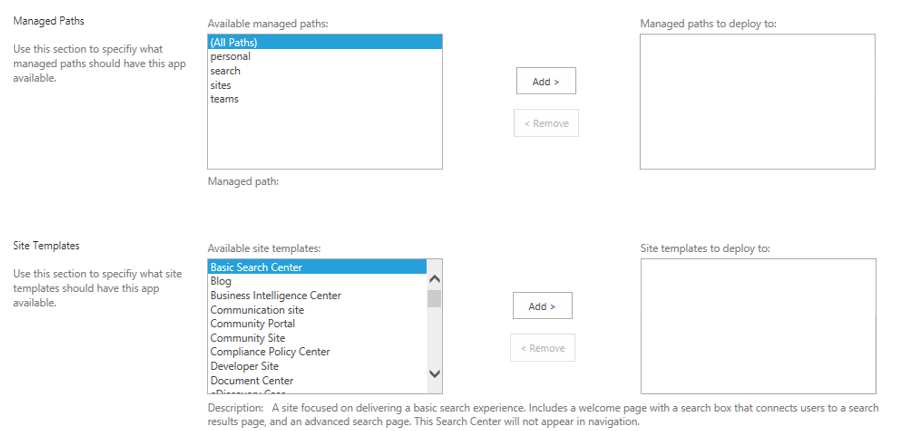
7.On the Manage App Deployments page, enter the site collection URL or select one from the list available, select and add the managed paths to deploy to, and select and add the templates to deploy to.
8.Click [OK] to apply your selections.
9.When asked whether you trust workflow0365.nintex.com click Trust It. This will start the actual deployment.
NOTE: Microsoft is now deploying the Nintex app to your tenant. It may take from a minute to hour(s) depending on the complexity of your site collection structure. Please verify your site collection for apps before starting a migration.
Additional Considerations for Nintex Forms
|
Navigation: How Content Matrix Handles Various SharePoint Components > Nintex Workflows and Forms Migration > Additional Considerations for Nintex Forms |
Content Matrix can migrate Nintex Classic and Responsive forms.
|
|
The migration of Nintex forms is supported for Object Model (OM) on premises connections, either local or remote (through the Metalogix Extensions Web Service (MEWS)). Even if you elect to Use Import Pipeline to migrate to SPO, Nintex forms will be migrated to the target using CSOM. |
|---|

Prerequisites
·For migrated Nintex forms to be published on a SharePoint on premises target, the SharePoint features Nintex Forms Prerequisites and Nintex Forms for SharePoint List Forms must be activated.
·For Nintex forms to be published on an SPO target, the Nintex Forms for Office 365 app must be deployed.
If prerequisites are not met before migration, the forms will need to be published manually after the features or app is installed on the target.
Current Limitations
·Nintex forms do not migrate for default content types of Asset Libraries.
·The following Nintex Responsive forms controls in SharePoint on premises are not supported in SharePoint Online and will be replaced with label controls on the target:
§SQL Request
§Web Request
§Change Content Type
StoragePoint Content Migration
|
Navigation: How Content Matrix Handles Various SharePoint Components > StoragePoint Content Migration |
There are a number of different behaviors to expect when migrating to a target SharePoint environment that has Metalogix StoragePoint installed. The different results you will see depend on which option is selected in the StoragePoint Options tab.
Prerequisites for Migrating StoragePoint Content
You can use Metalogix Content Matrix to migrate StoragePoint content if Metalogix Content Matrix detects that Metalogix StoragePoint version 5.1 or later is installed on the target.
For content to be externalized:
·An endpoint must be configured on the target.
NOTE: If you do not have an endpoint configured, content will be migrated directly into SharePoint.
·For a SharePoint 2010 source Database connection, an external connection to StoragePoint must be made.
·For a SharePoint 2013 or later source Database connection, an external SharePoint server connection must be made.
NOTE: Content cannot be externalized if the source is SharePoint 2007.
To allow the migration of files larger than 2GB:
·Large File Support must be enabled in StoragePoint.
·An external connection to StoragePoint must be made.
To make an external connection to StoragePoint (to allow Large File Support):
1.Select the site whose StoragePoint content you want to migrate.
2.Right-click and choose Attach External Connections > StoragePoint Connection.
3.Either:
·use the full Address of the site where the StoragePoint content is configured
OR
·if you specified a Host Name when connecting to the database, click [Fill in default URL] to have it auto-populated.
StoragePoint Options - Successful Outcome
·Add documents to StoragePoint if an endpoint is configured - This option is for when content from a non-externalized environment (a source environment that does not have StoragePoint installed) is being migrated into an externalized SharePoint target. In this case, any of the files or documents that are included in the migration will be externalized, meaning that those files and documents will call StoragePoint as they are being migrated, and will be externalized directly with the reference link left behind in the file or document's place (in the target SharePoint environment). Once the migration is complete, users can navigate to one of the migrated documents in Metalogix Content Matrix, switch to the Items View, right-click the document, and then select StoragePoint Details. Here, users should be able to see the StoragePoint endpoint folder location for the externalized content, as well as the externalized file name. If the document is opened through SharePoint directly, it will open as expected.
·None - This option is for cases where users do not want to use StoragePoint as part of the migration process. When this option is selected, content will be migrated directly into SharePoint with all StoragePoint-related features ignored. However, if the target environment is configured to be externalized with StoragePoint, it is possible that the content will be migrated into the SharePoint target as if the StoragePoint options are ignored, but the target SharePoint environment would then externalize the content separately after the migration completes. While the end result would be the externalization of the data, the migration process itself is only migrating content directly into the SharePoint target.
StoragePoint Options - Unsuccessful Outcome
·Add documents to StoragePoint if an endpoint is configured - If this option failed to migrate the documents/files into StoragePoint, then when users go to the StoragePoint Details, there will be nothing set. This indicates that the files were not placed into the StoragePoint EndPoint and were not externalized.
·None - If this option is selected but fails, then the content migration to the target will have failed. This means that the documents/files that are included in the migration action will not exist on the target (externalized or not).