
Starting a full farm backup
Only users who are members of the farm administrators group can perform farm backups. For information about the components that you can back up, see Using Metalogix Backup for SharePoint in your disaster recovery plans.
How do I start a full farm backup?
1.From the Management Console workspace selector click Farm Backup/Restore.
2.In the Farm Backup/Restore pane, click any server name or All Servers for any farm.
3.Click the Backup tab.
4.In the Select farm components to back up pane, select the check boxes for the items to include in the backup. From the ribbon, you can perform the following actions:
a.Click the Select All to select all farm components.
b.Click Unselect All to clear the selection of farm components.
c.Click Refresh to get the latest set of farm components.
5.From the ribbon, click Full Backup. The Backup Wizard starts.
6.On the Welcome to the Backup Wizard page, click Next.
7.On the Backup page, review the items that the backup includes. You can review and revise the farm component selections here.

8.Click Next. The Options step appears.

a.Enter the information as described below:
b.Backup Set Name - Specify a name for the backup set. The name appears on the Restore tab when you select the backup set to review and restore.
c.Backup Set Description - Enter notes about the backup set.
d.Backup Set Location - Select a location for the backup set from the drop-down list. You can click Manage Locations to open the Backup Service Preferences window and configure the backup locations. For more information about configuring your Backup Service preferences, see Defining the Backup Service preferences.
e.Do not execute scripts to report on the farm's configuration at time of backup - Select the check box to prevent Metalogix Backup for SharePoint from providing the farm's configuration at the time of the backup. If the check box is not selected, then users will be able to select the "view farm configuration" option for the backup set.
f.Enable compression - Select the check box to compress the backup set.
g.Enable encryption - Select the check box to encrypt the backup set. If you enable encryption, you must also specify a password for the backup set. You must supply the same password when you restore from the backup.
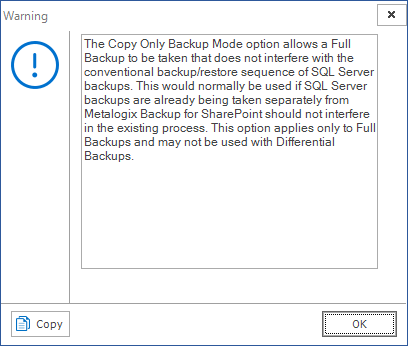
h.Copy Only - Select the check box to allow a full farm backup that does not interfere with the conventional backup/restore sequence of SQL Server backups. This option is normally used if SQL Server backups are already being taken separately.
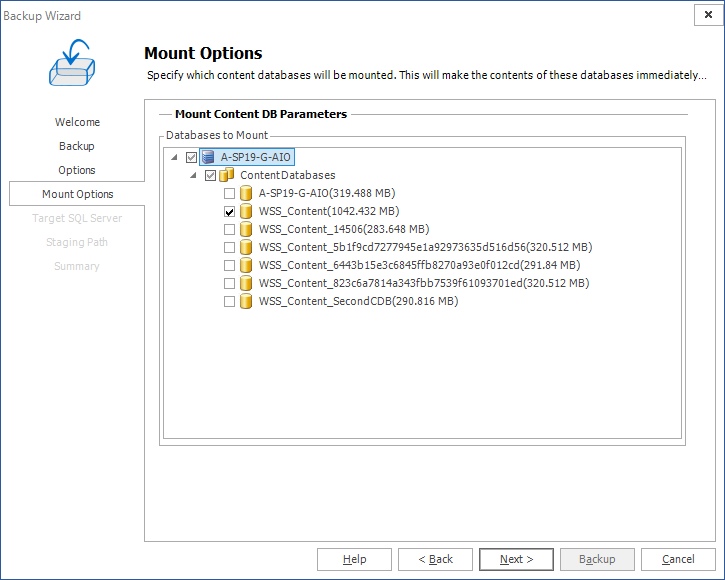
9.Click Next. The Mount Options step appears. Select which content database, if any, you would like the backup to mount.
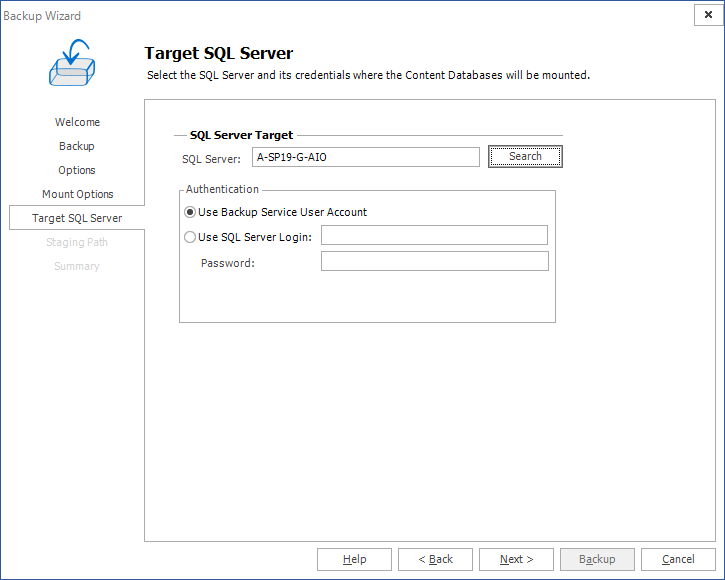
10.Click Next. If you did not choose a content database in the previous step, Target SQL Server step is ignored. If you chose a content database in the previous step, then the Target SQL Server step appears. Enter the information for the server on which you want to mount the backup.
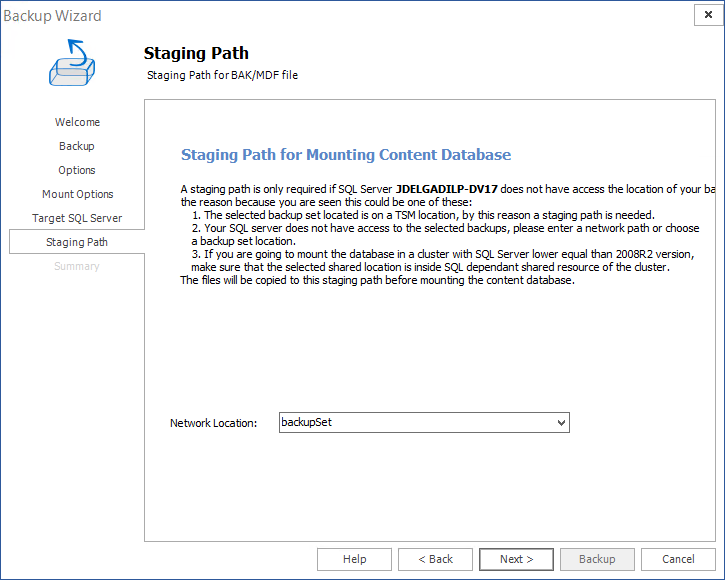
11.Click Next. The Staging Path step appears only if a TSM location is selected as the Backup Set Location in the Options step.
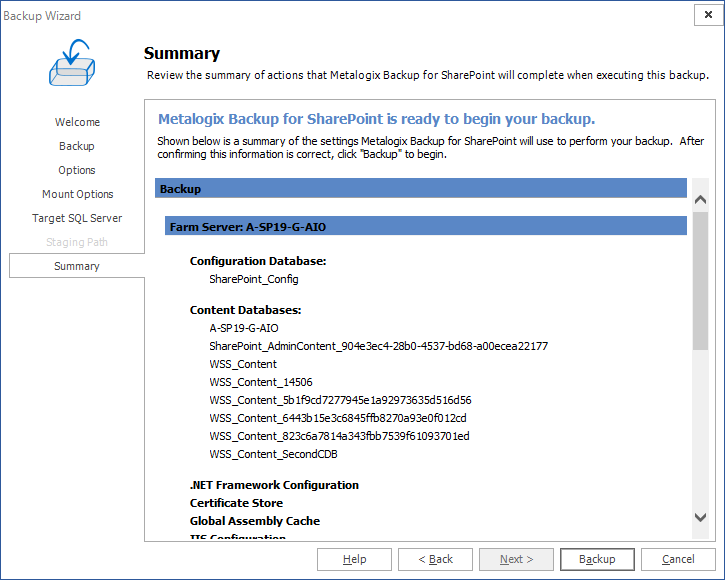
12.The Summary step appears. Review the information and click Backup to start the backup.
Scheduling a full or differential farm backup
Only users who are members of the farm administrators group can perform farm backups. For information about the components that you can back up, see Using Metalogix Backup for SharePoint in your disaster recovery plans.
How do I schedule a full or differential farm backup?
1.From the Management Console workspace selector click Farm Backup/Restore.
2.In the Farm Backup/Restore pane, click any server name or All Servers for any farm.
3.Click the Backup tab.
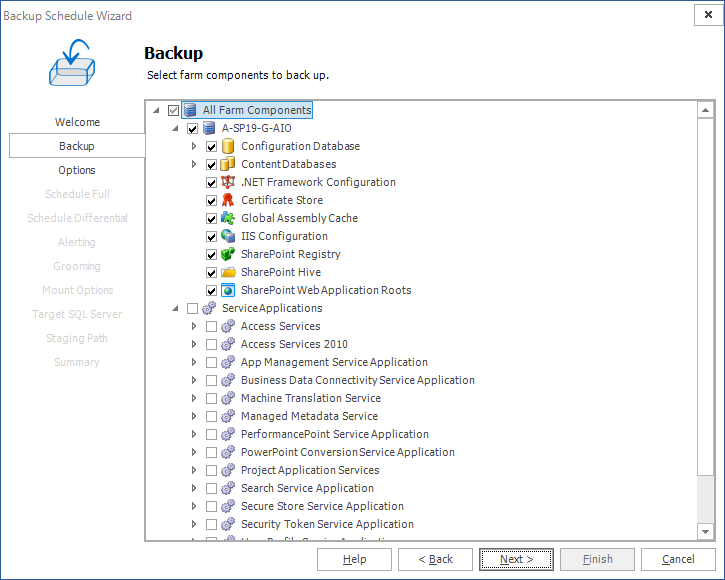
4.In the Select farm components to back up pane, select the check boxes for the items to include in the backup. From the ribbon, you can perform the following actions:
a.Click the Select All to select all farm components.
b.Click Unselect All to clear the selection of farm components.
c.Click Refresh to get the latest set of farm components.
5.From the ribbon, click Schedule aBackup. The Backup Schedule Wizard starts.
6.On the Welcome to the Backup Schedule Wizard page, click Next.
7.On the Backup page, review the items that the backup includes. You can review and revise the farm component selections here.
8.Click Next. The Options step appears.
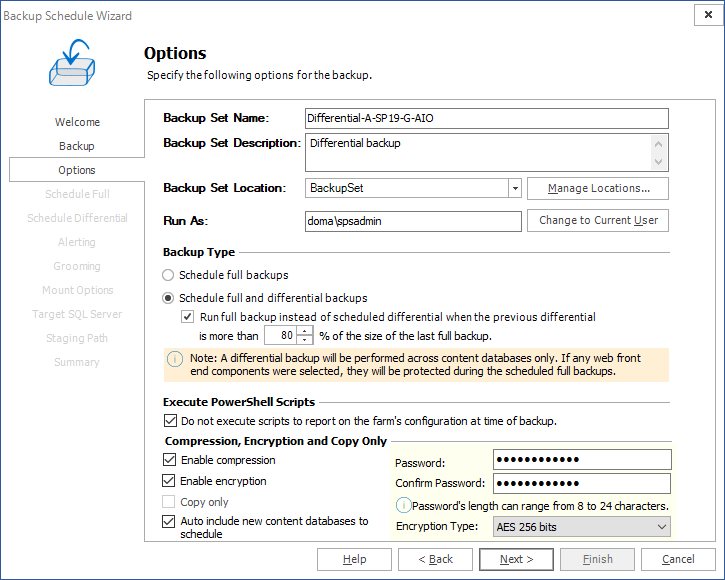
Enter the information as described below:
a.Backup Set Name - The name of the backup set. The name is required. The name can be up to 255 characters long. The name appears on the Restore tab when you select the backup set to review and restore. Metalogix Backup for SharePoint creates a corresponding backup set folder in the file system for the backup set. The folder uses an internal identifier name that is not the same as the name that you specify.
b.Backup Set Description - Provides additional information about the backup set. Use this optional property to document details that helps you select the correct backup set during restore operations and general administrative activities.
c.Backup Set Location - You can specify where Metalogix Backup for SharePoint stores the backup set. Click Manage Locations to create a new location, or select an existing location from the drop-down list.
d.Run As - You need to specify the user to run the backup as in the Run As field.
e.Backup Type - In the Backup Type area you need to select the type of backup to create on a schedule, you can select between Schedule Full Backups or Schedule full and differential backups. If you click Schedule full and differential backups, you can choose to perform a full backup in place of a differential backup when the differential backup size is larger than a percentage that you specify.
f.Do Not Execute Scripts to Report on the Farm's Configuration at Time of Backup - Select Do not execute scripts to report on the farm's configuration at time of backup in order to prevent Metalogix Backup for SharePoint from providing farm's configuration at the time of the backup. If this option is deselected, then users will be able to select the "view farm configuration" option for the backup set.
g.Enable compression - When selected, Metalogix Backup for SharePoint compresses the data in the backup set. Compressing the data makes the backup set smaller. Compressed data is also often faster to transfer on your network.
h.Enable encryption - When selected, Metalogix Backup for SharePoint encrypts the data in the backup set. You can select from two industry standard compression methodologies: AES 128 bits or AES 256 bits. Encrypted data can only be decrypted by Metalogix Backup for SharePoint. If you enable encryption, you must specify a password. When you restore from the backup set, you must provide the same password to decrypt the backup.
i.Copy Only - When selected, Metalogix SharePoint allows a backup to be taken that does not interfere with the conventional backup/restore sequence of SQL Server backups. This option is normally used if SQL Server backups are already being taken separately from Backup, and Backup should not interfere in the existing process.
j.Auto Include New Content Databases to Schedule - Select the Auto include new content databases to schedule, option in order to automatically include all new content databases to the scheduled backup.
9.Click Next. The Schedule Full step appears. This step appears if in the previous step, you either opted to schedule a full farm backup or you selected to run a full farm backup in place of a differential backup when the differential backup size is larger than a percentage that you specified.
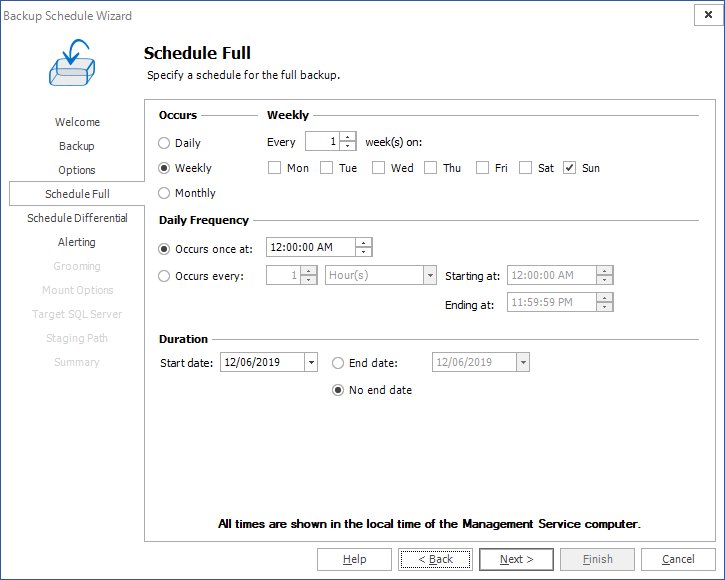
Specify the schedule from Daily, Weekly or Monthly. Specify the frequency of occurrence and specify the duration. Both the Management Service and the Backup Service must be running to start a backup operation. The time and date you specify identifies when to start the backup operation. If you specify an end date and time, Metalogix Backup for SharePoint does not start a new operation after that time. Any running backup operations continue to run.
10.Click Next. The Schedule Differential step appears.
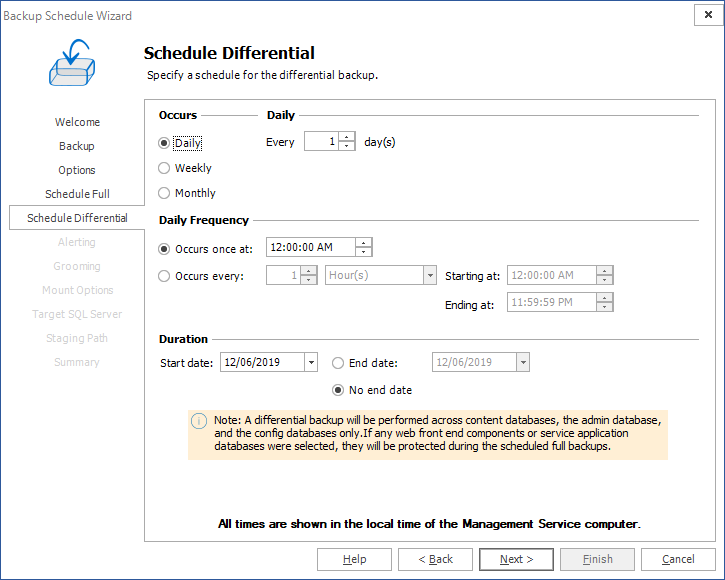
Specify the schedule from Daily, Weekly or Monthly. Specify the frequency of occurrence and specify the duration. Both the Management Service and the Backup Service must be running to start a backup operation. The time and date you specify identifies when to start the backup operation. If you specify an end date and time, Metalogix Backup for SharePoint does not start a new operation after that time. Any running backup operations continue to run.
11.Click Next. The Alerting step appears.
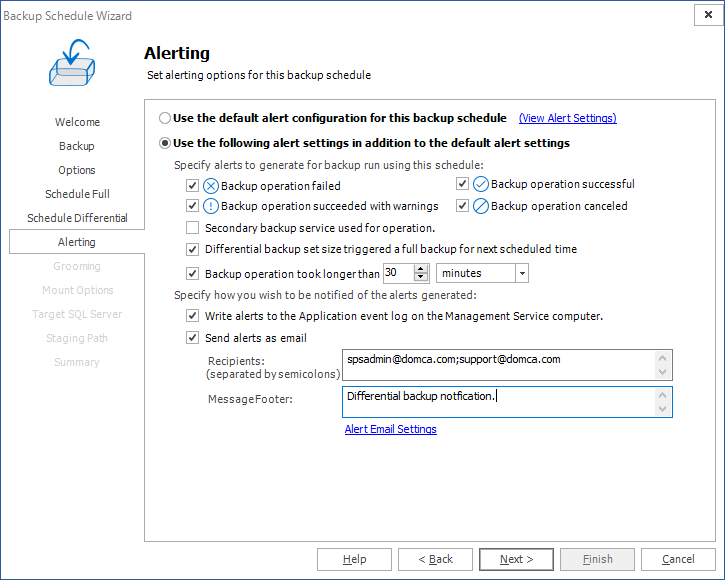
12.Select one of the following:
·Use the default alert configuration for this backup schedule.
·Use the following alert settings in addition to the default alert settings. If you select this option, you can specify how any of the following conditions affect alerts. These settings are used in addition to the default alert settings:
a.Backup operation failed - When selected, Metalogix Backup for SharePoint generates an alert when an operation fails.
b.Backup operation succeeded with warnings - When selected, Metalogix Backup for SharePoint generates an alert when a backup or restore operation succeeds but encounters errors.
c.Backup operation successful - When selected, Metalogix Backup for SharePoint generates an alert when an operation succeeds. Backup, restore, and preview operations can all generate Successful alerts.
d.Backup operation canceled - When selected, Metalogix Backup for SharePoint generates an alert when a user cancels a backup or restore operation.
e.Secondary Backup Service used for the operation - When selected, Metalogix Backup for SharePoint generates an alert if it uses a secondary Backup Service to perform a backup.
f.Differential backup set size triggered a full backup for the next scheduled time - When selected, Metalogix Backup for SharePoint generates an alert when the size of a differential backup triggers a full backup during the next scheduled backup. You specify when the differential backup size triggers a full backup when you create the scheduled backup.
g.Backup operation took longer than <number> <unit> - When selected, Metalogix Backup for SharePoint generates an alert when a backup takes longer than the amount of time that you specify.
h.Write alerts to the Application event log on the Management Service computer - When selected, Metalogix Backup for SharePoint notes alerts generated by the scheduled backup in the Application event log on the computer that hosts the Management Service. You can use the Windows Event Log viewer to review the event log.
i.Send alerts as email - When selected, sends any alerts generated by the scheduled backup as an email to the recipient or recipients that you specify. For emails to be sent successfully, the SMTP server must be setup. Click Alert Email Settings to verify that the SMTP settings have been configured.
Recipients - The SMTP email addresses of one or more recipients to send alerts generated by the scheduled backup. You can click Alert Email Settings to configure the outgoing SMTP mail server.
Message Footer - Text included in the generated email below the alert.
13.Click Next. The Grooming step appears.
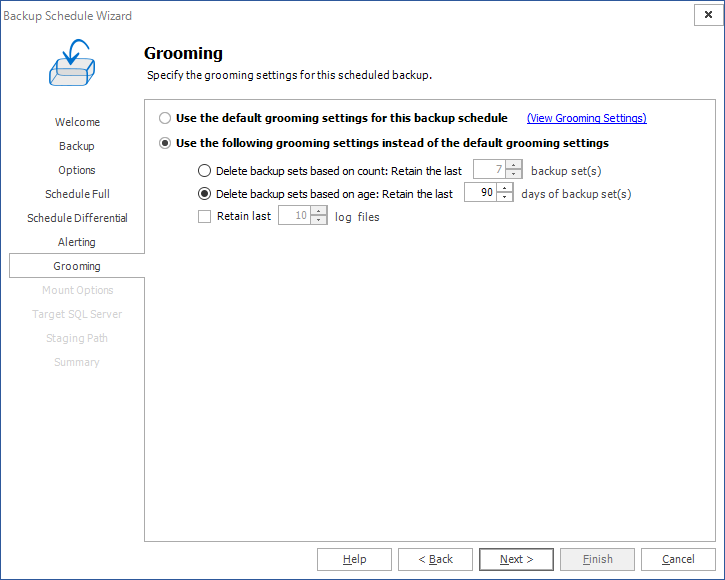
14.Select one of the following:
·Use the default grooming settings for this backup schedule.
·Use the following grooming settings instead of the default grooming settings. When you select this option you can specify when and how Metalogix Backup for SharePoint deletes out-of-date backup sets from the repository database and the storage location that you specify. For more information about grooming, see Learning about data grooming. You can specify the following settings, which replace the default grooming settings:
a.Retain last x good backup set(s) - When selected, Metalogix Backup for SharePoint always saves at least the number of backup sets that you specify, without regard to the age of the sets. When you enable both this setting and the "Delete backup sets from repository and disk after x days" settings, the oldest retained set may be older than the age that you specify.
b.Delete backup sets from repository and disk after x days - When selected, Metalogix Backup for SharePoint deletes the data after the specified number of days.
c.Retain last x log files - When selected, Metalogix Backup for SharePoint always saves at least the number of log files that you specify, without regard to the age of the log file.
15.Click Next. The Mount Options step appears.
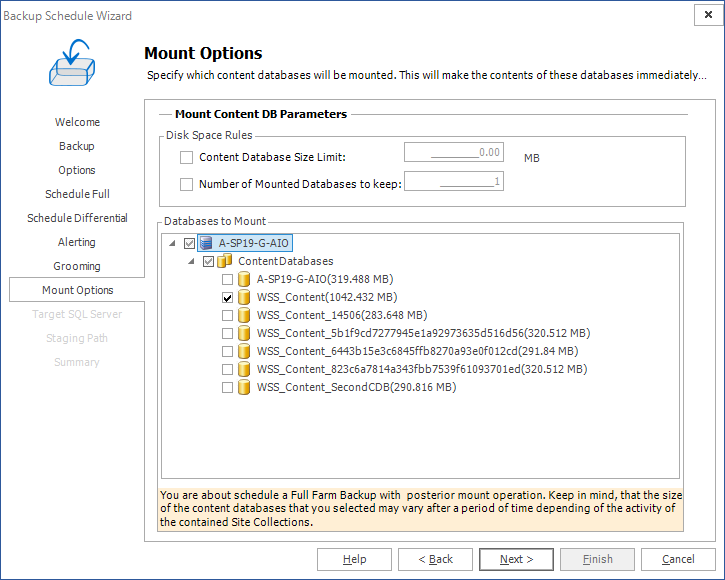
Set the following optional parameters:
a.Content Database size limit - prevents the backup from being mounted if the content database exceeds the specified size. Note that setting a limit of 0MB means that there is no size limit and all backups will be mounted to the selected content databases.
b.Number of Mounted Databases to keep - allows you to specify the number of backups sets that are kept mounted. Specifying a value of 1 will keep the latest scheduled backup mounted.
c.Databases to Mount - select which content databases will be mounted. Selecting a content database for mounting will make the content database immediately available for granular restores.
16.Click Next. The Target SQL Server step appears if a Content Database was selected to be mounted in the previous step.
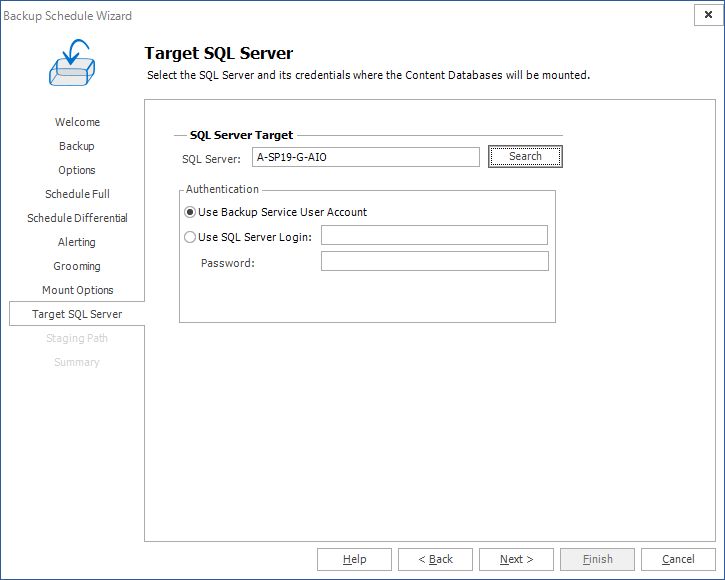
The Target SQL Server step lets you select the SQL Server location where the content databases will be mounted. Once you have selected the Target SQL Server location, select the authentication type, and enter credentials when needed.
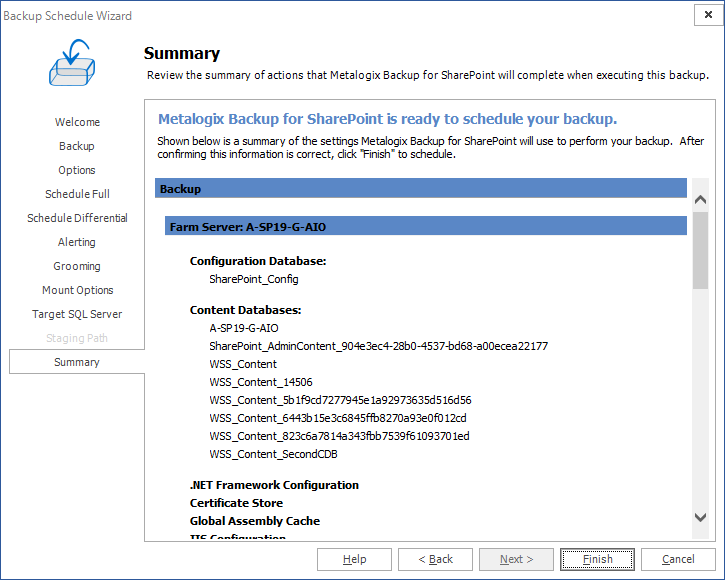
17.Click Next. The Summary step appears. Review the information and click Finish to schedule the backup.
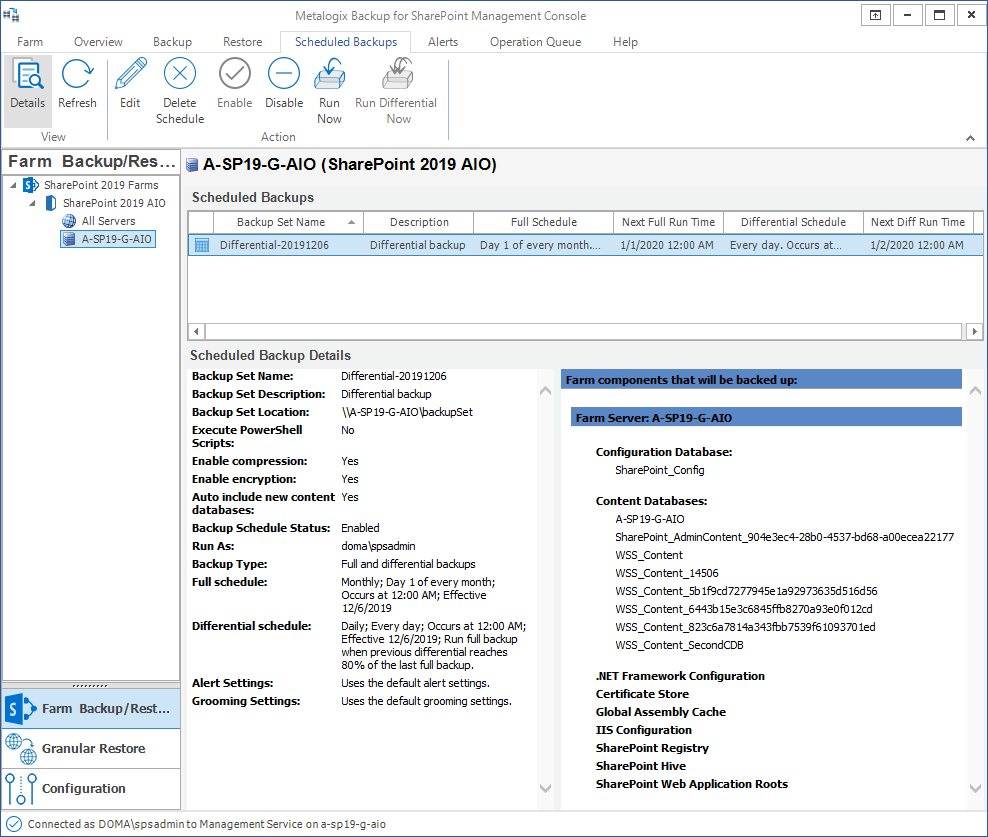
Managing scheduled farm backups
The Scheduled Backups tab in the Management Console lets you view, edit, delete, enable, and disable scheduled farm backups.
How do I view the scheduled farm backups?
You use the Scheduled Backups tab in the Farm Backup/Restore view to view the existing backup schedules.
To view the scheduled farm backups
1.From the Management Console, in the left pane, click Farm Backup/Restore.
2.In the Farm Backup/Restore pane, click any server name or All Servers for any farm.
3.Click the Scheduled Backups tab.
How do I make changes to a scheduled farm backup?
You use the Scheduled Backups tab in the Farm Backup/Restore view to make changes to a scheduled backup.
To make changes to a scheduled farm backup
1.Select the scheduled backup that you want to edit.
2.From the ribbon, click Edit. The Backup Schedule Wizard starts.
3.Step through the wizard and revise the settings. For more information see Scheduling a full or differential farm backup.
4.Review the information in the Summary step and click Finish to schedule the backup.
How do I delete a scheduled farm backup?
You use the Scheduled Backups tab in the Farm Backup/Restore view to delete a scheduled backup. When you delete a scheduled backup, you only delete the schedule. The existing backups in the backup sets are not deleted.
To delete a scheduled farm backup
1.Select the scheduled backup that you want to delete.
2.From the ribbon, click Delete Schedule.
3.A confirmation dialog prompts you to confirm that you want to delete the Scheduled Backup. Click Yes to delete the scheduled backup.
How do I enable and disable a scheduled farm backup?
You use the Scheduled Backups tab in the Farm Backup/Restore view to temporarily disable and enable scheduled backups. When you disable a scheduled backup, the scheduled backup definition stays in Metalogix Backup for SharePoint, but it does not execute. You can disable a scheduled backup when you need to temporarily suspend backups, then later resume them.
To disable a scheduled farm backup
1.Select the scheduled backup that you want to delete.
2.From the ribbon, click Disable. The Next Full Run Time and Next Diff Run Time columns values for the selected backup schedule displays the scheduled time. The Disable icon in the ribbon is enabled.
To enable a disabled scheduled farm backup
1.Select a disabled scheduled backup that you want to enable.
2.From the ribbon, click Enable. The Next Full Run Time and Next Diff Run Time columns values for the selected backup schedule will change to Disabled. The Enable icon in the ribbon is enabled.
Restoring SharePoint farms
Metalogix Backup for SharePoint can restore SharePoint 2010, 2013, 2016 and 2019 farms that have been previously backed-up using Metalogix Backup for SharePoint.
Metalogix Backup for SharePoint uses VSS to back up and restore the farm components that make up your SharePoint farm while your farm is in use. Your farm must be configured to use VSS. If VSS is not enabled, Metalogix Backup for SharePoint will not be able to back up your SharePoint 2010, 2013, 2016 and 2019 farms. VSS is included in Windows Server 2003 and later versions of Windows. For information about how VSS works, please consult your Windows Server documentation, or the Microsoft article Volume Shadow Copy Service Overview at http://msdn.microsoft.com/en-us/library/aa384649(VS.85).aspx.
Only SharePoint 2010, 2013, 2016 and 2019 farms can use Farm Backup/Restore.