
Jobs tab
As mentioned above, jobs need to be created up-front.
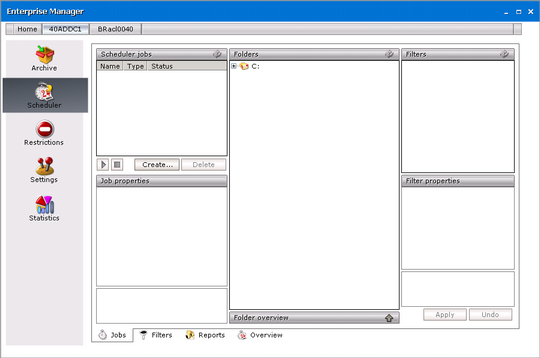
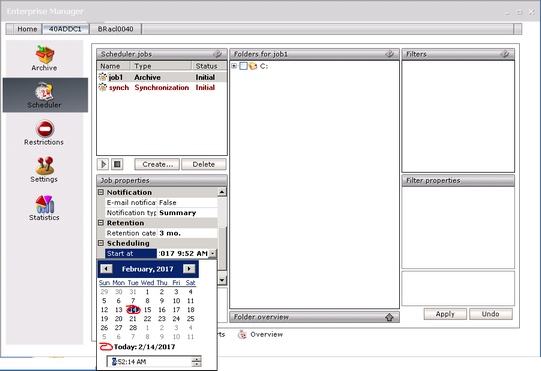
After clicking on the Jobs tab you will see it split in five parts (sections): Scheduler jobs, Job properties, Folders, Filters and Filter properties.
When running Archive Manager for Files for the first time, there are no jobs specified, thats why this tab is empty (as shown below). Later, when jobs have been defined, they would be displayed under Scheduler jobs.
Following sections deals with job creation. The process is as follows:
1.Job is defined and its properties are set.
2.Job is assigned to folders which should be processed.
3.Then a filter can be created and assigned to a folder.
How to define a job
1.Click on the Scheduler tab.
2.Click on the Jobs tab.
3.Click on the Create button.

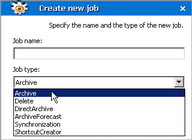
4.In the Create new job window enter a name for your job in the Job name text box. Then select the type of the job in the Job type drop-down box. Afterwards click OK.
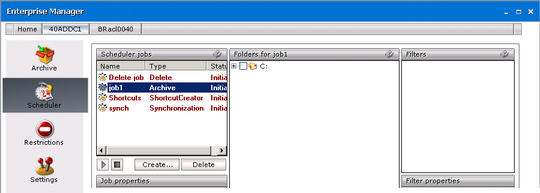
NOTE: There can be defined five types of jobs: Archive, Delete, DirectArchive, ArchiveForecast, ShortcutCreator and Synchronization.
As mentioned above, several types of jobs can be created:
·Archive - does archiving with specified settings
·Delete main features:
üdeletes documents marked for deletion in the HSM store (archive), if their retention period and keep alive time has expired (time is calculated from the document lifetime starting point)
üdeletes documents from the archive if their expiration time elapsed (time is calculated from the document lifetime starting point)
üfor both above mentioned cases, the job deletes also shortcuts from the file system when the corresponding document is deleted from the archive (optional feature; default its ON)
üdeletes shortcuts after a defined time where Delete shortcut after feature was activated (see the section Retention categories) (time is calculated from the document lifetime starting point)
Delete job can run on folder basis, i.e. process just specified folders. It can run in different modes, too:
oReporting no action is taken, just a report is generated. The report contains the list of files which are going to be deleted. The report can be checked and modified if necessary. It can be found under <installdir>\fsaPamLogs \delete \ delete.report
oProcess report mode files from the previously generated (and modified) report are processed
oProcess immediately mode processing files without any report (not recommended)
·DirectArchive - immediate archiving whenever a document is modified
·ArchiveForecast does not perform any archiving; it is designed to estimate space that will be saved by Archive Manager for Files. Although no archiving is performed, you have to select a retention category when creating this job. Different retention categories result in different space saving.
Simply schedule this job and apply it to the desired folders. After the job has finished running, data regarding the potential space saving can be found in the report summary of this job (Scheduler / Reports tab).
·ShortcutCreator creates delayed shortcuts; some documents may have been archived with retention category where the Delay shortcut creation by or Create shortcut if the document was not used option was selected; such items were copied to archive but the shortcuts are created after a defined time period
·Synchronization This job works for NTFS and FSA shortcuts and it has basically 3 main tasks:
üUpdate the database with correct file paths if a file shortcut was moved
üMark for deletion the documents which have no reference in the file system optional, this function must be activated in the document retention category (see the section Creating a new retention category)
üDelete unreferenced shortcuts
This job can run in different modes:
oReporting mode - no action is being taken just a report is generated. This is useful as administrators first have a report on what is going to be done. The report can be checked and modified if necessary. It can be found under <installdir> \fsaPamLogs \sync \ sync.report
oProcess report mode files from the previously generated (and modified) report are processed
oProcess immediately mode processing files without any report (not recommended)
NOTE: Keep in mind that the job processes all files twice, once it crawls the database, second it goes through the file system. The performance rate is around 50-200 docs/sec, depending on server capability and load. It can take days to run it on millions of archived/non-archived files, so, plan the schedule carefully. You may experience high disk and database load.
Further we describe how to specify job properties and explain individual features. Please note that not all settings apply to every type of job.
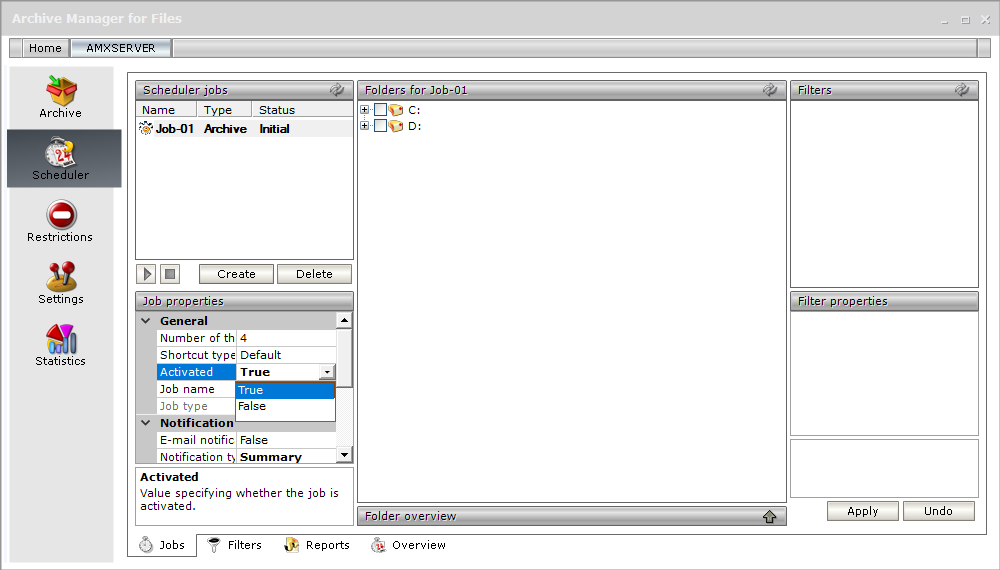
5.In the Job properties section you need to specify details about particular job (e.g. retention category; you may turn a job on / turn a job off, etc.). To turn a job on, click on the Activated field. Click on the down arrow to unfold the down-drop box and select True. Job will be turned on.
Number of threads field specify the number of threads in which the given job run. This feature can fasten up archiving and is recommended to be used. It is accessible for Archive, CreateVersion, and ArchiveForecast job. The default value for a new job is 4, the maximum value for one job is 16.
In the Shortcut type field select the type of shortcuts which will be created when the job archives files. Three shortcut types are available FSA, HTML or DEFAULT shortcuts. If Default is selected, settings of Settings tab / Shortcut creation section are applied. This setting is accessible only for Archive and DirectArchive job types. For more information please see the Shortcut creation section.
NOTE: Jobs created in older product versions in which this setting was not available will have this property set to 1 after upgrade.
6.In the Retention category field assign a retention category to the job. Retention categories define the document lifecycle. This setting is available for Archive, DirectArchive and ArchiveForecast jobs.
NOTE: Retention categories are created on Settings / General tab.
7.In the Notification section you can activate email notification for the given job. Click on the E-mail notification field and in the down-drop box select True. Archive Manager will be sending notifications about this job as configured on the Settings/ Notification tab. In the Notification type field choose Detailed type of notification or Summary for summarized notification.
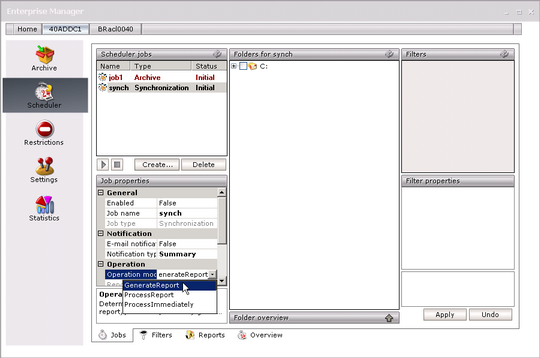
8.The Operation section is available just for the Synchronization and Delete job to specify its settings.
Click on the Operation mode field. Then click on the down arrow and select the operation mode:
oReporting mode - no action is being taken just a report is generated. This is useful as administrators first have a report on what is going to be done. The report can be checked and modified if necessary.
oProcess report mode files from the previously generated report are processed. Administrator is able first to check and modify the list of files going to be processed (i.e. deleted or synchronized)
oProcess immediately mode processing files without any report (not recommended)
The Report file field displays the path to the generated report (e.g.<installdir> \fsaPamLogs \sync \ sync.report).
Settings for Delete job:
If the Delete shortcuts field is set to true, files which are going to be deleted from the archive will also have its shortcuts deleted from the file system.
9.To schedule archiving, click on the Start at field. Then click on the down arrow and select a day on the calendar; select the desired month by clicking on the side arrows; and specify the desired time in the text box. Then press Enter.
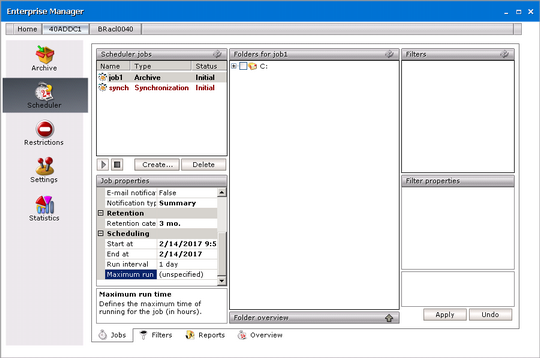
10.To specify the maximum time span during which the job will be running, click on the Maximum run time field and specify your requirements. (E.g. enter 3 and the job will be allowed to run for a maximum of 3 hours.). If you leave Unspecified, then there is no limitation as to time span.
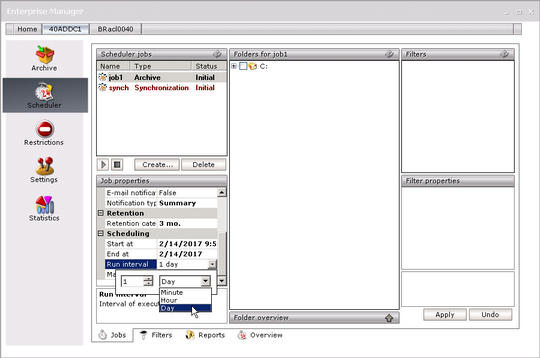
11.To specify how often the job should run, click on the Run interval field. Click on the down arrow to open the drop-down box and then specify the period in minutes, hours or days.
12.To enter the last day when the job should run, click on the End at field. Afterwards click on the down arrow to open the calendar and select the desired month and day.
NOTE: Should you select the Infinite check box, job would be running infinitely. Then press Enter.

Created jobs can now be assigned to folders to automate folder archiving.
NOTE: To change the properties of the job, it has to be stopped first.
How to assign a job to a folder
To automate folder archiving, assign jobs to them.
1.Click on the Scheduler tab.
2.Click on the Jobs tab.
3.Select a desired job in the list in the Scheduler jobs section.
4.Select a desired folder (disk), either recursively or non-recursively, in the Folders section. Click Apply.
NOTE: By unfolding the Folder overview tab you may see what folders the currently selected job is assigned to.

How to start the job immediately
Job starts running automatically as it is set in Job properties (see the previous section). However, you can start the job manually any time:
1.On the Scheduler / Jobs tab select the relevant job in the Scheduler jobs section.
2.Click the Start button below the list view. The job starts running immediately.
NOTE: You can also stop the job by using the Stop button.
IMPORTANT NOTE: If the job was stopped, it remembers which file was the last processed file. When it is started again, the job starts processing files from this last processed file.
