Prerequisites for SAML2 authentication:
If you have Evolve configured for HTTPS, you need to create three URLs in Azure:
Mail URL: https://YOURURL/evolve/
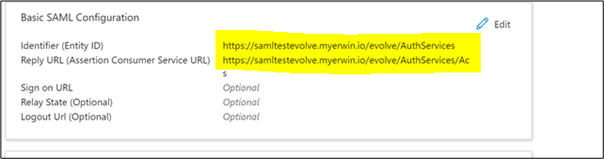
Entity ID URL: https://YOURURL/evolve/AuthServices
Assertion Consumer Service (ACS) URL: https://YOURURL/evolve/AuthServices/Acs
Setting up Single sign-on in Azure:
In Azure's Enterprise application, select Single sign-on and SAML.
Enter your Entity ID and Assertion Consumer Service (ACS) URLs in the "Basic SAML Configuration" below.
Now you can change your Attributes and Claims. Mail, Given name, Surname, and Principal name are already set up.
To change Attributes and Claims:
Click Add new claims.
Under Group Claims, click Groups assigned to the application to limit the list of AD groups assigned to this Azure application.
Under Advanced option, select Customize the name of the group claim check box.
In the Name box, enter the name of the group claim. For example, Group.
In the Namespace box, enter the namespace. For example, http://schemas.xmlsoap.org/claims.
Click Save.

Federation Metadata XML is now available for download. Copy the downloaded XML to Evolve Web Server (C:\Casewise\Evolve\Site).

To configure Evolve and Evolve Model:
Start Evolve Designer.
On the Evolve Designer Models launcher dialog box, click the Configure Evolve Server button.

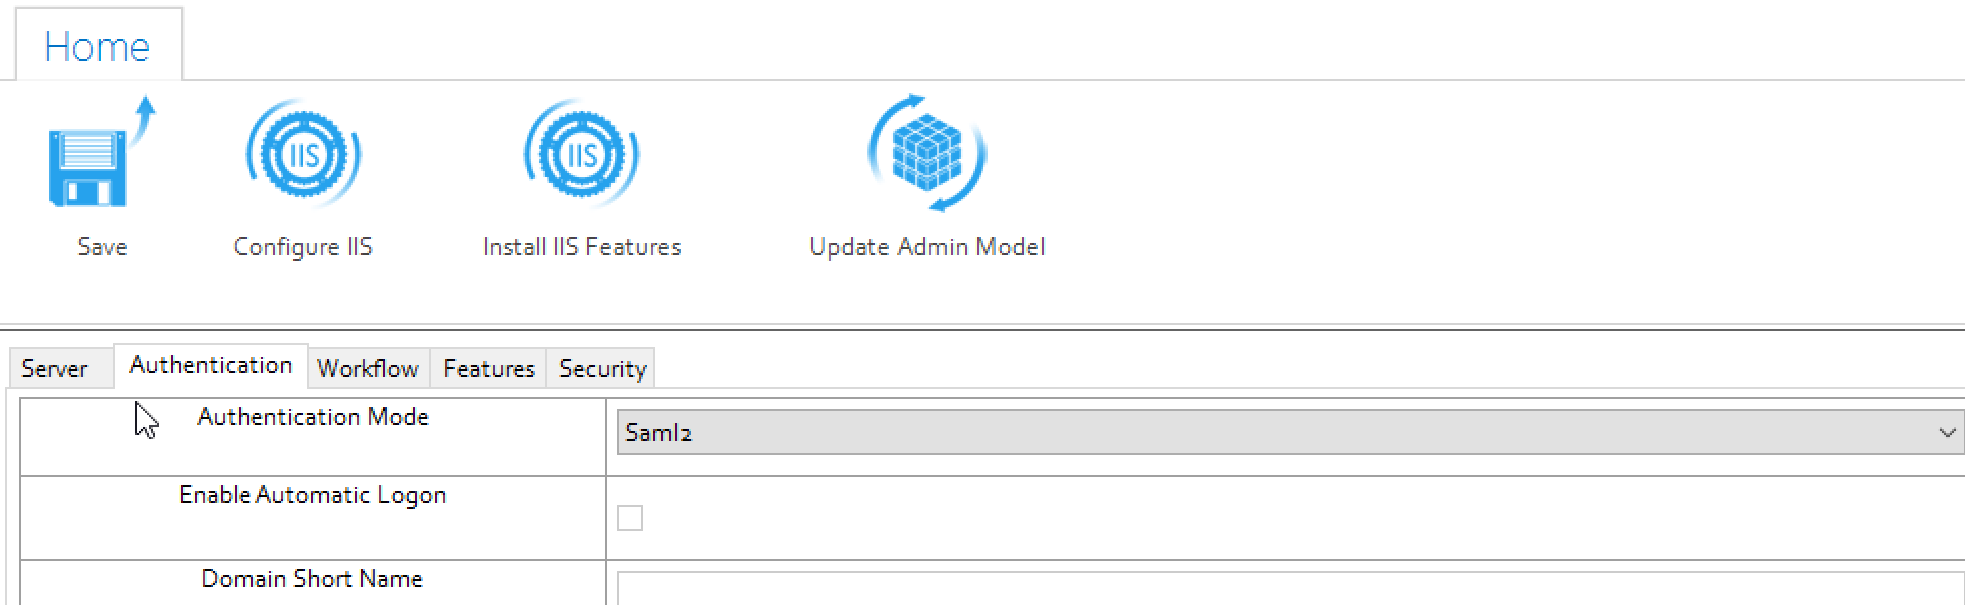
Under Authentication, click Authentication Mode drop down and select saml2.
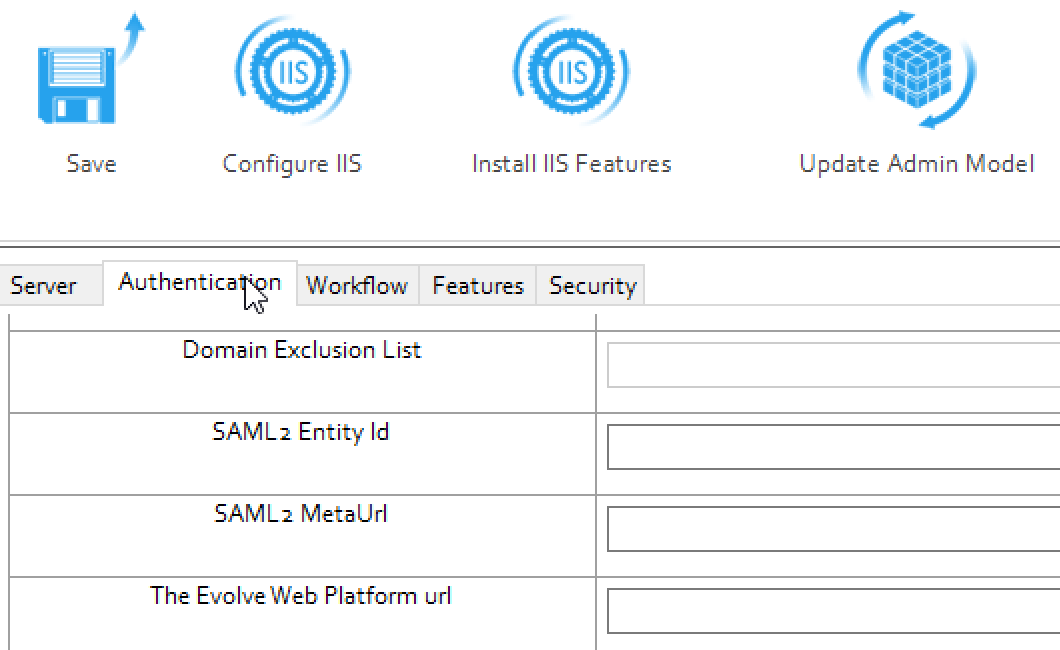
In the SAML2 Entity Id box, enter the entity id.
|
|
You can find this information in the meta data file you downloaded from Azure |
|---|
In the SAML2 MetaUrl box, enter the meta url.
|
|
The metadata URL has been copied to the Evolve server (C:/Casewise/Evolve/Site). |
|---|
In the The Evolve Web Platform url box, enter the evolve url.
Click Save.
Click Configure IIS and perform full deployment.
To configure Model in Evolve Designer:
Start Evolve Designer.
Click a model. For example, EA Foundation – Sample Model.
Click Site.
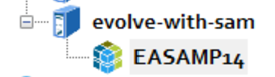
Expand Site > Deployment > evolve-with-sam.

Click EASAMP14.
Under AD Mapping, enter AD group ID.

|
|
Azure group ID must match the 32 mixed character ID separated by hyphen in every group, For example, 7e1cf831-83ff-47fc-896d-dfba641382c7. |
|---|
Click Save.
Click Dynamic Site.
You can now test and access the site https://YOURURL/evolve/ by following the above steps (as long as you are granted access within Azure AD). When you access the evolve site, the Azure Auth provider will redirect you to Evolve after authentication.
Active Directory is a commonly used Microsoft standard approach to securing logon to Windows and Web systems. The following section will describe both the pre-requisites and the Evolve configuration required to enable Active Directory (AD) as your authentication provider. It is largely assumed that you are knowledgeable about the configuration of Active Directory.
The instructions below explain how to configure your Evolve Server so that you can use AD as an authentication method to access your sites.
|
|
Changes to these settings will require the re-publication of the site. |
|---|
Pre-requisites for AD authentication:
Before proceeding with the connection, there are some preparatory steps you need to complete, in Modeler, Evolve and in the client’s Active Directory configuration in order for the synchronisation to work.
First let's setup the CW Roles:
Launch Model Explorer and create two (2) distinct objects within the CW Role object.
You can create as many roles as you want, but make sure that two of them can be used as generic roles for all incoming users. For example, you can create a role named “Read-Only Users” (which will ultimately contain all Social Users) and another called “Administrators” (or “Contributors”) (which will ultimately contain all Normal Users).
Connecting Roles to CW Views.
At this point, you should connect those default roles to the appropriate views to define which pages each user group will be able to access once logged in. To do this please refer to the appropriate section of the Evolve user guide (here).
If you choose not to connect any views to the roles, then both roles will be able to view the exact same pages.
Next configure the Client Active Directory:
Creating new AD Groups:
You need to arrange with your customer’s system administrator to create two (2) distinct groups within their Active Directory. They can choose to name them anything they want, but should keep those names distinct and recognizable so they can then be connected to Evolve.
Adding users to the AD Groups:
The client system administrator should then, in conjunction with your main contact within the client, ensure that the appropriate number of users is added in each group.
Configure the Active Directory Connection:
Change Authentication Mode:
Launch Evolve Designer (in Administrator mode) and choose "Server Configuration". Navigate to the "Authentication" tab. In the Authentication Mode drop-down list, switch the default value (CwAuthentication) to ActiveDirectoryAuthentication.

If you have not done so already, import the domain SSL certificate into Windows
Export the certificate to a new *.PFX file
Use the following password to secure the certificate :
LQMrnsuLpVAZ9ePd
Note that it is not currently possible to choose an alternative password. However the certificate is stored securely on your server, and is not made available externally, so this should not pose a concern.
Save the filename: CasewiseAuth.pfx
in the folder: c:\Casewise\Evolve\Site\bin
To configure SAML2 on your Evolve server:
Run Evolve Designer.
On the Evolve Designer Models launcher dialog, click the Server Configuration button.
The Server Configuration dialog opens.
Configure the settings according to the table below:
Authentication
|
Authentication Mode |
Choose how you want Users to be logged on to Evolve: Use Saml2 to make Evolve expect a SAML2 authentication |
|---|---|
|
Enable Automatic Logon |
Leave un-checked |
|
Domain Short Name |
Leave this setting blank. |
|
Use SSL Connection (Active Directory) |
Leave un-checked. |
|
AD Connection Path |
Leave this setting blank. |
|
AD Port |
Leave this setting blank. |
|
AD Group Membership Selection Mode |
Leave this setting blank. |
|
AD Connection Username |
Leave this setting blank. |
|
Connect to Active Directory Forest |
Leave this setting blank. |
|
Domain Exclusion List |
Leave this setting blank. |
|
SAML2 Entity ID |
This is often found in the metadata.xml file, and consists of the URL that Evolve needs to check authentication. |
|
SAML2 Meta Url |
This could be a public URL, a private URL or a local file path. The meta data consists of an XML file that contains the settings for the SAML2 configuration. where the metadata file should be stored in the Site folder
|
|
Evolve's Url |
Enter the URL to the Evolve home page - e.g. |
Click Save to save your configuration.
|
|
If you make any further changes to the server configuration in this dialog, you must Save again. |
|---|
At this point it will no longer be possible to logon to Evolve, as the final steps are to configure the permissions based on Claims configured on the Authentication Server, and their mapping to groups on the Evolve server.
To configure Groups and Roles on your Evolve server:
Groups and Roles for SAML2 are configured in exactly the same way as they are for Active Directory. Take a look at this to see how they work. You will find this detail in the "AD Mapping" details of the "Site Level Settings" - "Deployment Node Settings".
Further instructions for specific Identity Providers:
See here for help on Integrating with Okta Identity Provider.


