
Upgrading Metalogix Backup for SharePoint
You can upgrade your existing Metalogix Backup for SharePoint deployment to the current version to access the new and improved features available. This version of Metalogix Backup for SharePoint cannot upgrade backup sets from versions earlier than 5.0. If you used a version earlier than 5.0 to create a backup set, contact Metalogix Technical Support at https://support.quest.com for assistance with upgrades.
In this topic:
·Steps to perform a standard upgrade
·Steps to perform a custom upgrade
·Steps to upgrade the Backup Service instances
·Steps to use the Management Console wizard to upgrade all Backup Service instances
·Steps to use the installer wizard to manually upgrade a Backup Service
·Configuring the Backup Service staging location
·Upgrading the Self-Service Recovery feature
1.Ensure the computers on which you want to upgrade Metalogix Backup for SharePoint meet or exceed the product requirements. For more information see Product Requirements.
2.Ensure that the account that you use to log on to the computers that host the Metalogix Backup for SharePoint components also has administrator privileges on the repository database.
3.Identify the upgrade path your environment requires. For more information, see What upgrade options are available?
4.Temporarily disable any scheduled jobs and allow any currently running or queued backup/restore operations to complete.
5.Close all open applications on the Metalogix Backup for SharePoint component hosts.
6.Ensure that the .NET framework 4.0 is running on the target computer.
7.If you plan to use farm backups for your SharePoint 2010, 2013, 2016 or 2019 farm, use the Management Console to deploy additional Backup Service instances on every Web front end (WFE) and database server in the farm. For more information about this installation, see Installing the Backup Service manually.
8.If you deployed the Metalogix Backup for SharePoint Self Service Recovery solution, remove the Web part and use the SharePoint administration tools to retract the solution package. If you plan to use the new Self-Service Recovery feature, use the Management Console to deploy the Self-Service Recovery components manually. For more information about this installation, see Manually installing the Self-Service Recovery feature.
9.Upgrade your installation to Metalogix Backup for SharePoint by choosing the appropriate upgrade path:
a.Standard upgrade - In a single-server deployment, the Management Console, Repository database, Management Service and Backup Service are installed on the same computer. You can use the upgrade wizard to upgrade your installation to the new version of Metalogix Backup for SharePoint if you have a single-server deployment or if you are upgrading from a trial installation. See Steps to perform a standard upgrade.
b.Custom upgrade - In a distributed deployment, the components will be on different computers. See Steps to perform a custom upgrade.
Steps to perform a standard upgrade
1.Log in to the computer where you want to install Metalogix Backup for SharePoint. You should use a user account that is a member of the local administrators group on the computer. In addition, the account that you use must have the sysadmin role assigned for the SQL Server instance that hosts the Metalogix Backup for SharePoint repository database.
2.Download and unzip the upgrade files to a folder.
3.Locate and double click the Metalogix Backup for SharePoint.exe file. The installer bootstrap window opens.
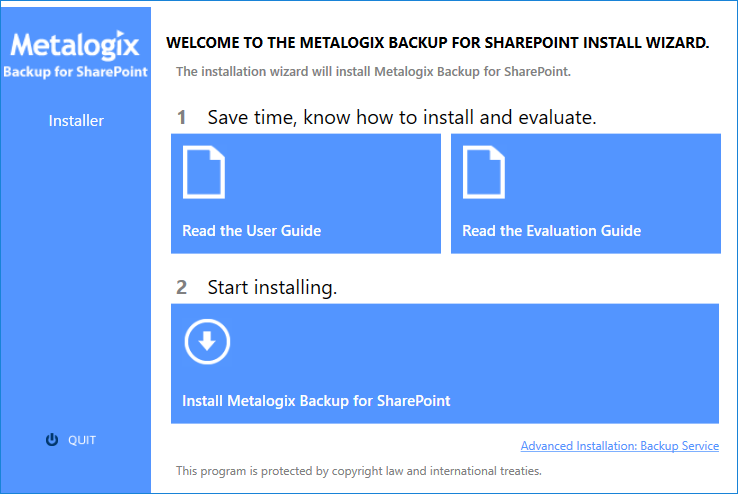
4.Click Install Metalogix Backup for SharePoint. The System Check window opens.
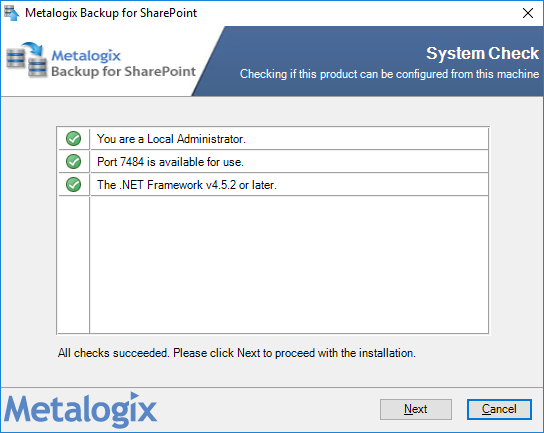
5.You must address the system check failures if any. When all checks succeed, click Next. The Upgrade Wizard for Metalogix SharePoint opens.
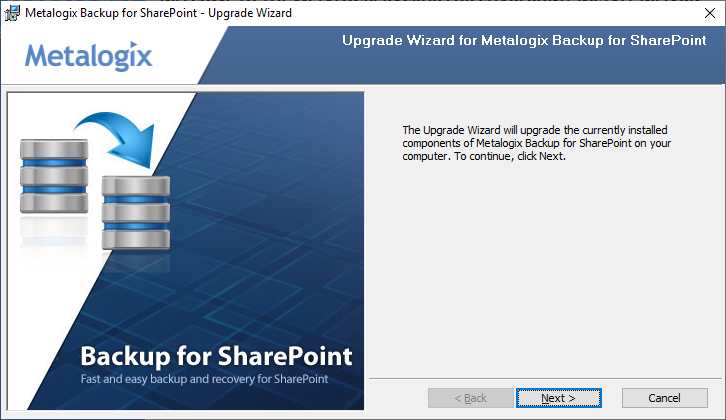
6.Click Next. The Upgrade the Metalogix Backup for SharePoint Repository window opens.
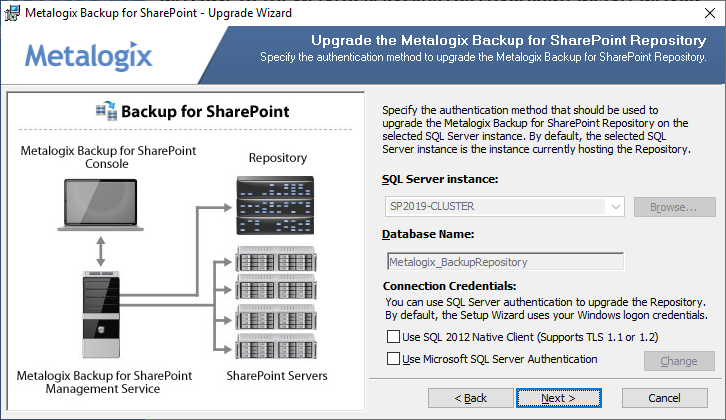
7.Click Next. The Metalogix Backup for SharePoint Management Service Account window opens.
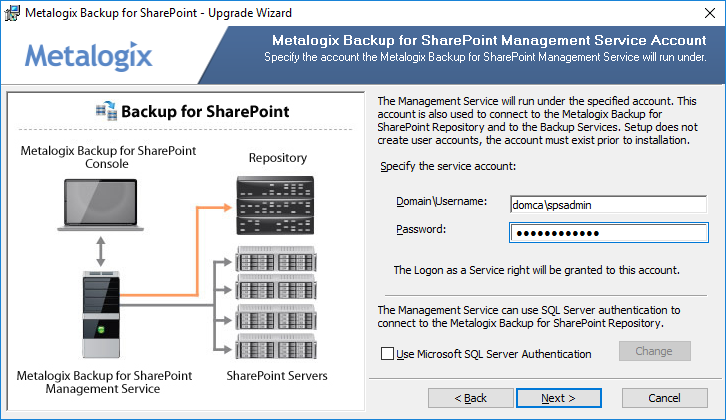
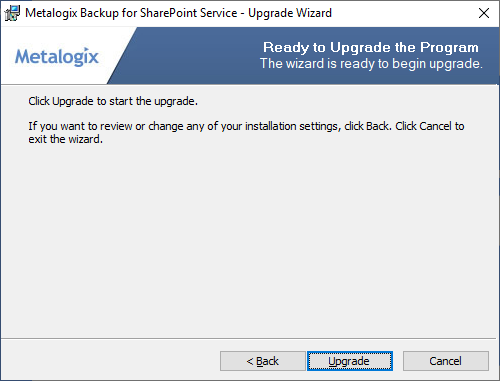
8.Click Next. The Ready to upgrade the program window opens.
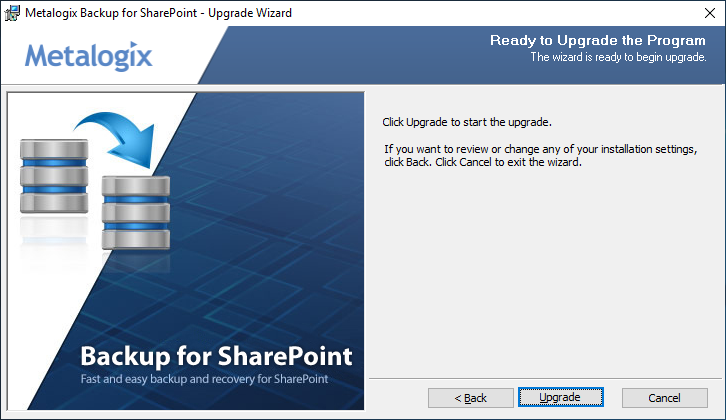
9.Click Upgrade. Wait until the Upgrade Wizard Completed window opens.
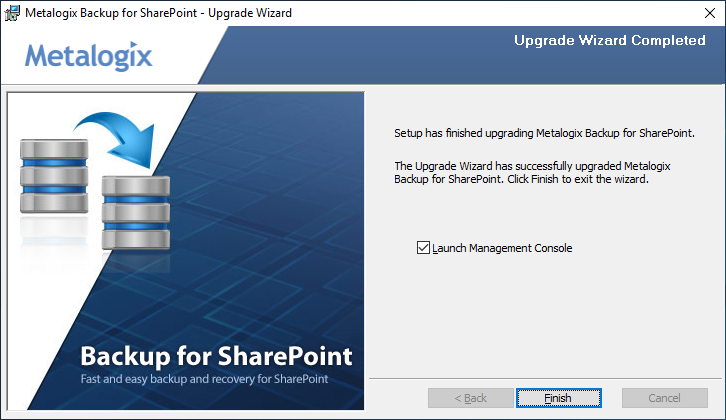
10.Select Launch Management Console and click Finish.
11.Upgrade all previously deployed Backup Service instances. See Steps to upgrade the Backup Service instances.
Steps to perform a custom upgrade
1.Perform a standard upgrade on the primary host that has the Management Service. See Steps to perform a standard upgrade.
2.Upgrade all previously deployed Backup Service instances. See Steps to upgrade the Backup Service instances.
3.Upgrade additional installations of the Management Console by running the Metalogix Backup for SharePoint upgrade wizard on each host computer.
Steps to upgrade the Backup Service instances
The Management Console, Management Service and the Backup Service require the same version otherwise no backup or restore operation can occur. You can upgrade the Backup Service in two ways:
·Use the Management Console - The first time that you open the Management Console after an upgrade, the Management Console prompts you to upgrade either the primary Backup Service or all Backup Services that lets you upgrade the services that you may have deployed on other machines. If you choose to upgrade only the primary Backup Service, you must use the Metalogix Backup for SharePoint installer on each Backup Service host to manually upgrade the secondary Backup Service instances.
|
|
CAUTION: If you choose to upgrade all backup services using the Management Console service upgrade wizard, make sure that all the services use the same windows credentials. If you have deployed additional Backup services on other host computers with different windows credentials, then the choice to upgrade all backup services using the Management Console will overwrite the windows credentials of all the services with the credentials that you specify in the upgrade wizard. If you have deployed additional Backup services on other host computers with different windows credentials, you can upgrade only the primary Backup Service using the Management Console service upgrade wizard, and then use the Metalogix Backup for SharePoint installer on each Backup Service host to manually upgrade the additional Backup Service instances. |

·Use the Metalogix Backup for SharePoint installer - You can also run the Metalogix Backup for SharePoint installer on each computer that hosts the Backup Service to manually upgrade the service. This method is particularly useful if each Backup service uses a different windows account credentials.
Steps to use the Management Console wizard to upgrade all Backup Service instances
1.Open the Management Console. The Upgrade Backup Service wizard opens when you open the Management Console for the first time after a standard upgrade.
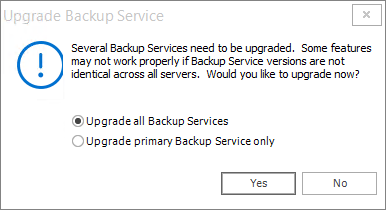
2.Choose an upgrade option as described below:
a.Upgrade all Backup Services - upgrades all Backup Services across all hosts where they are deployed.
b.Upgrade primary Backup Service only - upgrades only the primary Backup Service.
3.Click Yes. The Backup Service configuration window opens. If you select No, the Backup services will not be upgraded. You can open the wizard from the Configuration workspace in the Management console.
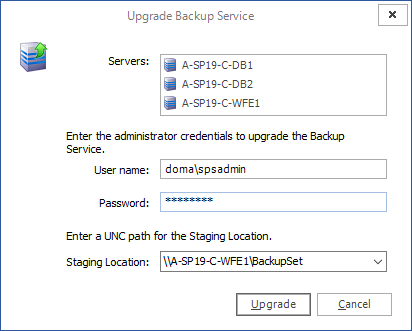
4.The Servers list displays all the servers where backup Services are installed. Enter the information as described below:
a.User name - the windows administrator account name used to run the service.
b.Password - the windows administrator account password.
c.Staging Location - enter or choose an existing UNC path. You cannot use a local path and you cannot leave this field empty.
|
|
CAUTION: All Backup Service account credentials will be upgraded with the credentials you enter. If you have deployed additional Backup Services on other host computers with different account credentials, you must upgrade only the primary Backup Service using the Management Console service upgrade wizard, and then use the Metalogix Backup for SharePoint installer on each Backup Service host to manually upgrade the additional Backup Service instances. |
5.Click Upgrade. The confirmation window opens indicating the servers where the Backup Service was upgraded.
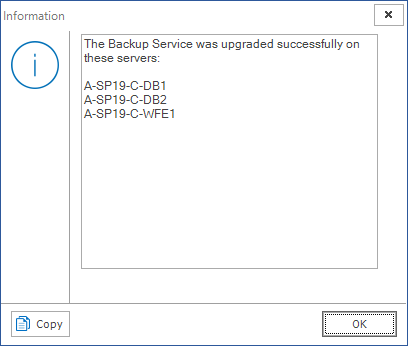
6.In the confirmation window, click OK.
Steps to use the installer wizard to manually upgrade a Backup Service
1.Log in to the computer where you want to install Metalogix Backup for SharePoint. You should use a user account that is a member of the local administrators group on the computer. In addition, the account that you use must have the sysadmin role assigned for the SQL Server instance that hosts the Metalogix Backup for SharePoint repository database.
2.Download and unzip the upgrade files to a folder.
3.Locate and double click the Metalogix Backup for SharePoint.exe file. The installer bootstrap window opens.
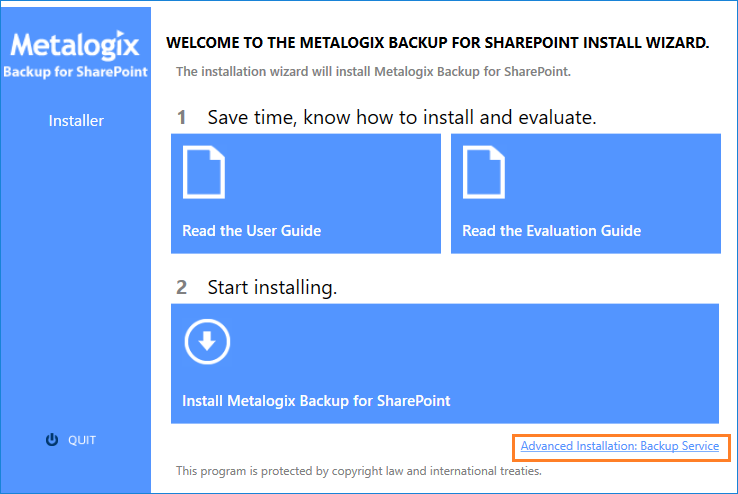
4.Click Advanced Installation: Backup Service. The System Check window opens.

5.You must address the system check failures if any. When all checks succeed, click Next. The Metalogix Backup for SharePoint Service Account window opens.
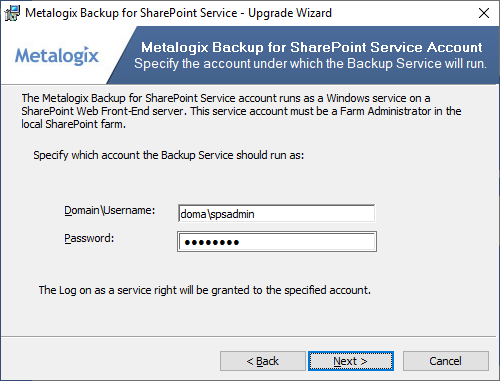
6.Click Next. The Ready to Upgrade the Program window opens.
7.Click Upgrade. The Setup wizard Completed window opens.
8.Verify that the upgrade was successful and click Finish to close the wizard. Then click Quit to exit the installer bootstrap.
Configuring the Backup Service staging location
The Backup Service uses a staging location to backup SharePoint data. During installation, the default location is configured as C:\Users\<username>\AppData\Local\Temp\ which is insufficient for a successful backup operation. You must specify a UNC path for the staging location.
If you specify an invalid UNC path during and upgrade or install you will get an error as shown below when you attempt a backup operation.
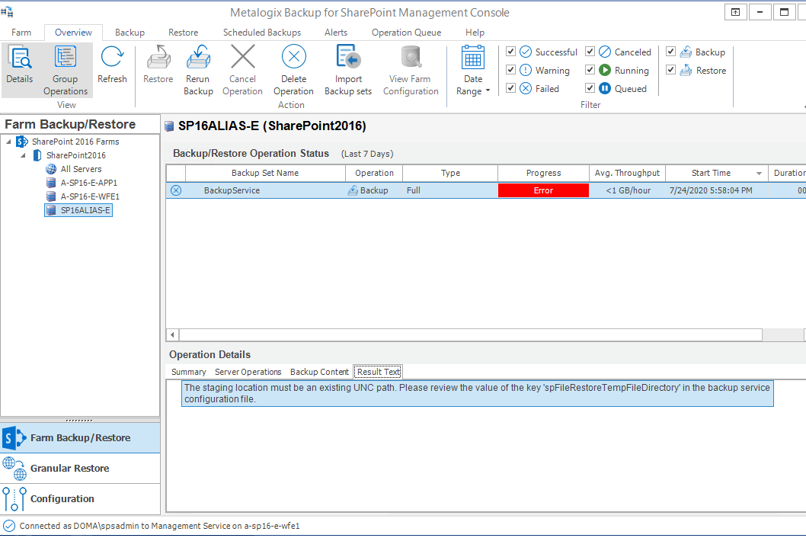
The error message appears in the Result Text tab of the Operations Detail pane: The staging location must be an existing UNC path. Please review the value of the key spFileRestoreTempFileDirectory in the Backup service configuration file.
Steps to review and change the staging location
1.Log in to the computer where Metalogix Backup for SharePoint has been installed.
2.Navigate to the Backup Service installation directory C:\Program Files\Metalogix\SharePointBackupService
3.Open the PBBackupService.exe.config file with Administrator privileges.
4.Inspect the value of the row key=spFileRestoreTempFileDirectory
5.If the value indicates a local path, you must change the path to a UNC path.
6.Save the changes to the configuration file and restart the Backup Services. If there are more instances of the backup Service on other computers, you must restart them as well.
Upgrading the Self-Service Recovery feature
When you upgrade Metalogix Backup for SharePoint, you can use the Deploy SharePoint Components dialog in the Management Console to upgrade the Self-Service Recovery feature. For information about using the Deploy SharePoint Components dialog to deploy the Self-Service Recovery feature manually, see Manually installing the Self-Service Recovery feature.
Configuring Metalogix Backup for SharePoint
Once you configure Metalogix Backup for SharePoint for your environment, you can perform the following tasks:
·Opening the Management Console
·Connecting a standalone Management Console to the Management Service
·Configuring Metalogix Backup for SharePoint for your farm
·Managing self-service recovery
·Managing backup set disk space
·Importing a Repository Database
When the Management Console connects to a particular Management Service, it determines whether you already configured the Management Service. If the Management Service is not yet configured, the Configuration wizard runs. When you run the Configuration wizard, you locate the SharePoint Web front end (WFE) servers and database servers in the farm and install the Backup Service on them. You also define the backup locations for the farm.
Opening the Management Console
You use the Management Console to configure Metalogix Backup for SharePoint and to back up and restore SharePoint content.
When you open the Management Console, it checks for a connection to the Management Service. If the Management Console cannot connect to the Management Service or if no Management Service is configured, the Management Console prompts you to select the Management Service that it should use. When you install Metalogix Backup for SharePoint, you can choose to launch the Management Console when the installer quits.
If you are using a trial license or a license that is soon expiring, the Management Console warns you that the license is nearing its expiration date. You can contact Metalogix to purchase an updated license key.
How do I open the Management Console?
You use the Windows Start Menu to open the Management Console.
|
|
NOTE: The first time you open the Management Console after installation, you will be required to enter a valid License key. |

To open the Management Console
1.At the Microsoft Windows desktop, click Start > All Programs > Metalogix > SharePointBackup > PBManagementConsole.exe
What permissions does the Management Console require?
The Management Console uses the SharePoint and Active Directory permissions of the currently logged in user to back up or restore SharePoint objects. If the currently logged in user is unable to access content, the user is unable to back up or restore that content.
|
|
NOTE: Only users that are members of the SharePoint farm administrators group can perform farm backups. |
For more information about the required permissions, see Understanding the granular restore process.
Connecting a standalone Management Console to the Management Service
When you install the Metalogix Backup for SharePoint, you can choose to install the Management Console on a computer with no other components. If you install only the Management Console, you must specify the computer that hosts the Management Service before you can use the Management Console.
You can connect more than one Management Console to a single Management Service.
If the Management Console is not on the computer that hosts the Management Service, the Management Console prompts you to add a farm the first time you start the Management Console. When you add the farm, you specify the name of the Management Service host.
When it connects to the Management Service, the Management Console prompts you to add a farm if none exists in the Metalogix Backup for SharePoint repository database.
When you specify the name of the Management Service host, you should use one of the following formats:
·DNS name
·Fully-qualified name
·NetBIOS name
·IP address
If you installed the Management Console and the Management Service on the same computer, the Management Console contacts the local Management Service automatically.
How do I connect the Management Console to a Management Service?
1.From the Microsoft Windows desktop, click Start > All Programs > Metalogix > Metalogix Backup for SharePoint. The Connect Management Service window opens.
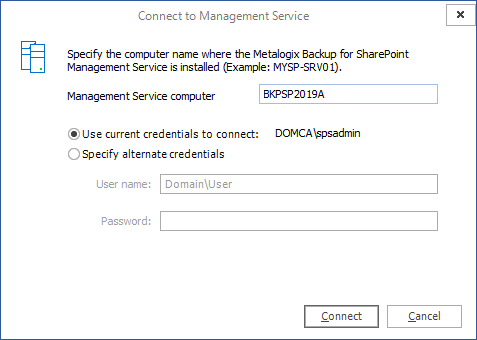
Enter the information as described below:
a.Management Service computer - specify the NetBIOS, FQDN or IP address of the computer that hosts the Management Service for the farm.
b.Use current credentials to connect - use the credentials of the logged-in user
c.Specify alternate credentials - enter a user name and password that has access to the Management Service compter.
2.Click Connect to finish connecting to the computer that hosts the Management Service.
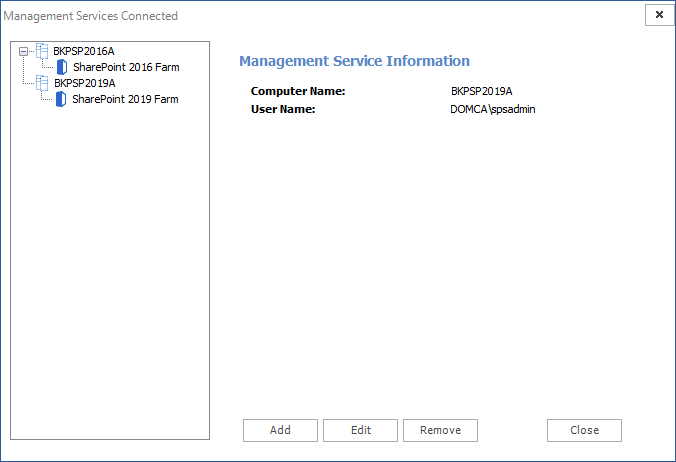
3.Verify that the management service is added.
|
|
NOTE: The SharePoint Farm child nodes appear in the Management Services Connected window only if the farms were added to the server that hosts the Management Service. If no farm was added to a server, only the management service node is displayed. If you add one or more farms to the same servers, the SharePoint Farm child nodes will indicate the farms added. |