
Create a Central Store
One of the main benefits of using the new ADMX files is the central store. The central store is a folder structure created in the Sysvol directory on the domain controllers in each domain in your organization. You will need to create the central store only once on a single domain controller for each domain in your organization. The File Replication service then replicates the central store to all domain controllers. It is recommended that you create the central store on the primary domain controller because the Group Policy Management Console and Group Policy Object Editor connect to the primary domain controller by default.
The central store consists of a root-level folder containing all language-neutral ADMX files and subfolders containing the language-specific ADMX resource files.
To perform this procedure, you must be a member of the Domain Administrators group in Active Directory.
Steps to create the central store
1.Create the root folder for the central store %systemroot%\sysvol\domain\policies\PolicyDefinitions on your domain controller.
2.Copy the Archive Manager Outlook Add-in.admx into %systemroot%\sysvol\domain\policies\PolicyDefinitions folder.
3.Create a subfolder under %systemroot%\sysvol\domain\policies\PolicyDefinitions for each language that your Group Policy administrators will use. Each subfolder is named after the appropriate ISO-style Language/Culture Name. For a list of ISO-style Language/Culture Names, see Locale Identifiers. For example, to create a subfolder for U.S. English, create the subfolder: %systemroot%\sysvol\domain\policies\PolicyDefinitions\EN-US.
4.Copy the Archive Manager Outlook Add-in.adml into %systemroot%\sysvol\domain\policies\PolicyDefinitions\EN-US sub-folder.
Edit the Administrative Template Policy Settings in the Domain-Based GPOs
1.Start the Group Policy Management.
2.In the console tree, expand your Group Policy Objects
3.Expand context menu on newly created policy (described in Create a Group Policy Object), and click on edit.
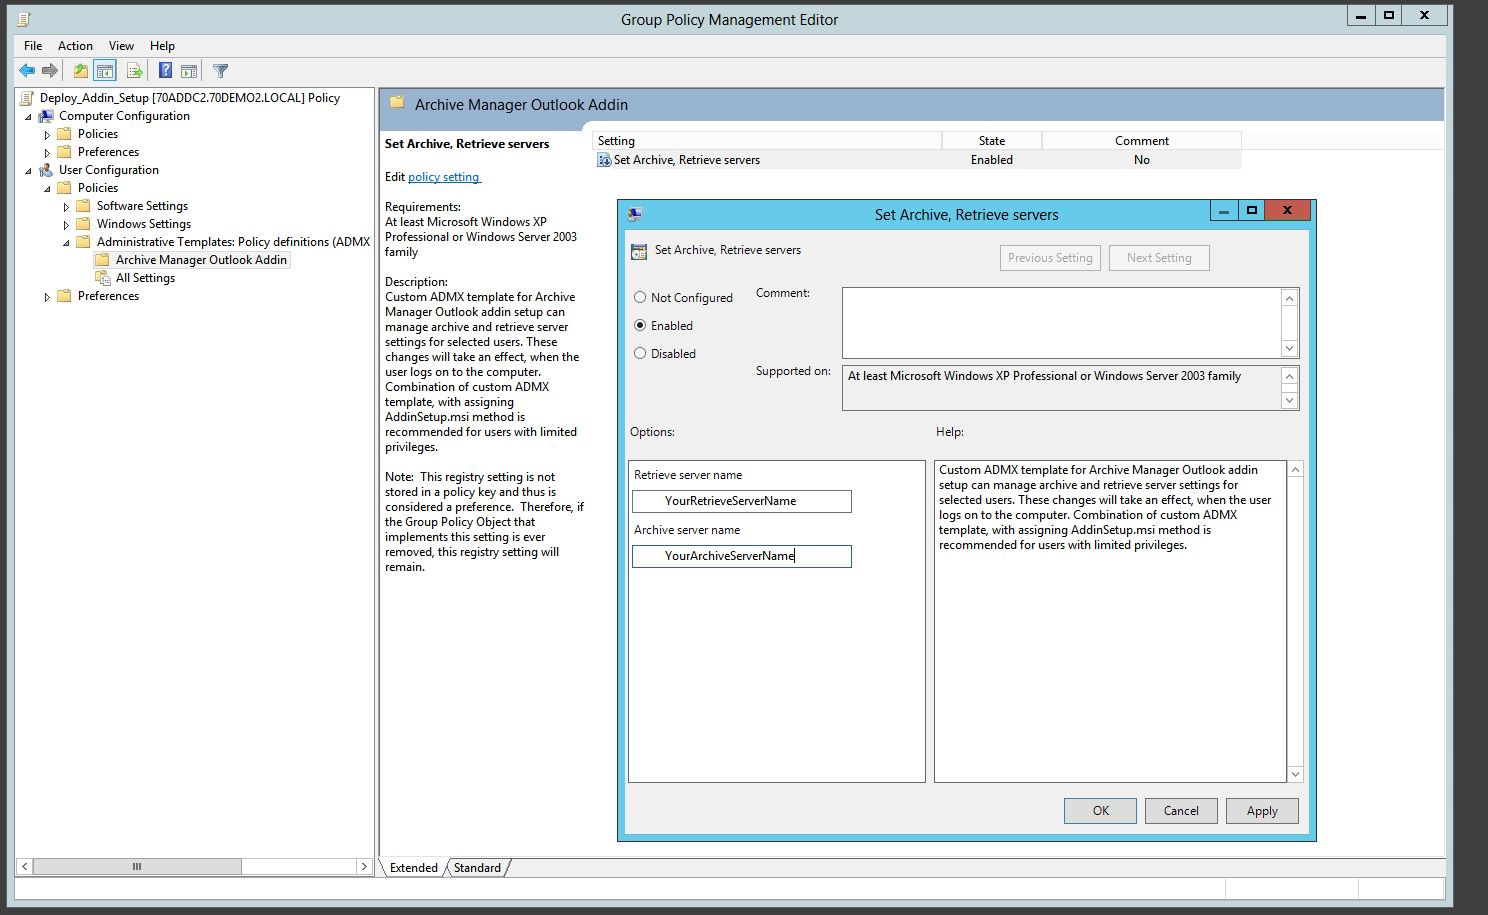
4.Under User Configuration, expand Administrative Templates. The Group Policy Object Editor automatically reads all ADMX files stored in the central store. The Add-in policy must be listed on the right pane of the administrative template
5.To change that policy setting from its current state, double-click the name of the policy setting.
6.In the policy setting dialog box, click Enabled, which means: The registry reflects that the policy setting is selected.
7.Fill the Archive Manager archive, retrieve server names into this policy and apply these changes.
Troubleshooting
In this section:
·Assigned Archive Manager Outlook Addin Setup.msi failed to install on a client computer during logon
·Archive Manager Outlook Add-in is not loaded by MS Outlook for all users
·Add-in is deactivated and it is not possible to enable it.
Assigned Archive Manager Outlook Addin Setup.msi failed to install on a client computer during logon
·Make sure that your distribution point is shared and the permissions on the share are set to allow access to the distribution package.
·Make sure that your Archive Manager Outlook Addin Setup.msi is added into the group policy software installation with full UNC path to the shared folder.
·Check, if group policy changes were successfully refreshed for logged users. Run the gpupdate command on the client computer to refresh the policy.
·Check client machine event logs for similar descriptions: Failed to apply changes to software installation settings. Software installation policy application has been delayed until the next logon because an administrator has enabled logon optimization for group policy." Then try to log on again.
·Open group policy security options and check, if Apply Group Policy is checked for the groups or users, that you want to prevent from having this policy applied.
·Make sure that all required prerequisites for Archive Manager Outlook Addin Setup.msi were installed. These events occur if the .NET Framework 2.0 is not installed on the client computer. Check client machine event logs for similar descriptions:
oFailed to apply changes to software installation settings.
oSoftware changes could not be applied.
oA previous log entry with details should exist.
oThe error was: Fatal error during installation.
oThe Group Policy client-side extension Software Installation failed to run.
oThe install of application Archive Manager Outlook Add-in from policy Archive Manager Outlook Add-in failed. The error was : Fatal error during installation.
Archive Manager Outlook Add-in is not loaded by MS Outlook for all users
·Make sure that the Archive Manager Add-in was deployed and registered under: HKCU\Software\Metalogix\PAM4Exchange Outlook Add-in

·Check the registry value HKLM\Software\Microsoft\Office\Outlook\Add-ins\PAM4ExchangeAdd-in\LoadBehavior, must be set to 3.
·Archive Manager Outlook Add-in can be deployed and registered only in one registry location, if you find ...\Software\Microsoft\Office\Outlook\Add-ins\PAM4ExchangeAdd-in both in HKLM and in HKCU, you have to delete one of them, depending on outlook version (The MS Outlook will not load the Add-in, if both are present).
For Outlook 2013 or higher delete HKLM key
·Visual Studio Tools for Office can write all errors that occur during startup to a log file or display each error in a message box. By default, these options are turned off for application-level projects. You can turn the options on by Add-ing and setting environment variables. To display each error in a message box, set the VSTO_SUPPRESSDISPLAYALERTS variable to 0 (zero). You can suppress the messages by setting the variable to 1 (one). To write the errors to a log file, set the VSTO_LOGALERTS variable to 1 (one). Visual Studio Tools for Office creates the log file in the folder that contains the application manifest. The default name is <Manifestname>.manifest.log. To stop logging errors, set the variable to 0 (zero). For information about setting environment variables in Microsoft Windows XP, see "How To Manage Environment Variables in Windows XP".
Add-in is deactivated and it is not possible to enable it
Outlook 2013: Make sure that you have installed .Net 4.0 FULL and not just the client.
About Us
Quest creates software solutions that make the benefits of new technology real in an increasingly complex IT landscape. From database and systems management, to Active Directory and Office 365 management, and cyber security resilience, Quest helps customers solve their next IT challenge now. Around the globe, more than 130,000 companies and 95% of the Fortune 500 count on Quest to deliver proactive management and monitoring for the next enterprise initiative, find the next solution for complex Microsoft challenges and stay ahead of the next threat. Quest Software. Where next meets now. For more information, visit www.quest.com.