
Distributed SCM Installation
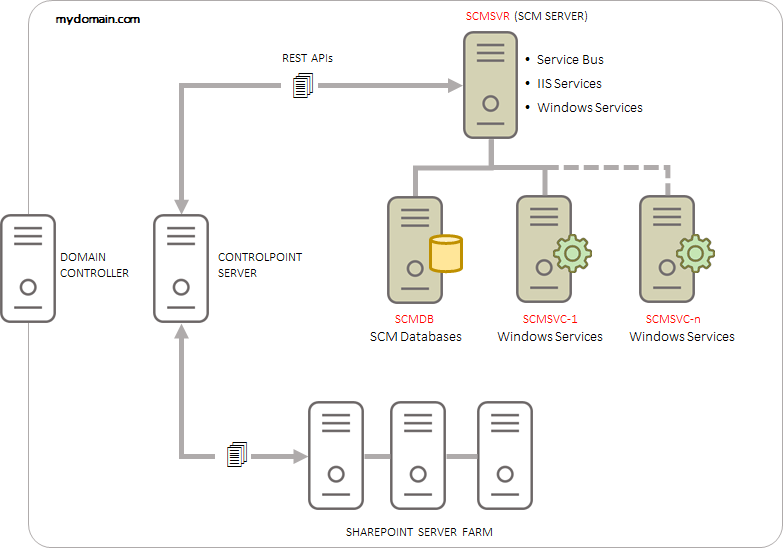
For this deployment topology, the SCM databases are installed on a dedicated server (SCMDB), and the rest of the components of the SCM are installed on a dedicated SCM server (SCMSVR) as shown in the illustration below.
Initially, the SCM Windows service that is installed on the SCMSVR analyzes documents that are submitted from Metalogix ControlPoint, file shares or other sources. As the analysis load increases, more servers can be deployed (SCMSVC-1 to SCMSVC-N) to scale up the processing power of SCM in addition to the SCM Windows service that is installed on the SCMSVR.
In this topic:
·Worksheet for this installation
·Steps to setup the SCM Server
·Steps to install a dedicated Analysis server
·Steps to verify the distributed installation
Worksheet
The following information will be required through the installation process. Sample values are provided here as a guidance based on the illustration above.
|
Field |
Description |
Example |
|
License Key |
The license key that you received from Quest. If you don't have a license key, contact your Quest representative. |
894K5-3M448-M544E-A594A-7K8Z7 (Sample only. This key is neither an active nor an expired license key) |
|
SCM Administrator |
The domain user who will log into the SCM Administration Center |
mydomain\scmadmin |
|
SCM Server |
The server where the SCM Administration Center and related services are installed. |
SCMSVR |
|
SCM Databases Server |
The SQL server instance on which the SCM databases will be installed. |
SCMDB |
|
SCM Windows service Server |
The dedicated server where additional SCM Windows services will be installed. |
SCMSVC-1 |
|
SCM Windows service account name |
The account name that will be used to run the SCM Windows service on all servers. |
mydomain\scmadmin. This is the username of the SCM Administrator. |
|
Temporary Folder |
Full path of the network shared folder that will contain the files during analysis. The shared folder must exist on the SCM server. |
\\SCMSVR\Storage |
|
Cluster Certificate name |
Name of the cluster certificate used to locate and join an SCM cluster. |
SCM-Cluster-Certificate.pfx |
|
Host Name |
The host name of the administration web site for the SCM. |
scmsvr.mydomain.com |
|
Admin Portal Port |
The port used by the SCM Administration Center. Specify a unique port number between 1 and 65535. The port number cannot be a duplicate or a reserved port number. |
44300 |
|
Admin Service Port |
The port used by the Admin service to request various admin information. Specify a unique port number between 1 and 65535. The port number cannot be a duplicate or a reserved port number. |
44301 |
|
Result Service Port |
The port used for REST calls to request the results of the file analysis. Specify a unique port number between 1 and 65535. The port number cannot be a duplicate or a reserved port number. |
44302 |
|
File Upload Service Port |
The port used for REST calls to submit files for analysis. Specify a unique port number between 1 and 65535. The port number cannot be a duplicate or a reserved port number. |
44303 |
|
Profile Service Port |
The port used for REST calls to manage profiles. Specify a unique port number between 1 and 65535. The port number cannot be a duplicate or a reserved port number. |
44304 |
|
Subquestion Service Port |
The port used for REST calls to manage search terms associated with the profiles. Specify a unique port number between 1 and 65535. The port number cannot be a duplicate or a reserved port number. |
44305 |
|
Scan Service Port |
The port used for REST calls to submit, cancel or delete scans and get information about running scans and reports. Specify a unique port number between 1 and 65535. The port number cannot be a duplicate or a reserved port number. |
44306 |
|
Notification Service Port |
The port used for REST calls to send system notifications. Specify a unique port number between 1 and 65535. The port number cannot be a duplicate or a reserved port number. |
44307 |
|
Analytics Service Port |
The port used for REST calls for analytics. Specify a unique port number between 1 and 65535. The port number cannot be a duplicate or a reserved port number. |
44308 |
|
RabbitMQ connection string |
Required if a pre-configured instance of RabbitMQ and Erlang exists on another server. |
Connection string as required. Contact your Quest Technical Support for further assistance. |
Steps to setup the SCM Server
In this topic:
·Steps to install the SCM components on the SCM server
·Steps to grant read/write permissions to the temporary shared folder
·Steps to export the cluster certificate
Steps to install the SCM components on the SCM server
The install steps described below assume that a SQL server machine that is designated to be configured as the SCM databases server (e.g., SCMDB) is available on the network and accessible by the domain user who will install the SCM Server.
1.Log in to the computer designated as the SCM Server. For example, log in to SCMSVR using the SCM Administrator credentials (mydomain\scmadmin).
2.Unzip the install media files to a suitable folder.
3.Click the windows installer file Metalogix Sensitive Content Manager.exe. The SCM - Prerequisites window opens. The prerequisites window will appear if the installer determines that one or more prerequisites are required.
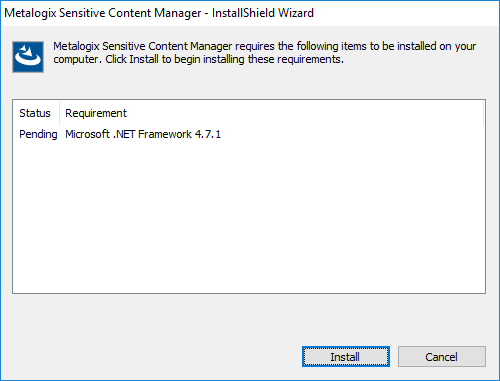
4.Click Install. When the prerequisites are installed, the Welcome to Metalogix Sensitive Content Manager Setup Wizard window opens. If the appropriate prerequisites are already installed, this is the first window that opens.
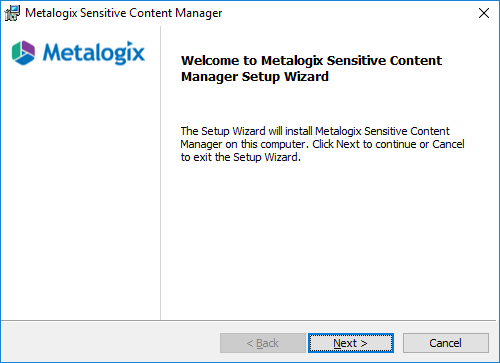
5.Click Next. The License Agreement window opens.
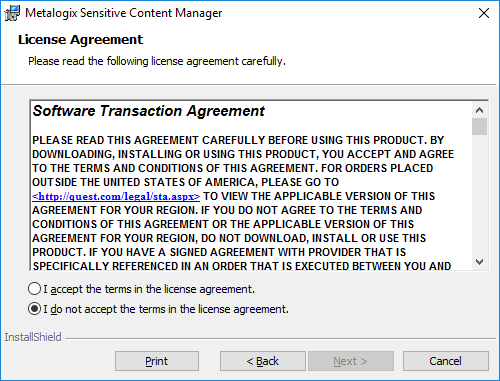
6.Click the check box I accept the terms in the License Agreement to activate the Next button. Click Print to print the License Agreement.
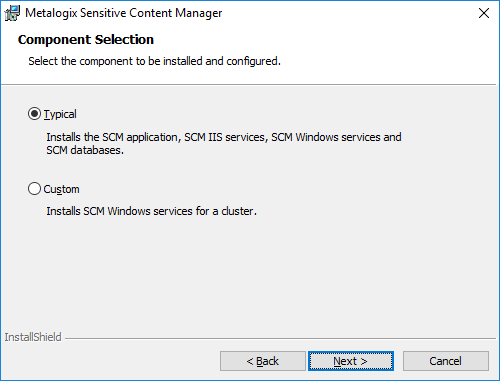
7.Click Next. The Component Selection window opens. Select Typical to install the components on the SCM Server.
8.Click Next. The Product Licensing window opens. In the License Key field, enter your license key.
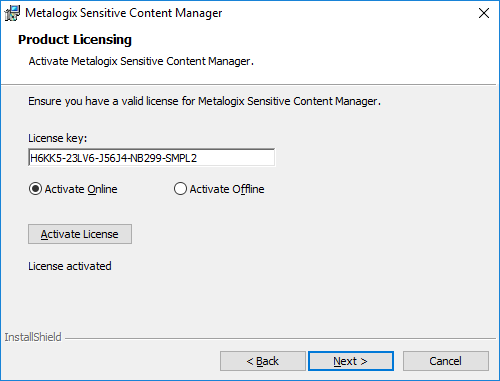
9.There are two options available to activate your license. The online activation steps are described here. See Steps to activate your license offline for more information.
a.Select Activate Online.
b.Click Activate License. If the license activation is successful, a confirmation message opens.

c. Click OK. The status License not activated on the Product Licensing window changes to License activated. Verify your license details as they will differ from the license details shown here.
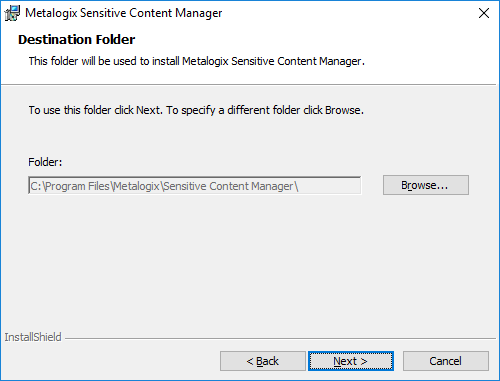
10.Click Next. The Destination Folder window opens. Click Browse to change the destination folder. If you change the destination folder, ensure that the folder exists on this computer and there are no restrictions to reading or writing to the new folder.
11.Click Next. The Service Account Credentials window opens.
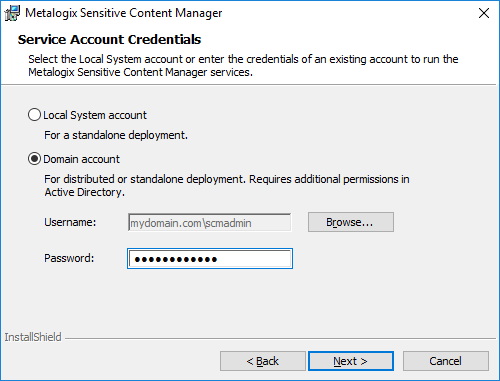
12.Choose Domain Account and enter the credentials of the domain user.
|
|
NOTE: The domain user must have read/write permissions to the Service Connection Point in the active directory. For more information see Steps to grant additional privileges to the SCM Administrator. |

13.Click Next. The SQL Server Information window opens.
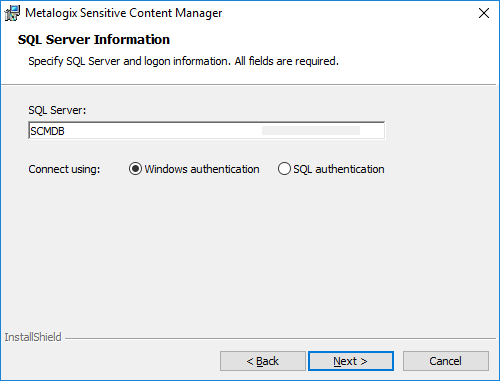
Enter the values as described below
a.SQL Server - the name of the SQL Server instance where the SCM database will be installed.
b.Connection options:
i.Windows authentication - SQL Server validates the account name and password using the Windows principal token in the operating system. The user must have log in rights to the SQL Server instance with security admin and dbcreator roles assigned. This is the recommended authentication option.
ii.SQL authentication - uses the user credentials stored in SQL Server that may not be based on Windows user accounts. The user must have log in rights to the SQL Server instance with security admin and dbcreator roles assigned.
14.Click Next. The Service Bus Installation window opens. Metalogix SCM uses RabbitMQ as the service bus.
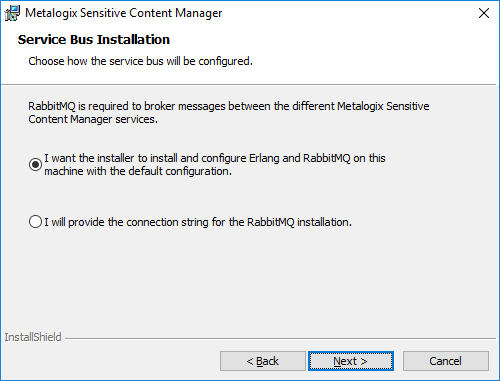
Choose from one of the following options:
a.Select I want the installer to install and configure Erlang and RabbitMQ on this machine with the default configuration if you don't have an existing instance of the service bus. The installer will install the necessary files and dependencies at the end of the install process and create a certificate with the necessary credentials to operate RabbitMQ.
b.Select I will provide the connection string for the RabbitMQ installation if you already have a preinstalled instance that you have configured. When you click Next with this option selected, the Service Bus Connection Information window opens. Specify the RabbitMQ connection string.

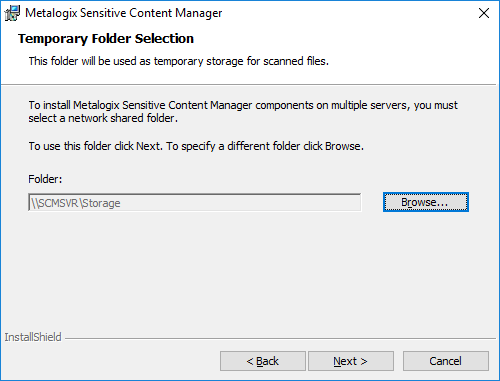
15.Click Next. The Temporary Folder Selection window opens. A default temporary storage folder is specified. Click Browse to change to a network shared folder which exists on this computer and there are no restriction to reading or writing to the new folder.
|
|
NOTE: We recommend selecting a location on SSD or other fast access storage. The location will be heavily used, and fast access storage can significantly improve file analysis times. |
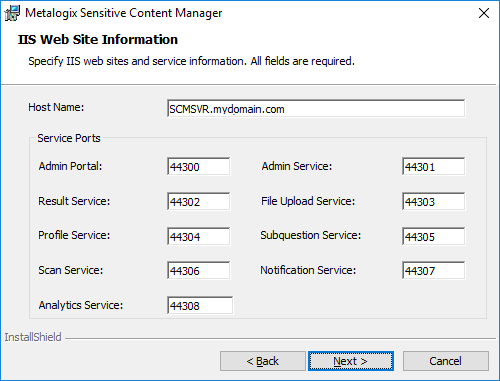
16.Click Next. The IIS Web Site Information window opens.
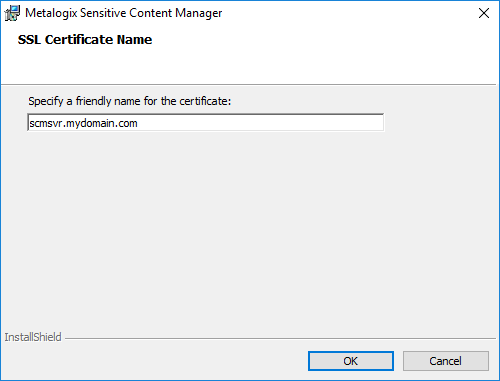
a.Click the drop-down box for the SSL Certificate field and select <Create Self Signed Certificate> option. The SSL Certificate Name window opens. Enter a friendly name and click OK. The IIS Web Site Information window reopens with the specified SSL Certificate name.
b.For the Security Group, click Browse to open the Select Group window. Enter SCM Users in the Enter the object name to select field and click Check Names. When the Domain Users group is verified, click OK to add the group.

17.Click Next. The IIS Web Site Information window reopens with default port specifications for each IIS service. If you choose to change the default port numbers, ensure that the port numbers are within the range 1 to 65535 and they are unique and available for use.
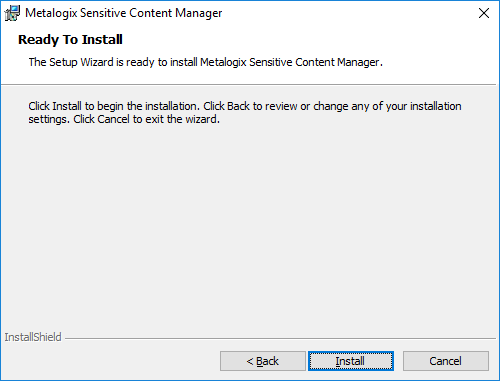
18.Click Next. The Ready To Install window opens.
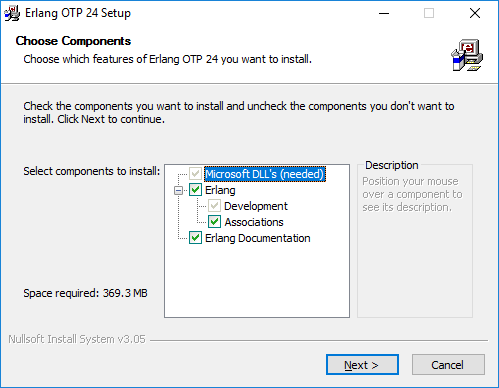
19.Click Install. The Erlang third-party component installer starts. You must allow additional Microsoft redistributable components to be installed if requested by the installer.
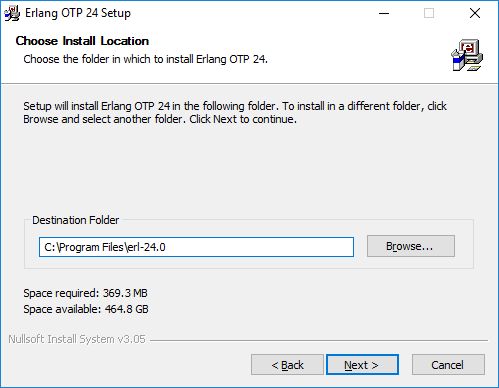
20.Keep the defaults as indicated and click Next. The Choose Install Location window opens. Click Browse to change the location if necessary.
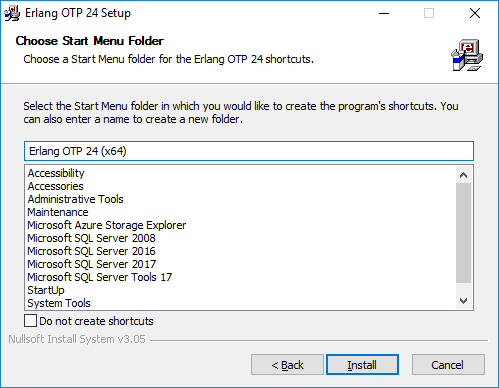
21.Click Next. The Choose Start Menu Folder window opens. Keep the defaults as indicated and select Do not create shortcuts to avoid shortcut creation. You must allow additional Microsoft redistributable components to be installed if requested by the installer.
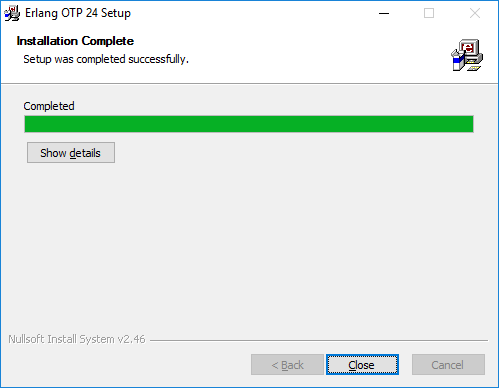
22.Click Next. The Installation Complete window opens when the installation is successful.
23.Click Close. The RabbitMQ installer starts.
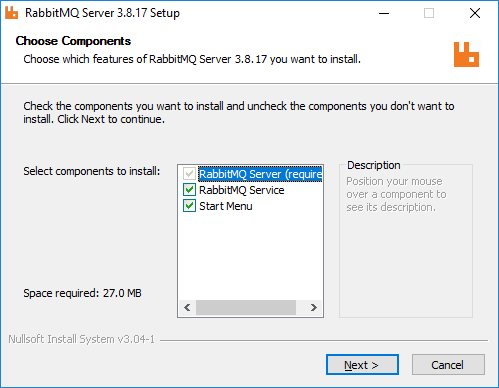
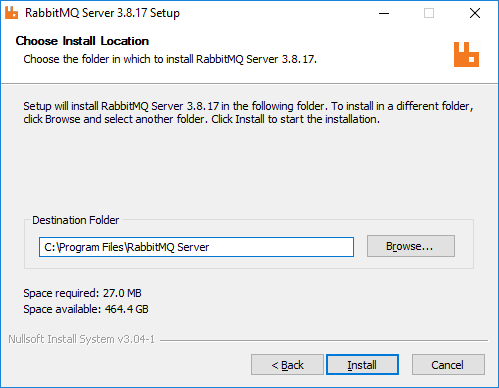
24.Keep the defaults as indicated click Next. The Choose Install Location window opens. Click Browse to change the location if necessary.
25.Click Next. The Installation Complete window opens when the installation is successful. Click Show details to inspect the RabbitMQ installation locations.
26.Click Next. The confirmation window opens.
27.Click Install. The rest of the SCM components and any prerequisites will be installed. If the installation is successful, the SCM Setup Wizard Completed window opens.
28.You can select the check box Show the Windows Installer log which opens the installation log file for reviewing or troubleshooting the installation. Click Finish to exit the wizard.
29.A shortcut is added to the desktop.
Steps to grant read/write permissions to the temporary shared folder
Read/Write permission is granted to the SCM Windows service account so that files that are submitted for analysis to the shared folder can be accessed and disposed by the SCM Windows service on the same server or from dedicated servers.
|
|
NOTE: If the account used to run the SCM Windows service is the same as the account used to install the SCM Server, then the account is automatically added to the folder with the Owner permission level when the folder is created. the permission level does not need to be changed. |
1.Log in to the SCM Server (SCMSVR).
2.Locate the shared folder. For example, C:\Storage.
3.Right-click on the folder and select Properties. The SCM Temporary Storage Properties window opens.
4.Click the Sharing tab.
5.Click Share. The File Sharing window opens.
6.Enter the username that will be used to run the SCM Windows service. Click Add.
7.Change the Permission Level of the added user to Read/Write.
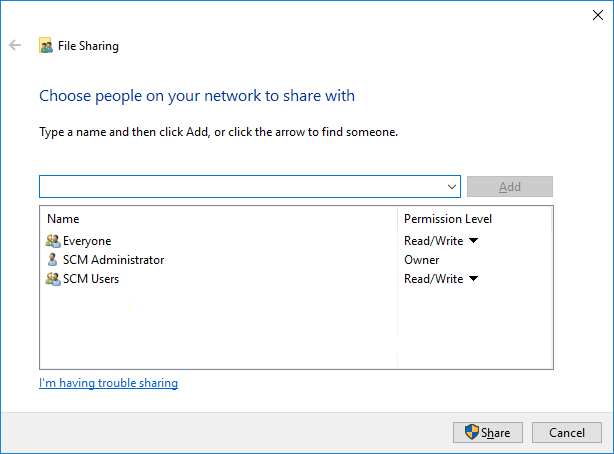
8.Click Share.
9.Click Done to close the File Sharing window.
10.Click OK to close the SCM Temporary Storage Properties window.
Steps to export the cluster certificate
1.In the SCM Server, right-click Start > Run. Enter certlm.msc and click OK.
2.If the User Account Control window opens, click Yes. Then the Certificate Manager window opens.
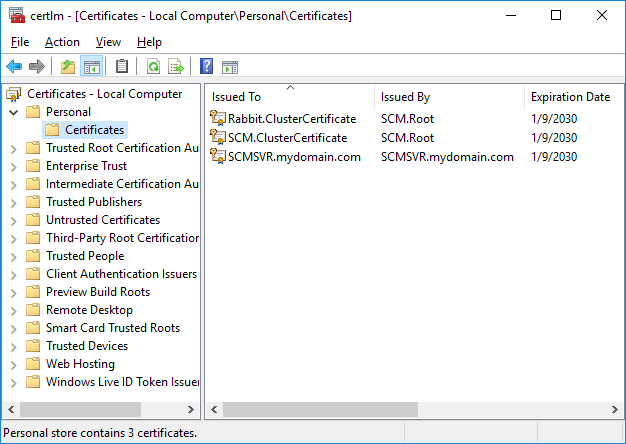
3.From the Certificates hierarchy, expand the Personal node and click Certificates.
4.From the list of certificates that are displayed in the right-hand pane, right-click SCM.ClusterCertificate.
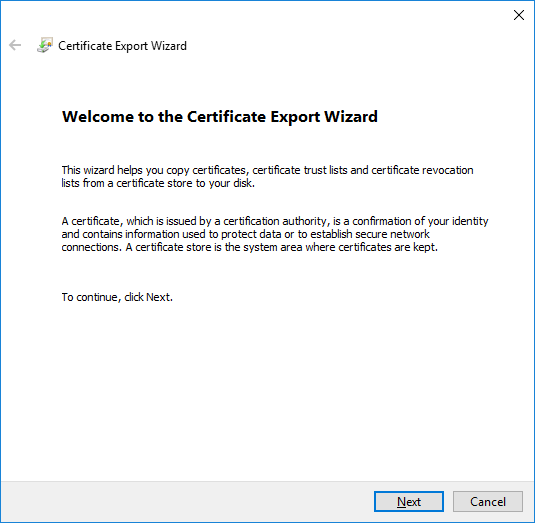
5.From the context-menu that appears, select All Tasks > Export. The Certificate Export Wizard starts.
6.Click Next. Select Yes, export the private key.
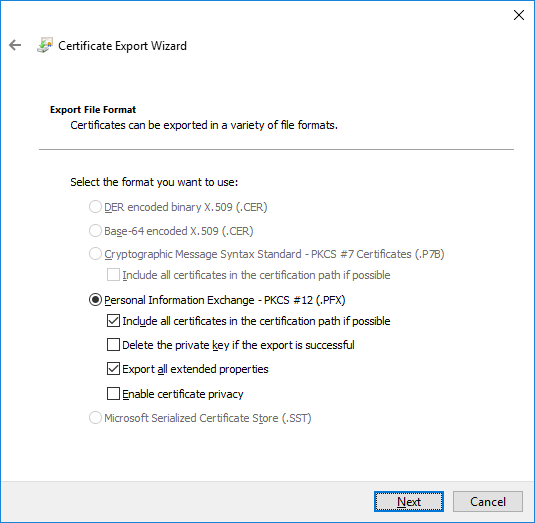
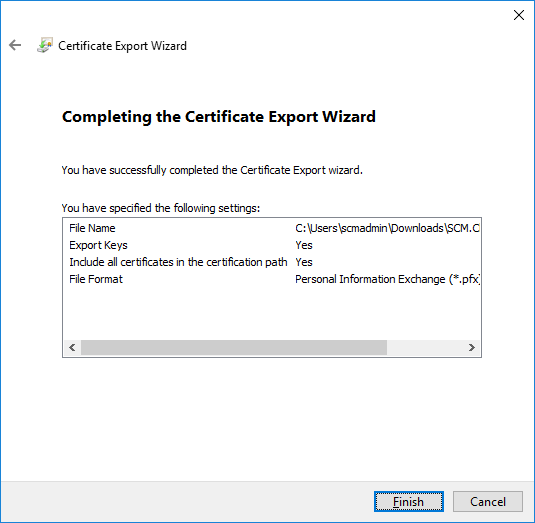
7.Click Next. Verify the settings on the Export File Format step as shown.
8.Click Next. Select Password and then enter a password and confirm the password. Remember this password for future use.

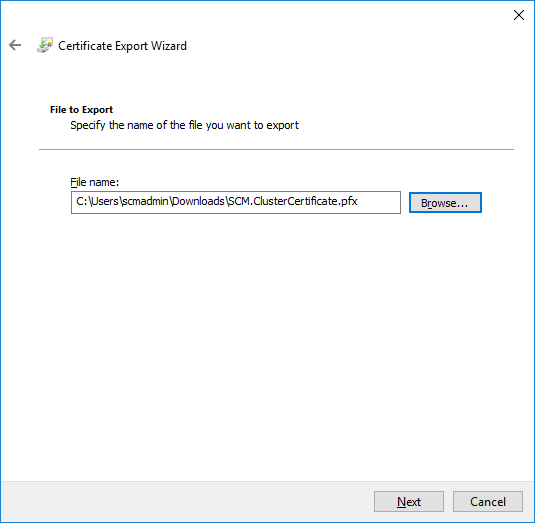
9.Click Next. Click Browse and select a local folder on the SCM Server where the certificate file will be exported.
10.Click Next. Verify the settings and click Finish to export the certificate. Click OK in the confirmation dialog and close the Certificate Manager window.
|
|
IMPORTANT: Copy this certificate to a local folder on each server that will host a dedicated service so that the service can identify and join the same cluster during installation of the service. |
Steps to install a dedicated SCM Service server
Before you start installing the SCM Windows services on a dedicated server verify the following prerequisites:
·The cluster certificate has been copied to the dedicated server. The installer will help you install the certificate.
·The temporary folder on the SCM Server has been shared and the SCM Windows service account that will be used to run the SCM services on this server has been granted read/write permission to the shared folder.
·The SCM Windows service account is a member of the local Administrators group.
Steps to install the SCM Windows services
1.Log in to the SCM service server using the credentials of the SCM Windows service account. For example, log in to SCMSVC-1 using mydomain\scmadmin.
2.Download and unzip the install media files to a suitable folder.
3.Click the windows installer file Metalogix Sensitive Content Manager.exe. The SCM - Prerequisites window opens. The prerequisites window will appear if the installer determines that one or more prerequisites are required.
4.Click Install. When the prerequisites are installed, the Welcome to SCM Setup Wizard window opens. If the appropriate prerequisites are already installed, this is the first window that opens.
5.Click Next. The License Agreement window opens.
6.Click the check box I accept the terms in the License Agreement to activate the Next button. Click Print to print the License Agreement.
7.Click Next. The SCM Components Selection window opens. Select Custom.

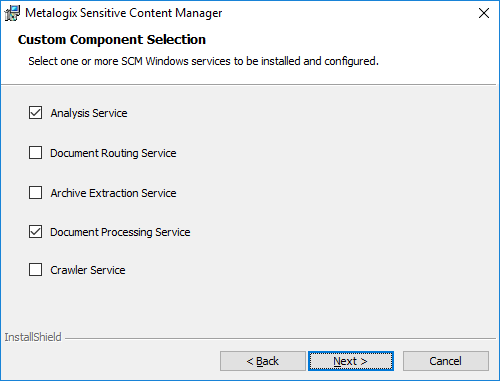
8.Click Next. The Custom Component Selection window opens. Select Analysis Service and Document Processing Service. These are typical high-load services, but you can choose more services if required.
9.Click Next. The Import Cluster Certificate window opens. Click Browse and locate the cluster certificate that was copied from the primary SCM Server. Then enter the password associated with the certificate.

10.Click OK. The Join a Cluster window opens.

Verify the cluster name displayed. The cluster bears the name of the SCM server. If the name is incorrect, click drop-down and re-import the correct cluster certificate. The SCM Windows services will be linked to this cluster. There could be multiple deployments of SCM clusters in the same domain for development, user-acceptance testing or others. Ensure that the SCM cluster you select is a part of your installation.
11.Click Next. The Destination Folder window opens. Click Browse to change the destination folder if necessary. If you change the destination folder, ensure that the folder exists on this computer and there are no restrictions to reading or writing to the new folder.
12.Click Next. The Service Account Credentials window opens.
Choose Domain account and enter the valid credentials of the SCM Service user that will be used to run the windows service.
13.Click Next. The SQL Server Information page opens. Verify that the SQL Server information is correct.

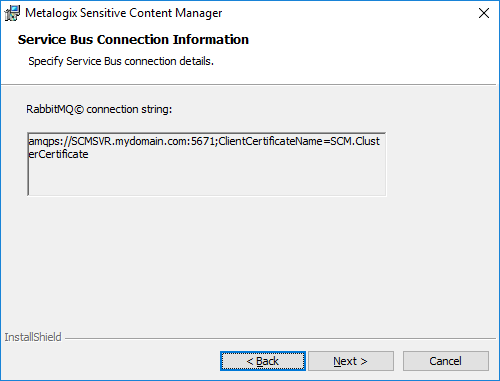
14.Click Next. The Service Bus Connection Information window opens. Verify that the connection string indicates the appropriate cluster certificate.
15.Click Next. The Temporary Folder Selection window opens. You must change the default folder to use a shared folder. Click Browse and locate a suitable shared folder with Read/Write permissions. For example, \\SCMSVR\Storage. Ensure that the folder is shared with SCM Service users in the same cluster but is not shared with other users in other SCM clusters.
16.Click Next. The Ready To Install window opens.
17.Click Install. If the installation is successful, the SCM Setup Wizard Completed window opens.
18.Click Finish to exit the wizard.