Archiving backup sets
While Metalogix Backup for SharePoint does not offer backup set archiving functionality, you can archive older backup sets using Windows Explorer or any other file management tool. When you archive a backup set, you can move the backup set to another disk, allowing you to conserve space on your backup disk and archive the backup set for the future.
Archived backup sets continue to appear in the Management Console, but you cannot review or restore the contents of those sets. If you need to access the contents of an archived backup set, you must import the set. For more information about importing a backup set, see Importing backup sets.
Each backup set in the backup set location is stored in a folder with a unique name. The name is based on the name of the backup set and a time stamp.
How do I archive a backup set?
You can use Windows Explorer or any other file management tool to archive backup sets. You do not use the Management Console to archive backup sets.
To archive a backup set
1.Open Windows Explorer or any other file management tool.
2.Access the directory that contains your backup sets.
3.Use the file management tool to copy that directory to another location.
4.In the Management Console, delete the operation that uses the backup set. The Management Console also deletes the original copy of the backup set directory.
Importing backup sets
You can import a backup set that you have removed from Metalogix Backup for SharePoint. When you import a backup set, you make it available for Metalogix Backup for SharePoint to use for backup and restore operations.
You might import a backup set in the following cases:
·Reinstating an archived backup set to review or restore its contents.
·Moving a backup set to a new installation of Metalogix Backup for SharePoint.
When you import a backup set from a differential backup, you must ensure that you also import the associated full backup. If you import a backup set created by Metalogix Backup for SharePoint 5.0 that includes a farm component backup, Metalogix Backup for SharePoint only successfully imports full backups. It does not successfully import backup sets that include differential backups of farm component backups. Both full and differential backups are imported from granular backups and are imported for all backup sets and all backup types created by Metalogix Backup for SharePoint 3.1 and newer.
How do I import a backup set?
Use the Import Backup Sets window to import a backup set. When you import backup sets, you copy all of the backup sets that you want to import into a single directory. In the Import Backup Sets window, you specify that directory as a UNC path and Metalogix Backup for SharePoint imports every backup set in the directory.
If the repository database includes information about a backup set that you import, Metalogix Backup for SharePoint updates the repository database with the new information.
To import backup sets
1.Using the Windows Explorer or another file management tool, move all of the backup sets you want to import into a single directory. Note the UNC path of this directory.
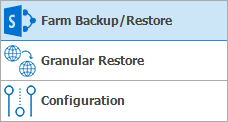
2.From the Management Console workspace selector click Farm Backup/Restore.
3.From the Overview tab click Import Backup Sets.

4.In the Import Backup Sets window, do one of the following:
oSelect the location that contains the backup sets to import from the Backup Set Location drop-down list.
oClick Manage Locations. In the Backup Service Preferences window that opens, specify a new backup location, then select that location from the Backup Set Location drop-down list.
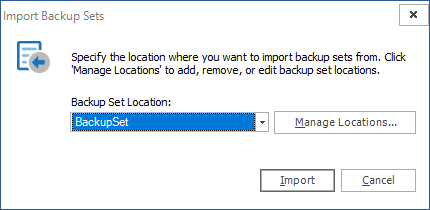
5.Click Import. Metalogix Backup for SharePoint imports all backup sets from the specified location.
Data grooming
Metalogix Backup for SharePoint can automatically delete (groom) backup sets based on configured parameters, saving disk space for newer backup sets. Backup sets are groomed based on how many sets already exist, or based on how old the sets are.
If Data Grooming is enabled, Metalogix Backup for SharePoint will look for backup sets to delete from the repository and disk once a day, at the configured time. If an expired set is found, it will be deleted at that time.
If a full backup is older than the maximum retention time in days but is associated with a differential backup that is within the permitted date range, the full backup will not be groomed.
Data grooming preferences can be configured separately for each farm in the Management Console, Management Service Preferences. Grooming options for scheduled backup jobs are also configured here.
It is also possible for Metalogix Backup for SharePoint to keep a specific number of good backups, no matter their age. For more information about setting the Management Service Preferences, including grooming, see Defining the Management Service preferences.
When enabling data grooming, it is best to schedule it to for a non-peak time when it will not interfere with your enterprise network, as data grooming can be a processor and disk-intensive process.
|
|
TIP: Metalogix Backup for SharePoint can use Tivoli Storage Manager (TSM) to store backup set content. If you enable data grooming for a backup set that Metalogix Backup for SharePoint stores in TSM, Metalogix Backup for SharePoint removes references to the data in Metalogix Backup for SharePoint. In addition, Metalogix Backup for SharePoint sets the data objects to Inactive in TSM. Metalogix Backup for SharePoint does not automatically delete the data itself. If you need to delete the data from TSM, you should use the TSM management tools to do so. For more information about using TSM, see Learning about Tivoli Storage Manager. |

Steps to activate data grooming
1.From the Management Console workspace selector click Configuration.
2.Select the farm whose Management Service preferences you want to set
3.From the Configuration tab, click Management Service.
4.In the Management Service Preferences window, set the preferences in the Grooming section as follows:
5.Delete backup sets based on count - select this option to delete a predefined number of backup sets.
6.Delete backup sets based on age - select this option to delete a backup sets based on number of days.
7.Check for expired backup sets - if the check box is checked the backup set count that will be determined for deletion will be calculated at the specified local time on the Management service computer.
8.Retain last n log files - if the check box is checked the specified number of log files will be deleted. Console logs will only be deleted after the scheduled grooming time has passed and the console has been closed and reopened
9.Click OK to close the window and save the changes you made to the data grooming settings.
Importing a Repository Database
You can consolidate operational data from one or more Repositories into your current Repository by importing the data from those repositories. All types of operational data related to backups and restores of components and granular objects from the imported Repository will be copied to the current Repository and will be displayed in the Management Console. System information and preferences in your current environment will not be affected.
Steps to import a Repository database
1.From the Management Console toolbar click Farm > Import Repository.

2.The Import Metalogix Backup Repository dialog appears.
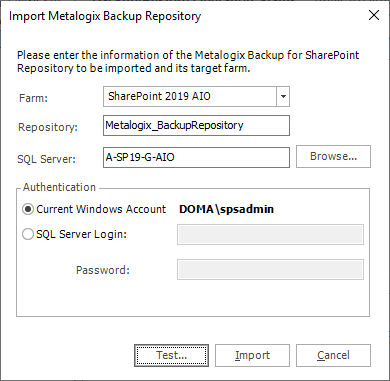
3.Enter the following information:
a.Farm - Enter the target farm for which the repository should be imported.
b.Repository - the name of the repository database that will be imported.
c.SQL Server - The name of the SQL Server instance that contains the Repository database to be imported. You can click Browse to locate the SQL Server if needed.
d.Authentication - The credentials needed to access the Repository database. The default authentication method uses the Current Windows Account. If you prefer to use the SQL Server authentication, enter the Login and Password.
4.Click Test to validate the connection to the Repository to be imported. If the connection is successful, a confirmation dialog appears. Click OK to accept the confirmation.
5.Click Import to complete the operation, or click Cancel to exit.
6.
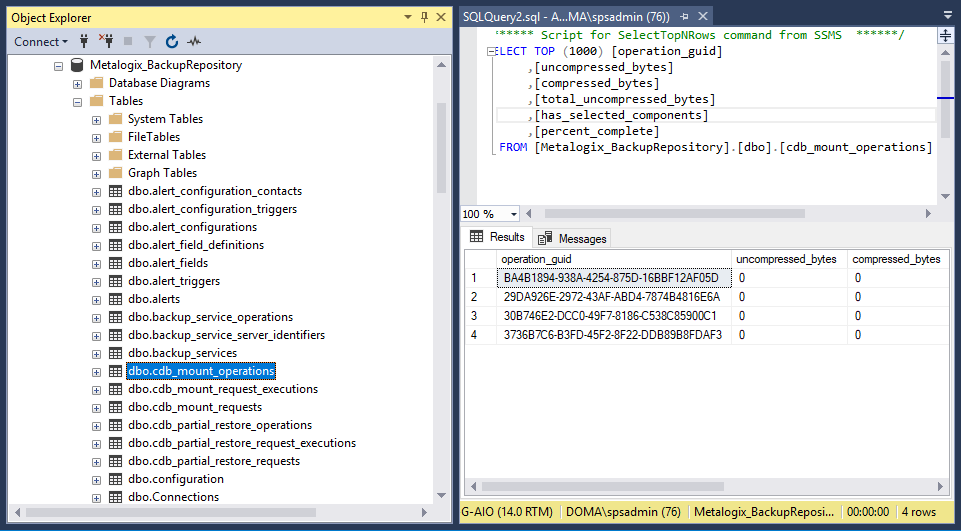
Viewing Repository Data in the SQL Server database
1.Expand the Metalogix_BackupRepository database and locate the cdb_mount_operations table. An SQL query can be used to verify the two operations exist.