
5.2 Global Domain Document
5.2 Global Domain Document
While still connected to the Hub server, return to the left-hand Navigation Pane, expand Messaging and click on the Domains view. Expand the Global Domain category.
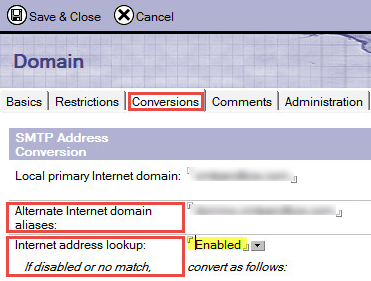
Edit the existing Global Domain Document to match the screenshot below.
|
|
The Global Domain Document should already exist. If for some reason it does not, add it with the appropriate values. |

-
Select the Conversions tab and edit each field to match the recommended values below:
|
Field |
Description |
Recommended Value |
|
Alternate Internet domain aliases |
The value for the Alternate Internet domain aliases will be what you listed in the Administrator Pre-Install Checklist Domino Mail Namespace/SMTP Domain field, with multiple domains separated by carriage returns |
domino.<PrimarySMTPDomain.com> |
|
Internet address lookup |
|
Enabled |
5.3 Foreign Domain Document
5.3 Foreign Domain Document
Create the Foreign Domain Document by following the steps below:
-
While still in the Messaging | Domains view, click the Add Domain button
-
In the opened document, edit the fields to match the recommended values listed below:
-
On the Basics tab, make the following changes:

|
Field |
Description |
Recommended Value |
|
Domain type |
|
“Foreign Domain” |
|
Foreign domain name |
Use the value from the Foreign Domain line in the Administrator Pre-Install Checklist |
[Foreign Domain value from Administrator Pre-Install Checklist] i.e. MSO365 or BTEX |
-
Click the Calendar Information tab and make the following changes:
|
Field |
Description |
Recommended Value |
|
Calendar server name |
|
[Domino Coexistence Server Name value from Administrator Pre-Install Checklist] |
|
Calendar system |
|
“btexchange.box” |
-
Click Save & Close; this new document will need to replicate to all other servers in the Domino domain
5.4 Program Document
5.4 Program Document
Create a new Program Document by following the steps below.
-
In the left-hand Navigation Pane, switch from the Messaging view to the Server view
-
Click on the Programs view and click the Add Program button
-
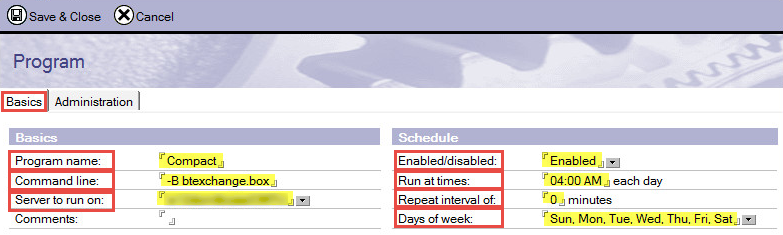
In the new Program Document that opens, edit the fields on the Basics tab to match the following recommended values:
|
Field |
Value |
|
Program name |
Compact |
|
Command line |
-B btexchange.box |
|
Server to run on |
<Domino Coexistence Server name> |
|
Enabled/disabled |
Enabled |
|
Run at times |
04:00AM |
|
Repeat interval of |
0 |
|
Days of week |
Sun, Mon, Tue, Wed, Thu, Fri, Sat |
-
Save and Close the document when complete
|
|
5.5 FreeBusy Person Document
5.5 FreeBusy Person Document
-
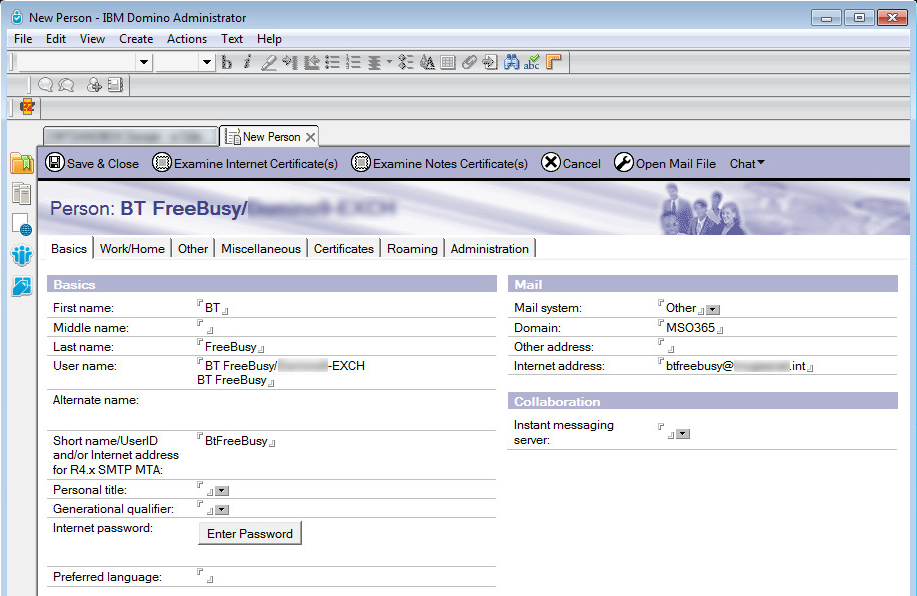
Create a new Person Document using the field values shown in the table below. This Person Document does not need a Notes ID or mailbox, so it is not necessary to create it via the normal Notes registration process. Save and close the document when complete.
|
Field |
Value |
|
First name |
BT |
|
Last name |
FreeBusy |
|
User name |
BT FreeBusy/<DominoOrgName (e.g. “Domino20-EXCH”)> BT FreeBusy |
|
Short name |
BtFreeBusy |
|
Mail system |
Other |
|
Domain |
<DominDomain>-EXCH or MSO365 |
-
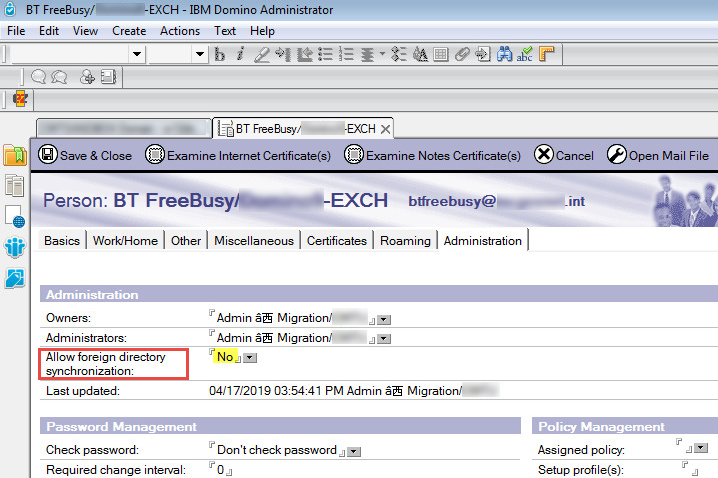
Re-open the newly created BT FreeBusy Person Document and click the Edit Person button
-
Navigate to Administration tab and change the Allow foreign directory synchronization field value to No:
-
Save and close the document
|
|
|
|
|
|
Section 6. Configure Integration for Notes FreeBusy in Exchange or Office 365
The last step before installing FreeBusy involves configuring Office365 or Exchange to route FreeBusy traffic from Exchange to Domino. For detailed instructions on the necessary changes, scroll to or click on the environment that matches your own:
6.1 Office 365 (O365)
|
|
This information should be found in the Administrator Pre-Install Checklist. |