
Cryptographic usage
Migrator Pro for Exchange's Admin Portal is a friendly user interface that lets you control various administrative tasks related to Exchange mailbox migration.
The first time you run the Admin Portal after installing Migrator Pro for Exchange, the program leads you through a series of screens for you to enter your Migrator Pro for Exchange license key and configure Migrator Pro for Exchange communications with other programs and hardware. After that initial configuration, the Admin Portal lets you update configuration data, define new forests to Migrator Pro for Exchange, designate mailboxes and public folders for migration, schedule and execute migrations, pause and resume migrations, review migration statistics, and so forth.
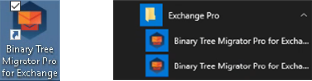
To access the Admin Portal, double-click the Migrator Pro for Exchange shortcut on your Windows desktop, or select Migrator Pro for Exchange from the Windows Start menu:
The Admin Portal opens as a new tab in your browser called Migrator Pro for Exchange:
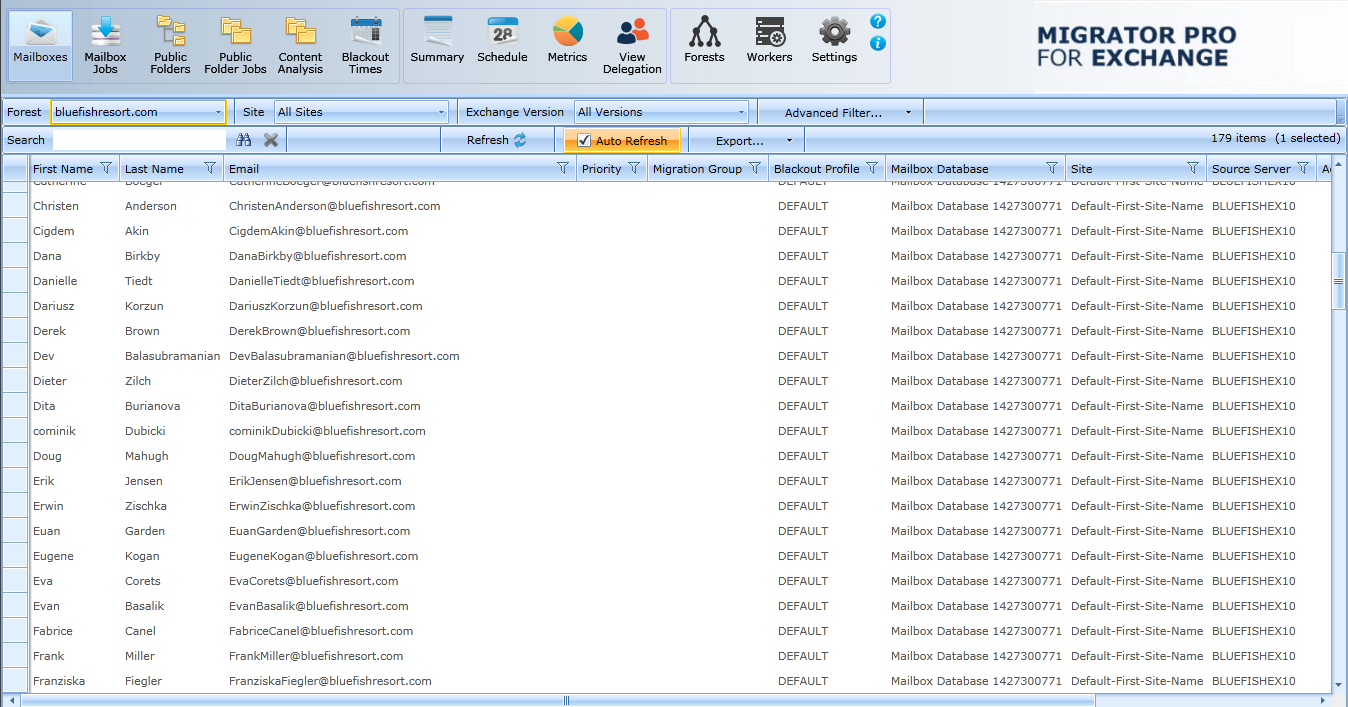
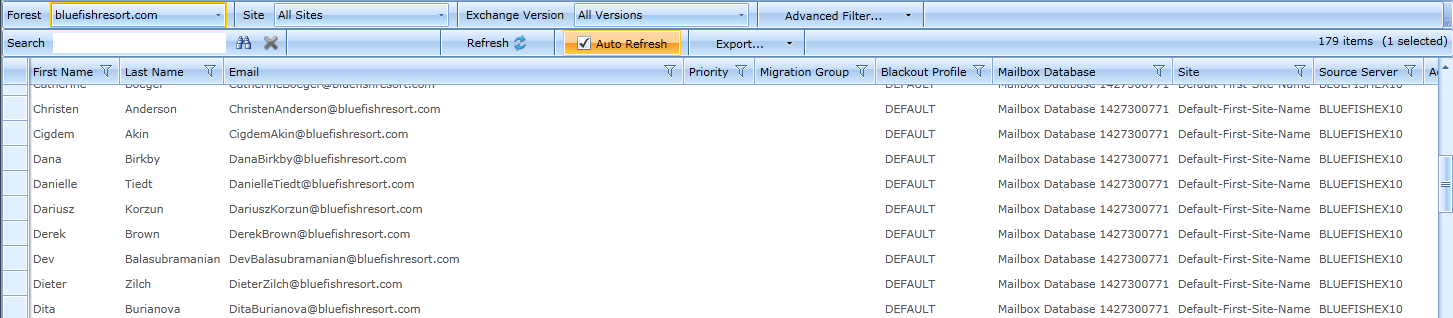
Migrator Pro for Exchange's Main Toolbar appears across the top of the browser tab:

The toolbar buttons let you change the view of the Admin Portal, to show different types of information and different groups of available features below the Main Toolbar:
-
Mailboxes: Lists mailboxes from all the sites in the specified forest. In addition, it allows you to sort, group, search, and select mailboxes to add to the migration queue.
-
Mailbox Jobs: Manages the sequence of migration requests for the selected migration destination site.
-
Public Folders: Displays the Public Folder tree from the selected Source and Target forest. In addition, it allows you to sort, group, search, and select public folders to add to the migration queue. Public folder migration is only enabled during on-premises cross forest migration projects.
-
Public Folder Jobs: Manages the sequence of migration requests for the selected migration destination. Public folder migration is only enabled during on-premises cross forest migration projects.
-
Content Analysis: Allows Public Folder content information collection and analysis in SQL for data remediation.
-
Blackout Times: Allows the configuration of time periods when mailboxes cannot be migrated for the selected migration site.
-
Summary: Displays high-level accounting of mailbox migrations, which allows you to view all status levels.
-
Schedule: Displays estimated migration sequence for the selected migration site. It is a read-only view.
-
Metrics: Provides historical data and throughput measurements of migrations in a graphical format.
-
View Delegation: Displays delegation data, so you can migrate mailboxes associated by delegation rights together (to preserve delegation rights after the migration).
-
Forests: Configure global forest settings, add new forest, etc.
-
Workers: Administer Public Folder migration workers.
-
Settings: Configure general settings, activities, mailboxes, Public Folders, workers, scripts, notification templates, and licenses.
-
Help: Open a browser window of information and field notes about the currently active Migrator Pro for Exchange screen or tab.
-
About: Displays version information about the Migrator Pro for Exchange product.
In addition to the Main Toolbar, the Admin Portal also contains a Data Panel that displays data depending on the button that is currently selected.
Detailed information about the Admin Portal is available in the Migrator Pro for Exchange User Guide.
Please note the following considerations for STIG environments.
The SQL Express option should not be chosen when installing Migrator Pro for Exchange. SQL Express does not include the following settings or features needed for STIG environments:
-
SQL Server must be monitored to discover unauthorized changes to stored procedures. (SQL Agents is not part of SQL Express) 41403, 41404, 41405
A dedicated SQL Server (full version) should be used.
Microsoft SQL Server 2012 Database Security Technical Implementation Guide (stigviewer.com)
Microsoft SQL Server 2012 Database Instance Security Technical Implementation Guide (stigviewer.com)
MS SQL Server 2016 Instance Security Technical Implementation Guide (stigviewer.com)
MS SQL Server 2016 Database Security Technical Implementation Guide (stigviewer.com)
Appendix B. Deployment in FIPS Environment
Binary Tree Migrator Pro for Exchange 20.11.0 can be successfully deployed in a FIPS environment by following the procedure described in this document.
The audience for this section is technical implementation consultants deploying Migrator Pro for Exchange.
Migrator Pro for Exchange relies on the following Third-Party cryptographic libraries for its cryptographic needs.
|
Cryptographic usage |
Cryptographic algorithm |
Cryptographic parameters |
|
Communication – Website User Interface |
SSL TLS 1.2 |
|
|
Communication – SQL Server |
SSL TLS 1.2 |
|
|
Communication – (LDAP/Kerberos) |
AES128_HMAC_SHA1, AES256_HMAC_SHA1 |
SESSION: Signing & Sealing |
|
Symmetric encryption of bulk data |
AES256 CBC Mode |
KEY: 256-bit PBKDF2 (Constant) IV: 128-bit PBKDF2 (Constant) |
|
Symmetric encryption of bulk data – Additional Entropy |
RNG |
64-bits (Random per encrypted value) |
|
Symmetric encryption of secrets – (DPAPI) Configuration Parameters |
AES256 CBC Mode |
SCOPE: LocalMachine |
|
Symmetric encryption of secrets – Additional Entropy |
RNG |
256-bits (Constant per node) |
|
Hashing – (PBKDF2) Generation of encryption KEY/IV |
HMACSHA1 |
HASH SIZE: 160-bit |
|
Hashing – (DPAPI) |
SHA512 |
HASH SIZE: 523-bit |
To execute in a FIPS compliant mode, a Windows environment requires the Microsoft Policy “System cryptography: Use FIPS compliant algorithms for encryption, hashing, and signing” setting enabled.
Microsoft states that “This policy is only advisory to applications. Therefore, if you enable the policy, it does not make sure that all applications will comply”.
Migrator Pro for Exchange leverages Microsoft’s CryptoAPI (CAPI) and CryptoAPI Next Generation (CNG) for its cryptographic needs
Microsoft Product Relationship with CNG and CAPI libraries is documented here: https://technet.microsoft.com/en-us/library/cc750357.aspx
“Rather than validate individual components and products, Microsoft chooses to validate only the underlying cryptographic modules. Subsequently, many Windows components and Microsoft products are built to rely on the Cryptographic API: Next Generation (CNG) and legacy Cryptographic API (CAPI) FIPS 140 validated cryptographic modules. Windows components and Microsoft products use the documented application programming interfaces (APIs) for each of the modules to access various cryptographic services.
External to Migrator Pro for Exchange, the following server configurations are necessary to set up the environment for FIPS Mode.
-
Windows Server 2012 R2 or later must be installed and up to date.
-
The following group policies must be enabled:
-
System Cryptography: Use FIPS compliant algorithms for encryption, hashing, and signing.
-
Ensure this policy is enabled.
-
-
Network Security: Configure encryption types allowed for Kerberos.
-
Ensure the “AES128_HMAC_SHA1” and “AES256_HMAC_SHA1” values are selected.
-
NOTE: Authentication of target accounts with synchronized passwords requires Kerberos encryption type “RC4_HMAC_MD5” to be allowed for participating devices.
-
-
-
Insecure SCHANNEL Server protocols must be disabled.
-
SSL 2.0, SSL 3.0, TLS 1.0, TLS 1.1
-
-
SSL certificate for Web Hosting issued by a trusted certificate authority.
-
SQL Server Encrypted Connections must be enabled.
-
See reference links for configuration details
-
For environments with existing Migrator Pro for Exchange installations, the installation must be upgraded to version 20.11 or later. If the existing installation is configured with remote Migrator Pro for Exchange Workers, the remote Workers need to be upgraded to version 20.11 or later.
For new installations, Migrator Pro for Exchange 20.11 enforces all FIPS mode requirements, no additional steps are required.
Website SSL Certificate Installation
-
Ensure the certificate and CA certificate chain has been installed on the server.
-
Open Internet Information Services (IIS) Manager.
-
Expand the Sites node in the Connections pane.
-
Right-click the “Default Web Site” website node and choose “Edit Bindings…”.
-
If the site has an “https” binding, select it and click “Edit…”
-
If the site does not have an “https” binding, click “Add…”
-
From the “Type” drop-down, select “https”.
-
-
From the “SSL certificate” drop-down, select the appropriate certificate.
-
Click OK.
-
Remove the “http” binding.
-
-
In the IIS Manager Features View pane, double-click “SSL Settings”.
-
Check the “Require SSL” checkbox and click “Apply” in the Actions pane.
-
-
Validate the website can be accessed and the bowers is indicating the certificate is valid and trusted.
System cryptography: Use FIPS compliant algorithms for encryption, hashing, and signing
Network security: Configure encryption types for Kerberos
Windows Server SCHANNEL Protocol Settings
Internet Information Services (IIS) 7.0 Set Up SSL Certificates
Internet Information Services (IIS) 8.0 Centralized SSL Certificates
Enable encrypted connections - SQL Server | Microsoft Docs
KB3135244 - TLS 1.2 support for Microsoft SQL Server
Background
Migrator Pro for Exchange's Admin Portal is a friendly user interface that lets you control various administrative tasks related to Exchange mailbox migration.
The first time you run the Admin Portal after installing Migrator Pro for Exchange, the program leads you through a series of screens for you to enter your Migrator Pro for Exchange license key and configure Migrator Pro for Exchange communications with other programs and hardware. After that initial configuration, the Admin Portal lets you update configuration data, define new forests to Migrator Pro for Exchange, designate mailboxes and public folders for migration, schedule and execute migrations, pause and resume migrations, review migration statistics, and so forth.
To access the Admin Portal, double-click the Migrator Pro for Exchange shortcut on your Windows desktop, or select Migrator Pro for Exchange from the Windows Start menu:
The Admin Portal opens as a new tab in your browser called Migrator Pro for Exchange:
Migrator Pro for Exchange's Main Toolbar appears across the top of the browser tab:
The toolbar buttons let you change the view of the Admin Portal, to show different types of information and different groups of available features below the Main Toolbar:
-
Mailboxes: Lists mailboxes from all the sites in the specified forest. In addition, it allows you to sort, group, search, and select mailboxes to add to the migration queue.
-
Mailbox Jobs: Manages the sequence of migration requests for the selected migration destination site.
-
Public Folders: Displays the Public Folder tree from the selected Source and Target forest. In addition, it allows you to sort, group, search, and select public folders to add to the migration queue. Public folder migration is only enabled during on-premises cross forest migration projects.
-
Public Folder Jobs: Manages the sequence of migration requests for the selected migration destination. Public folder migration is only enabled during on-premises cross forest migration projects.
-
Content Analysis: Allows Public Folder content information collection and analysis in SQL for data remediation.
-
Blackout Times: Allows the configuration of time periods when mailboxes cannot be migrated for the selected migration site.
-
Summary: Displays high-level accounting of mailbox migrations, which allows you to view all status levels.
-
Schedule: Displays estimated migration sequence for the selected migration site. It is a read-only view.
-
Metrics: Provides historical data and throughput measurements of migrations in a graphical format.
-
View Delegation: Displays delegation data, so you can migrate mailboxes associated by delegation rights together (to preserve delegation rights after the migration).
-
Forests: Configure global forest settings, add new forest, etc.
-
Workers: Administer Public Folder migration workers.
-
Settings: Configure general settings, activities, mailboxes, Public Folders, workers, scripts, notification templates, and licenses.
-
-
In addition to the Main Toolbar, the Admin Portal also contains a Data Panel that displays data depending on the button that is currently selected.
Detailed information about the Admin Portal is available in the Migrator Pro for Exchange User Guide.
Please note the following considerations for STIG environments.
The SQL Express option should not be chosen when installing Migrator Pro for Exchange. SQL Express does not include the following settings or features needed for STIG environments:
-
SQL Server must be monitored to discover unauthorized changes to stored procedures. (SQL Agents is not part of SQL Express) 41403, 41404, 41405
A dedicated SQL Server (full version) should be used.
Microsoft SQL Server 2012 Database Security Technical Implementation Guide (stigviewer.com)
Microsoft SQL Server 2012 Database Instance Security Technical Implementation Guide (stigviewer.com)
MS SQL Server 2016 Instance Security Technical Implementation Guide (stigviewer.com)
MS SQL Server 2016 Database Security Technical Implementation Guide (stigviewer.com)
Appendix B. Deployment in FIPS Environment
Binary Tree Migrator Pro for Exchange 20.11.0 can be successfully deployed in a FIPS environment by following the procedure described in this document.
The audience for this section is technical implementation consultants deploying Migrator Pro for Exchange.
Migrator Pro for Exchange relies on the following Third-Party cryptographic libraries for its cryptographic needs.
|
Cryptographic usage |
Cryptographic algorithm |
Cryptographic parameters |
|
Communication – Website User Interface |
SSL TLS 1.2 |
|
|
Communication – SQL Server |
SSL TLS 1.2 |
|
|
Communication – (LDAP/Kerberos) |
AES128_HMAC_SHA1, AES256_HMAC_SHA1 |
SESSION: Signing & Sealing |
|
Symmetric encryption of bulk data |
AES256 CBC Mode |
KEY: 256-bit PBKDF2 (Constant) IV: 128-bit PBKDF2 (Constant) |
|
Symmetric encryption of bulk data – Additional Entropy |
RNG |
64-bits (Random per encrypted value) |
|
Symmetric encryption of secrets – (DPAPI) Configuration Parameters |
AES256 CBC Mode |
SCOPE: LocalMachine |
|
Symmetric encryption of secrets – Additional Entropy |
RNG |
256-bits (Constant per node) |
|
Hashing – (PBKDF2) Generation of encryption KEY/IV |
HMACSHA1 |
HASH SIZE: 160-bit |
|
Hashing – (DPAPI) |
SHA512 |
HASH SIZE: 523-bit |
To execute in a FIPS compliant mode, a Windows environment requires the Microsoft Policy “System cryptography: Use FIPS compliant algorithms for encryption, hashing, and signing” setting enabled.
Microsoft states that “This policy is only advisory to applications. Therefore, if you enable the policy, it does not make sure that all applications will comply”.
Migrator Pro for Exchange leverages Microsoft’s CryptoAPI (CAPI) and CryptoAPI Next Generation (CNG) for its cryptographic needs
Microsoft Product Relationship with CNG and CAPI libraries is documented here: https://technet.microsoft.com/en-us/library/cc750357.aspx
“Rather than validate individual components and products, Microsoft chooses to validate only the underlying cryptographic modules. Subsequently, many Windows components and Microsoft products are built to rely on the Cryptographic API: Next Generation (CNG) and legacy Cryptographic API (CAPI) FIPS 140 validated cryptographic modules. Windows components and Microsoft products use the documented application programming interfaces (APIs) for each of the modules to access various cryptographic services.
External to Migrator Pro for Exchange, the following server configurations are necessary to set up the environment for FIPS Mode.
-
Windows Server 2012 R2 or later must be installed and up to date.
-
The following group policies must be enabled:
-
System Cryptography: Use FIPS compliant algorithms for encryption, hashing, and signing.
-
Ensure this policy is enabled.
-
-
Network Security: Configure encryption types allowed for Kerberos.
-
Ensure the “AES128_HMAC_SHA1” and “AES256_HMAC_SHA1” values are selected.
-
NOTE: Authentication of target accounts with synchronized passwords requires Kerberos encryption type “RC4_HMAC_MD5” to be allowed for participating devices.
-
-
-
Insecure SCHANNEL Server protocols must be disabled.
-
SSL 2.0, SSL 3.0, TLS 1.0, TLS 1.1
-
-
SSL certificate for Web Hosting issued by a trusted certificate authority.
-
SQL Server Encrypted Connections must be enabled.
-
See reference links for configuration details
-
For environments with existing Migrator Pro for Exchange installations, the installation must be upgraded to version 20.11 or later. If the existing installation is configured with remote Migrator Pro for Exchange Workers, the remote Workers need to be upgraded to version 20.11 or later.
For new installations, Migrator Pro for Exchange 20.11 enforces all FIPS mode requirements, no additional steps are required.
Website SSL Certificate Installation
-
Ensure the certificate and CA certificate chain has been installed on the server.
-
Open Internet Information Services (IIS) Manager.
-
Expand the Sites node in the Connections pane.
-
Right-click the “Default Web Site” website node and choose “Edit Bindings…”.
-
If the site has an “https” binding, select it and click “Edit…”
-
If the site does not have an “https” binding, click “Add…”
-
From the “Type” drop-down, select “https”.
-
-
From the “SSL certificate” drop-down, select the appropriate certificate.
-
Click OK.
-
Remove the “http” binding.
-
-
In the IIS Manager Features View pane, double-click “SSL Settings”.
-
Check the “Require SSL” checkbox and click “Apply” in the Actions pane.
-
-
Validate the website can be accessed and the bowers is indicating the certificate is valid and trusted.
System cryptography: Use FIPS compliant algorithms for encryption, hashing, and signing
Network security: Configure encryption types for Kerberos
Windows Server SCHANNEL Protocol Settings
Internet Information Services (IIS) 7.0 Set Up SSL Certificates
Internet Information Services (IIS) 8.0 Centralized SSL Certificates
Enable encrypted connections - SQL Server | Microsoft Docs
KB3135244 - TLS 1.2 support for Microsoft SQL Server
Prerequisites
Migrator Pro for Exchange's Admin Portal is a friendly user interface that lets you control various administrative tasks related to Exchange mailbox migration.
The first time you run the Admin Portal after installing Migrator Pro for Exchange, the program leads you through a series of screens for you to enter your Migrator Pro for Exchange license key and configure Migrator Pro for Exchange communications with other programs and hardware. After that initial configuration, the Admin Portal lets you update configuration data, define new forests to Migrator Pro for Exchange, designate mailboxes and public folders for migration, schedule and execute migrations, pause and resume migrations, review migration statistics, and so forth.
To access the Admin Portal, double-click the Migrator Pro for Exchange shortcut on your Windows desktop, or select Migrator Pro for Exchange from the Windows Start menu:
The Admin Portal opens as a new tab in your browser called Migrator Pro for Exchange:
Migrator Pro for Exchange's Main Toolbar appears across the top of the browser tab:
The toolbar buttons let you change the view of the Admin Portal, to show different types of information and different groups of available features below the Main Toolbar:
-
Mailboxes: Lists mailboxes from all the sites in the specified forest. In addition, it allows you to sort, group, search, and select mailboxes to add to the migration queue.
-
Mailbox Jobs: Manages the sequence of migration requests for the selected migration destination site.
-
Public Folders: Displays the Public Folder tree from the selected Source and Target forest. In addition, it allows you to sort, group, search, and select public folders to add to the migration queue. Public folder migration is only enabled during on-premises cross forest migration projects.
-
Public Folder Jobs: Manages the sequence of migration requests for the selected migration destination. Public folder migration is only enabled during on-premises cross forest migration projects.
-
Content Analysis: Allows Public Folder content information collection and analysis in SQL for data remediation.
-
Blackout Times: Allows the configuration of time periods when mailboxes cannot be migrated for the selected migration site.
-
Summary: Displays high-level accounting of mailbox migrations, which allows you to view all status levels.
-
Schedule: Displays estimated migration sequence for the selected migration site. It is a read-only view.
-
Metrics: Provides historical data and throughput measurements of migrations in a graphical format.
-
View Delegation: Displays delegation data, so you can migrate mailboxes associated by delegation rights together (to preserve delegation rights after the migration).
-
Forests: Configure global forest settings, add new forest, etc.
-
Workers: Administer Public Folder migration workers.
-
Settings: Configure general settings, activities, mailboxes, Public Folders, workers, scripts, notification templates, and licenses.
-
-
In addition to the Main Toolbar, the Admin Portal also contains a Data Panel that displays data depending on the button that is currently selected.
Detailed information about the Admin Portal is available in the Migrator Pro for Exchange User Guide.
Please note the following considerations for STIG environments.
The SQL Express option should not be chosen when installing Migrator Pro for Exchange. SQL Express does not include the following settings or features needed for STIG environments:
-
SQL Server must be monitored to discover unauthorized changes to stored procedures. (SQL Agents is not part of SQL Express) 41403, 41404, 41405
A dedicated SQL Server (full version) should be used.
Microsoft SQL Server 2012 Database Security Technical Implementation Guide (stigviewer.com)
Microsoft SQL Server 2012 Database Instance Security Technical Implementation Guide (stigviewer.com)
MS SQL Server 2016 Instance Security Technical Implementation Guide (stigviewer.com)
MS SQL Server 2016 Database Security Technical Implementation Guide (stigviewer.com)
Appendix B. Deployment in FIPS Environment
Binary Tree Migrator Pro for Exchange 20.11.0 can be successfully deployed in a FIPS environment by following the procedure described in this document.
The audience for this section is technical implementation consultants deploying Migrator Pro for Exchange.
Migrator Pro for Exchange relies on the following Third-Party cryptographic libraries for its cryptographic needs.
|
Cryptographic usage |
Cryptographic algorithm |
Cryptographic parameters |
|
Communication – Website User Interface |
SSL TLS 1.2 |
|
|
Communication – SQL Server |
SSL TLS 1.2 |
|
|
Communication – (LDAP/Kerberos) |
AES128_HMAC_SHA1, AES256_HMAC_SHA1 |
SESSION: Signing & Sealing |
|
Symmetric encryption of bulk data |
AES256 CBC Mode |
KEY: 256-bit PBKDF2 (Constant) IV: 128-bit PBKDF2 (Constant) |
|
Symmetric encryption of bulk data – Additional Entropy |
RNG |
64-bits (Random per encrypted value) |
|
Symmetric encryption of secrets – (DPAPI) Configuration Parameters |
AES256 CBC Mode |
SCOPE: LocalMachine |
|
Symmetric encryption of secrets – Additional Entropy |
RNG |
256-bits (Constant per node) |
|
Hashing – (PBKDF2) Generation of encryption KEY/IV |
HMACSHA1 |
HASH SIZE: 160-bit |
|
Hashing – (DPAPI) |
SHA512 |
HASH SIZE: 523-bit |
To execute in a FIPS compliant mode, a Windows environment requires the Microsoft Policy “System cryptography: Use FIPS compliant algorithms for encryption, hashing, and signing” setting enabled.
Microsoft states that “This policy is only advisory to applications. Therefore, if you enable the policy, it does not make sure that all applications will comply”.
Migrator Pro for Exchange leverages Microsoft’s CryptoAPI (CAPI) and CryptoAPI Next Generation (CNG) for its cryptographic needs
Microsoft Product Relationship with CNG and CAPI libraries is documented here: https://technet.microsoft.com/en-us/library/cc750357.aspx
“Rather than validate individual components and products, Microsoft chooses to validate only the underlying cryptographic modules. Subsequently, many Windows components and Microsoft products are built to rely on the Cryptographic API: Next Generation (CNG) and legacy Cryptographic API (CAPI) FIPS 140 validated cryptographic modules. Windows components and Microsoft products use the documented application programming interfaces (APIs) for each of the modules to access various cryptographic services.
External to Migrator Pro for Exchange, the following server configurations are necessary to set up the environment for FIPS Mode.
-
Windows Server 2012 R2 or later must be installed and up to date.
-
The following group policies must be enabled:
-
System Cryptography: Use FIPS compliant algorithms for encryption, hashing, and signing.
-
Ensure this policy is enabled.
-
-
Network Security: Configure encryption types allowed for Kerberos.
-
Ensure the “AES128_HMAC_SHA1” and “AES256_HMAC_SHA1” values are selected.
-
NOTE: Authentication of target accounts with synchronized passwords requires Kerberos encryption type “RC4_HMAC_MD5” to be allowed for participating devices.
-
-
-
Insecure SCHANNEL Server protocols must be disabled.
-
SSL 2.0, SSL 3.0, TLS 1.0, TLS 1.1
-
-
SSL certificate for Web Hosting issued by a trusted certificate authority.
-
SQL Server Encrypted Connections must be enabled.
-
See reference links for configuration details
-
For environments with existing Migrator Pro for Exchange installations, the installation must be upgraded to version 20.11 or later. If the existing installation is configured with remote Migrator Pro for Exchange Workers, the remote Workers need to be upgraded to version 20.11 or later.
For new installations, Migrator Pro for Exchange 20.11 enforces all FIPS mode requirements, no additional steps are required.
Website SSL Certificate Installation
-
Ensure the certificate and CA certificate chain has been installed on the server.
-
Open Internet Information Services (IIS) Manager.
-
Expand the Sites node in the Connections pane.
-
Right-click the “Default Web Site” website node and choose “Edit Bindings…”.
-
If the site has an “https” binding, select it and click “Edit…”
-
If the site does not have an “https” binding, click “Add…”
-
From the “Type” drop-down, select “https”.
-
-
From the “SSL certificate” drop-down, select the appropriate certificate.
-
Click OK.
-
Remove the “http” binding.
-
-
In the IIS Manager Features View pane, double-click “SSL Settings”.
-
Check the “Require SSL” checkbox and click “Apply” in the Actions pane.
-
-
Validate the website can be accessed and the bowers is indicating the certificate is valid and trusted.
System cryptography: Use FIPS compliant algorithms for encryption, hashing, and signing
Network security: Configure encryption types for Kerberos
Windows Server SCHANNEL Protocol Settings
Internet Information Services (IIS) 7.0 Set Up SSL Certificates
Internet Information Services (IIS) 8.0 Centralized SSL Certificates
Enable encrypted connections - SQL Server | Microsoft Docs
KB3135244 - TLS 1.2 support for Microsoft SQL Server
Installation and operation
Migrator Pro for Exchange's Admin Portal is a friendly user interface that lets you control various administrative tasks related to Exchange mailbox migration.
The first time you run the Admin Portal after installing Migrator Pro for Exchange, the program leads you through a series of screens for you to enter your Migrator Pro for Exchange license key and configure Migrator Pro for Exchange communications with other programs and hardware. After that initial configuration, the Admin Portal lets you update configuration data, define new forests to Migrator Pro for Exchange, designate mailboxes and public folders for migration, schedule and execute migrations, pause and resume migrations, review migration statistics, and so forth.
To access the Admin Portal, double-click the Migrator Pro for Exchange shortcut on your Windows desktop, or select Migrator Pro for Exchange from the Windows Start menu:
The Admin Portal opens as a new tab in your browser called Migrator Pro for Exchange:
Migrator Pro for Exchange's Main Toolbar appears across the top of the browser tab:
The toolbar buttons let you change the view of the Admin Portal, to show different types of information and different groups of available features below the Main Toolbar:
-
Mailboxes: Lists mailboxes from all the sites in the specified forest. In addition, it allows you to sort, group, search, and select mailboxes to add to the migration queue.
-
Mailbox Jobs: Manages the sequence of migration requests for the selected migration destination site.
-
Public Folders: Displays the Public Folder tree from the selected Source and Target forest. In addition, it allows you to sort, group, search, and select public folders to add to the migration queue. Public folder migration is only enabled during on-premises cross forest migration projects.
-
Public Folder Jobs: Manages the sequence of migration requests for the selected migration destination. Public folder migration is only enabled during on-premises cross forest migration projects.
-
Content Analysis: Allows Public Folder content information collection and analysis in SQL for data remediation.
-
Blackout Times: Allows the configuration of time periods when mailboxes cannot be migrated for the selected migration site.
-
Summary: Displays high-level accounting of mailbox migrations, which allows you to view all status levels.
-
Schedule: Displays estimated migration sequence for the selected migration site. It is a read-only view.
-
Metrics: Provides historical data and throughput measurements of migrations in a graphical format.
-
View Delegation: Displays delegation data, so you can migrate mailboxes associated by delegation rights together (to preserve delegation rights after the migration).
-
Forests: Configure global forest settings, add new forest, etc.
-
Workers: Administer Public Folder migration workers.
-
Settings: Configure general settings, activities, mailboxes, Public Folders, workers, scripts, notification templates, and licenses.
-
-
In addition to the Main Toolbar, the Admin Portal also contains a Data Panel that displays data depending on the button that is currently selected.
Detailed information about the Admin Portal is available in the Migrator Pro for Exchange User Guide.
Please note the following considerations for STIG environments.
The SQL Express option should not be chosen when installing Migrator Pro for Exchange. SQL Express does not include the following settings or features needed for STIG environments:
-
SQL Server must be monitored to discover unauthorized changes to stored procedures. (SQL Agents is not part of SQL Express) 41403, 41404, 41405
A dedicated SQL Server (full version) should be used.
Microsoft SQL Server 2012 Database Security Technical Implementation Guide (stigviewer.com)
Microsoft SQL Server 2012 Database Instance Security Technical Implementation Guide (stigviewer.com)
MS SQL Server 2016 Instance Security Technical Implementation Guide (stigviewer.com)
MS SQL Server 2016 Database Security Technical Implementation Guide (stigviewer.com)
Appendix B. Deployment in FIPS Environment
Binary Tree Migrator Pro for Exchange 20.11.0 can be successfully deployed in a FIPS environment by following the procedure described in this document.
The audience for this section is technical implementation consultants deploying Migrator Pro for Exchange.
Migrator Pro for Exchange relies on the following Third-Party cryptographic libraries for its cryptographic needs.
|
Cryptographic usage |
Cryptographic algorithm |
Cryptographic parameters |
|
Communication – Website User Interface |
SSL TLS 1.2 |
|
|
Communication – SQL Server |
SSL TLS 1.2 |
|
|
Communication – (LDAP/Kerberos) |
AES128_HMAC_SHA1, AES256_HMAC_SHA1 |
SESSION: Signing & Sealing |
|
Symmetric encryption of bulk data |
AES256 CBC Mode |
KEY: 256-bit PBKDF2 (Constant) IV: 128-bit PBKDF2 (Constant) |
|
Symmetric encryption of bulk data – Additional Entropy |
RNG |
64-bits (Random per encrypted value) |
|
Symmetric encryption of secrets – (DPAPI) Configuration Parameters |
AES256 CBC Mode |
SCOPE: LocalMachine |
|
Symmetric encryption of secrets – Additional Entropy |
RNG |
256-bits (Constant per node) |
|
Hashing – (PBKDF2) Generation of encryption KEY/IV |
HMACSHA1 |
HASH SIZE: 160-bit |
|
Hashing – (DPAPI) |
SHA512 |
HASH SIZE: 523-bit |
To execute in a FIPS compliant mode, a Windows environment requires the Microsoft Policy “System cryptography: Use FIPS compliant algorithms for encryption, hashing, and signing” setting enabled.
Microsoft states that “This policy is only advisory to applications. Therefore, if you enable the policy, it does not make sure that all applications will comply”.
Migrator Pro for Exchange leverages Microsoft’s CryptoAPI (CAPI) and CryptoAPI Next Generation (CNG) for its cryptographic needs
Microsoft Product Relationship with CNG and CAPI libraries is documented here: https://technet.microsoft.com/en-us/library/cc750357.aspx
“Rather than validate individual components and products, Microsoft chooses to validate only the underlying cryptographic modules. Subsequently, many Windows components and Microsoft products are built to rely on the Cryptographic API: Next Generation (CNG) and legacy Cryptographic API (CAPI) FIPS 140 validated cryptographic modules. Windows components and Microsoft products use the documented application programming interfaces (APIs) for each of the modules to access various cryptographic services.
External to Migrator Pro for Exchange, the following server configurations are necessary to set up the environment for FIPS Mode.
-
Windows Server 2012 R2 or later must be installed and up to date.
-
The following group policies must be enabled:
-
System Cryptography: Use FIPS compliant algorithms for encryption, hashing, and signing.
-
Ensure this policy is enabled.
-
-
Network Security: Configure encryption types allowed for Kerberos.
-
Ensure the “AES128_HMAC_SHA1” and “AES256_HMAC_SHA1” values are selected.
-
NOTE: Authentication of target accounts with synchronized passwords requires Kerberos encryption type “RC4_HMAC_MD5” to be allowed for participating devices.
-
-
-
Insecure SCHANNEL Server protocols must be disabled.
-
SSL 2.0, SSL 3.0, TLS 1.0, TLS 1.1
-
-
SSL certificate for Web Hosting issued by a trusted certificate authority.
-
SQL Server Encrypted Connections must be enabled.
-
See reference links for configuration details
-
For environments with existing Migrator Pro for Exchange installations, the installation must be upgraded to version 20.11 or later. If the existing installation is configured with remote Migrator Pro for Exchange Workers, the remote Workers need to be upgraded to version 20.11 or later.
For new installations, Migrator Pro for Exchange 20.11 enforces all FIPS mode requirements, no additional steps are required.
Website SSL Certificate Installation
-
Ensure the certificate and CA certificate chain has been installed on the server.
-
Open Internet Information Services (IIS) Manager.
-
Expand the Sites node in the Connections pane.
-
Right-click the “Default Web Site” website node and choose “Edit Bindings…”.
-
If the site has an “https” binding, select it and click “Edit…”
-
If the site does not have an “https” binding, click “Add…”
-
From the “Type” drop-down, select “https”.
-
-
From the “SSL certificate” drop-down, select the appropriate certificate.
-
Click OK.
-
Remove the “http” binding.
-
-
In the IIS Manager Features View pane, double-click “SSL Settings”.
-
Check the “Require SSL” checkbox and click “Apply” in the Actions pane.
-
-
Validate the website can be accessed and the bowers is indicating the certificate is valid and trusted.
System cryptography: Use FIPS compliant algorithms for encryption, hashing, and signing
Network security: Configure encryption types for Kerberos
Windows Server SCHANNEL Protocol Settings
Internet Information Services (IIS) 7.0 Set Up SSL Certificates
Internet Information Services (IIS) 8.0 Centralized SSL Certificates
Enable encrypted connections - SQL Server | Microsoft Docs
KB3135244 - TLS 1.2 support for Microsoft SQL Server