
Managing Audit Settings
The Manage Audit Settings action lets you to manage (enable and disable) SharePoint audit settings from within the ControlPoint application interface.
NOTE: Using "Manage Audit Settings" to disable or enable Audit flags will not affect auditing enabled through a SharePoint Information Management Policy for a list or library. These Audit flags are enabled at the Content Type level, and disabling auditing at the Site Collection level will not disable Content Type auditing.
In a multi-farm environment, audit settings can be managed across multiple farms.
To access the Manage Audit Settings workspace:
1Select the object(s) whose audit settings you want to manage.
NOTE: If you select the entire farm or one or more Web applications or site collections, the audit settings will be applied to the site collection(s) and inherited by child objects (sites, libraries, and lists). If you want a site collection to be included in the GDPR Dashboard Sites with Auditing Enabled calculation, you must enable audit settings at the site collection level or above.
2Choose Audit and Alerts > Manage Audit Settings.
It is important to note that if your selection includes a single object, audit settings currently enabled for that object will be checked. (Enabled settings will not be checked if your scope includes multiple objects.)
To enable or change audit settings:
1Select Enable Audit.
2Use the information in the following table to determine the appropriate action to take.
|
If you want to ... |
Then ... |
|---|---|
|
reset all audit settings for the selected objects* |
·select Reset Audit Settings to the settings below ·check/uncheck each setting you want to enable/disable. |
|
add to existing audit settings for the selected objects* |
·select Add the settings below to the existing Audit Settings ·check each setting you want to add. NOTE: Remember that existing audit settings will appear checked only if they were set explicitly for all objects within the scope of your selection. |
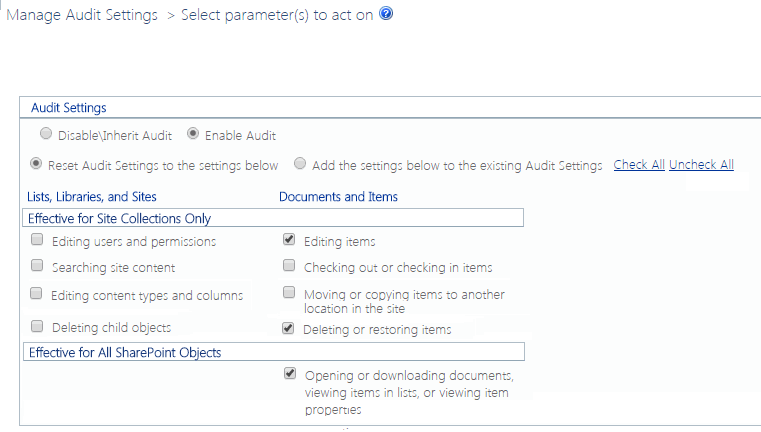
* For most audit settings, SharePoint will only recognize and report on those that have been set at the site collection level (in the Effective for Site Collections Only section). The only setting that can be set explicitly at the site or list/library level that SharePoint will recognize is Opening or downloading documents, viewing items in lists, or viewing item properties (in the Effective for all SharePoint Objects section).
If you are enabling audit settings at the site collection level or above, all settings (except for Deleting child objects) must be enabled if you want the affected site collections to be included in the GDPR Dashboard Sites with Auditing Enabled calculation.
Now you can:
·run the operation immediately (by clicking the [Run Now] button)
OR
·complete the Enforce Policy section and schedule the operation to run at a later time.
OR
·save the operation as XML Instructions that can be run at a later time.
If you chose the Run Now, option, after the operation has been processed:
·a confirmation message displays at the top of the page, and
·a ControlPoint Task Audit is generated for the operation and displays in the Results section.
If you schedule the operation, a link to the Task Audit is included in the scheduled action notification email.
See also The ControlPoint Task Audit.
To disable audit settings:
Select Disable\Inherit Audit.
If you select this option for site collections, auditing for individual sites and lists/libraries within the site collection depends on whether auditing has been enabled for the site or list/library. If you select it for sites, libraries, or lists, whether SharePoint captures audit events depends on whether auditing has been enabled for the site collection. (By design, sites, lists, and libraries inherit most audit behavior from the site collection.)
NOTE: If you disable the auditing of any event type(s) for which ControlPoint alerts have been scheduled, you will no longer receive alerts for those events. See also Setting ControlPoint Alerts.
Creating and Managing SharePoint Alerts
The ControlPoint Create SharePoint Alerts action lets you create alerts for users in your SharePoint environment. You can create SharePoint alerts for sites, lists, and individual list items.
You can also change and/or delete SharePoint alerts using the Manage SharePoint Alerts action.
In a multi-farm environment, alerts can be created and managed for the home farm only.
Creating SharePoint Alerts
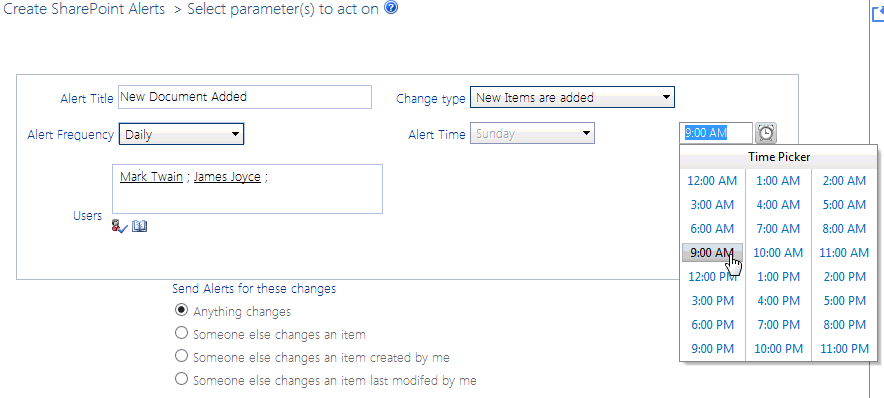
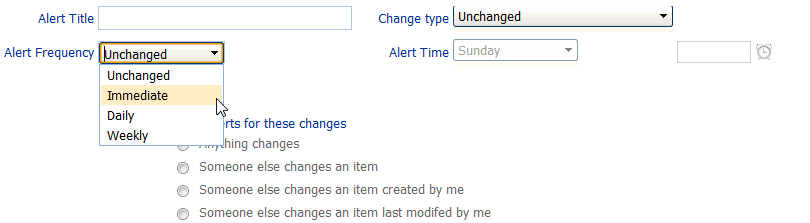
You can set alerts for SharePoint users from the ControlPoint application interface using the Create SharePoint Alerts action.
To create SharePoint alerts:
1Select the object(s) for which you want to set alerts).
2Choose Audit and Alerts > Create SharePoint Alerts.
NOTE: If you want to set alerts for individual items within the list(s), follow the procedure for Selecting List Items on Which to Perform a ControlPoint Operation.
3Select the user(s) for whom you want to create the alert.
4Complete the remaining parameters as you would if you were creating the alert in SharePoint.
Users will receive alert emails only if they have a minimum of Read permissions for the selected object(s). For additional SharePoint alert troubleshooting tips, refer to the following article: http://sharepointalert.info/troubleshooting-sharepoint-alerts/
NOTE: If your selection includes lists of different types, Send Alerts for these changes will include options that are common to both. (For example, if your selection includes both Announcements and Tasks, the options that are unique to each type (such as "An announcement with an expiration date is added or changed" and "A task is assigned to me") will not be available for selection.
Now you can:
·run the operation immediately (by clicking the [Run Now] button)
OR
·complete the Enforce Policy section and schedule the operation to run at a later time.
OR
·save the operation as XML Instructions that can be run at a later time.
If you chose the Run Now, option, after the operation has been processed:
·a confirmation message displays at the top of the page, and
·a ControlPoint Task Audit is generated for the operation and displays in the Results section.
If you schedule the operation, a link to the Task Audit is included in the scheduled action notification email.
See also The ControlPoint Task Audit.
Managing SharePoint Alerts
Use the Manage SharePoint Alerts action to delete or update alerts on lists and libraries that have been set for users in your SharePoint environment. Deletions are always performed in real time. Updates can either be performed in real time or scheduled.
To access the Manage SharePoint Alerts workspace:
1Select the object(s) containing the alerts that you want to manage.
2Choose Audit and Alerts > Manage SharePoint Alerts.
A table displays with information about all of the alerts within the scope of your selection. (Note that, if the alert was set on the list itself, Item and Item ID will be blank).
3If you want to narrow the list to only alerts that meet specific criteria:
a) in the Search Parameters section, specify the criteria you want to use.
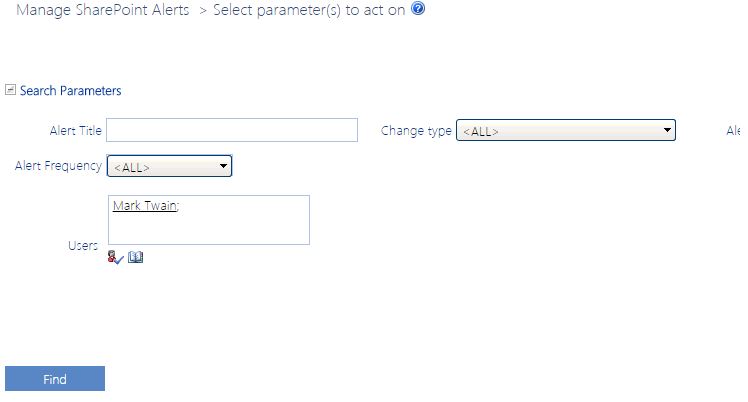
b)Click [Find].
4The Search Parameters section collapses and the Update/Delete section expands automatically.
5Check the Select box to the left of the row(s) containing the alerts that you want to update or delete.
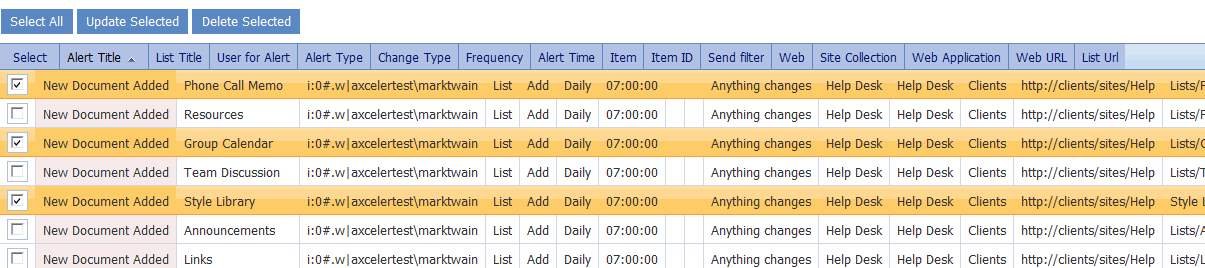
NOTE: If you want to select all alerts in the table, click [Select All].
6Use the information in the following table to determine the appropriate action to take.
|
If you want to ... |
Then ... |
|
update one or more alert criteria |
select the criteria you want to change. Now you can either: ·update the alert(s) immediately (by clicking the [Update selected] button OR ·complete the Enforce Policy section and schedule the update to run on a one-time or recurring basis. |
|
delete the selected alert(s) |
click [Delete selected]. |