Registering and Re-registering the ControlPoint Online App for Modern Authentication
As the last stage of the ControlPoint Online configuration process, the ControlPoint Online app must be registered in the Azure Active Directory to allow Modern Authentication.
The app can also be registered after the installation, as a separate action, if you launch ControlPoint Online Configuration. However, ControlPoint Online cannot be run until the app is registered.
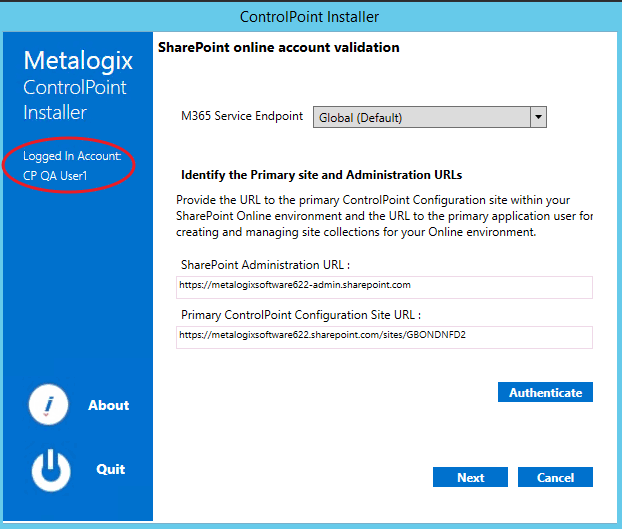
If you do choose to perform this action at later time, you will be prompted to complete the SharePoint online account validation dialog and authenticate using the Office 365 account used at the time ControlPoint was installed (which must be a Global Administrator for the tenant).
NOTE: Once the ControlPoint Online app is registered, it is only necessary to re-register it to change the tenant administrator and/or SSL certificate. Re-registering essentially deletes the existing registration and replaces it with a new one.
To register the ControlPoint Online app in Azure Active Directory:
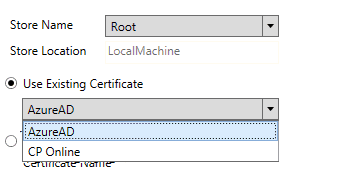
1.Select the SSL certificate that will allow ControlPoint users to authenticate with Microsoft, using one of the options described in the following table.
NOTE: To allow Microsoft Modern Authentication to be used by all users, the certificate must be located in the Trusted Root store. The Personal store of the ControlPoint installation account cannot be used. You can use the same certificate that you used for IIS Configuration, but a copy must be located in the Root store.
|
If you want to ... |
Then ... |
|---|---|
|
use an existing certificate |
·For the Store Name, make sure Root is selected from the drop-down. The Use Existing Certificate drop-down will be populated with available certificates in the selected store. ·Make sure Use Existing Certificate is selected, then select a certificate from the drop-down. NOTE: If the ControlPoint Installer cannot find a Certificate in the Store, this option will be disabled. |
|
create a new self-signed certificate (default option) |
Select Create new Self Signed Certificate, and enter a Certificate Name. The ControlPoint installer will create a .crt certificate file in the local machine Root store. IMPORTANT: Unlike a .pfx certificate file, which contains a private key, a .crt certificate file is less secure and will not be listed in the Certificate Manager in IIS. |

3Click [Register].
You will be prompted to accept Terms of Use, which grants ControlPoint Online permissions to access and operate on SharePoint Online data. When registration is complete, you can close the browser. The ControlPoint Installer will close automatically.
To re-register the ControlPoint Online app:
1.On the Azure AD Application Registration dialog, click [Registration].
2.Check the Re-Register Application box.
3.Specify a different tenant administrator and/or certificate as described in the procedure "To register the controlPoint Online app in Azure Active Directory."
Modifying ControlPoint Configuration Settings
ControlPoint Application Administrators can modify a number of ControlPoint configuration settings, including
·elements of the user interface
·environmental settings that can be "fine-tuned" to improve performance, and
·default security settings.
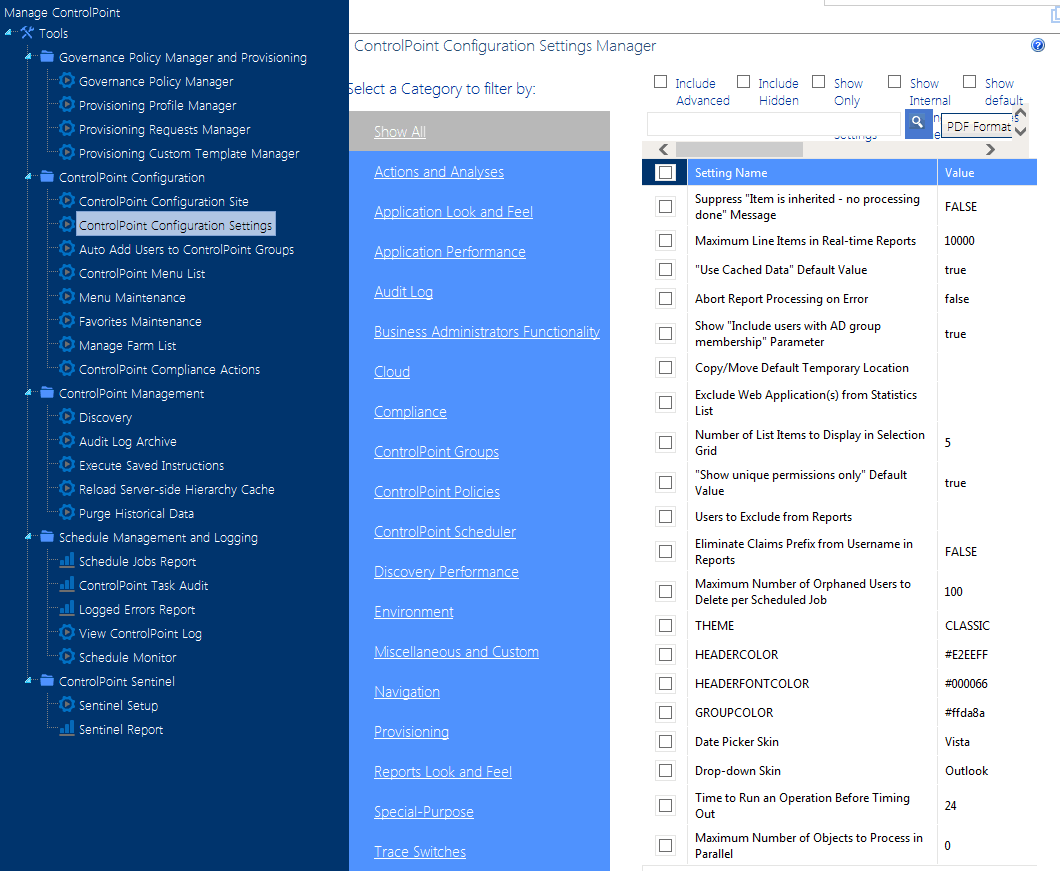
ControlPoint Application settings are modified via the ControlPoint Configuration Settings Manager page.
NOTE: If you first installed ControlPoint prior to version 6.0 and prefer to modify settings using the ControlPoint Configuration Site's ControlPoint Settings list, you may continue to do so. Be aware, however, that if you make changes directly to the list you will have to restart the application pool for the changes to take effect.
Configuration Settings That Apply to ControlPoint Online
All of the configuration settings that are relevant for ControlPoint Online are described in this section. Settings that appear in the list but are not covered in this guide apply to the On Premises version of ControlPoint only.
To access the ControlPoint Settings list:
From the Manage ControlPoint panel, chose ControlPoint Configuration > ControlPoint Configuration Settings.
Permissions for this list are inherited from the ControlPoint Configuration site. Therefore, members of ControlPoint Application Administrators group have full control access and can modify settings.
Members of the Administrators group have read-access to the list, and therefore can view, but not modify, settings.
NOTE: ControlPoint Settings can also be edited via the ControlPoint Configuration Site - ControlPoint Settings list. ControlPoint Application Administrators may prefer this option if they have been using ControlPoint prior to version 6.0 and are accustomed to editing settings this way.
Setting Classifications:
ControlPoint Settings fall into the following classifications:
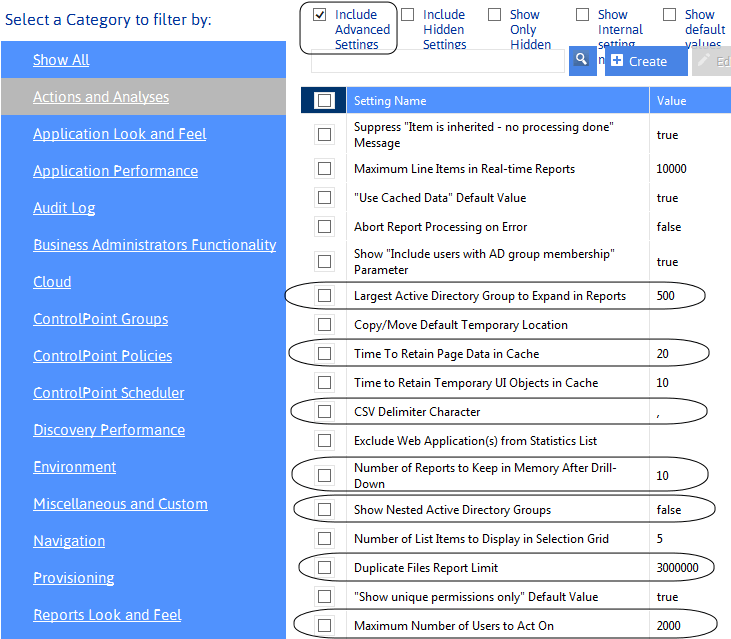
Basic - Generally the most commonly-configured settings,. Only Basic settings display in the ControlPoint Configuration Settings Manager page by default.
Advanced - Less commonly-used settings that you may want to modify to further customize ControlPoint to meet particular needs of your SharePoint environment or users. [
Created - Special-purpose settings that you can add to the ControlPoint Settings list if needed. Generally, these settings should only be configured under special circumstances and with guidance from Quest Support.
Filtering the ControlPoint Configuration Settings List
You can filter the ControlPoint Settings list using one or more of the following options:
·By choosing a Category

·By choosing to Include Advanced Settings
·If special-purpose settings have been created:
§Include Created Settings, or
§Show Only Created Settings
TIP: You can view created settings Include Created Settings and selecting the Special Purpose category.
Showing Additional Columns and Sorting by Column
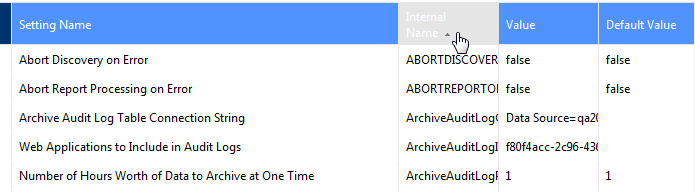
By default, the ControlPoint Configuration Settings list displays the Setting Name and current Value, but you can also choose to Show Internal setting name and/or Show default values. You can sort on any column.
For example, if you are a long-time ControlPoint user and are already familiar with internal setting names, you can sort by this column.
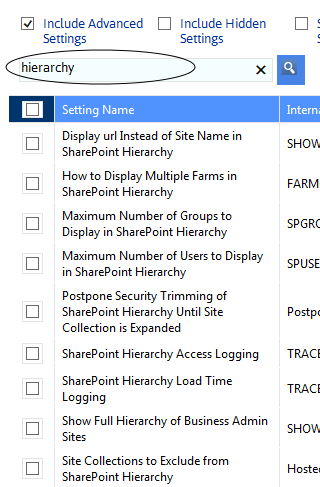
To search for a ControlPoint Setting by Setting Name:
Enter a full or partial text string in the search box, then click the magnifying glass icon 
To edit a ControlPoint Setting:
1Check the box to the left of the setting that you want to edit.
NOTE: You can edit only one setting at a time. If you select more than one, the [Edit] button becomes disabled.
2Click [Edit].
3Update the Value field as appropriate. (Descriptions of configurable settings, along with guidelines for changing parameter values, follow.)
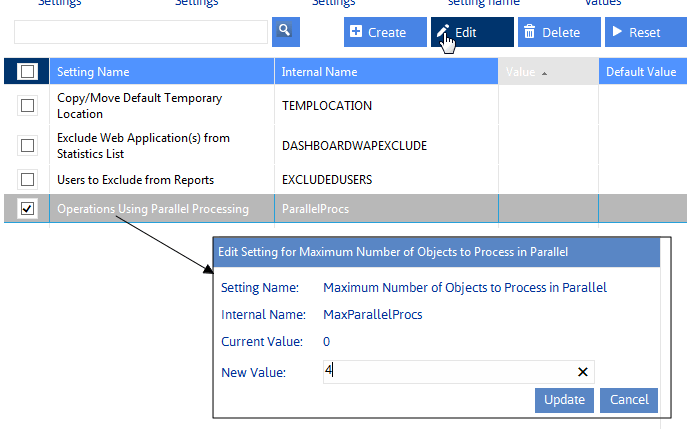
4Click [Update].
Changes to ControlPoint Settings take effect immediately.
Deleting ControlPoint Settings
Only Created settings can be deleted.
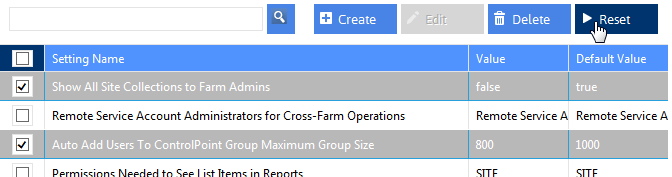
To restore ControlPoint Setting default values:
1Check the box to the left of each setting for which you want to restore the default value.
NOTE: For this operation, you may select multiple settings.
2Click [Reset].
Changing Default Settings for Actions and Analyses
These configuration settings display in the ControlPoint Settings list under the category Actions and Analyses.
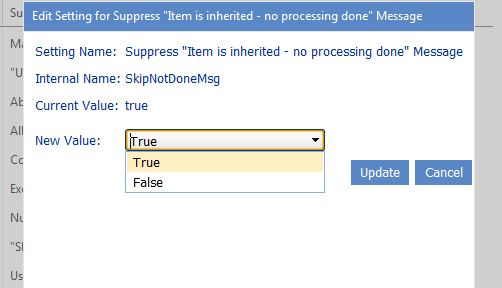
Supress "Item is inherited - no processing done" Message(SkipNotDoneMsg)
By default, when a permissions action includes SharePoint objects with inherited permissions, the following line displays in the ControlPoint Task Audit for each of these objects:
Security is inherited - no processing done
ControlPoint Application Administrators can, however, suppress this message for objects with inherited permissions by changing the Value of the ControlPoint Setting Supress "Item is inherited -no processing done" Message from True to False.