
Users
The Users page shows a list of users in the tenant that you have permission to view. Depending on authorization policies in place, you can create new users and perform actions on existing users.

On the Users page, which you can access by going to Manage, then Users, you can perform the following actions:
·Refresh: This refreshes the users list.
·Create user: Here you can create an on-premises user or a cloud user. Details on that are below.
·Delete: Delete a user.
·Invite user: You can invite a user to the tenant by selecting the organizational unit to insert them into, and entering their email. They will then receive an invitation email to join the tenant.
·Columns: You can add and remove columns from the table.
·Advanced Filter: Find a user by their personal details or account details.
On the User Profile page you can see information about the user who is logged in to Nova. If there is a default self-service policy in place, then some or all of the information on the page relating to the user account can also be edited. There are a multitude of tabs that have user information, including:
·Detail: This includes display names, email addresses, departments, managers, and locations.
·Licenses: This is the licenses that the user has access to.
·OneDrive: Details on the user's OneDrive account, including information on the drive type, when it was created and last modified, as well as space used and space remaining.
·Authentication: This gives information on multi factor authentication status. Administrators have rights to reset password, revoke the user token so the user will have to sign back into their device, and disable MFA.
·Group membership: From here, you can add the user to a group by clicking on the group and clicking Add.
·Intune Devices: This lists the number of devices registered to the user in Microsoft Intune. You can perform similar actions as seen in this section.
Creating a cloud user
Below are steps on how to create a cloud user.
1.Click Create user, then Create cloud user.
2.Select the vOU to insert the user into.
3.Enter the display name, and if the account should be enabled or not.
4.Enter the username of the email address of the user and select the domain name from the drop-down menu.
5.Enter the password for the user, and if the user should be forced to changed their password on the next sign in.
6.Enter the user's exchange alias.
7.Enter the location of the user from the drop down menu.
8.Optionally, add the details of the user, including display name, manager, department and additional location details.
9.Click Save.
Creating an on-premises user
Below are steps on how to create an on-premises user.
1.Click Create user, then Create on-premises user.
2.Select the vOU to insert the user into.
3.Enter the display name, and if the account should be enabled or not.
4.Enter the username of the email address of the user, and select the domain name from the drop down menu.
5.Enter the password for the user, and if the user should be forced to change their password on the next sign in.
6.Enter the SAM account name of the user.
7.Optionally, add the details of the user, including manager and display name.
8.Click Save.
Add authentication method
Below are steps on adding a new authentication method for each individual user:
1.Click on the desired user.
2.Click Authentication.
3.Click Add authentication method.
4.Under Choose label, select either Email or Phone number.
5.Enter the desired parameters into the boxes, and click Save. A job will then run for each authentication method.
6.Your desired authentication method will appear under the Authentication tab for the user.
Contacts
This page shows you a list of mail contacts for a certain Office 365 tenant.
On this page, you can:
·Refresh: Update the page to get the most up-to-date contacts.
·Create Mail Contact: You can add an on-premises contact or a cloud contact. Instructions on how to do that are below.
·Delete: Delete a contact from the list.
·Columns: You can add and remove columns from the table.
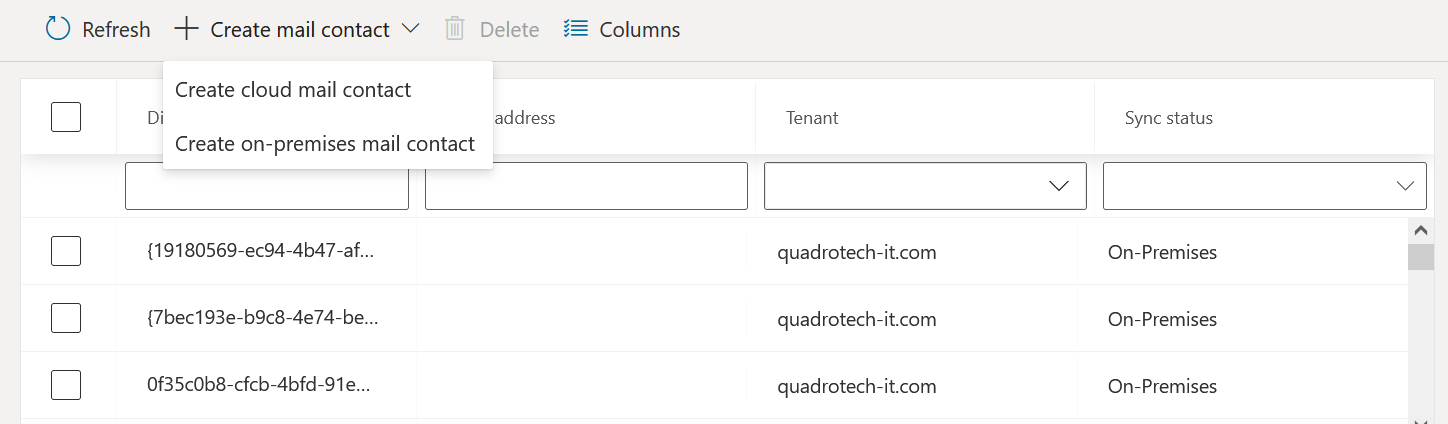
Creating a cloud mail contact
Below is how to create a mail contact stored in the cloud.
1.Click Create mail contact, then Create cloud mail contact.
2.Select the vOU to insert the user into.
3.Enter the email address of the chosen contact.
4.Enter the contact name of the user.
5.Enter the display name of the user.
6.Optionally, add the first name, last name and initials of the user.
7.Click Save.
Create on-premises mail contact
Below is how to create a mail contact stored on-premises.
1.Click Create mail contact, then Create on-premises mail contact.
2.Select the vOU to insert the user into.
3.Choose the user's domain from the drop down menu.
4.Enter the contact name of the user.
5.Enter the display name of the user.
6.Optionally, enter the personal details of the contact. This includes location, department, telephone number and job title.
7.Click Save.
Mailboxes
On the Mailboxes page, you can review and manage mailboxes in the Office 365 tenants that you have access to.
You can:
·Refresh: Refresh the mailbox list to get the most updated data.
·Create Mailbox: You can create either a shared mailbox or a room. Instructions on how to do that are below.
·Columns: You can add and remove columns from the table.
You can get details on each mailbox. By clicking on the name of the mailbox, you will see:
·Detail: This includes basic mailbox information, including forwarding addresses, recipient type and archive status.
·Permission owner: This shows the owner of the mailbox.
·Recipient permissions: Allows users to add send as and send on behalf permissions to other mailboxes.
·Mailbox permissions: This shows the list of users associated with the mailbox, and their permissions, including access rights.
·SMTP aliases: This is the list of email addresses assigned to the mailbox.
·Folder statistics: These are statistics associated with the different folders in the mailbox.
·Mobile devices: This is the list of devices that have access to the mailbox.
·Automatic replies: This is a list of automatic replies created by the users of the mailbox.
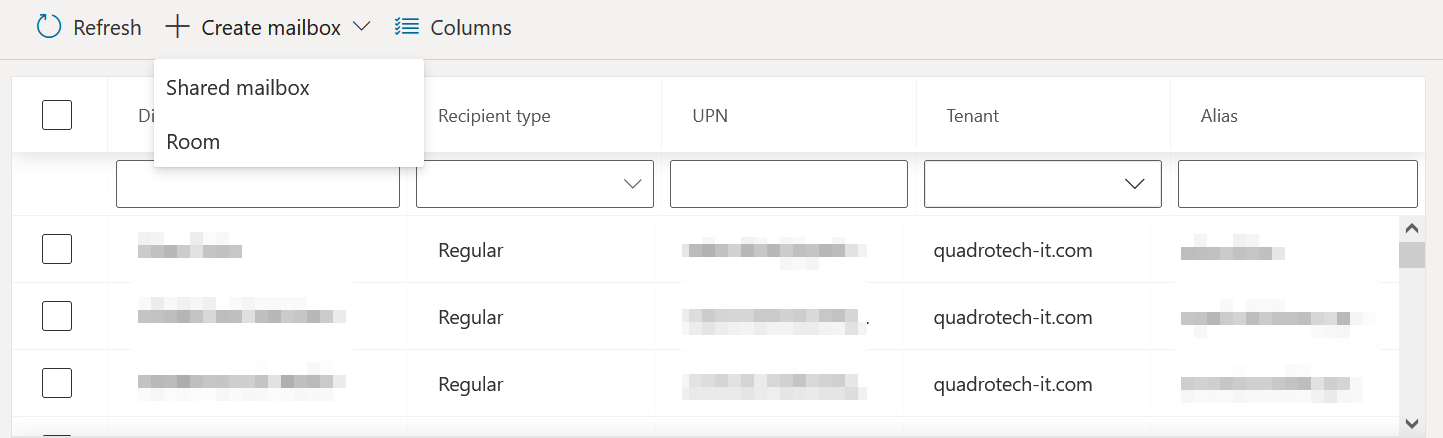
Creating a shared mailbox
Below are steps on how to create a shared mailbox.
1.Click Create mailbox, then Shared mailbox.
2.Select the vOU to insert the user into.
3.Enter this name of the mailbox.
4.Enter the display name of the mailbox.
5.Enter the mailbox's alias.
6.From the drop down menu, select the owner of the mailbox.
7.Click Save.
Creating a Room
Below are steps on how to create a room.
1.Click Create mailbox, then Room.
2.Select the vOU to insert the user into.
3.Enter this name of the room.
4.Enter the room's alias.
5.Optionally, enter the maximum amount of resources this room can have.
6.Optionally, enter the room's office location.
7.Click Save.
Groups
On the Groups page, by going to Manage, then Groups, you can manage Office 365 groups.

You can:
·Refresh: Refresh the groups list to get the most updated data.
·Create group: you can create either a group in the cloud, or an on-premises group. Details on how to do that are below.
·Delete: Delete a group from the list.
·Columns: You can add and remove columns from the table.
By clicking on a group, you will see additional information, such as:
·Detail: This includes information on the group such as its group type, mail and security enablement and its mail nickname.
·Owners: This is a list of the group owners. You are able to add and remove owners if you have the permissions to.
·Members: This is a list of the group members. You are able to add and remove members if you have the permissions to.
Creating a Cloud Group
Below is how to create a group stored in the cloud.
1.Click Create group, the Create on-premises group.
2.Select the vOU to insert the user into.
3.Enter this display name of the group.
4.Enter the group's Exchange alias to link the group to.
5.Enter the group type. These are:
a.Office 365 Group
b.Security Group
c.Distribution Group
d.Mail enabled security group
6.Optionally, add a description to inform other users of the group's purpose.
7.Click Save.
Create an On-Premises Group
Below are steps on how to create a group stored on-premises.
1.Click Create group, then Create on-premises group.
2.Select the vOU to insert the user into.
3.Enter this domain of the group from the drop down list.
4.Enter the group's display name.
5.Enter the group's name.
6.Enter the group's SAM account name.
7.Enter the group's category: Distribution or Security.
8.Enter the group's scope: Domain local, Global or Universal.
8.Optionally, add who the group is managed by, a description of the group, the home page of the group and its mail address.
9.Click Save.