
Repairing SCM components
When troubleshooting fails to address problems with unresponsive SCM components, follow the steps below to repair the SCM components in your deployment.
Steps to repair SCM components
1.Log in to the primary SCM Server. For example, log in to SCMSVR using the SCM Administrator credentials (mydomain\scmadmin).
2.Unzip the install media files to a suitable folder.
|
|
NOTE: You must use the same version of the install media that was used in your deployment. |

3.Click the windows installer file Metalogix Sensitive Content Manager.exe. The Welcome to SCM Setup Wizard opens.
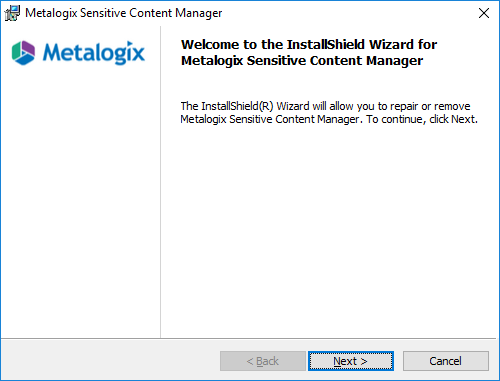
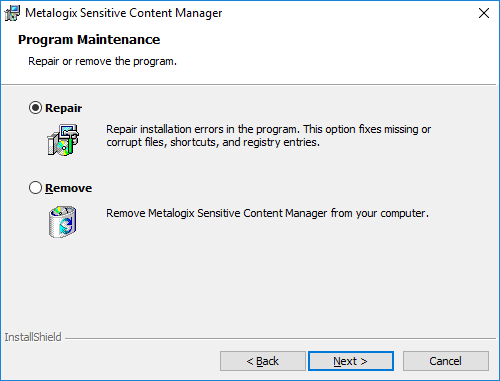
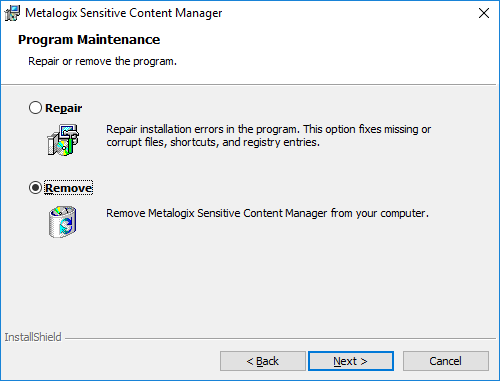
4.Click Next. The Program Maintenance window opens. Select Repair.
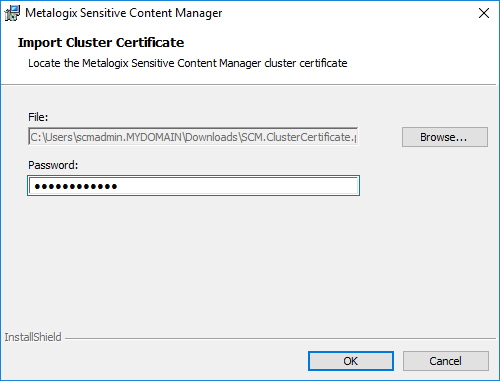
5.If the cluster certificate or license is invalid, you will be prompted to provide the file path or license key respectively. Click OK to import the cluster certificate. Otherwise Click Next.P
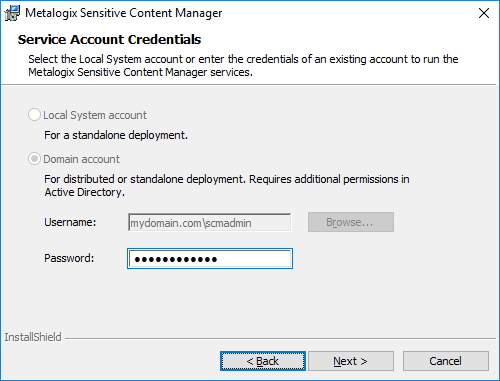
6.The Service Account Credentials window opens. Enter the password if the server uses the Domain account setting.
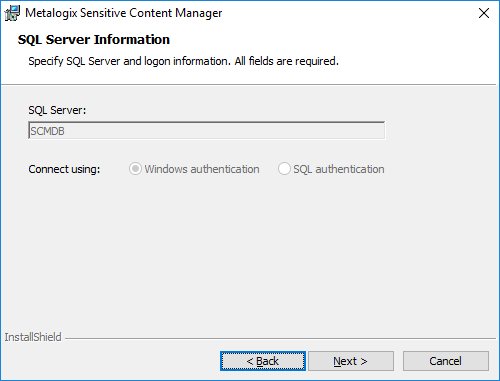
7.Click Next. The SQL Server Information window opens. Verify the information in the window.
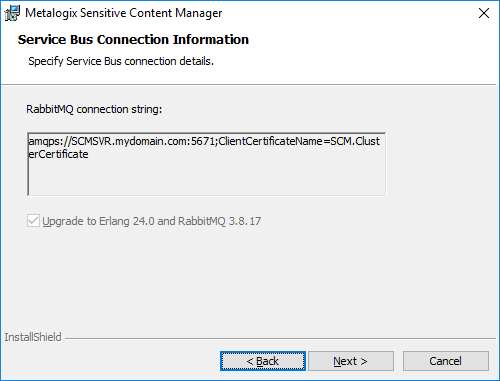
8.Click Next. The Service Bus Connection Information window opens. verify the information shown in the RabbitMQ connection string field.
9.Click Next. The Ready to Install window opens.

10.Click Install. Each SCM component is removed and re-installed. If the installation is successful, the SCM Setup Wizard Completed window opens.
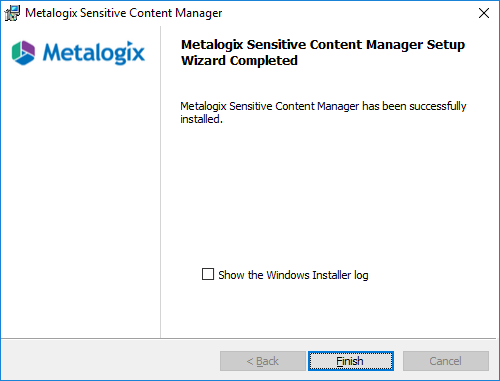
11.Click Finish to exit the wizard.
Removing SCM components
This topic describes two methods to uninstall SCM components.
Steps to uninstall SCM components with the SCM windows installer
Steps to manually uninstall all SCM components
Steps to uninstall SCM components with the SCM windows installer
1.Log in to the computer designated as the SCM Server.
2.Unzip the install media files to a suitable folder.
3.Click the windows installer file Metalogix Sensitive Content Manager.exe. If the User Account Control window opens, click Yes and the Welcome to SCM Setup Wizard opens.
4.Click Next. The Program Maintenance window opens. Select Remove.
5.Click Next. The Remove the Program window opens.
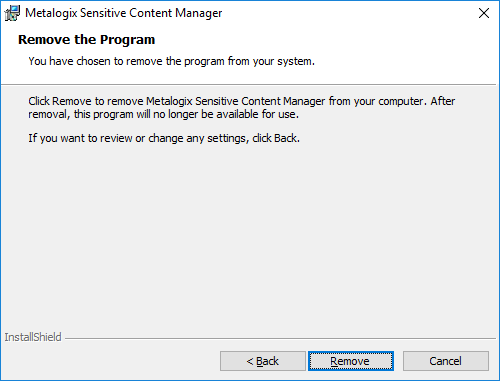
6.Click Remove. If the removal is successful, the SCM Setup Wizard Completed window opens.
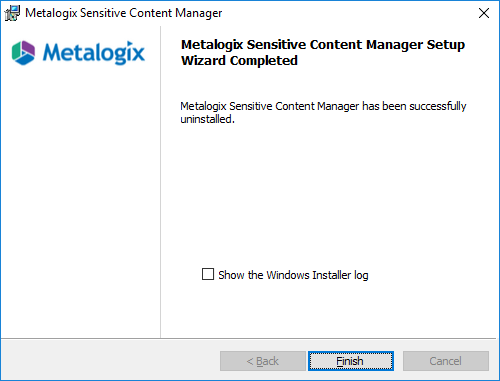
7.Click Finish to exit the wizard.
|
|
NOTES: 1.Third party components like Erlang and RabbitMQ must be manually uninstalled. 2.The SCM databases cannot be removed with the SCM windows installer. To remove the SCM databases you could delete the databases using Microsoft SQL Server tools. 3.In a standalone deployment, all SCM components except the SCM databases and certificates are removed. 4.In a distributed deployment: a.Only the components from the computer are removed where the SCM windows installer is being used. For example, if the removal steps are followed on the SCM Server only the SCM components installed on the SCM Server are removed. If dedicated servers are used for other services, then these components must be removed separately from each of those servers. b.The shared folder is not removed. This folder must be deleted manually to ensure that sensitive files are disposed carefully. |
Steps to manually uninstall all SCM components
|
|
NOTE: Take a backup of the SCM databases if you plan to remove components. |
For a standalone SCM installation
1.Navigate to Control Panel > All Control Panel Items > Programs and Features.
2.Uninstall SCM.
3.Remove all SCM IIS application pools and sites.
4.Stop and remove the SCM Windows services.
5.Delete the temporary file storage folder.
6.Delete the installation folder.
7.Restart the computer.
For a distributed SCM installation
1.Log in to the SCM Server and navigate to Control Panel > All Control Panel Items > Programs and Features.
a.Uninstall SCM.
b.Remove all SCM IIS application pools and sites.
c.Stop and remove the SCM Windows services.
d.Delete the shared temporary file storage folder.
e.Delete the installation folder.
f.Restart the computer.
2.Log in to each server that has an instance of the SCM Windows service
a.Navigate to Control Panel > All Control Panel Items > Programs and Features.
b.Uninstall SCM.
c.Stop and remove the SCM Windows service.
d.Restart the computer.
Troubleshooting
The first step in solving an installation issue is to trace the source of the issue through the installer.log file which is created during each install attempt in the same folder where your installation file is located. The troubleshooting messages listed below will help you identify some of the most common issues during the install process and are grouped into installation categories:
·Destination and Temporary Folder messages
·Windows Service Account messages
|
Error Message |
Resolution |
|
License key <LicenseKey> has expired. Please contact your Quest sales representative. |
Contact Quest support. |
|
License key <LicenseKey> is invalid. Please contact your Quest sales representative. |
Contact Quest support. |
|
Please activate your license. |
Click Activate License for online activation or click Activate Offline for offline activation. If the license activation is successful, a confirmation message opens. |
|
The license key <LicenseKey> does not match the currently activated license key <activatedLicenseKey>. Please activate your license again. |
Try reactivating the old license, and then activate the new license. |
|
An error occurred while copying the activation string to the clipboard. |
Try again. If the error persists, contact Quest support. |
|
An error occurred while saving the file. |
The folder may be read only or may not exist. Try saving to a different folder. If the error persists, contact Quest support. |
|
An error occurred while reading the file. |
The file may be corrupted. Try generating the file again by attempting an offline activation. If the error persists, contact Quest support. |
Destination and Temporary Folder messages
|
Error Message |
Resolution |
|
The folder <folderpath> is invalid or does not exist. |
The destination or temporary folder that was specified should exist. If you choose to keep the default settings, then the folder will be created by the installer. |
|
The folder <folderpath> is read only. |
Remove the read restriction on the destination or temporary folder. |
|
An error occurred while creating the destination folder. |
Ensure that the destination folder exists, and the account used for installing the product or service has permissions to create the destination folder. |
|
An error occurred while validating the destination folder. |
Ensure that the destination folder exists, and the account used for installing the product or service has permissions to write to the destination folder. |
|
An error occurred while selecting the destination folder. |
Ensure that the destination folder exists. |
|
The folder must be a local folder. |
The destination folder for installing the product or service cannot be a shared folder. |
|
An error occurred while ensuring user <serviceIdentityUserName> permission on <targetPath>. |
Ensure that the temporary folder exists, and the account used for installing the product or service has read/write permissions on the temporary folder. |
|
An error occurred while validating the temporary storage folder. |
Ensure that the temporary folder exists, and the account used for installing the product or service has read/write permissions on the temporary folder. |
|
An error occurred while selecting the temporary storage folder. |
Ensure that the temporary folder exists. |
|
The folder <folderpath> must be a shared folder. |
If a service instance is installed on a dedicated server for scalability, the temporary folder selected must be a shared folder. |
|
Insufficient disk space detected for temporary folder <folderPath>. Select a folder on a larger drive or a dedicated UNC location. |
The expected space requirement is approximately double the size of the physical RAM. For example, if you have 32GB of RAM then you must have 64GB of available space on the local drive. You can clear some unused files to recover the required space or select a folder on a larger drive or select a dedicated UNC location. |
Windows Service Account messages
|
Error Message |
Resolution |
|
An error occurred while validating the users credentials. |
Please check the windows log in credentials of the user that will run the Windows service or re-enter the correct credentials. |
|
The specified account does not exist, or the users credentials are invalid. |
Check the windows log in credentials of the user that will run the windows service, or re-enter the correct credentials. if the user is a domain user, please verify the user account in the domain active directory. |
|
Access to the Service Connection Point is denied |
Ensure that the domain user or LocalSystem account that is used to run the windows service has been added to the Service Connection Point of the SCM Server in the active directory and all permissions have been granted. For more information see Steps to grant permissions to the SCM Service account for the Service Connection Point. |
|
Unable to reach the SCM services |
1.Log in to the dedicated service server. Open a command window with Start > Run > cmd. At the command prompt run the command ping <SCM Server IP Address> and ensure that you get the responses to verify that SCM Server is reachable. 2.Log in to the SCM Server and verify that the ports are open. For more information see Steps to configure the inbound rules for the service ports on the SCM Server. 3.In the SCM Server open the Internet Information Services (IIS) Manager and verify that the Application Pools and Sites related to SCM are running. |
|
An error occurred while checking for existing Service Connection Point. |
Ensure that the domain user or LocalSystem account that is used to run the windows service has been added to the Service Connection Point of the SCM Server in the active directory and all permissions have been granted. For more information see Steps to grant permissions to the SCM Service account for the Service Connection Point |
|
A Service Connection Point already exists for '<computerName>' but the Local System account ('<SCM_MACHINE_FRIENDLY_DOMAINNAME}\\{computerName>$') may not have write permissions. |
Ensure that the domain user or LocalSystem account that is used to run the windows service has been added to the Service Connection Point of the SCM Server in the active directory and all permissions have been granted. For more information see Steps to grant permissions to the SCM Service account for the Service Connection Point. |
|
Error Message |
Resolution |
|
Unable to connect to the SQL Server <sqlServerName> using service account <serviceIdentityUserName>. |
Verify that the SQL Server is accessible to the logged in user. If a firewall is active, ensure that an inbound port rule on the SCM Server is created for port 1433. |
|
The specified account does not have the required permissions on SQL Server. |
Verify that the user exists in the SQL Server with appropriate log in rights. This is usually the case with orphaned users. |
|
The installation account <sqlUserName> must have the 'dbcreator' and 'securityadmin' roles assigned in <sqlServerName>. |
The logged in user who is installing the SCM components must be granted the 'dbcreator' and 'securityadmin' roles in the SQL Server. |
|
The service account <serviceIdentityUserName> must have the 'db_owner' role assigned in <sqlServerName> for database(s): <missingDbOwnerDatabaseNames>. |
The SCM Service user account on a distributed node must be granted the 'db_owner' roles in the SQL Server. The SQL Server must be accessible to the SCM Service user. If a firewall is active, ensure that an inbound port rule on the SCM Server is created for port 1433. |
|
Insufficient disk space detected on the SQL Server database drive. |
The expected space requirement is approximately double the size of the physical RAM. For example, if you have 32GB of RAM then you must have 64GB of available space on the SQL Server database drive. You can clear some unused files to recover the required space or move your database default drive to a disk drive with the required disk space. |
|
The ScanDetail table contains a large volume of data that impacts report generation. Configure additional settings to prepare for the upgrade as described in the SCM Installation Guide. |
Additional configuration that is required is described in the topic Preparing for the upgrade. |
|
Error Message |
Resolution |
|
Please enter a port number between 1 and 65535. |
Specify a port number that is within the bounds indicated. |
|
Port number is already in use. |
Specify a different port number that is within the bounds indicated. |
|
An error occurred while validating the IIS web site information. |
This is a generic error. If the error persists, contact your IT resource or contact Quest support. |
|
An error occurred while creating the self-signed certificate <friendlyName>. |
Try creating another self-signed certificate. For the SCM Server, ensure that the self-signed certificates are kept in: ·Trusted Root Certification Authorities store, and ·Personal or Web certificate store If you have a Verisign, Thawte or another commercial certificate then they do not need to be placed in the Trusted Root Certification Authorities store. |
|
An error occurred while binding certificates. |
Verify that the certificate is in the correct folder or regenerate the certificate as it may be corrupted and try again or contact Quest support. |
|
Security group <groupName> does not exist. or An error occurred while verifying security group <groupName>. |
Verify that a valid security group exists in the domain active directory. |
|
The computer must be joined to a domain. |
The computer should be added to the domain. Start > Run > sysdm.cpl to open the System properties window. Add your computer to the domain from there. |
|
Error Message |
Resolution |
|
Unable to connect to the RabbitMQ. |
Check that RabbitMQ is accessible. Verify that the Rabbit.ClusterCertificate (if applicable) is in the certificate store. Verify that the connection string is valid. If the connection uses amqp then port 5672 must be open, or if connection uses amqps (secured) then port 5671 must be open. |
|
RabbitMQ is already installed. Click 'OK' to remove the previous version or 'Cancel' to cancel this installation |
A mismatch between the installed version of RabbitMQ and the required version was detected. Click OK to allow the installer to uninstall and install the required version of RabbitMQ. |
|
An error occurred while validating the service bus connection string.
|
This is an unexpected error from the service bus. Check that RabbitMQ is accessible. Verify that the Rabbit.ClusterCertificate is in the certificate store. Verify that the connection string is valid. If the connection uses amqp then port 5672 must be open, or if connection uses amqps (secured) then port 5671 must be open or contact Quest support. |
|
Insufficient disk space detected on the Rabbit drive. |
The expected space requirement is approximately double the size of the physical RAM. For example, if you have 32GB of RAM then you must have 64GB of available space on the SQL Server database drive. You can clear some unused files to recover the required space. |
Appendix
In this chapter:
·Steps to grant permissions to the SCM Service account for the Service Connection Point
·Steps to grant Remote Desktop Access
·Steps to get the URL for the SCM Administration Center
·Relocating the RabbitMQ installation directory
Steps to grant permissions to the SCM Service account for the Service Connection Point
Contact your domain administrator to help with these steps if needed.
1.Log in to your domain controller
2.Click Start > Run. Enter ADSIEdit.msc and click OK to start the Active Directory Service Interfaces Editor.
3.From the Console Tree, expand the computers node and select the SCM Server (e.g., CN=SCMSVR).
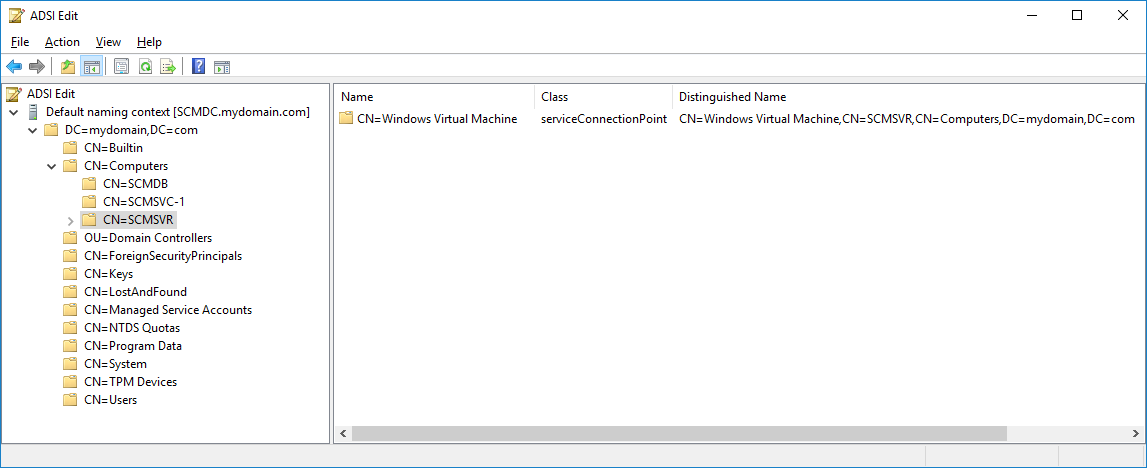
4.Right-click the CN=Sensitive Content Manager node and select Properties from the context menu.
5.Select the Security tab.
6.Click Add and follow the steps to add a domain user (eg. SCM Administrator)
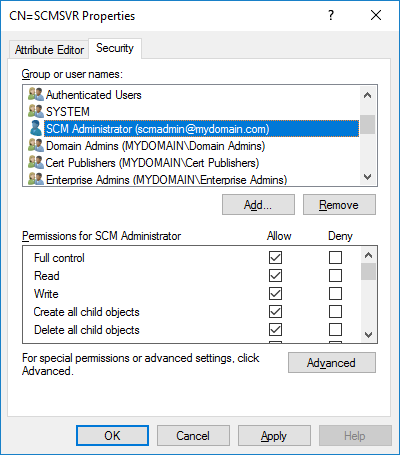
7.In the Permissions window, select all the Allow check boxes.
8.Click OK to close the window.
Steps to grant Remote Desktop Access
Follow the steps below to grant the required privilege to log on through Remote Desktop Services:
1.Log in to the computer with the local administrator credentials.
2.Start > Run > secpol.msc
3.From the Security Settings pane, open Local Policies > User Rights Assignment.
4.From the right-hand pane, double-click on Allow log on through Remote Desktop Services to open the properties window.
5.Select the Local Security Settings tab and click Add User or Group...
6.Add the SCM Administrator and the SCM Users group.
7.Click OK to save the changes and exit.
Steps to get the URL for the SCM Administration Center
1.Right-click the desktop shortcut and select Properties.
2.Click the Shortcut tab and note the value of the Target field.
or
1.Log in to the SCM Server and open the Command console.
2.Run the command ipconfig /all
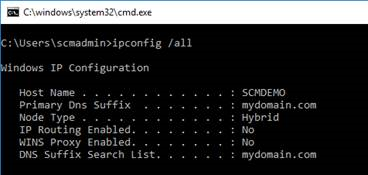
3.Get the FQDN of the server from the windows command prompt. This will give you [Hostname].[Primary Dns Suffix]. For example, SCMDEMO.mydomain.com
4.To get the protocol and port open IIS Manager
a.Expand the server node.
b.Expand the Sites node and select SCMAdminPortal
c.From the Actions pane click Bindings. This will gives you [protocol] and [port]. For example, the protocol is https and the port binding is 44300.
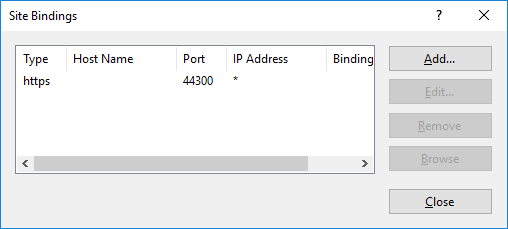
You can put all this information together and get [protocol]:// [Hostname].[Primary Dns Suffix]:[Port]. For example, https://SCMDEMO.mydomain.com:44300
Relocating the RabbitMQ installation directory
To move the Rabbit configuration and data files to a secondary drive (for example, E:\RabbitMQ)
1.Run the following commands to stop and remove the service
·rabbitmq-service.bat stop
·rabbitmq-service.bat remove
2.Physically move all the existing RabbitMQ files from %APDATA%\RabbitMQ to the new location E:\RabbitMQ
3.Use a text editor to update the rabbitmq.conf file located in the E:\RabbitMQ folder with the new certificate location path
·ssl_options.cacertfile = E:\\RabbitMQ\\CertificatePemFiles\\cabundle.pem
·ssl_options.certfile = E:\\RabbitMQ\\CertificatePemFiles\\rabbit.pem
·ssl_options.keyfile = E:\\RabbitMQ\\CertificatePemFiles\\key.pem
4.Run the following commands to install and start the RabbitMQ service and point them to the new location.
·SET RABBITMQ_BASE=E:\RabbitMQ
·rabbitmq-service.bat install
·rabbitmq-service.bat start