
-
タイトル
How to manage SQL Server logins with ApexSQL Manage -
説明
SQL Server Logins are a vital mechanism used primarily by DBAs on an everyday basis. While certain logins are limited to only reading data from a database, a login can have additional server privileges that enable the user to manipulate the data in the database. Given that Logins and Users are a vital part of SQL Server security, their privileges ought to be closely monitored which will be explained in this article. -
対策
ApexSQL Manage is an enterprise SQL Server instance tool used to manage active SQL Server logins on multiple instances, discover SQL Server instances on a domain or local network, perform SQL Server health checks, document SQL Server configuration, create instance snapshots and comparison between live SQL Server or snapshots.
Main areas covered in the article are how to:
- add additional SQL Server logins
- assign and edit Server roles to existing or newly created SQL Server logins
- remove existing SQL Server logins
Prior to diving further, a SQL Server instance must be discovered and added in ApexSQL Manage, detailed information on the discovering and adding SQL Servers process can be found in How to discover SQL Server instances, SSRS, SSAS and SSIS services across the network article.
Add SQL Server Logins
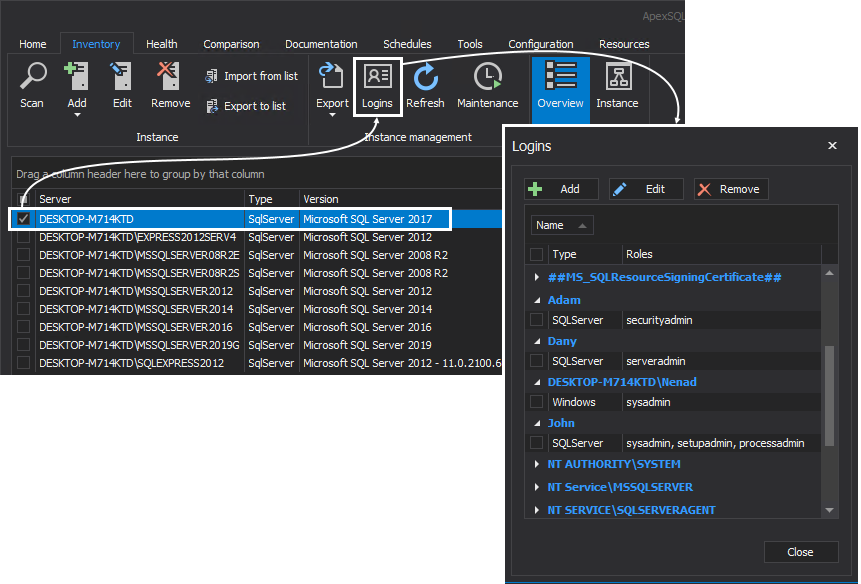
To open the logins of a SQL Server instance, first, go to the Inventory tab in the main ribbon.
Check the desired SQL instance from the shown grid and click the Logins button. This will open the Logins window where all logins located on the checked SQL instance are, as well as their Server roles.
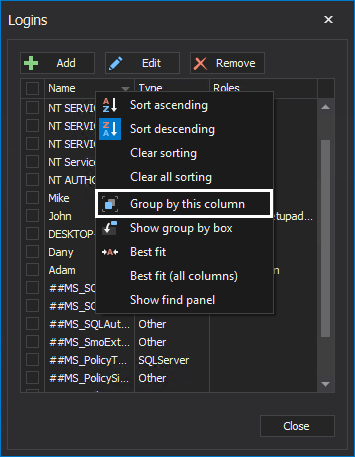
Once the login list is shown, it can additionally be sorted by Name, Type, or Roles for easier management. In the following examples, SQL Server logins are grouped by Name:
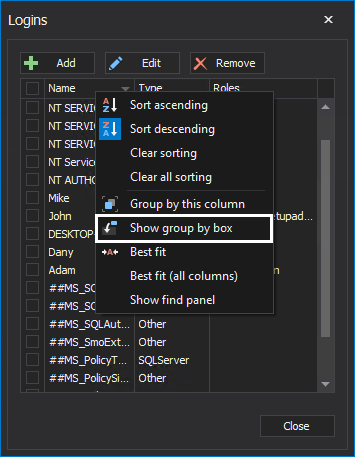
The SQL Server logins can be grouped by any of the present columns in the Logins window grid. To change the grid grouping, right-click on any column of the Logins window and select the Show group by box option:
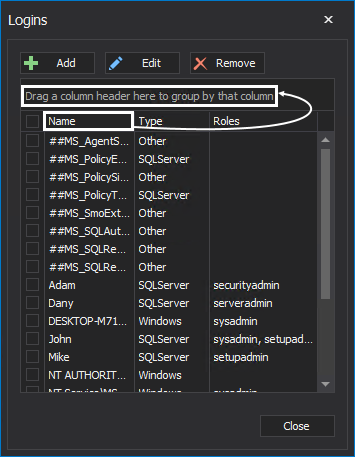
Once the grouping box is shown, click and hold on the column header, drag and drop it in the grouping box to group by that column:
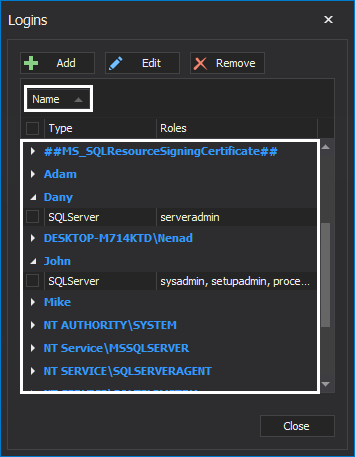
For example, dragging the Name column in the grouping box will group the results by the login names:
Grouping can be done in another way. Right-click on the column header on which the results should be grouped from the Logins window grid, and choose the Group by this column option from the context menu:
As mentioned previously, using ApexSQL Manage, SQL Server logins can be added, Server roles of the already existing logins can be edited, or they can be removed.
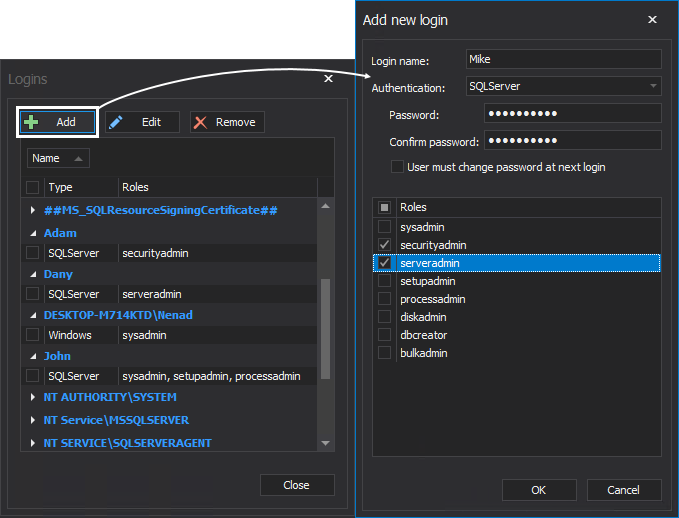
To add a new login click on the Add button under the Logins window to open the Add new login window, where a Login name, Authentication type (Windows, SQL Server or Other), Password (credentials) and Server Roles for a new login can be specified. For this article, the Login Mike will be created using SQL Server authentication and added to the securityadmin and serveradmin SQL Server roles:
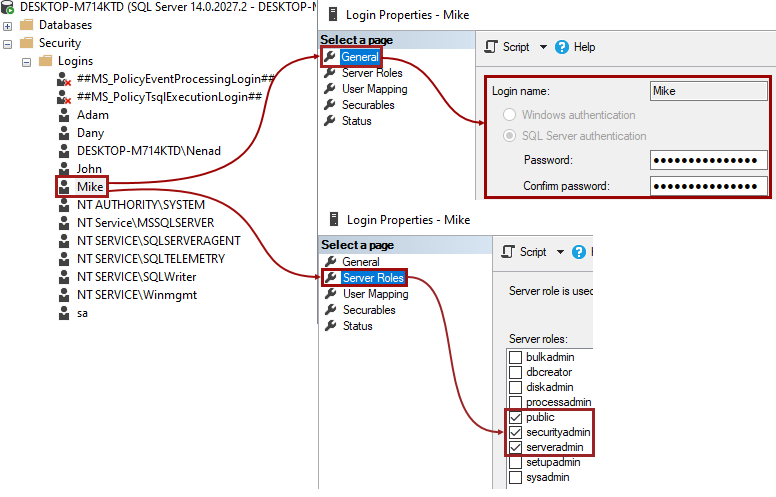
A newly created login will be checked through SQL Server Management Studio (SSMS). The Mike login will be present under the Logins node on the chosen SQL Server instance as well as the other assigned Server roles:
Edit SQL Server logins
To edit a SQL Server login, check the login from the grid and click on the Edit button under the Logins window.
- Note: To edit a SQL Server login in the Logins window, the user password is required.
In this example, the login Mike, which previously had been added to the securityadmin and serveradmin roles, will now be changed and will be added only to the setupadmin role. In the Edit login window, uncheck the previously checked roles and check only the setupadmin role, and click the OK button:
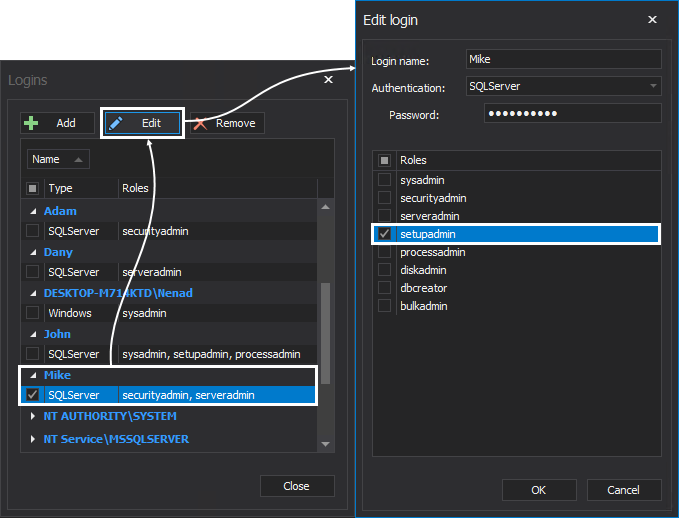
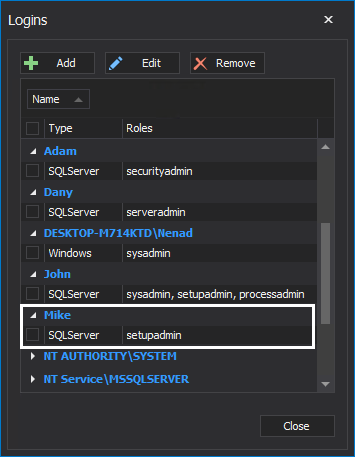
When the changes are in effect, in the Logins window, for the login Mike only the setupadmin Server role will be listed:
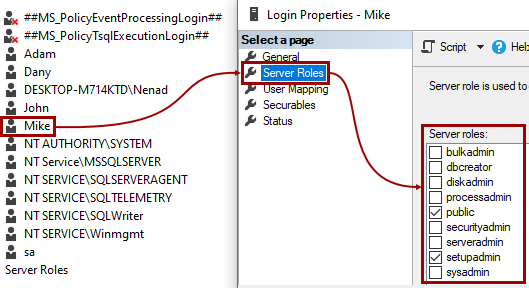
Now, the login details of the chosen SQL Server instance in SSMS will show that the login Mike now is a member of the setupadmin Server role, besides the default public Server role:
Remove SQL Server logins
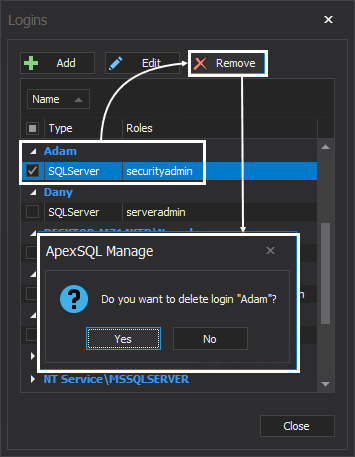
To remove a login from a SQL Server instance using ApexSQL Manage, check the login and click the Remove button in the Logins window. Click the Yes button in the pop-up confirmation message to remove the chosen SQL Server login, in this case,the Adam login:
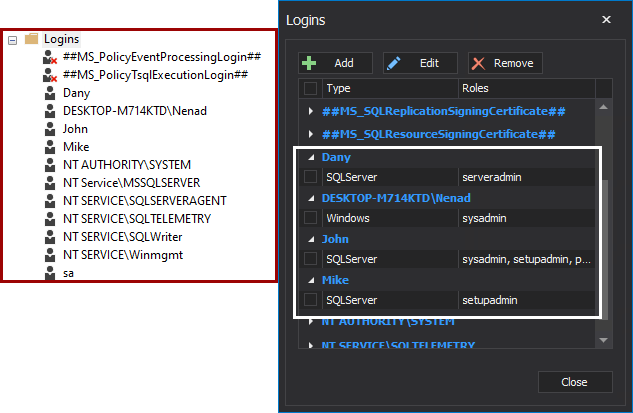
A side by side comparison of logins for the same SQL Server instance in SSMS and ApexSQL Manage shows that the login Adam has been removed:
After all of this being said, the main benefits of using this tool for SQL Server logins management are:
- Easier overview of all SQL Server logins for all managed SQL Servers on a domain or local network
- The time needed for adding, editing, or removing SQL server logins and their roles is drastically reduced