
-
Titolo
Resolving SQL auditing connection issues - Adding read/write SQL Server account permissions for data storage folder -
Descrizione
Resolving SQL auditing connection issues - Adding read/write SQL Server account permissions for data storage folder -
Risoluzione
This article is a Part 3 of the Resolving SQL auditing connection issues series
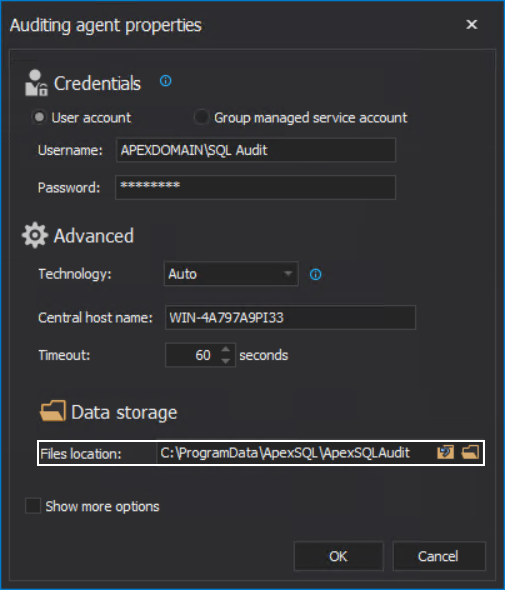
After the connection issues were resolved with the previous explanation, we should be expecting that the SQL auditing works, and we should be able to see some events collected in the reports. But there is one more prerequisite that needs to be fulfilled.When auditing agent properties were configured, the temporary files location was set. This is the location where the SQL Server will write the auditing session files and will log the audited events in them:
The account that was used to access the SQL Server via the auditing agent will need permissions to read and write to this location, and more specifically, to modify the session files.
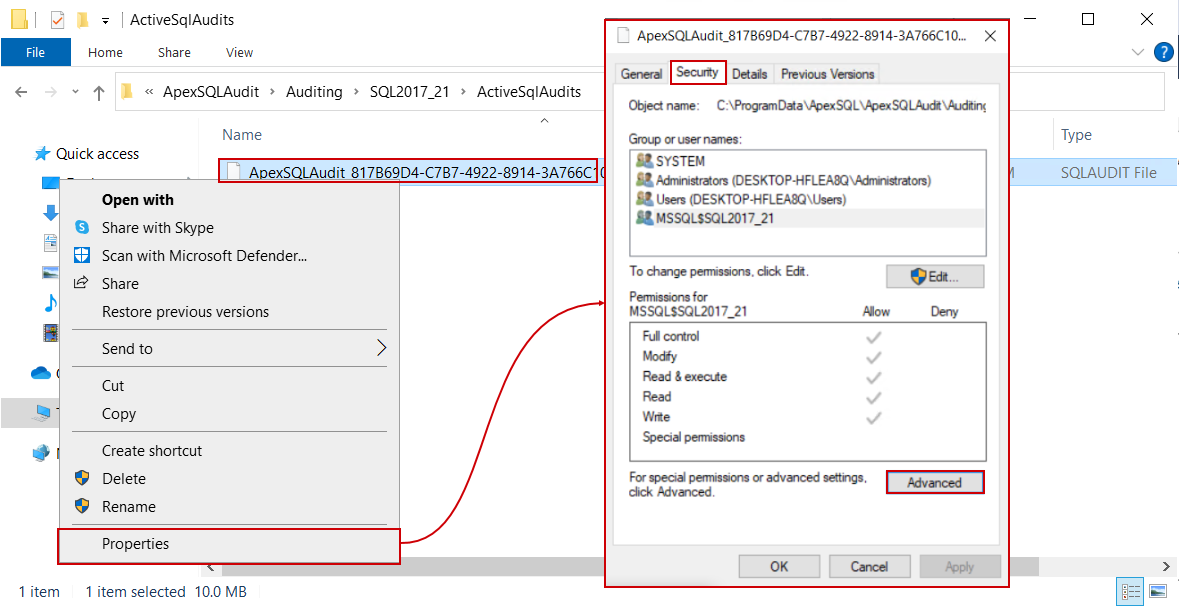
To check the permission settings for the session files, open the Properties for one of the files, and from the Security tab click the Advanced button:
In the Advanced window we can see that the ownership for these files is set to the account running the SQL Server and by default full permissions are allowed to that account and local administrators:
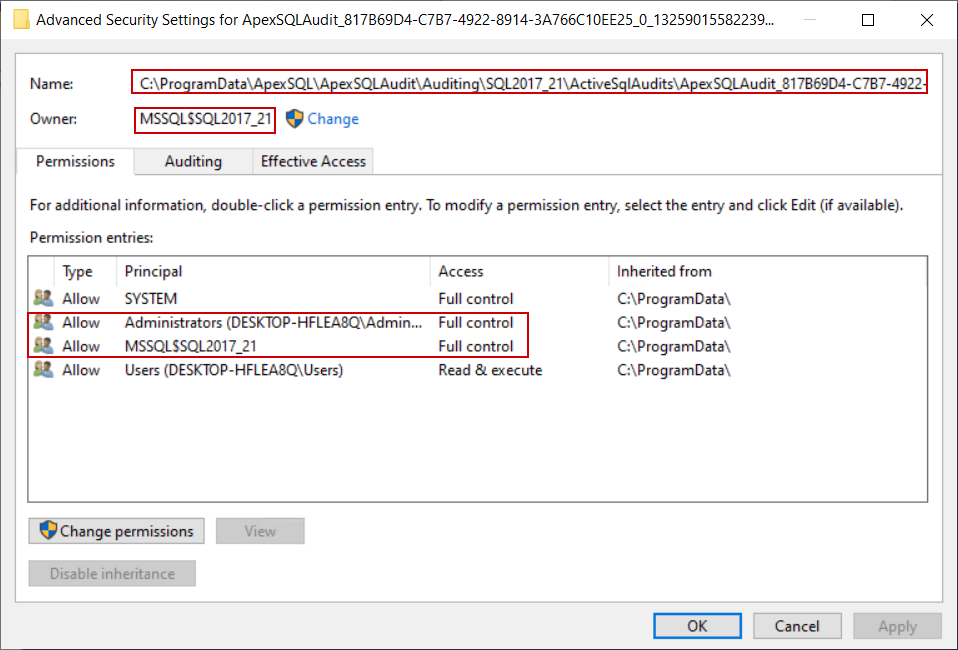
Since this file is dynamically managed by the SQL Server, it does not inherit permissions from the parenting folder. As a result, those files will remain there indefinitely due to the inability to be deleted by the auditing agent when they expire, which will result in a pileup and large storage space occupation.
Resolving the access to these files for the auditing agent account cannot be resolved by setting permissions for it on the temporary files location but should be done by adding this account to local administrators on the system hosting the SQL Server. The procedure was explained previously for the central instance account.
Alternatively, instead of adding the auditing agent account, it is possible to use it as the SQL Server Log On account. However, it is necessary to mention that this method will have to be repeated for every SQL Server on this system that requires auditing in comparison to the previous method which resolves the issue for the entire system.
- Warning: The following method will require SQL Server restart
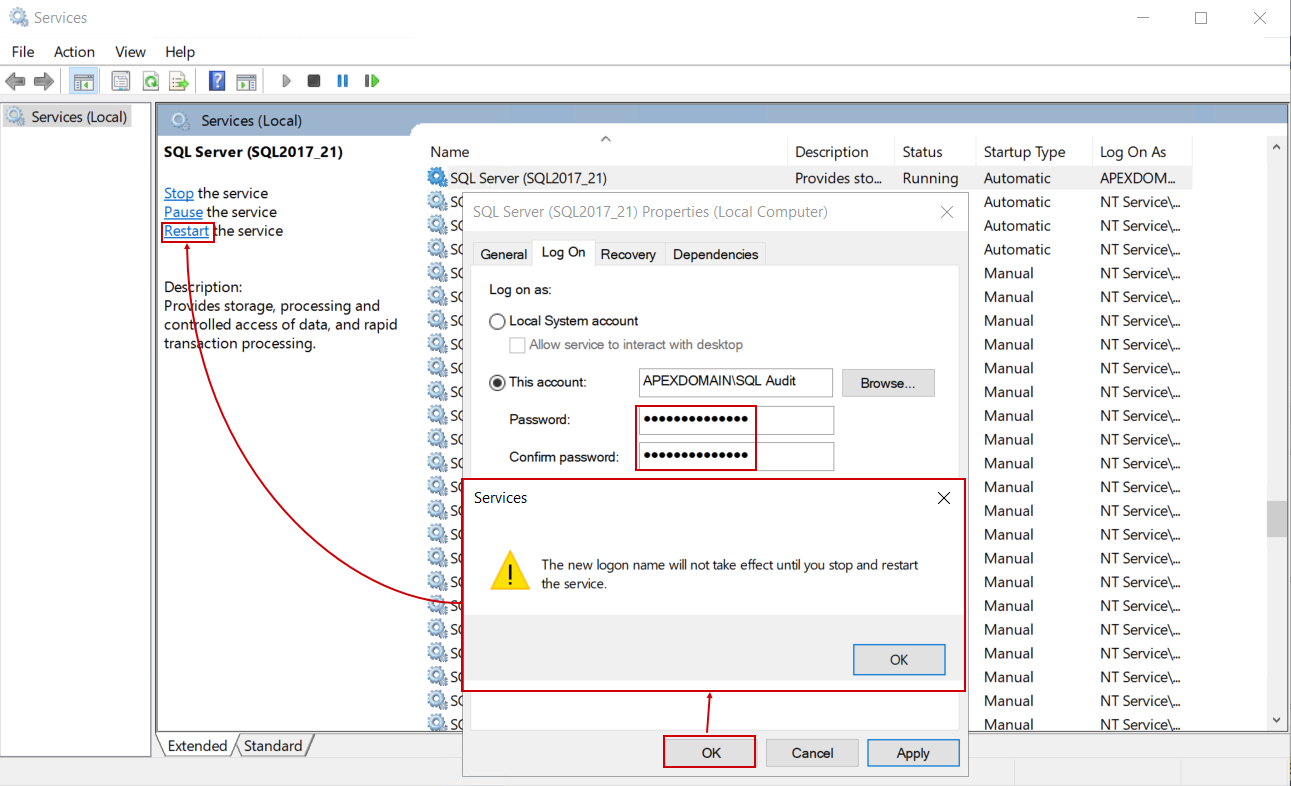
To do that, open the Services window, find the service for the desired SQL Server by its name and open the Properties window for it. When opened, switch to the Log On tab and click the Browse button:
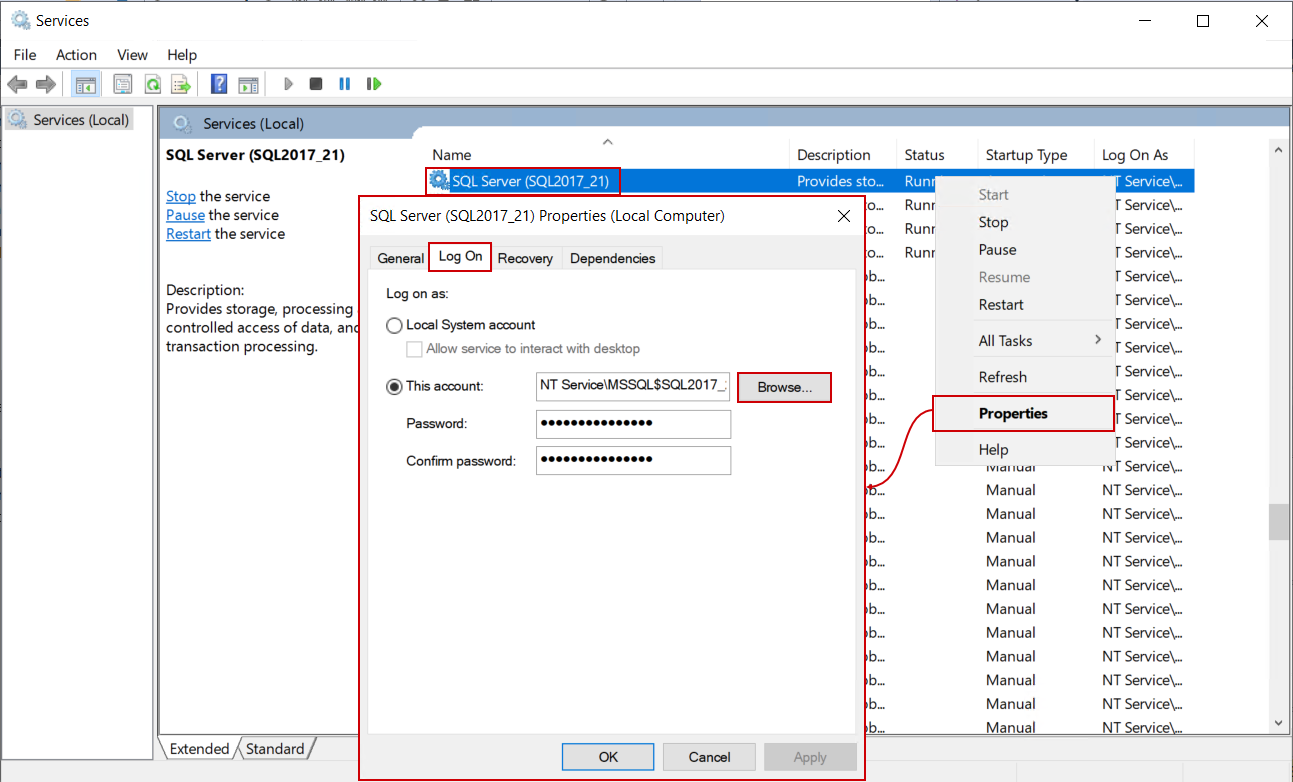
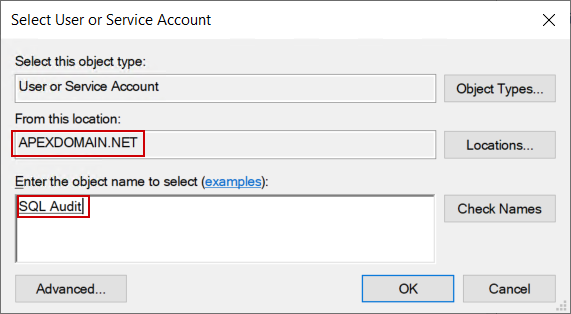
Similar to the earlier explanation, when browsing for the SQL Server login, in this dialogue the domain account used for auditing agent can be found and used (again, make sure that the correct location is chosen):
The OK button will return to the Log On properties where the password for this account should be entered and click on the OK button from here will show a message indicating that the service has to be restarted to apply this change:
With these final settings, SQL auditing will work without further issues. Note that the procedure for auditing agent permissions will have to be applied for every SQL Server when concerning logins and for every system when concerning file system access.
For more information please visit the Resolving SQL auditing connection issues article