
Database Attach Method
The Database Attach method of upgrading SharePoint involves creating a separate 2019 "upgrade" farm and then attaching the content databases from the 2016 farm into the 2019 farm.
Upgrade Steps
The following table outlines the steps involved in upgrading SharePoint 2016 with StoragePoint to SharePoint/StoragePoint 2019 using the database attach method:
|
# |
Step |
Description |
|
1 |
Ensure 2019 upgrade farm is established. |
The 2019 farm should be provisioned and functioning (without any upgrade content). Any non-StoragePoint 3rd party solutions/features/web parts, etc. should be installed into the farm. |
|
2 |
Document and disable source StoragePoint profile jobs. |
For each StoragePoint storage profile, make note of any timer jobs configured to run on a set schedule, as well as any archiving configurations. Also note the frequency of Content Migrator and Capacity Monitor on General Settings, if they apply to your configuration. For all StoragePoint Profiles that will be migrated, disable all jobs for those profiles. # Disable all StoragePoint timer jobs
If upgrading is abandoned, the following script can be used to to re-enable timer jobs. # Enable all StoragePoint timer jobs |
|
3 |
Backup/Restore StoragePoint database to new farm. |
A backup of the StoragePoint database from the 2016 farm should be restored in the new 2019 farm. It is not recommended you share a copy of this database between the 2016 and 2019 farms. |
|
4 |
Install StoragePoint for SharePoint 2019. |
StoragePoint for SharePoint 2019 should be installed in the 2019 upgrade farm. When prompted for the database name and location, ensure that the database copy established in step #3 is specified. *It is imperative that all StoragePoint jobs be double-checked as disabled on the migration target prior to continuing. |
|
5 |
Copy the blob store(s) for profiles that are being migrated. (OPTIONAL) |
A copy of the blob stores for profiles being migrated needs to be made if the 2016 farm will remain functional after the upgrade. If the 2016 farm will retire the content databases that are being upgraded, then this step is not necessary. |
|
5a |
Update endpoint connection paths to point to blob store copy. (OPTIONAL) |
The endpoints need to be edited to reflect the new blob store copy location established in step #6. This step may be skipped if step #5 was skipped. |
|
6 |
Attach content database(s) from 2016 farm to 2019 farm. |
The content database(s) from the 2016 farm should be attached into the 2019 farm. Please see the Microsoft documentation for more information. |
|
7 |
Re-link Web Application scoped profiles. (ONLY if using Web Application scoped profiles) |
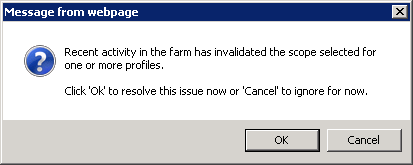
When using the database attach upgrade method, the web application IDs on the 2019 farm will not match the IDs on the 2016 farm. To fix the profile links, follow these steps on the 2019 upgrade farm: a)Go to the Storage Profiles screen in StoragePoint. b)A popup should alert you that some of the profiles have become unlinked from their Web Application: c)Click OK on the popup to be taken to the Storage Profile Fixup screen. d)Click on the profile scope name under the Profile Scope column to manually fix the linkage. *DO NOT* click Fix Automatically as it will not work in this case. e)A warning will display about issues with manually fixing a profile scope - click the OK button. f)On the Select Web Application screen that pops up, select the Web Application on the 2019 farm that the profile should be associated with. |
|
8 |
Re-establish any StoragePoint timer job definitions. |
StoragePoint timer job schedules and settings will not be migrated to the 2019 farm automatically. These must be setup manually. Key timer jobs to check: ·Orphan BLOB Cleanup Job. This job is usually run on a weekly or daily schedule. It must be scheduled for each profile. This timer job can be accessed from the Jobs link on the Profile page, under Advanced Configuration. ·BLOB Health Analysis Job. This job is usually run on a weekly or daily schedule. It must be scheduled for each profile. This timer job can be accessed from the Jobs link on the Profile page, under Advanced Configuration. ·Externalize/Recall/Bulk Migrate. These jobs are not normally run on a schedule but if your environment had them running on a schedule, be sure to reestablish them. This timer job can be accessed from the Jobs link on the Profile page, under Advanced Configuration. ·Archiving Rules and Jobs. If any archiving configurations were setup in the 2016 farm, these must be reestablished on each profile. ·Content Migrator/Endpoint Capacity Monitor. These jobs are scheduled by default during the installation for 5 minute run intervals. If you wish a more or less frequent schedule, you may modify it on the General Settings screen. ·Librarian Timer Job. This is found under the Librarian settings. |
|
9 |
IISRESET and start/stop Timer Service |
It is required that an IISRESET and stop/start of the SharePoint 2019 Timer service, SPTimmerV4, be done on each server in the farm after the upgrade is complete. |
|
10 |
Test! |
Thoroughly test each profile to ensure that it is storing and retrieving content appropriately. Contact StoragePoint support if you encounter any issues. |
|
11 |
Take Source Content Offline |
Once the migration checks out, take the source content offline for each migrated profile: For web application-scoped profile(s): Remove Web Application(s) from Central Administration on source. For content database-scoped profile(s): Remove Content Database(s) from Central Administration on source. |
Known Issues
Error Testing Restored Databases
When testing (executing the PowerShell command Test-ContentDatabase) a restored content database in the SharePoint 2019 farm, an error message similar to this may be received:
Database [wss_content_21822_EBS] has reference(s) to a missing feature: Id = [4822d9ca-c6b1-46ab-993a-89a9cfb4e4ac],
Name = [StoragePoint], Description = [], Install Location = [StoragePoint].
It is because the externalization was not set to No before performing the content database backup on the SharePoint 2016 farm. It doesnt prevent the database from being mounted or upgraded.
About Us
Quest creates software solutions that make the benefits of new technology real in an increasingly complex IT landscape. From database and systems management, to Active Directory and Office 365 management, and cyber security resilience, Quest helps customers solve their next IT challenge now. Around the globe, more than 130,000 companies and 95% of the Fortune 500 count on Quest to deliver proactive management and monitoring for the next enterprise initiative, find the next solution for complex Microsoft challenges and stay ahead of the next threat. Quest Software. Where next meets now. For more information, visit www.quest.com.