
Importing or Creating Groups
Groups allow you to schedule archiving jobs. There must be at least one group (either imported from Active Directory or a user-defined group) if you plan to schedule archiving jobs. User-defined groups are not Active Directory groups.
In this topic:
Steps to import groups from on-premise Microsoft Exchange servers
Steps to import groups from online Microsoft Exchange servers
Steps to create user-defined groups
Steps to verify the imported and user-defined groups
Microsoft Exchange server groups can be added to the Address Book Manager in one of two ways:
·By using the Address Book Setup Wizard.
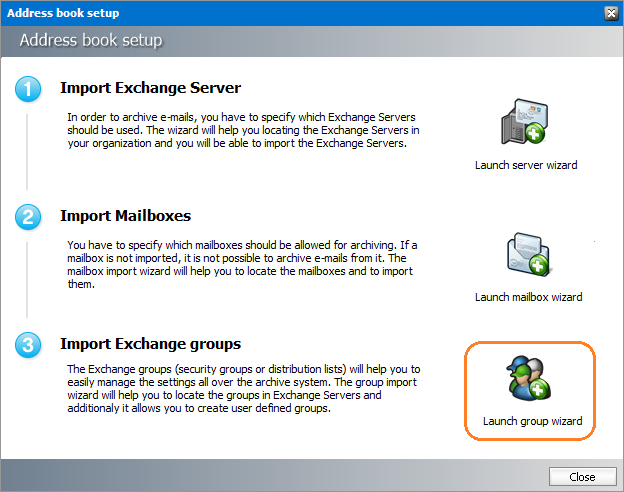
1.Open the Address Book Manager.
2.From the Setup menu, click Setup Wizard. The Address book Setup wizard opens.
3.Click the Launch group wizard to initiate the import process.
·By using the Groups tab of the Address Book Manager.
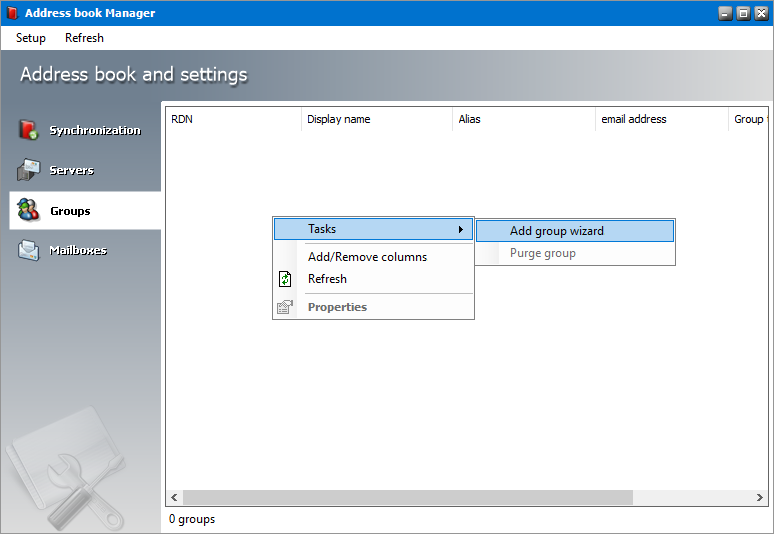
1.Open the Address Book Manager.
2.Click the Groups tab.
3.Right-click inside the list view and from the context menu point to Tasks and select Add group wizard to initiate the import process.
Whichever method you choose, the Import group wizard window opens.
Steps to import groups from an on-premise Microsoft Exchange Server
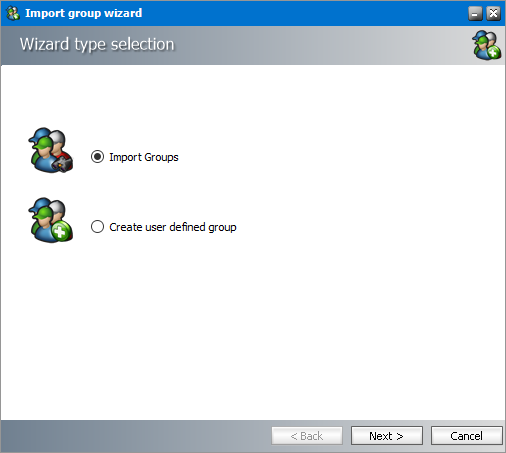
1.In the Import group wizard window, select Import Groups.
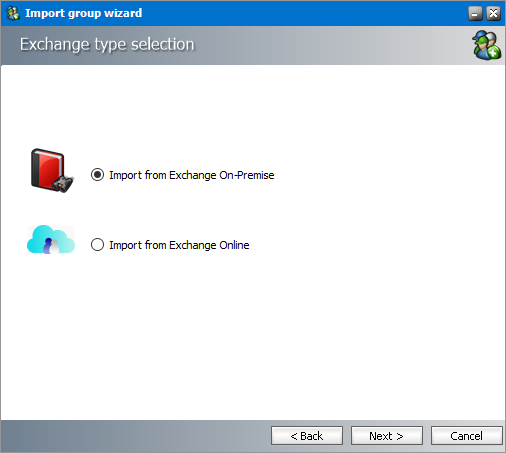
2.Click Next. The Exchange type selection window opens. Select Import form Exchange On-Premise.
3.Click Next. The Groups - search and select groups to import window opens.
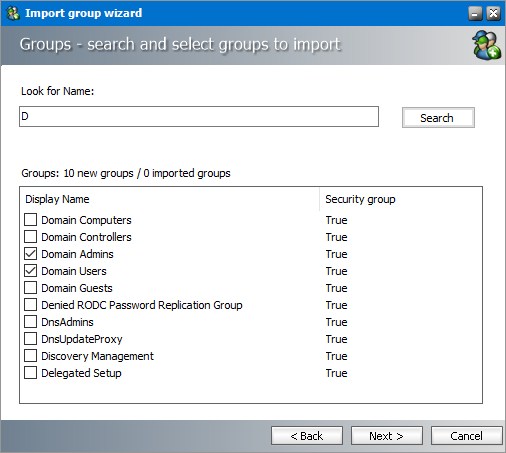
4.Click Search to return the list of all groups across all on-premise servers available to the Address Book Manager. To reduce the list of groups, you can specify a search term in the Look for Name search box. Only the initial letters of the groups Display Name can be specified, and wildcards are not supported. The search term is case-insensitive. For example, if you enter D as the search term and click Search, the groups that start wit the letter D will be returned in the search results list.
5.Select one or more groups that you want to import.
|
|
NOTE: Groups that are highlighted indicate that they already exist in the Address Book Manager. The list summary above the list of groups will indicate how many groups that you select are new, and how many already exist. If you select pre-exisitng groups, all new mailboxes will also be imported. |

6.Click Next. The Group settings - default values window opens.
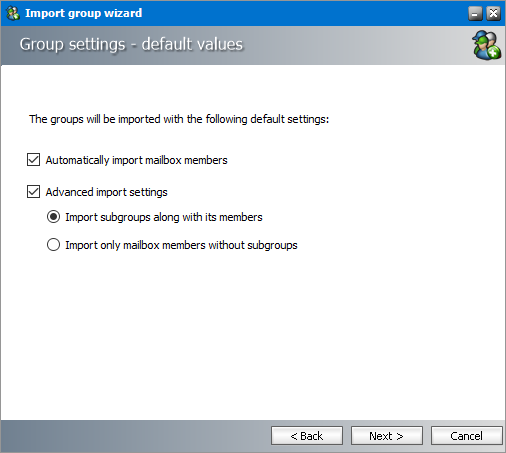
7.Specify the settings which will be applied when the groups are imported now or synchronized in future with the Address Book Manager automatically or manually. The settings are described below:
a.Automatically import mailbox members - check this box to import all Active Directory accounts with a mailbox that are members of this group.
b.Advanced import settings - check this box if you intend to import subgroups and subgroup mailbox members. You can activate this setting only if you select the Automatically import mailbox members setting.
c.Import subgroups along with members - check this box to import existing subgroups of selected groups including its member mailboxes. This is the default setting.
d.Import only mailbox members without subgroups - check this box to import only member mailboxes from subgroups. These mailboxes will be added to mailboxes in the parent group in the Address Book Manager.
8.Click Next. The Summary window opens that lists the groups that will be added.
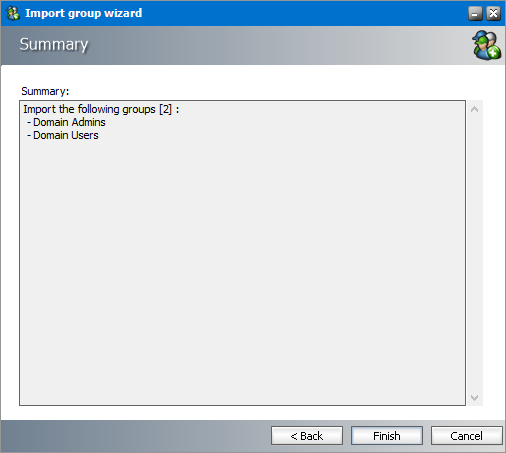
9.Click Finish to start the import process. The Creating Object window opens.
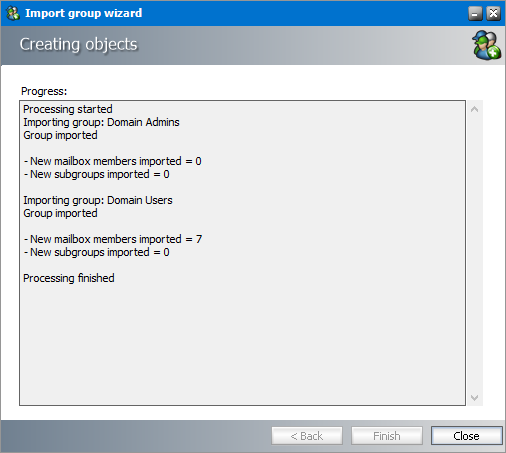
10.When the import process has completed, click Close.
Steps to import groups from an online Microsoft Exchange Server
1.In the Import group wizard window, select Import Groups.
2.Click Next. In the Exchange Type selection window, select Import from Exchange Online.

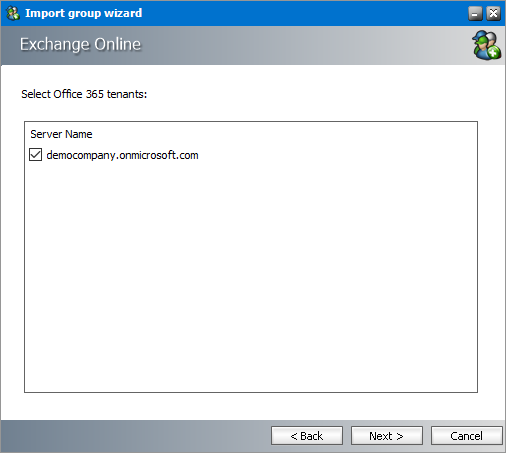
3.Click Next. The Exchange Online window opens. Select the desired online Microsoft Exchange server.
4.Click Next. The Groups - search and select groups to import window opens.
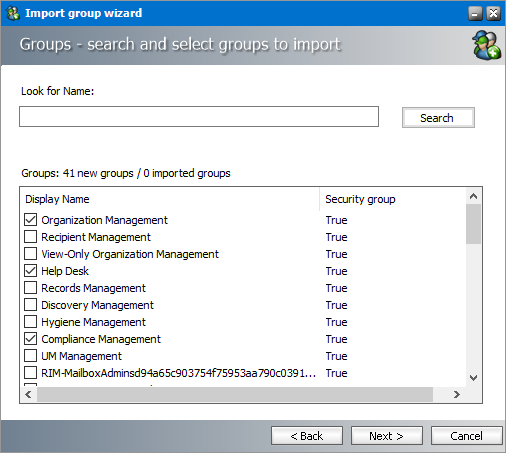
5.Click Search to return the list of all groups across all online servers available to the Address Book Manager. To reduce the list of groups, you can specify a search term in the Look for Name search box. Only the initial letters of the group Display Name can be specified and wildcards are not supported. The search term is case-insensitive.
|
|
NOTE: Groups that are highlighted indicate that they already exist in the Address Book Manager. The list summary above the list of groups will indicate how many groups that you select are new, and how many already exist. If you select pre-existing groups, all new mailboxes in those groups will also be imported. |
6.Select the groups that you want to import.
7.Click Next. The Group settings - default values window opens
8.Specify the settings which will be applied when the groups are imported now or synchronized in future with the Address Book Manager automatically or manually. The settings are described below:
a.Automatically import mailbox members - check this box to import all Active Directory accounts with a mailbox that are members of this group.
b.Advanced import settings - check this box if you intend to import subgroups and subgroup mailbox members. You can activate this setting only if you select the Automatically import mailbox members setting.
c.Import subgroups along with members - check this box to import existing subgroups of selected groups including its member mailboxes. This is the default setting.
d.Import only mailbox members without subgroups - check this box to import only member mailboxes from subgroups. These mailboxes will be added to mailboxes in the parent group in the Address Book Manager.
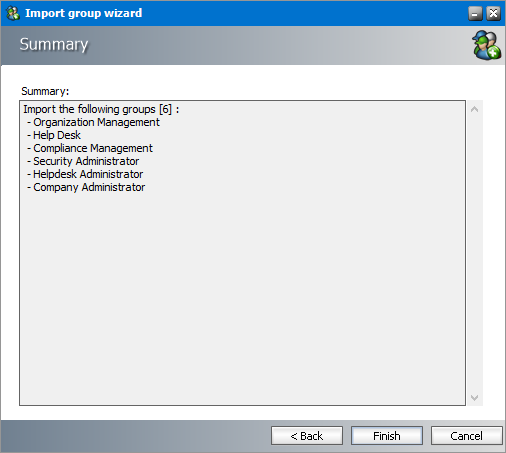
9.Click Next. The Summary window opens that lists the groups that will be added.
10.Click Finish to start the import process. The Creating objects window opens. You can click Back to select more groups to add or remove some of the selected groups.
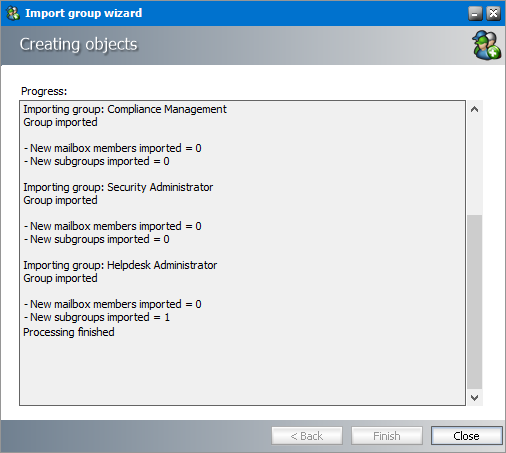
11.When the import process has completed, click Close.
Steps to create user-defined groups
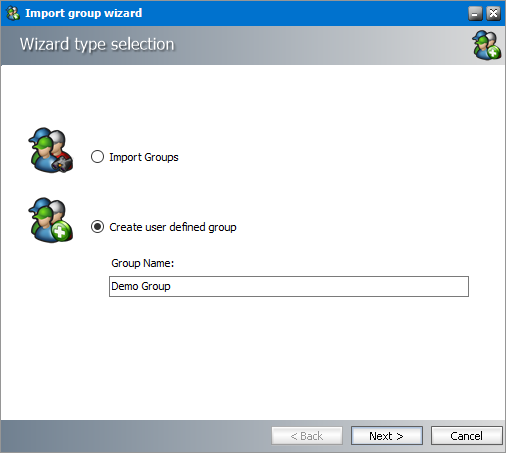
1.In the Import group wizard window, select Create user defined group. Enter a name for the group in the Group Name field.
2.Click Next. The User Defined Group - Add members to group window opens. By default, the on-premise Microsoft Exchange server is the source for the list of mailboxes and groups that can be added to the user-defined group. To use O365 Exchange servers as a source for mailboxes and groups, select Exchange Online.
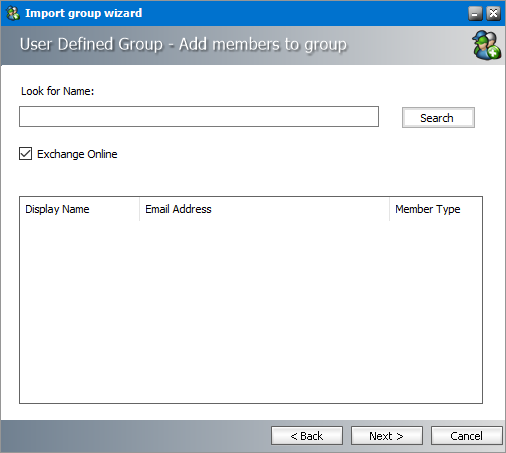
3.Click Search to return the list of all mailboxes and groups. To reduce the list of mailboxes and groups, you can specify a search term in the Look for Name search box. Only the initial letters of the mailbox or group Display Name can be specified and wildcards are not supported. The search term is case-insensitive.
|
|
NOTE: If the Exchange Online check box is checked, only the online Microsoft Exchange servers will be used as the source. If the Exchange Online check box is unchecked, only on-premise Microsoft Exchange servers will be used as the source. Mailboxes and groups that are highlighted indicate that they already exist in the Address Book Manager. The list summary above the list of groups will indicate how many mailboxes and groups are available. |
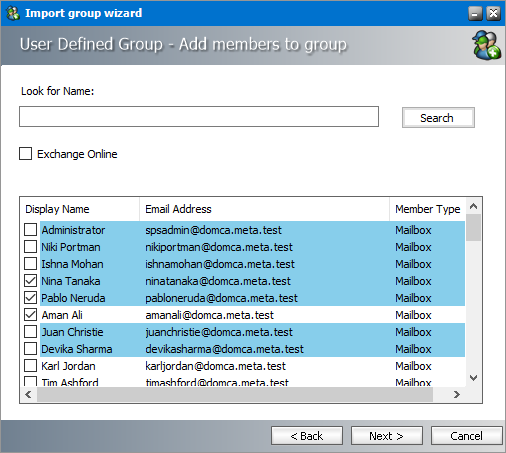
4.Select one or more mailboxes and groups that want to add to the user-defined group. If you select one or more groups, all mailboxes in that group will also be add to the user-defined group during the import process.
5.Click Next. The Summary window opens that indicates the user-defined group that will be created.
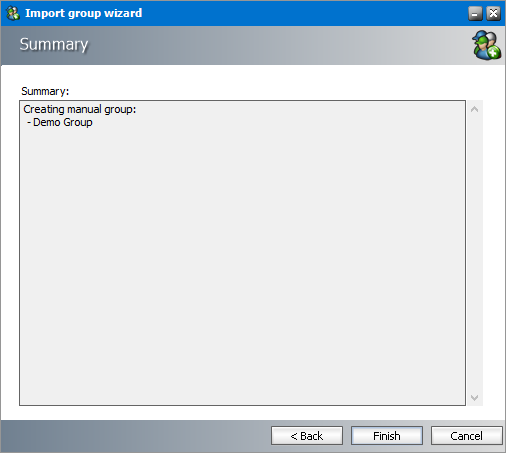
6.Click Finish to start the group creation process. The Creating Object window opens. You can click Back to revise your selection of mailboxes and groups.

7.When the import process has completed, click Close.
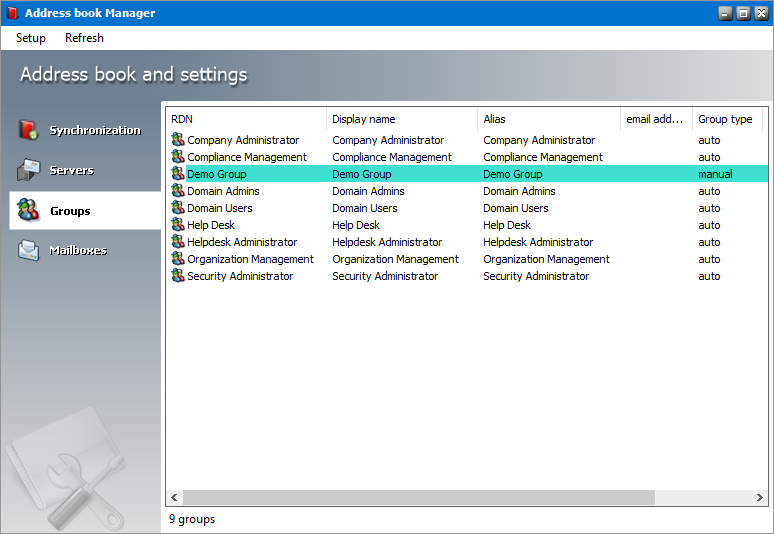
Steps to verify the imported and user-defined groups
1.Open the Address Book Manager
2.Click the Groups tab and verify that the imported Active Directory and user-defined groups appear in the list view as expected. User-defined groups are highlighted in green 
3.Select a group and right-click to open the context menu. Click Properties. The Properties window of the selected group opens.
4.Click the Members tab and verify that the list of mailboxes were imported as expected.
Synchronizing Address Book Manager
Synchronization with the Microsoft Exchange servers keeps groups and mailboxes up to date so that emails can be archived without problems. With the Address Book Manager, you can set up automatic synchronization schedules and initiate manual synchronization of various artifacts.
In this topic:
Steps to perform a manual synchronization
Steps to schedule automatic synchronization
Steps to perform a manual synchronization
1.Open Address Book Manager by clicking the toolbar icon 
2.The Synchronization tab opens by default.
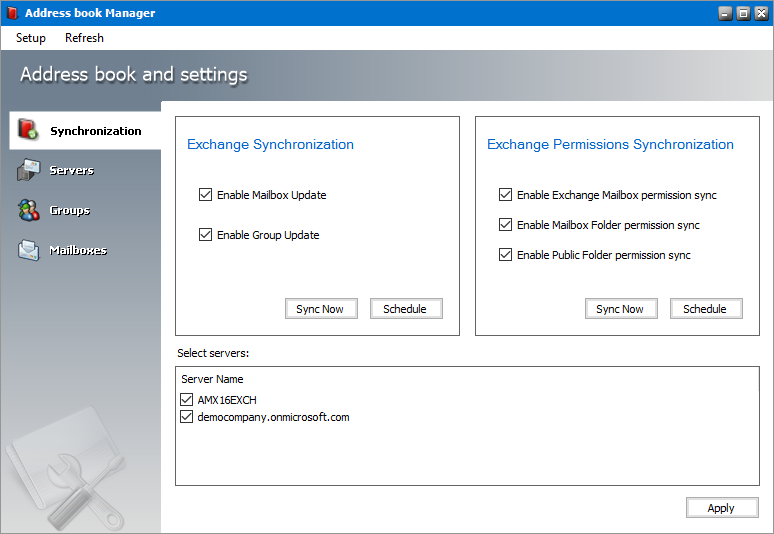
3.Select the Microsoft Exchange mailboxes, groups and permissions that you want to synchronize.
4.In the Select servers box, select the Microsoft Exchange servers with which you want to synchronize the mailboxes, groups and permissions.
5.Click Apply to confirm the settings.
6.Click Sync Now in the Microsoft Exchange Synchronization box to manually initiate the synchronization of the mailboxes and groups with the selected Microsoft Exchange servers.
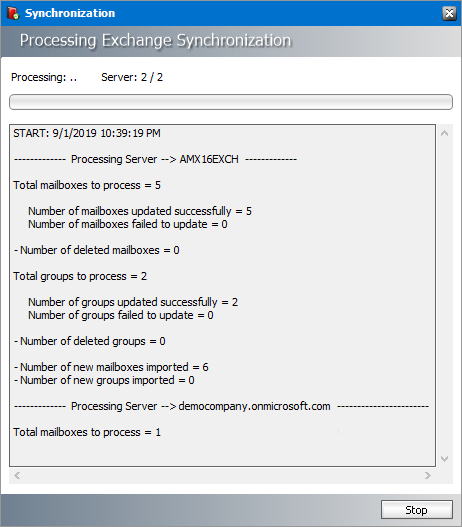
7.Click Stop to halt the synchronization process before it completes. When the process completes, click the Close button that opens. You can find the results of the synchronization process in a log file located at C:\Program Files (x86)\Metalogix\MAM4Exchange\Log\Synchronization_<timestamp>.log
8.Click Sync Now in the Microsoft Exchange Permissions Synchronization box to manually initiate the synchronization of the mailboxes and groups with the selected Microsoft Exchange servers.
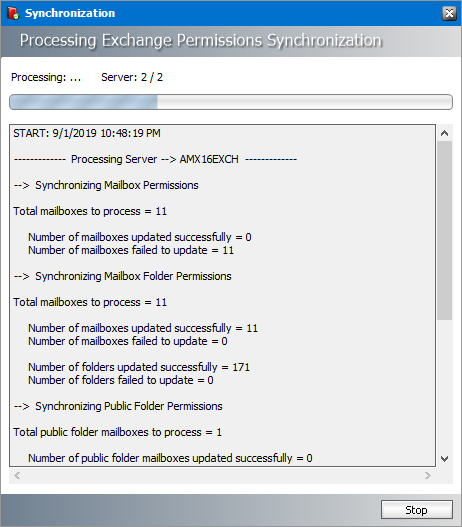
9.Click Stop to halt the synchronization process before it completes. When the process completes, click the Close button that opens. You can find the results of the synchronization process in a log file located at C:\Program Files (x86)\Metalogix\MAM4Exchange\Log\Synchronization_<timestamp>.log
Steps to schedule automatic synchronization
1.Open Address Book Manager by clicking the toolbar icon
2.The Synchronization tab opens by default.
3.Select the Microsoft Exchange mailboxes, groups and permissions that you want to synchronize.
4.In the Select servers box, select the Microsoft Exchange servers with which you want to synchronize the mailboxes, groups and permissions.
5.Click Schedule in the Microsoft Exchange Synchronization box. The Microsoft Exchange Synchronization Scheduler dialog opens.
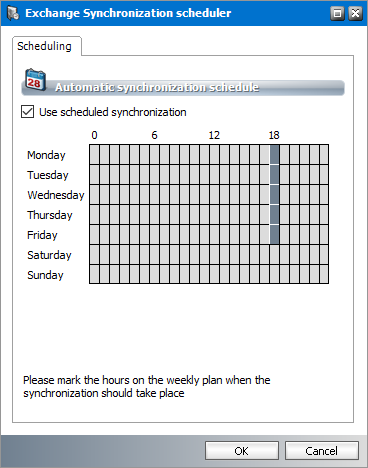
6.Select Use scheduled synchronization to activate the synchronization calendar. Each row corresponds to a day of the week. Each column corresponds to an hour of the day (24-hour clock).
7.To set up a schedule using the synchronization calendar, click the cell that corresponds to the day of the week and the hour of day when you want the scheduler to initiate a synchronization job. For example, in the figure above, the synchronization schedule is set to start at 18:00 hrs (6 pm) every weekday. The time zone of the computer where the application is running will be used to determine the time.
|
|
NOTE: If you select consecutive cells in a single row, synchronization will start automatically every hour on the hour. It will consume unnecessary processing time and is not recommended. |
8.Click OK to save the schedule or Cancel to discard the setup.
9.You can find the results of the scheduled synchronization process in a log file located at C:\Program Files (x86)\Metalogix\MAM4Exchange\Log\Synchronization_<timestamp>.log
Publish Archive Manager Forms
Archive Manager Forms are a set of custom Outlook forms that are used to display and work with archived emails. You can choose to publish these custom forms to the Organizational Forms Library of your on-premise Exchange Server, or publish these forms to the Personal Forms Library of each user whether they use an on-premise Exchange Server or the online Exchange server (O365).
This topic describes the steps to use the Forms Installer to publish the Archive Manager Forms directly to the Organizational Forms Library of your on-premise Exchange server, or prepare the the Archive Manager Forms for publishing to the Personal Forms Library of each on-premise or O365 user registered in the domain active directory using the Group Policy Object (GPO).
·Publish Forms to Organizational Forms Library
·Publish Forms to Personal Forms Library
Publish Forms to Organizational Forms Library
In this topic:
·Steps to publish forms to the Organization Forms Library
·Steps to activate Archive Manager forms in mailboxes
Steps to publish forms to the Organization Forms Library
|
|
NOTE: It is assumed that the Organizational Forms Library exists on the on-premise Exchange Server. For more information see Setup the Organizational Forms Library. |
1.Log in to the server where Archive Manager for Exchange (designated the Archive server is a distributed deployment) was installed (eg. AMXSERVER-A) with the credentials of the superuser (eg. democorp\mamadmin)
2.To open the Outlook Forms Setup wizard do one of the following:
·If the Post installation Tasks wizard is not already open, you can open the the Post installation Tasks wizard from C:\Program Files (x86)\Metalogix\MAM4Exchange\Tools\LaunchTools\LaunchTools.exe and then click Start next to step 2 to start the installer.
·Start the forms installer directly from C:\Program Files (x86)\Metalogix\MAM4Exchange\Tools\Forms\FormsInstaller.exe.
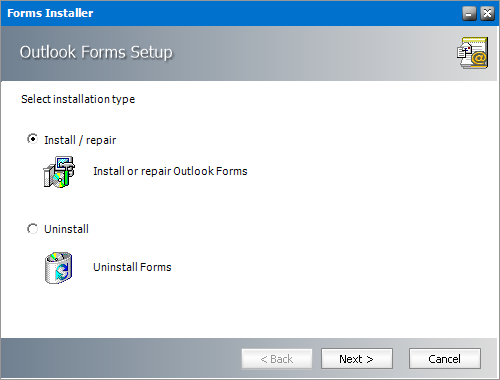
3.Select Install/repair and then click Next. The Outlook Forms Setup - Folder Location window for the form template opens.
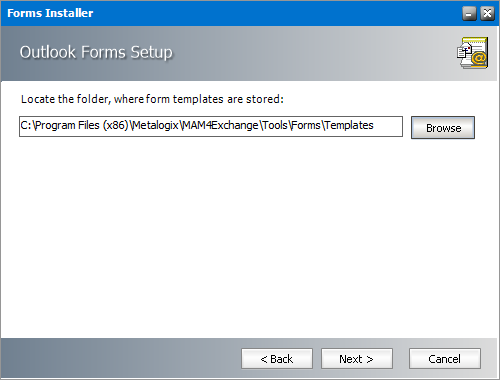
The default location is displayed. Click Browse to locate the template folder if you have moved the templates to a different location.
4.Click Next. The Outlook Forms Setup - Form Selection window open.
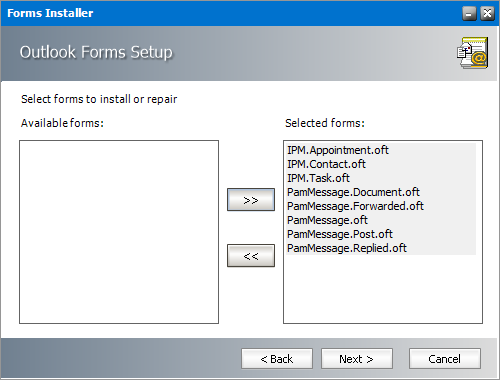
Select all the forms from the Available forms list and move it to the Selected forms list.
5.Click Next. The Outlook Forms Setup - Activate/deactivate Outlook forms events window opens.
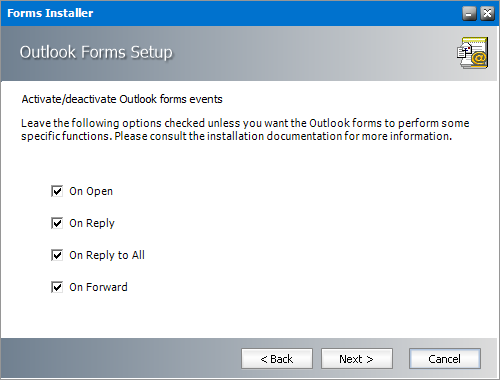
Keep the default selections on this page unless you want to change the behavior as described below:
a.On Open - When checked, this option presents a shortcut that can be clicked to download the archived email but deactivates the ability to use the Previous Item and Next Item functionality in Outlook because archived emails are offline copies and are not aware of previous or next emails. When unchecked, the archived email cannot be downloaded or viewed.
b.On Reply - When checked, the content of the email is included in the reply to the sender of the original email. When unchecked, the shortcut to the archived email is included in the reply message and can be accessed only by members of the Exchange server.
c.On Reply to All - When checked, the content of the email is included in the reply to recipients of the original email. When unchecked, the shortcut to the archived email is included in the reply message and can be accessed only by members of the Exchange server.
d.On Forward - When checked, the content of the email is forwarded to the new recipient(s) of the original email. When unchecked, the shortcut to the archived email is forwarded to the new recipient and can be accessed only by members of the Exchange server.
6.Click Next. The Outlook Forms Setup - Retrieve servers identification window opens.
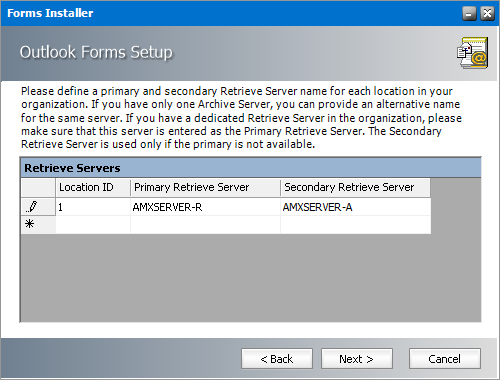
Specify the information as described below:
a.Location ID - Each Archive Manager for Exchange server is bound to a single location identified by the Location Id.
b.Primary Retrieve Server - If the deployment topology has just one standalone Archive Manager for Exchange server then enter the NetBIOS name of the standalone server. If the deployment topology has a dedicated Archive Manager for Exchange server with the Retrieve role, then specify the NetBIOS name of the Retrieve server (eg. AMXSERVER-R).
c.Secondary Retrieve Server - For a standalone deployment topology, enter an alternate identifier (eg. IP address) of the same server. For a dedicated Retrieve server specify the NetBIOS name of the Archive server.
Examples:
|
Topology |
Primary Retrieve Server |
Secondary Retrieve Server |
|
Standalone Archive server |
NetBIOS name of the Archive server (eg. AMXSERVER) |
IP address of the Archive server (eg. 10.20.30.40) |
|
Dedicated Archive and Retrieve servers |
NetBIOS name of the Retrieve server (eg. AMXSERVER-R) |
NetBIOS name of the Archive server (eg. AMXSERVER-A) |
|
Load-balanced Retrieve servers |
NetBIOS name of the load balancer |
IP Address of the load balancer |
7.Click Next. The Outlook Forms Setup - Retrieval settings window opens.
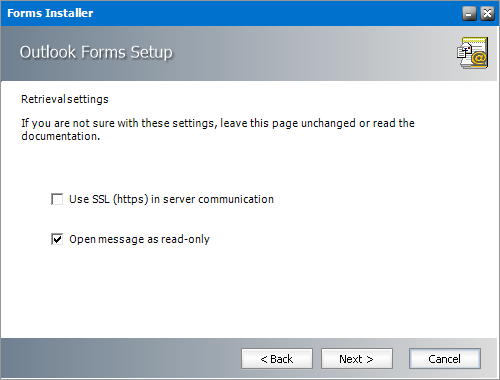
The options are as described below:
a.Use SSL (https) in server connection - Select this option only if the Exchange server communication uses SSL.
b.Open message as read-only - When checked, archived emails are opened in read-only mode. When this option is unchecked, users are allowed to modify archived emails but these changes are not updated in the archive. Users with Archive Manager Outlook Addin installed can modify archived emails by creating new email versions in the archive even if the Open message as read-only check box is selected.
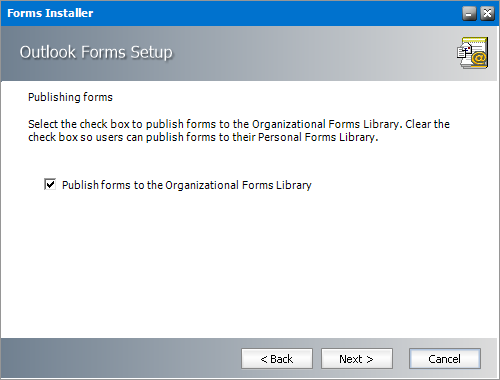
8.Click Next. The Outlook Forms Setup - Publishing forms window opens.
9.Click Next. The Outlook Forms Setup - Summary window opens.
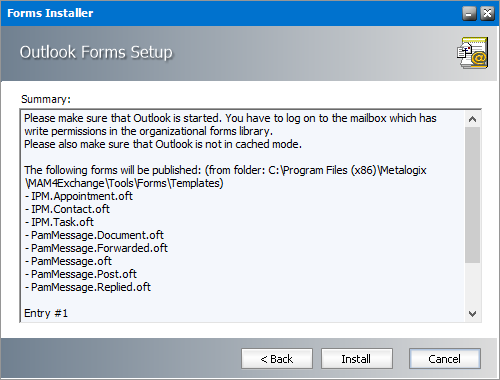
10.Verify the settings or click Back to revise the settings. Click Install to publish the forms. The Outlook Forms Setup - Install progress window opens.
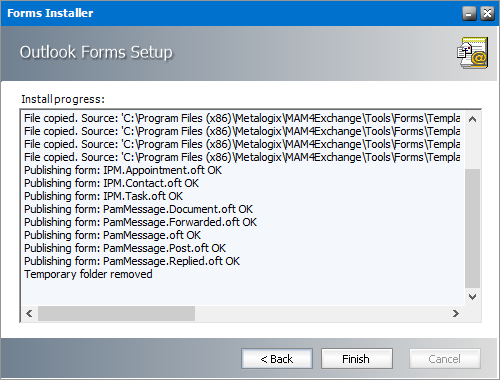
When the forms are published click Finish.
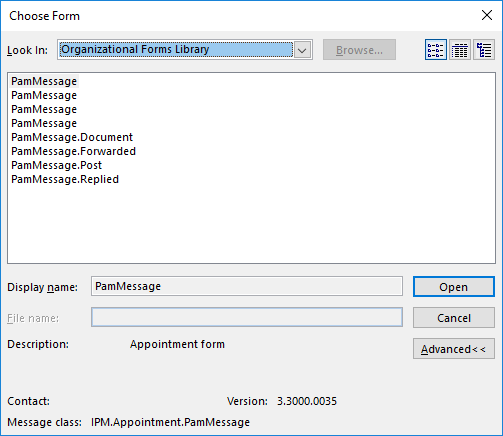
11.To verify that the forms were published to the Organizational Forms Library in the Exchange server, open an Outlook client account connected to the Exchange server. From the Home tab click New Items > More Items > Choose Form. In the Look In list, click Organizational Forms Library and view the published forms.
Steps to activate Archive Manager forms in mailboxes
After publishing the forms, it is recommended to activate any one Archive Manager form for all users to ensure that the forms are immediately available to the users.
1.Open Outlook on the Archive Manager server with your administrator or super-user credentials.
2.Click the Home tab and navigate to New Items > More Items > Choose Form.
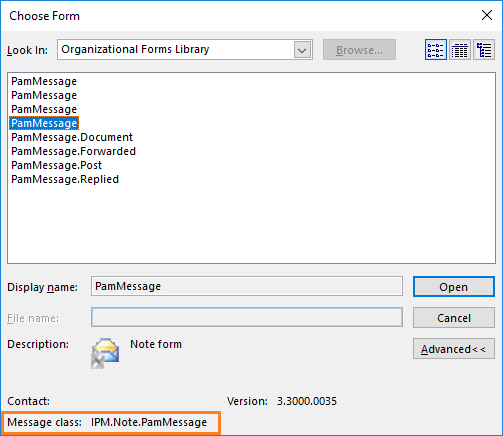
3.Choose Organizational Forms Library from the Look in drop down.
4.Select the PamMessage form that has the archived email icon in the Description (to display the icon click Advanced)
5.Click and hold the SHIFT-key and double-click to load the form. The form opens like a normal email.
6.Send this email to all mailboxes you plan to archive. When users receive the email, the new set of custom forms in the Organizational Forms Library will be available to the users.
|
|
NOTE: a. If there are multiple languages (multiple organizational form libraries), then you need to publish the forms using a language specific Outlook and account one for each language. b. To replicate the Archive Manager forms in the Public Information Store, use an Archive Manager form to send an email to your Inbox folder. Then copy or move the email to the Public Folder you wish to archive. The Archive Manager forms are replicated in the Public Information Store too. |